The Witch King's Flail
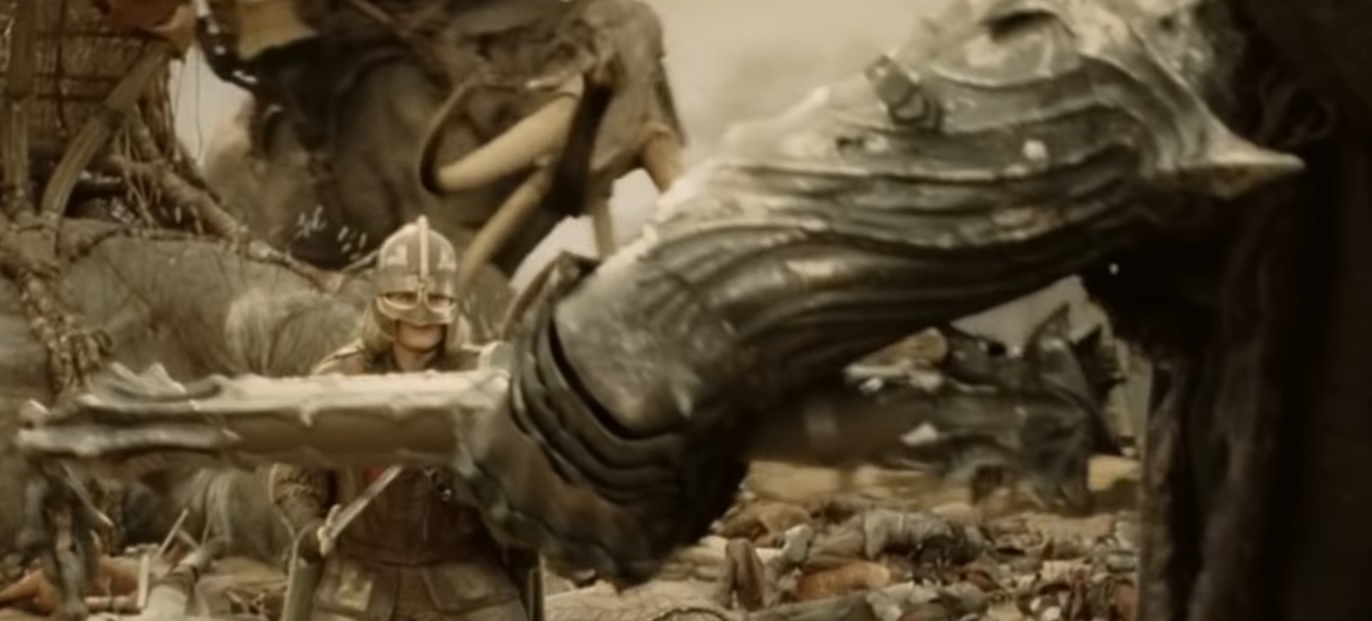
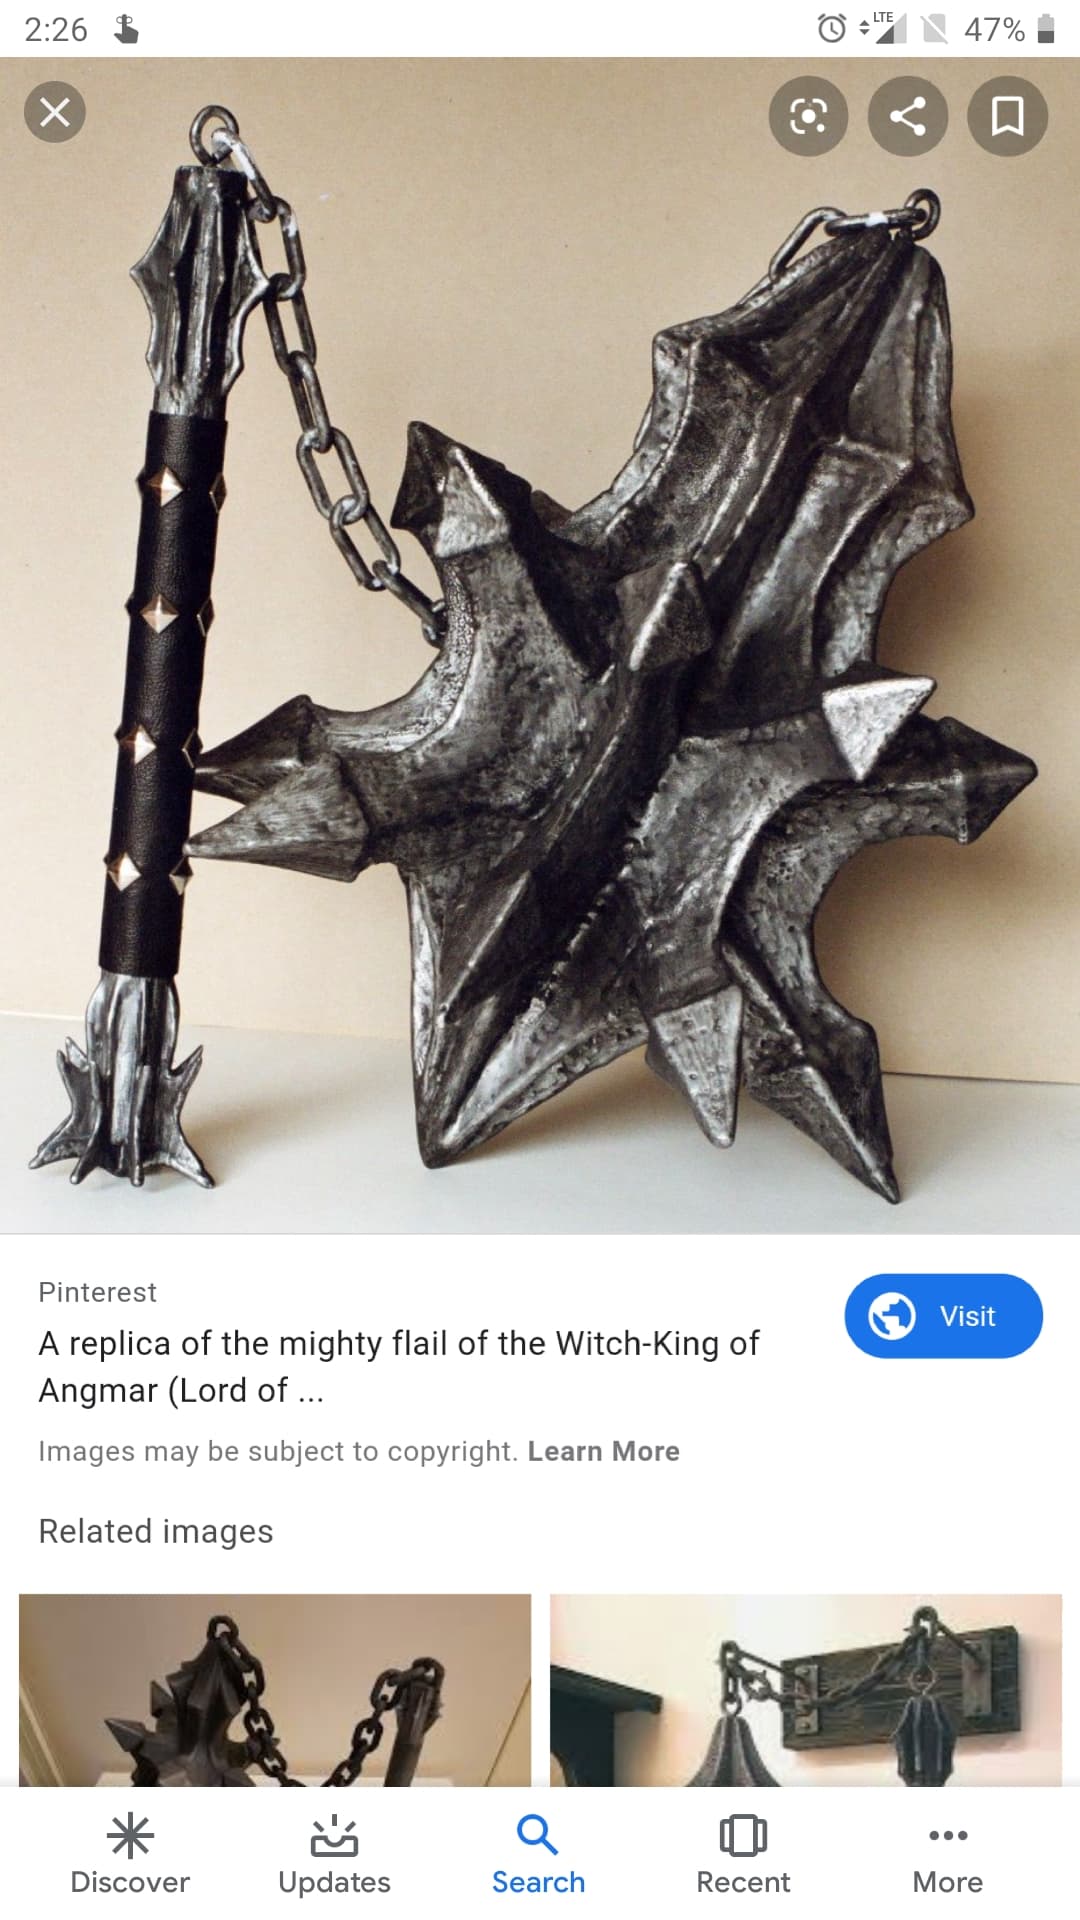
Late 2019 I needed to burn some time and thought it would be fun to start making a life-size replica of the flail of the Witch King of Angmar - specifically the version in the Lord of the Rings films:
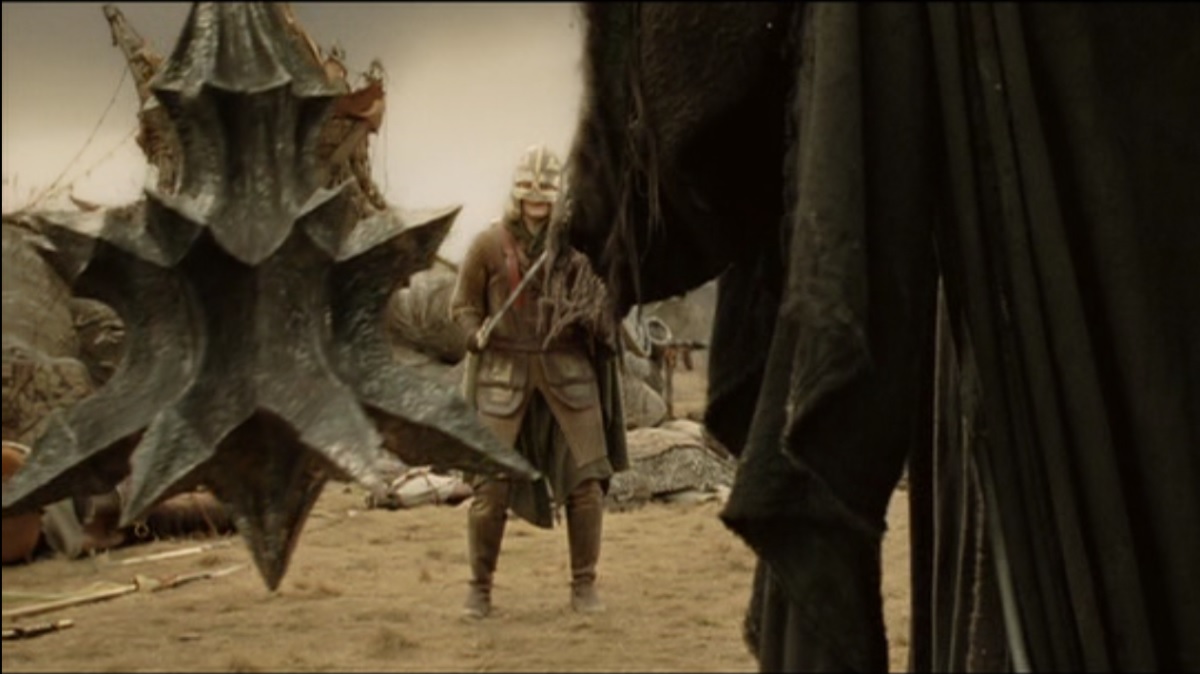
There’s not many clear shots, as ole Witchy is mostly hefting it at poor Eowyn, but you get the idea. I had already begun a bit of my Witch King armour costume, and needed a break, so this provided a related distraction.
Contents
Mock up and materials
A quick comment about materials: this was mostly ad-hoc. My style is to figure out a broad idea at the start, and then sort out smaller details as time and project progresses, so I’m not locked into many tiny cascading decisions from the start.
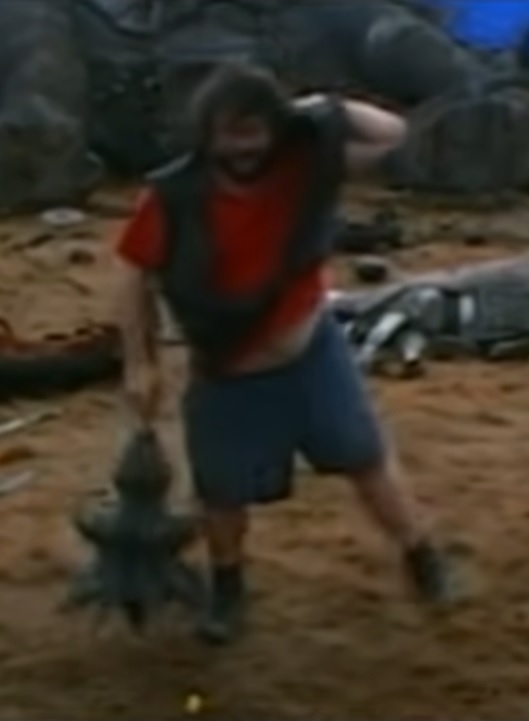
First things first, let’s get a good look at this thing, and figure out how big I should make it. I watched several clips from the film and behind the scenes over and over, frame by frame, to get an idea for the size, using people as a comparison. Eg. Peter Jackson is 5’7”, and look at how big the spiky chunk is next to him - that gives a good idea for size.
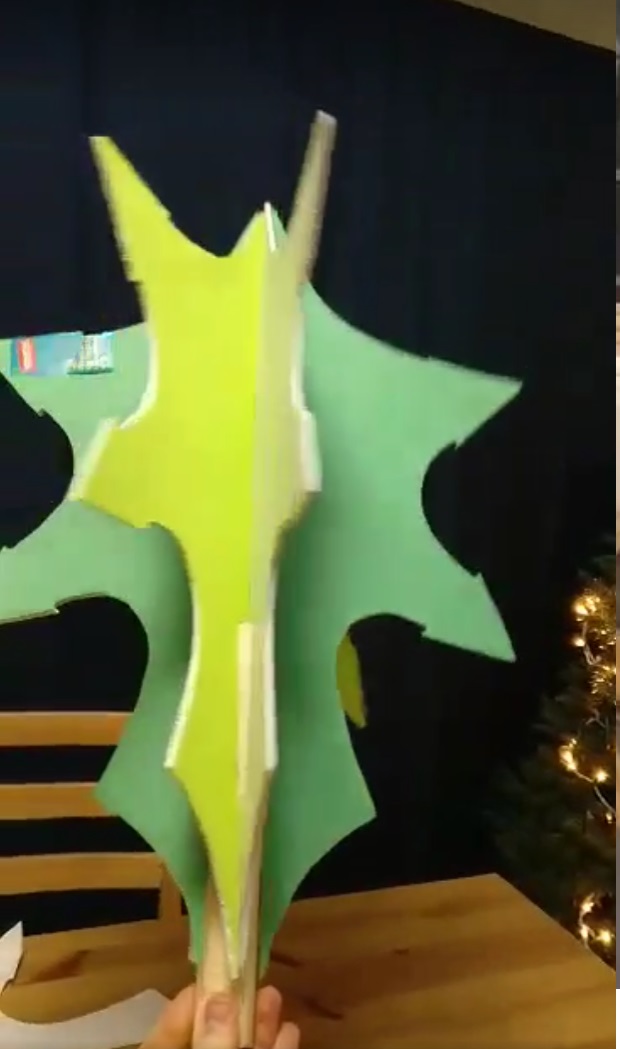
The other part was to make a basic outline shape from cheap foam board. I cut out several cross sections and fit them together to make a 6-point star head at a particular size, before I realised it’s 8 points (retrospectively,I should have googled it because here it is, clear and obvious). But this is the sizing draft, so that doesn’t matter - and I decided that, in the spirit of Peter Jackson, it was roughly 50% too small. So let’s go bigger.
Materials
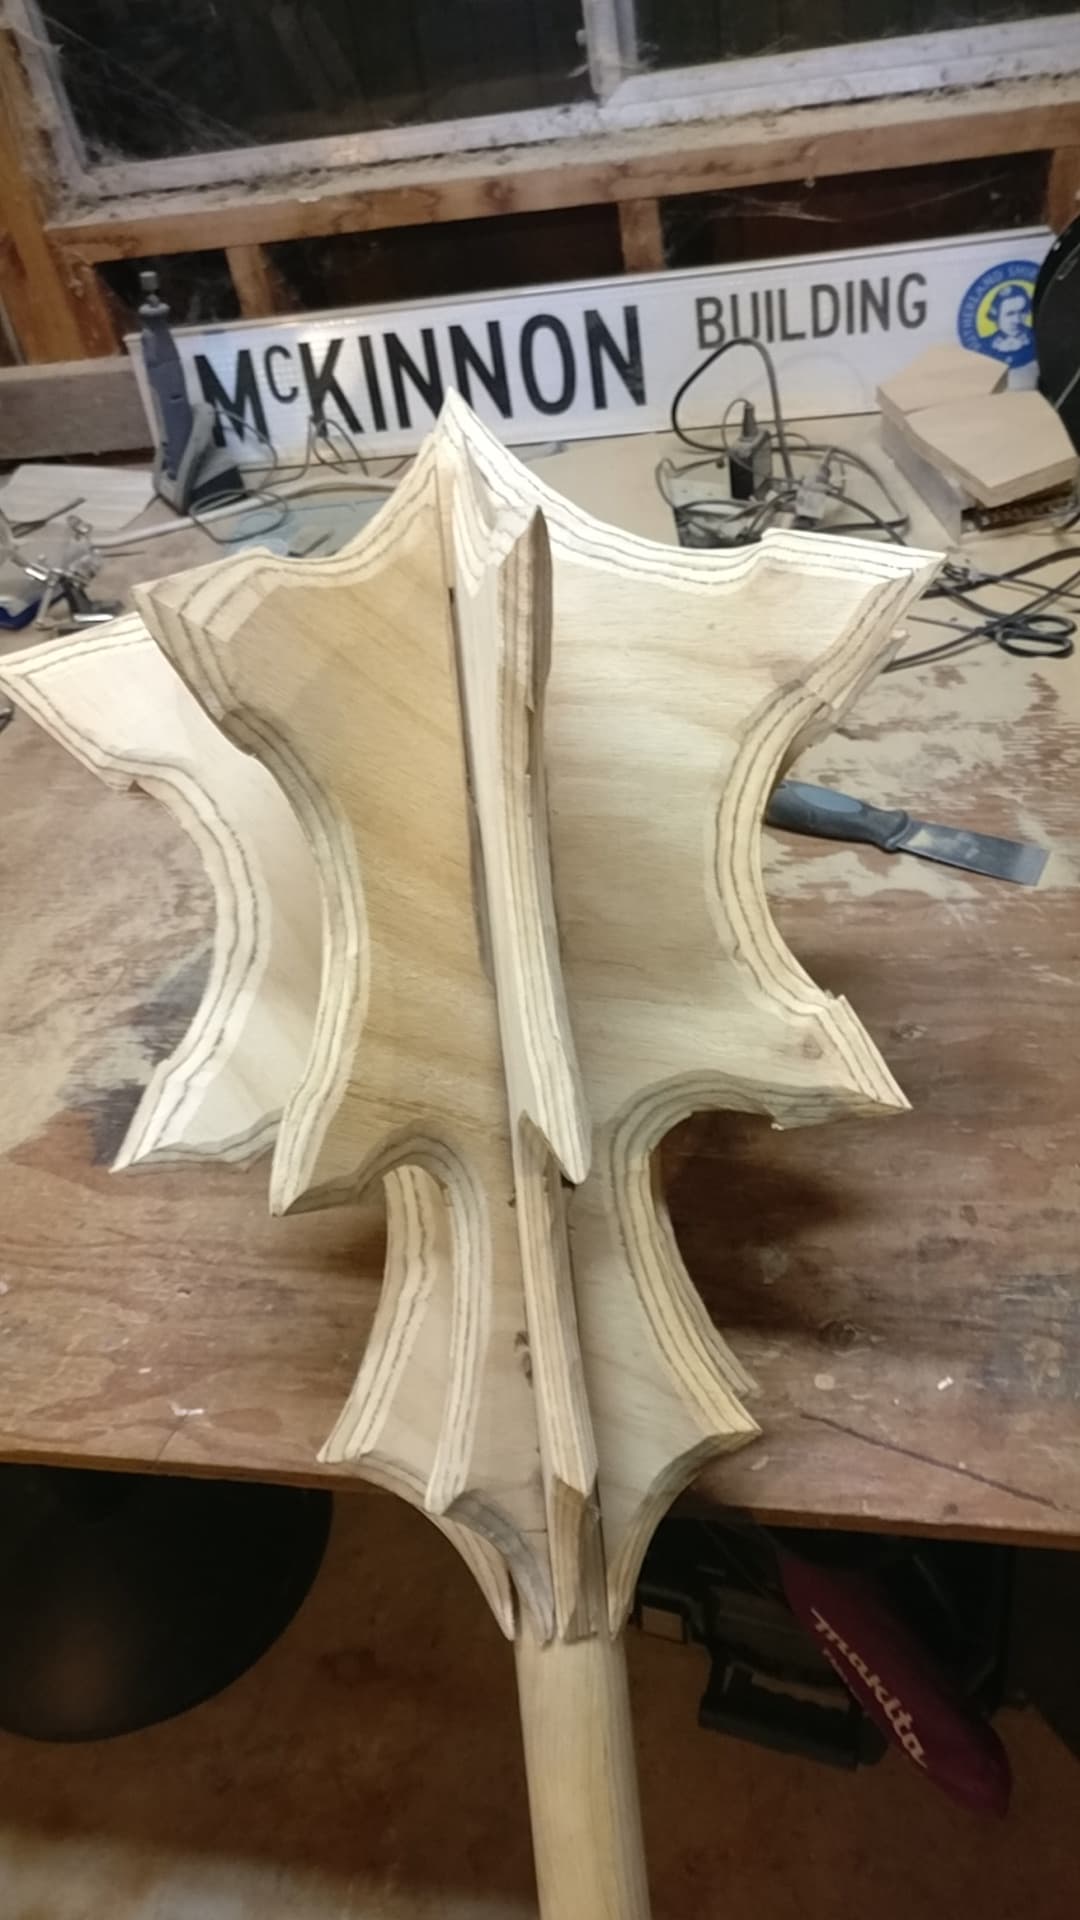
I didn’t know how invested I’d get in this, and so went for the idea of “cheap and whatever I have lying around, plus cheap stuff from Home Depot” - so I used some massive 7-ply boards I had sitting around in the shed. Heavy stuff, but it worked. With my bigger cross sections, I sketched the outlines onto the wood and jigsaw’d these out. These then fit around a centre pole (53mm dowel from Home Depot) that slotted into the centre. At this stage it fit really tight and not well, and was more of a mace on the end of an immense stick. A nice weapon, but not what I wanted.
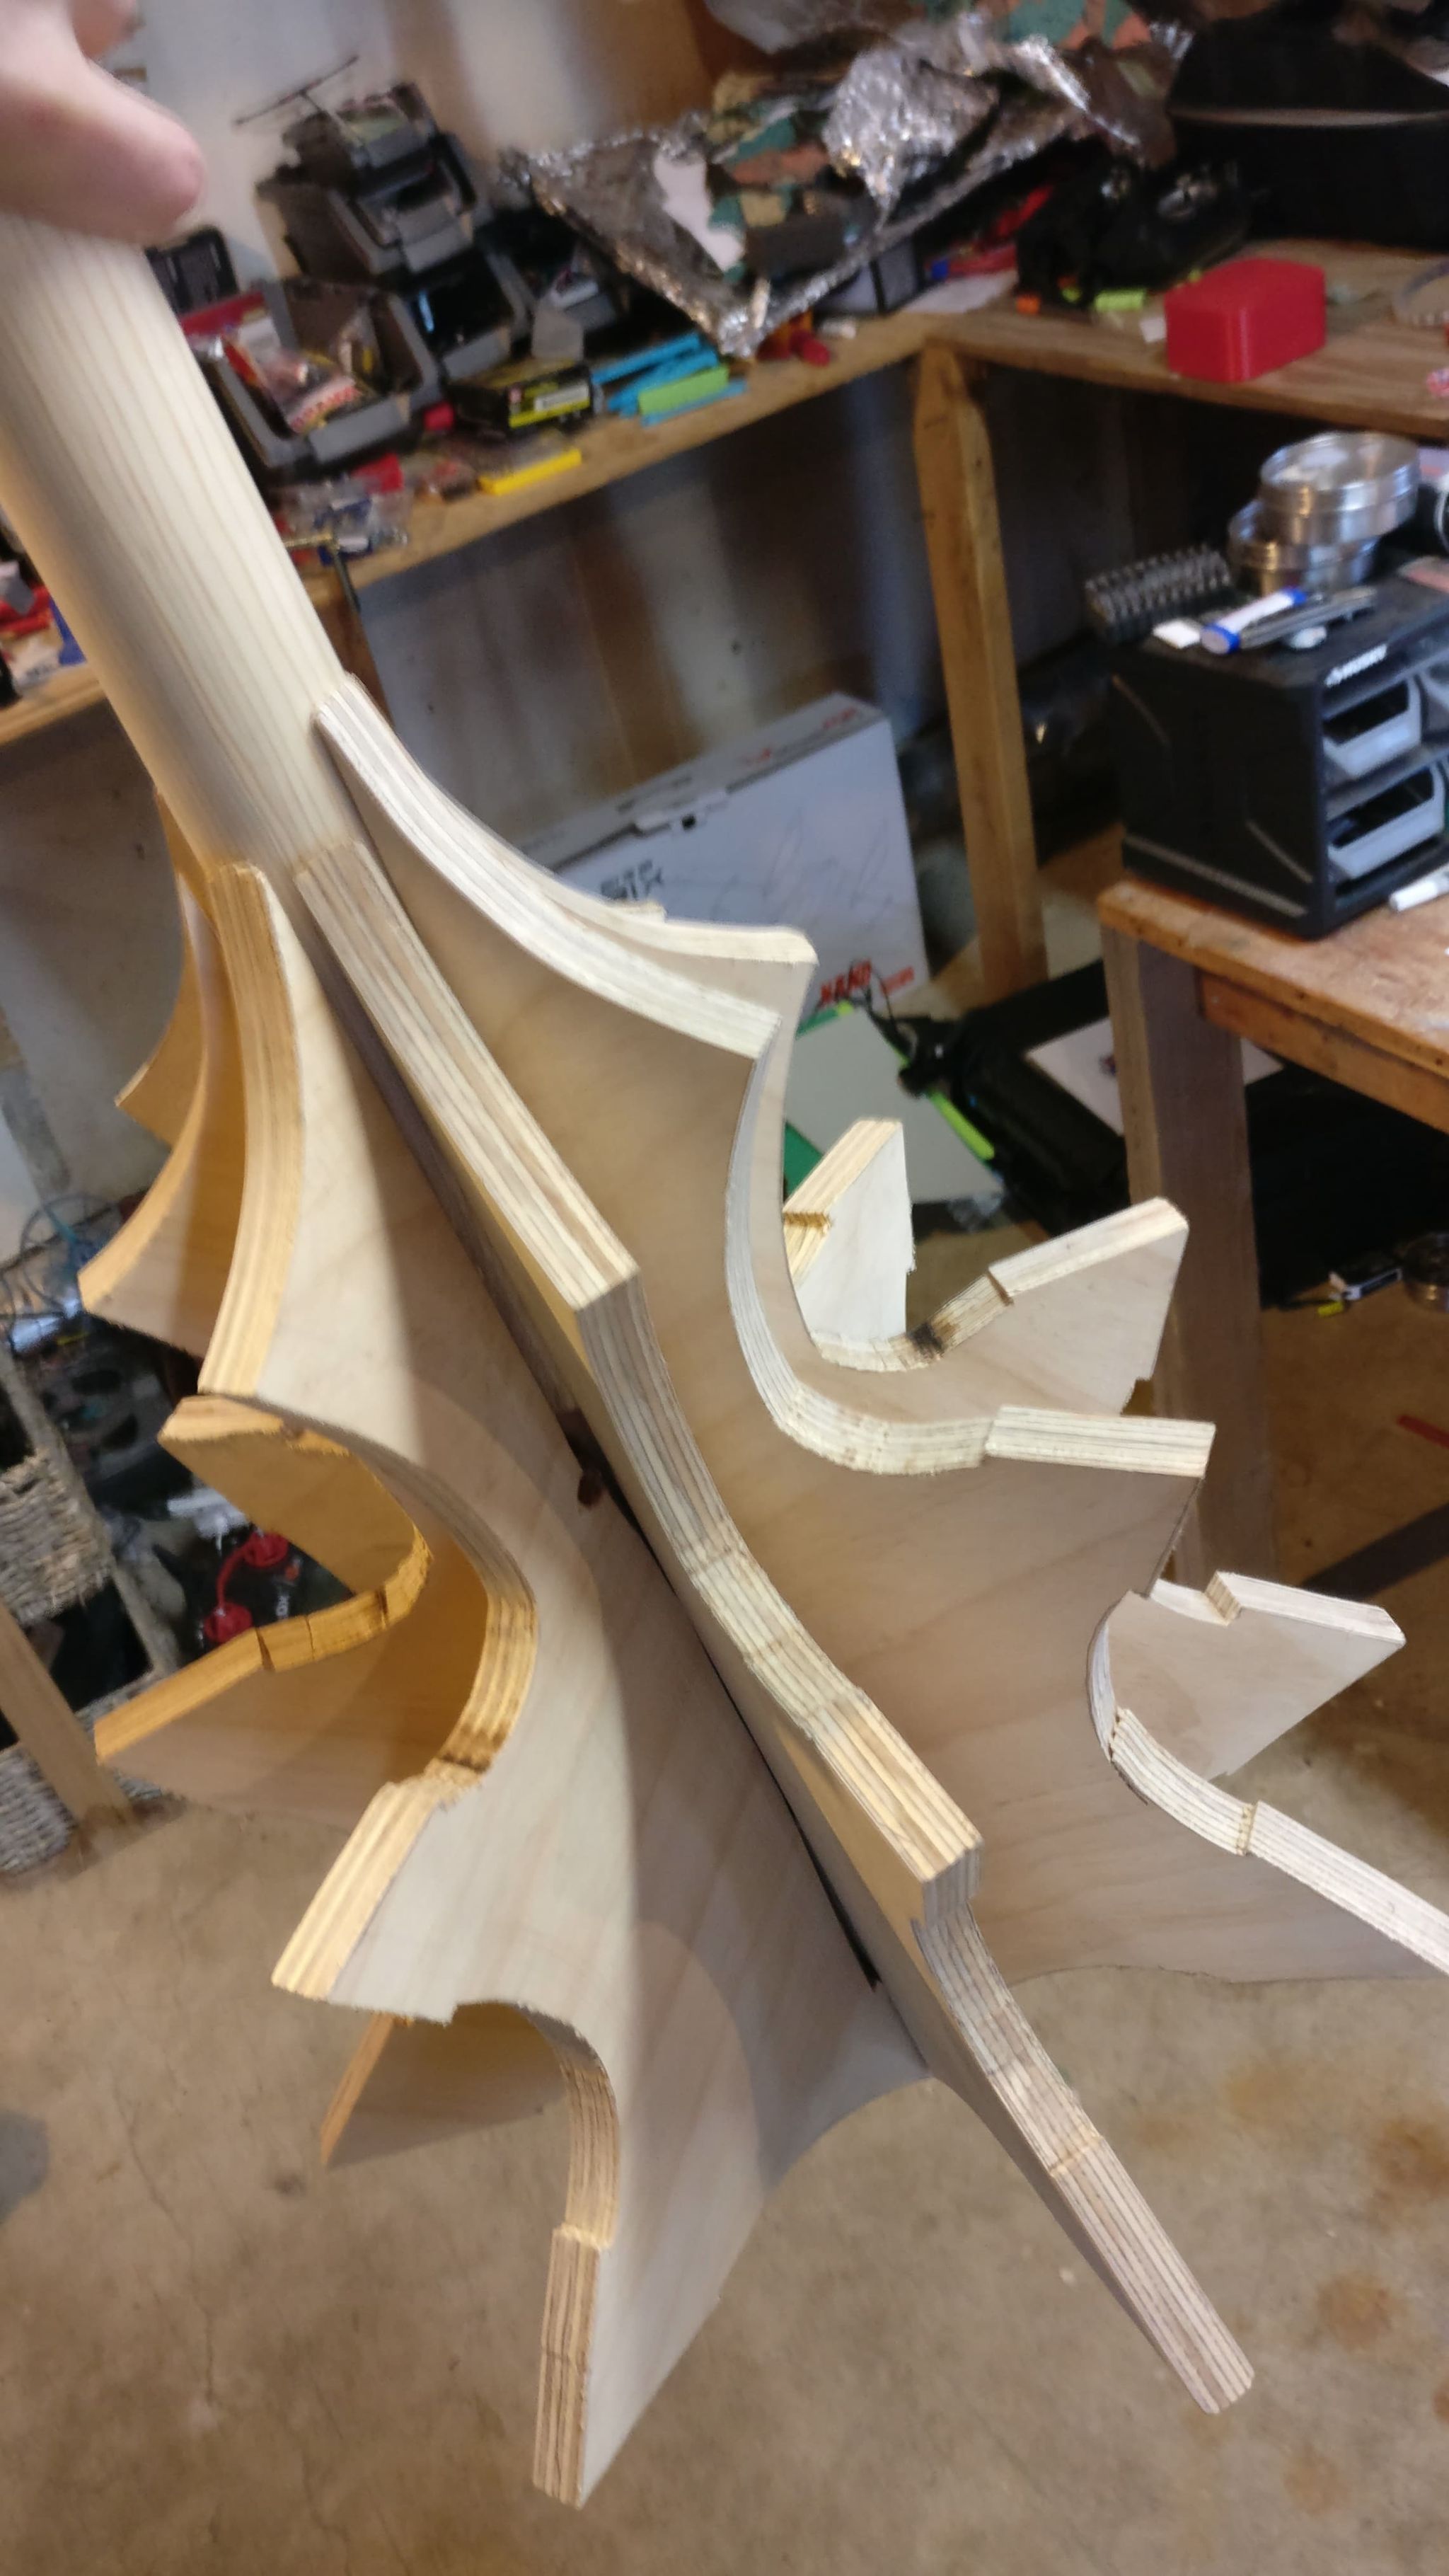
This head felt about the right size, and weight too - I didn’t want some lightweight foam thing swaying in the breeze, I wanted you to feel when you were lifting this. This had to feel real. And it did.
Filling out the skeleton
I needed to properly attach these ‘ribs’ to the central rod, and then fill the space betweeen these ribs to create the final shape - and probably reduce the weight a bit while I was at it, cos 7-ply was hefty stuff. It fit together as in the above photo, but not cleanly, and the outward-facing edges are flat. These need to be tapered so as to present less of a surface - this’ll aid in getting a nice smooth curve around the flail later, rather than having wooden edges poking out and ruining that rounded shape. Furthermore, the inward-facing surfaces need to taper to an edge so that the ribs can slot together properly. A handheld belt sander did the trick:
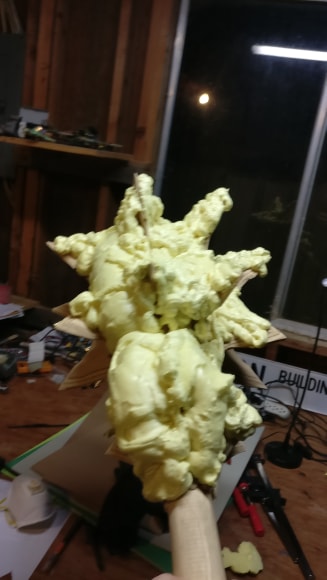
And then they slotted together nicely, bit of wood glue (a LOT of wood glue) and it held! So how to fill all that empty space to give it some body?
Spray-on space-filling foam seemed the best option, though I will admit I did not research alternatives extensively. I went through four or five cans to get it to this stage
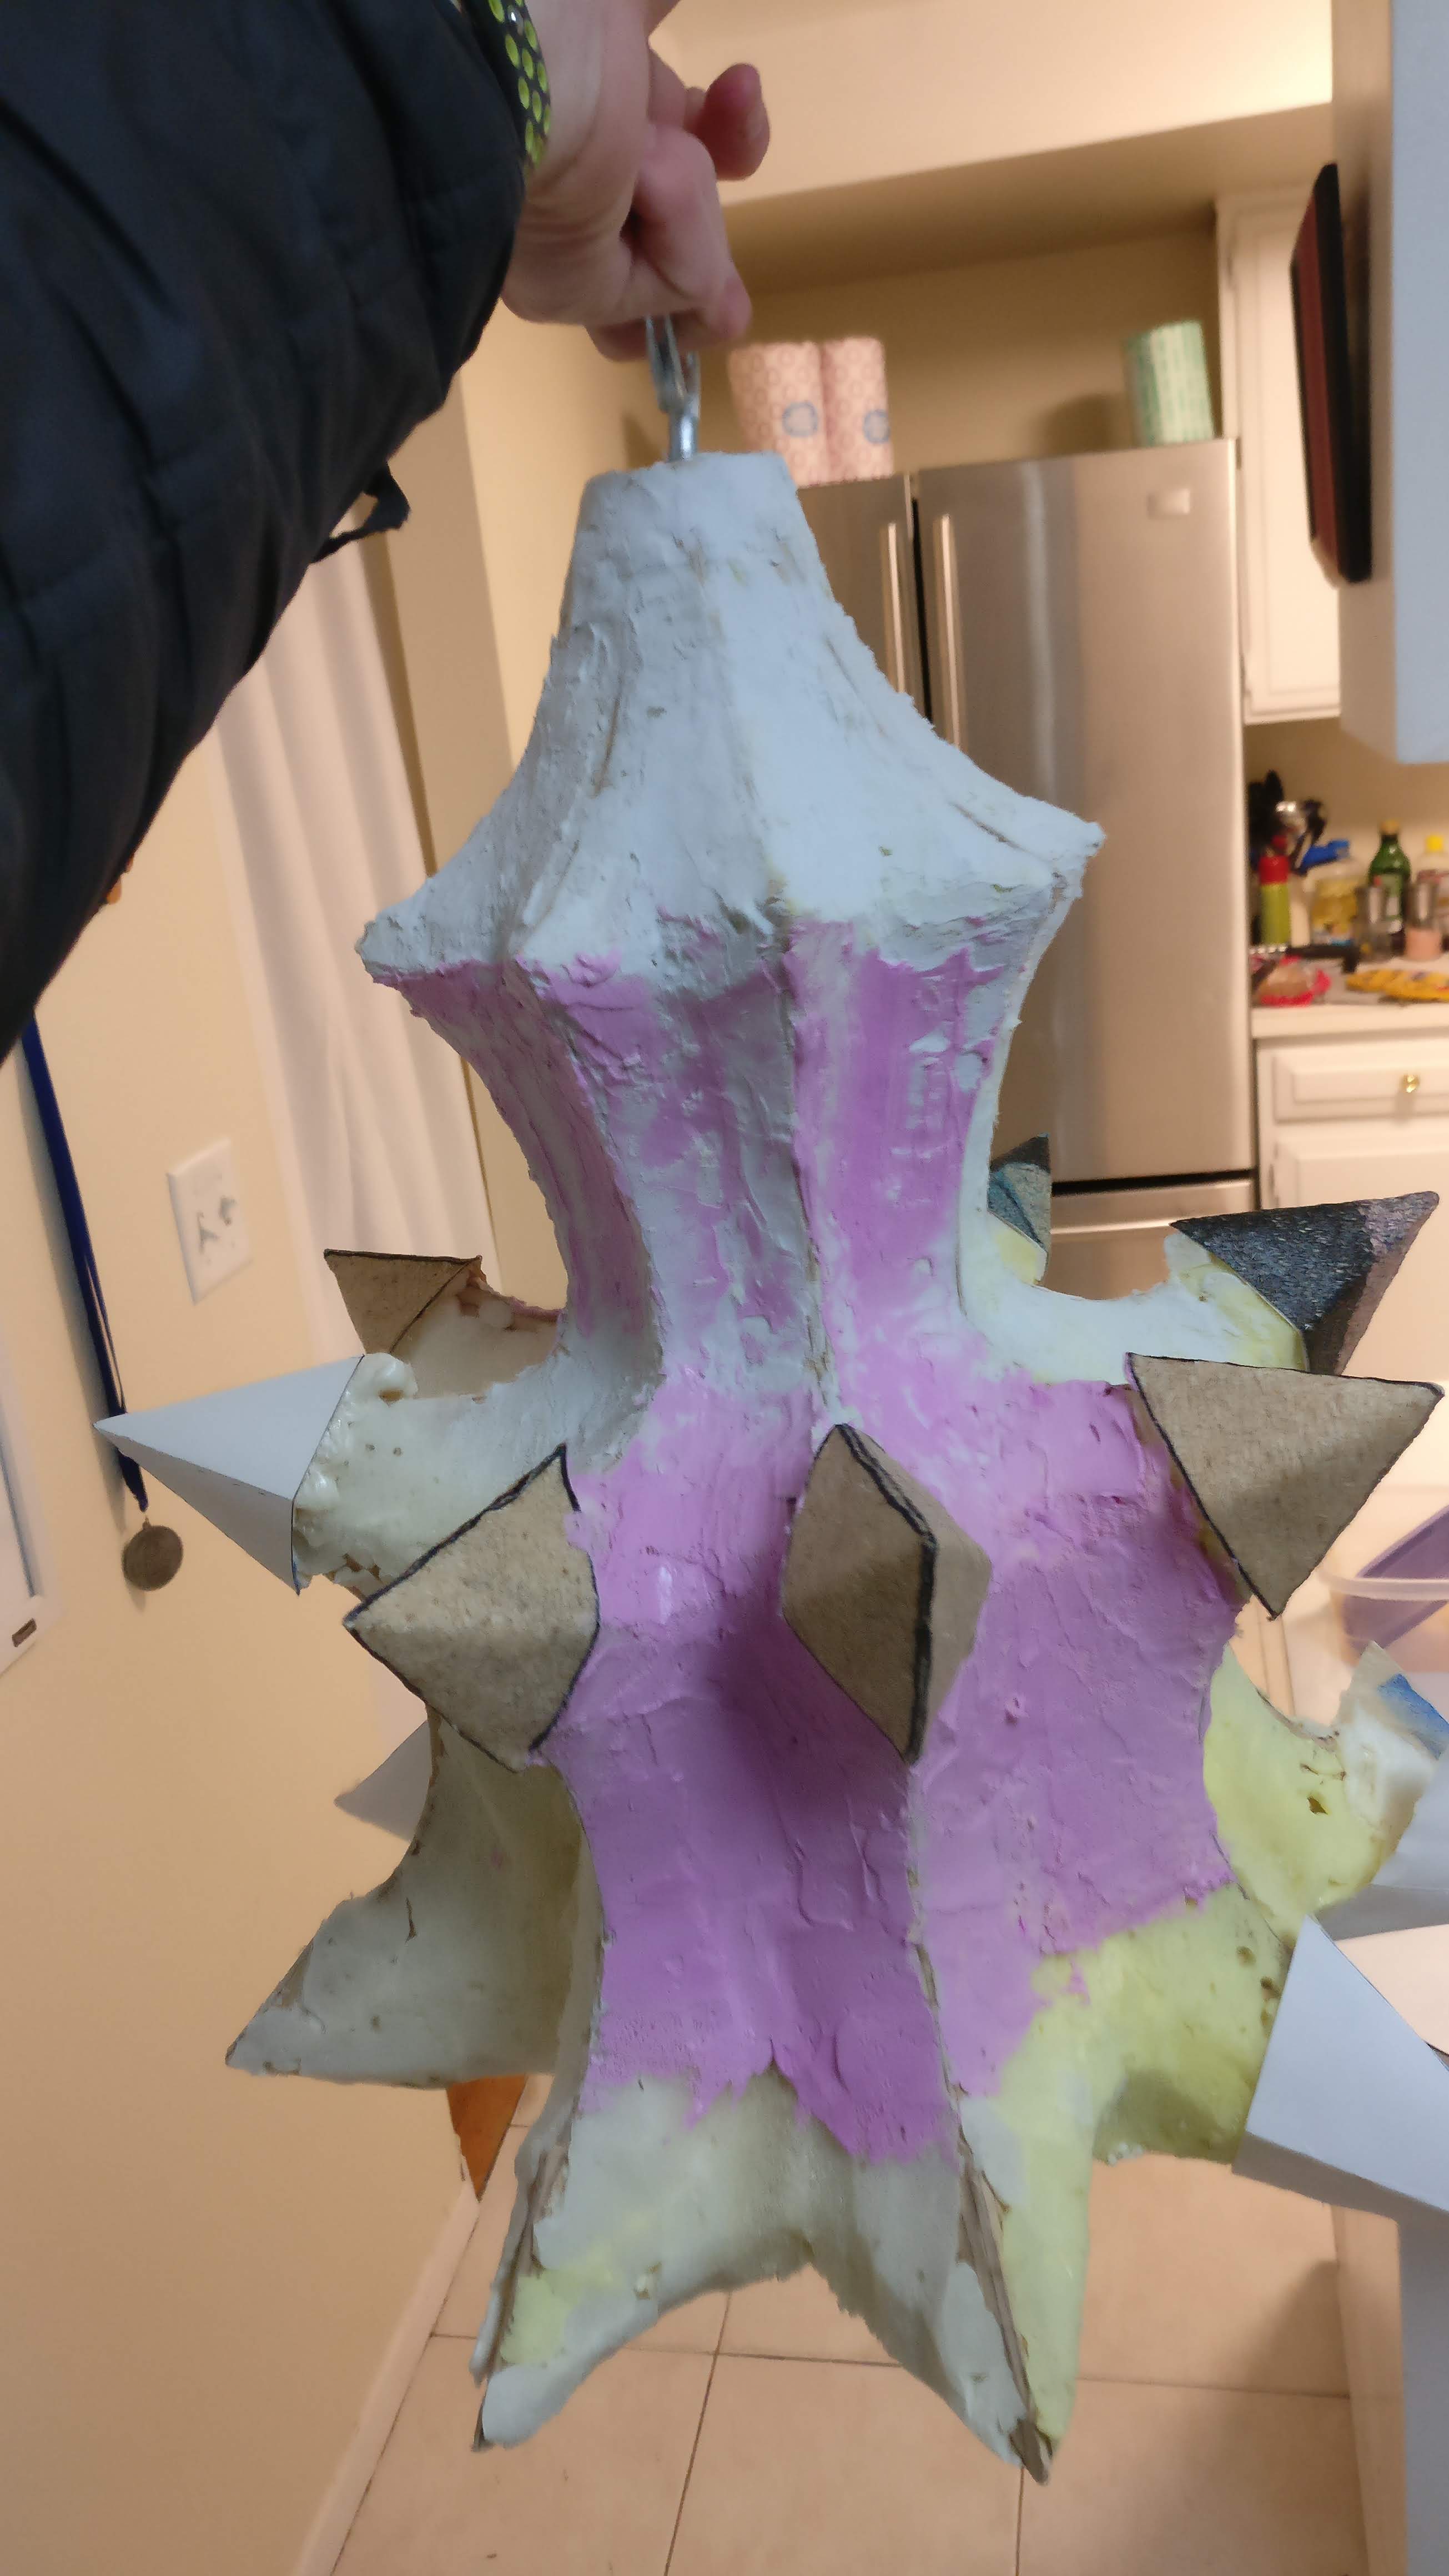
and then cut it down to something more resembling the final product. Did this with just a knife, shaping bit by bit until it looked and felt right. There was very little exactness after this stage, just a lot of me comparing what I had to photos and eyeballing it.
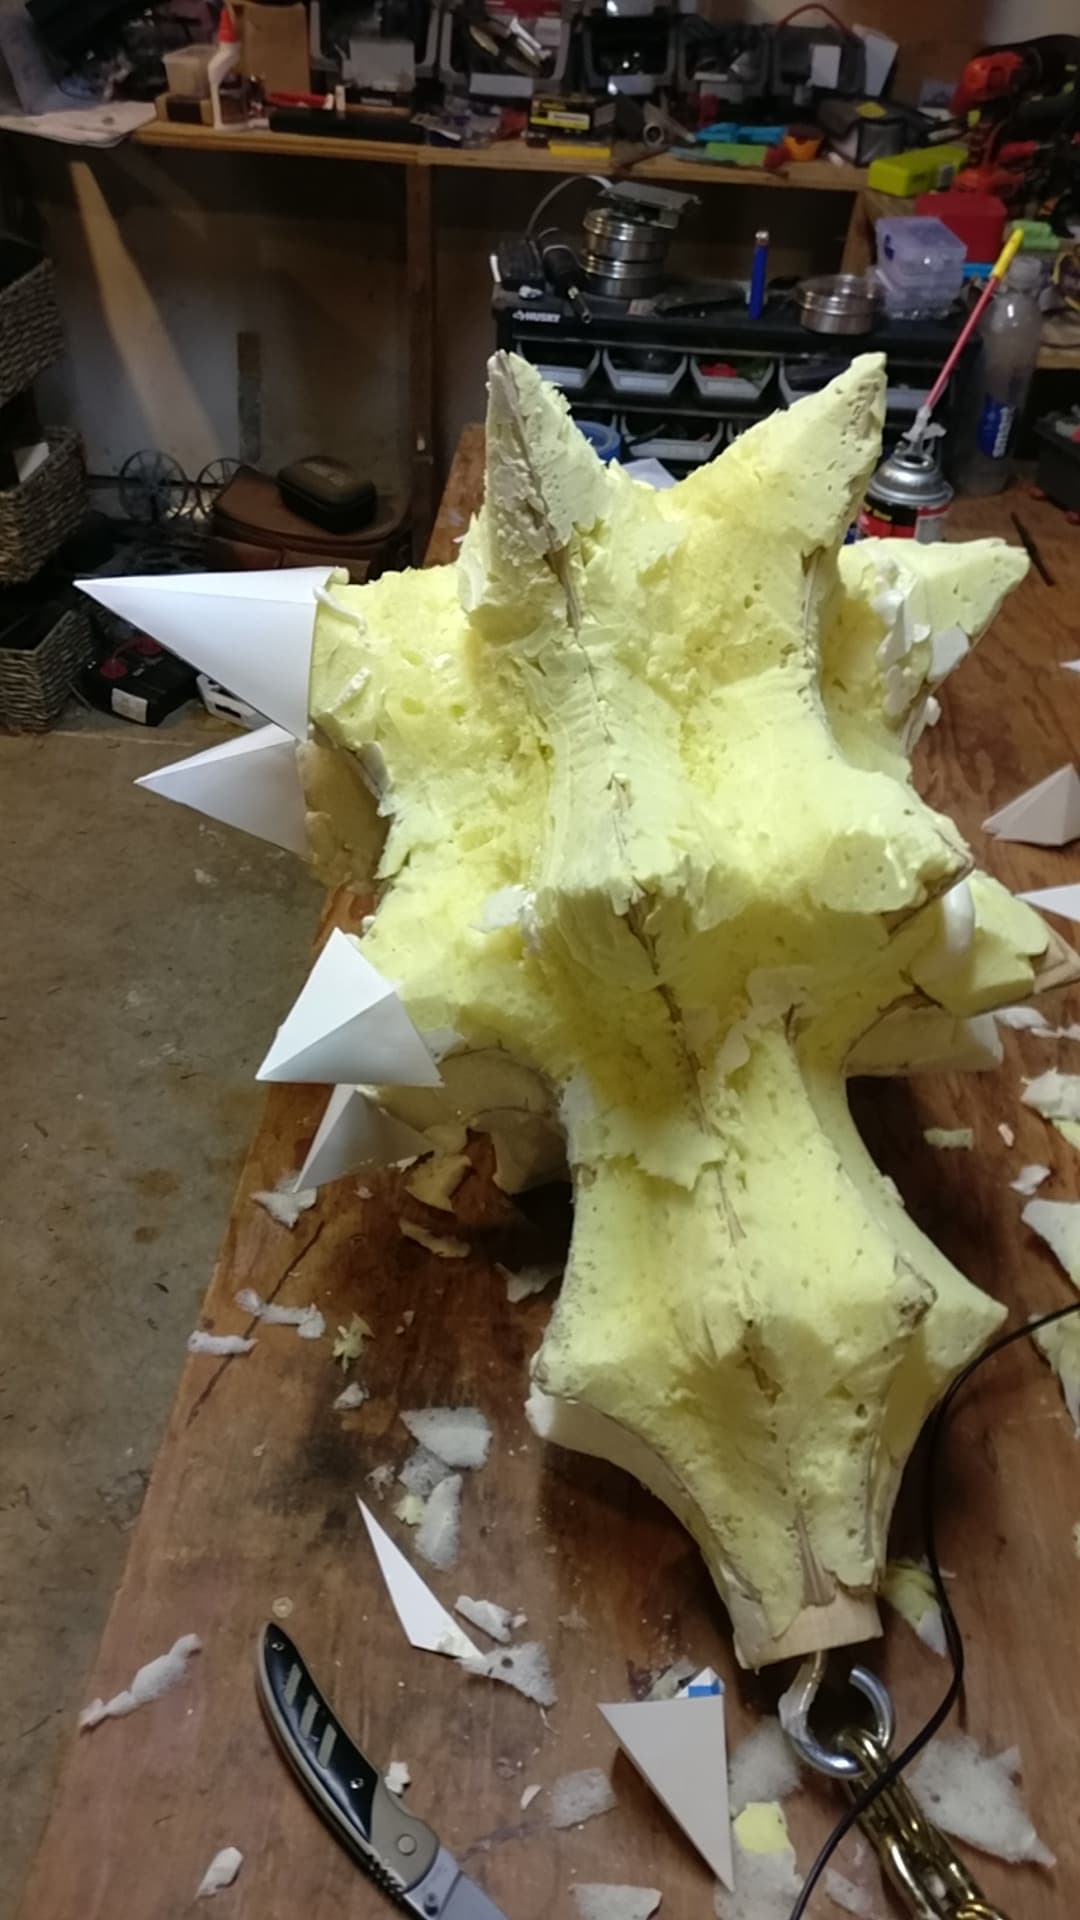
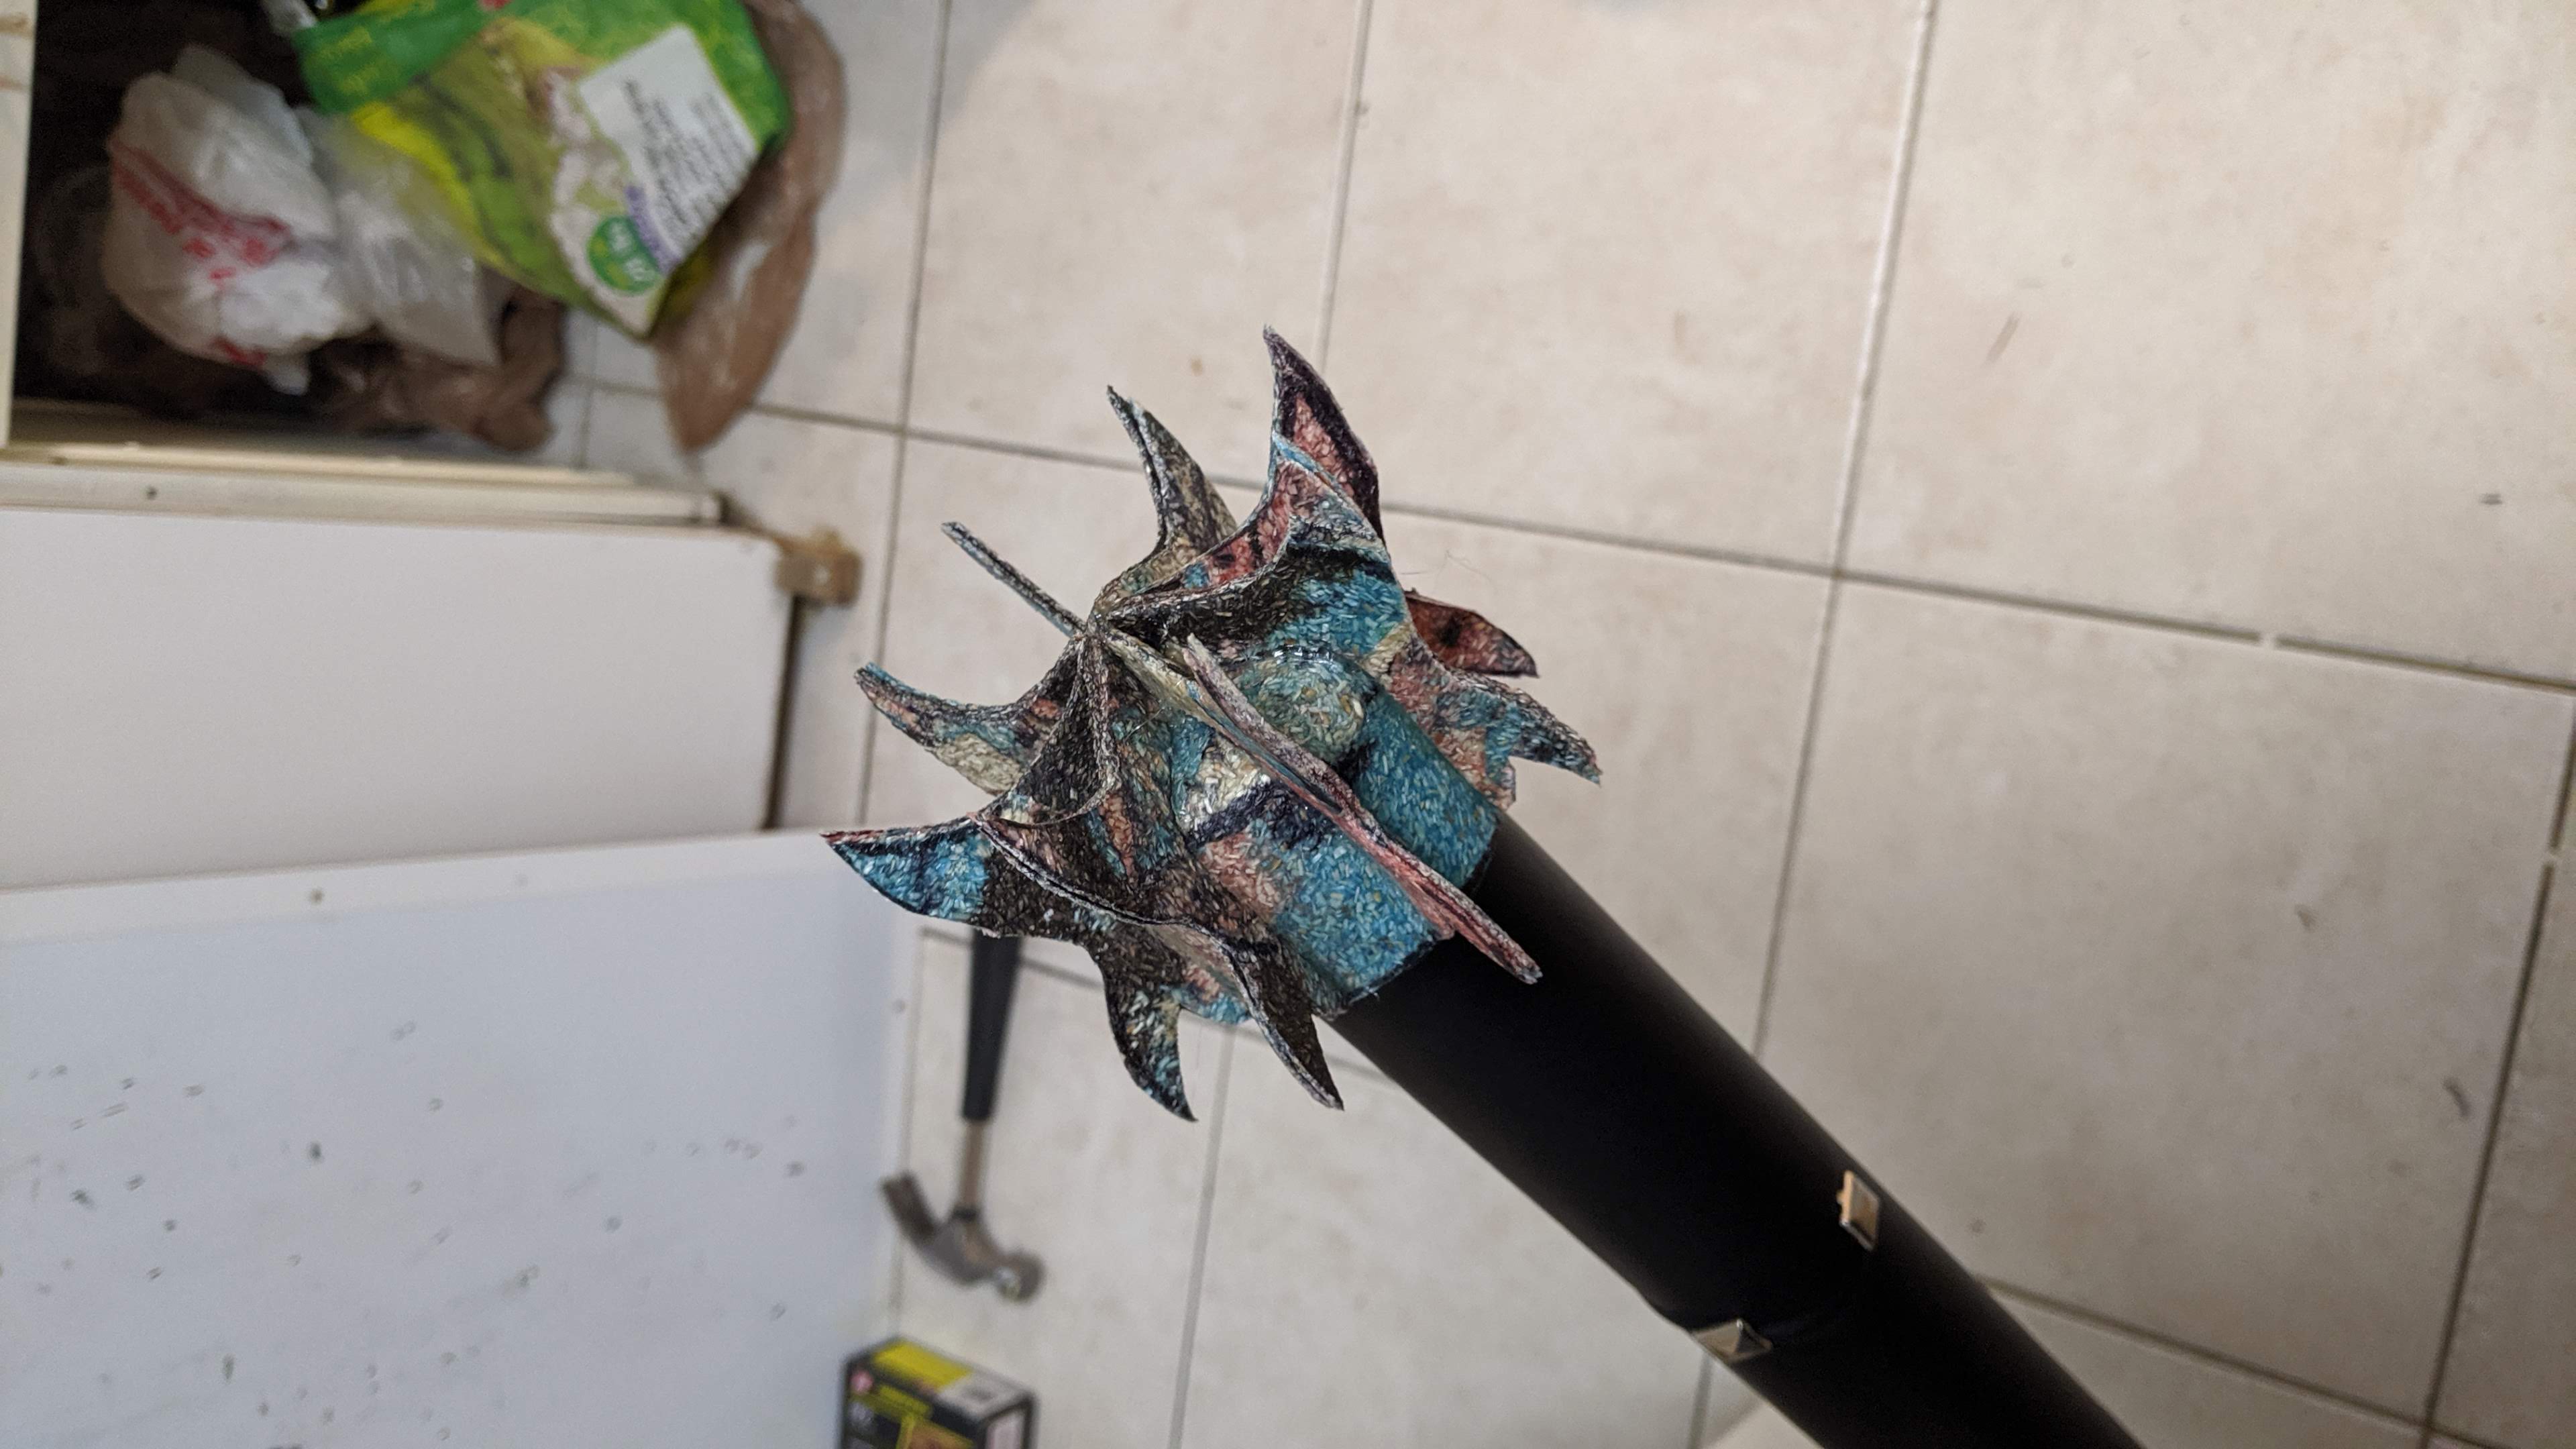
The one difficult part was the spikes - take a look (photo) - they’re very … spiky, sure, but triangular, or like cones with edges. The point is, those tips are a very particular well-defined shape and I couldn’t just have blobs. I was careful to keep the foam around the wood in a similar shape to assist later on. These spikes needed to hold the weight, as I noticed they were resting points, but also hold their shape. I played around with covering them in shells of thin cardboard, which bent quickly and easily, and then also thin-but-still-rigid shells of treeflx, which worked a lot better. You can see the different attempts on various spikes - card centre and right, treeflx on the left one:

Treeflx is amazing stuff. Heat it, mold it, stick it in a stew … well, not the latter, but you can heat it up, roll it thin, cut it with scissors, and then it cools to a very rigid shape. It became very useful in the handle, as you’ll see.
The handle
While the head gets built, I started to think about how the handle will attach and how to make it look proper. Here’s what it looks like in the film:
Not super clear, but you can see some outlines of metal “wings” along the handle, it’s probably wrapped in leather, and there are some studs. It’s also gotta have a chain attach point, and be strong enough to hold the weight. I had some spare dowel left over after lopping off … four feet, so can use that as a base. But that felt a little too thin. Looking around the shed, I had some slightly wider PVC, which fit the dowel nicely. Alright! I grabbed some PVC caps, bolted the ring for the chain attach point through the cap into the dowel, got a chain from home depot, and we have a viable handle! Now it just needs to look … more Mordor.
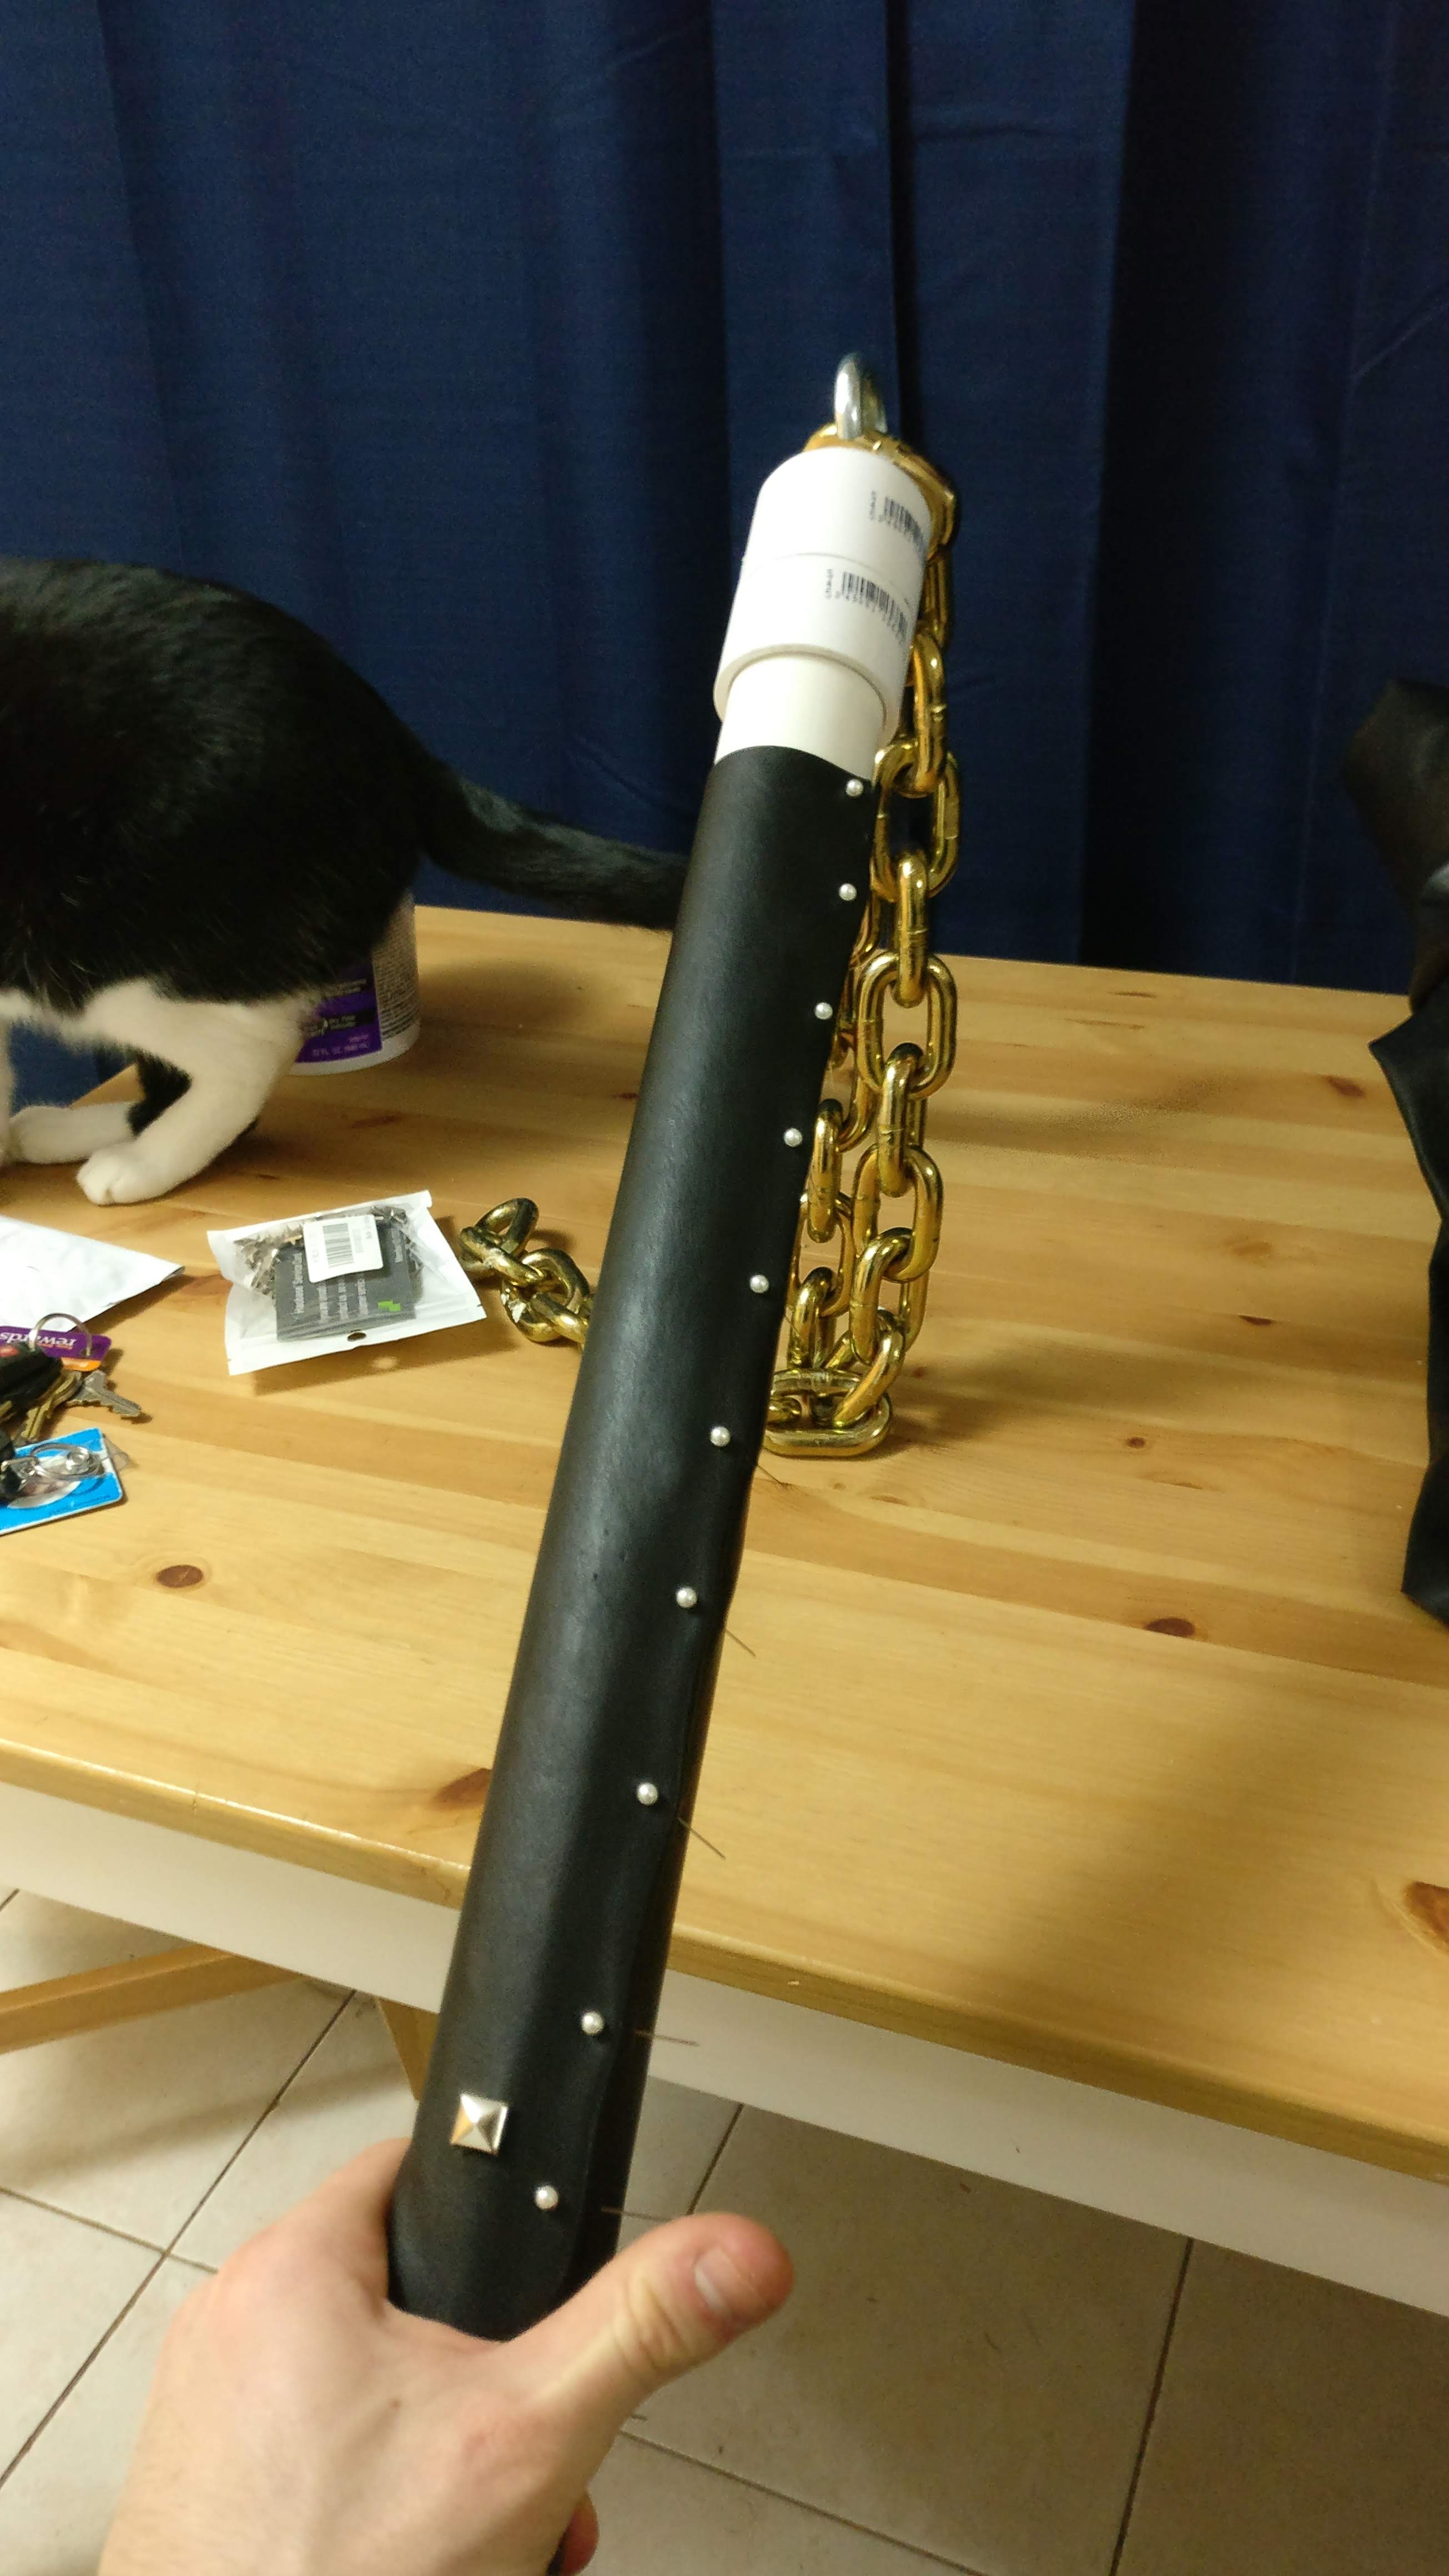
The PVC was easy to cover in pleather, so I just sewed a cylinder of pleather and added the studs. Next step was to slide the pleather sleeve over the PVC - I’m pleased it fit so well first go - and then as an extra precaution I nailed the sleeve down to the pipe so it wouldn’t slide as I held the handle.
Let’s take a look at those metal wings then. You get a vague idea of the shape from the very few closeups we get, which also implied that I didn’t need to be super exact (again, like at the start, I could have googled for other ideas, but for some reason I subconsciously decided to do this all from the films and no other sources). This seemed like a good chance to use treeflx again. I cut the fins out of thin treeflx for both ends, covered the caps, and just heat-molded the fins on:
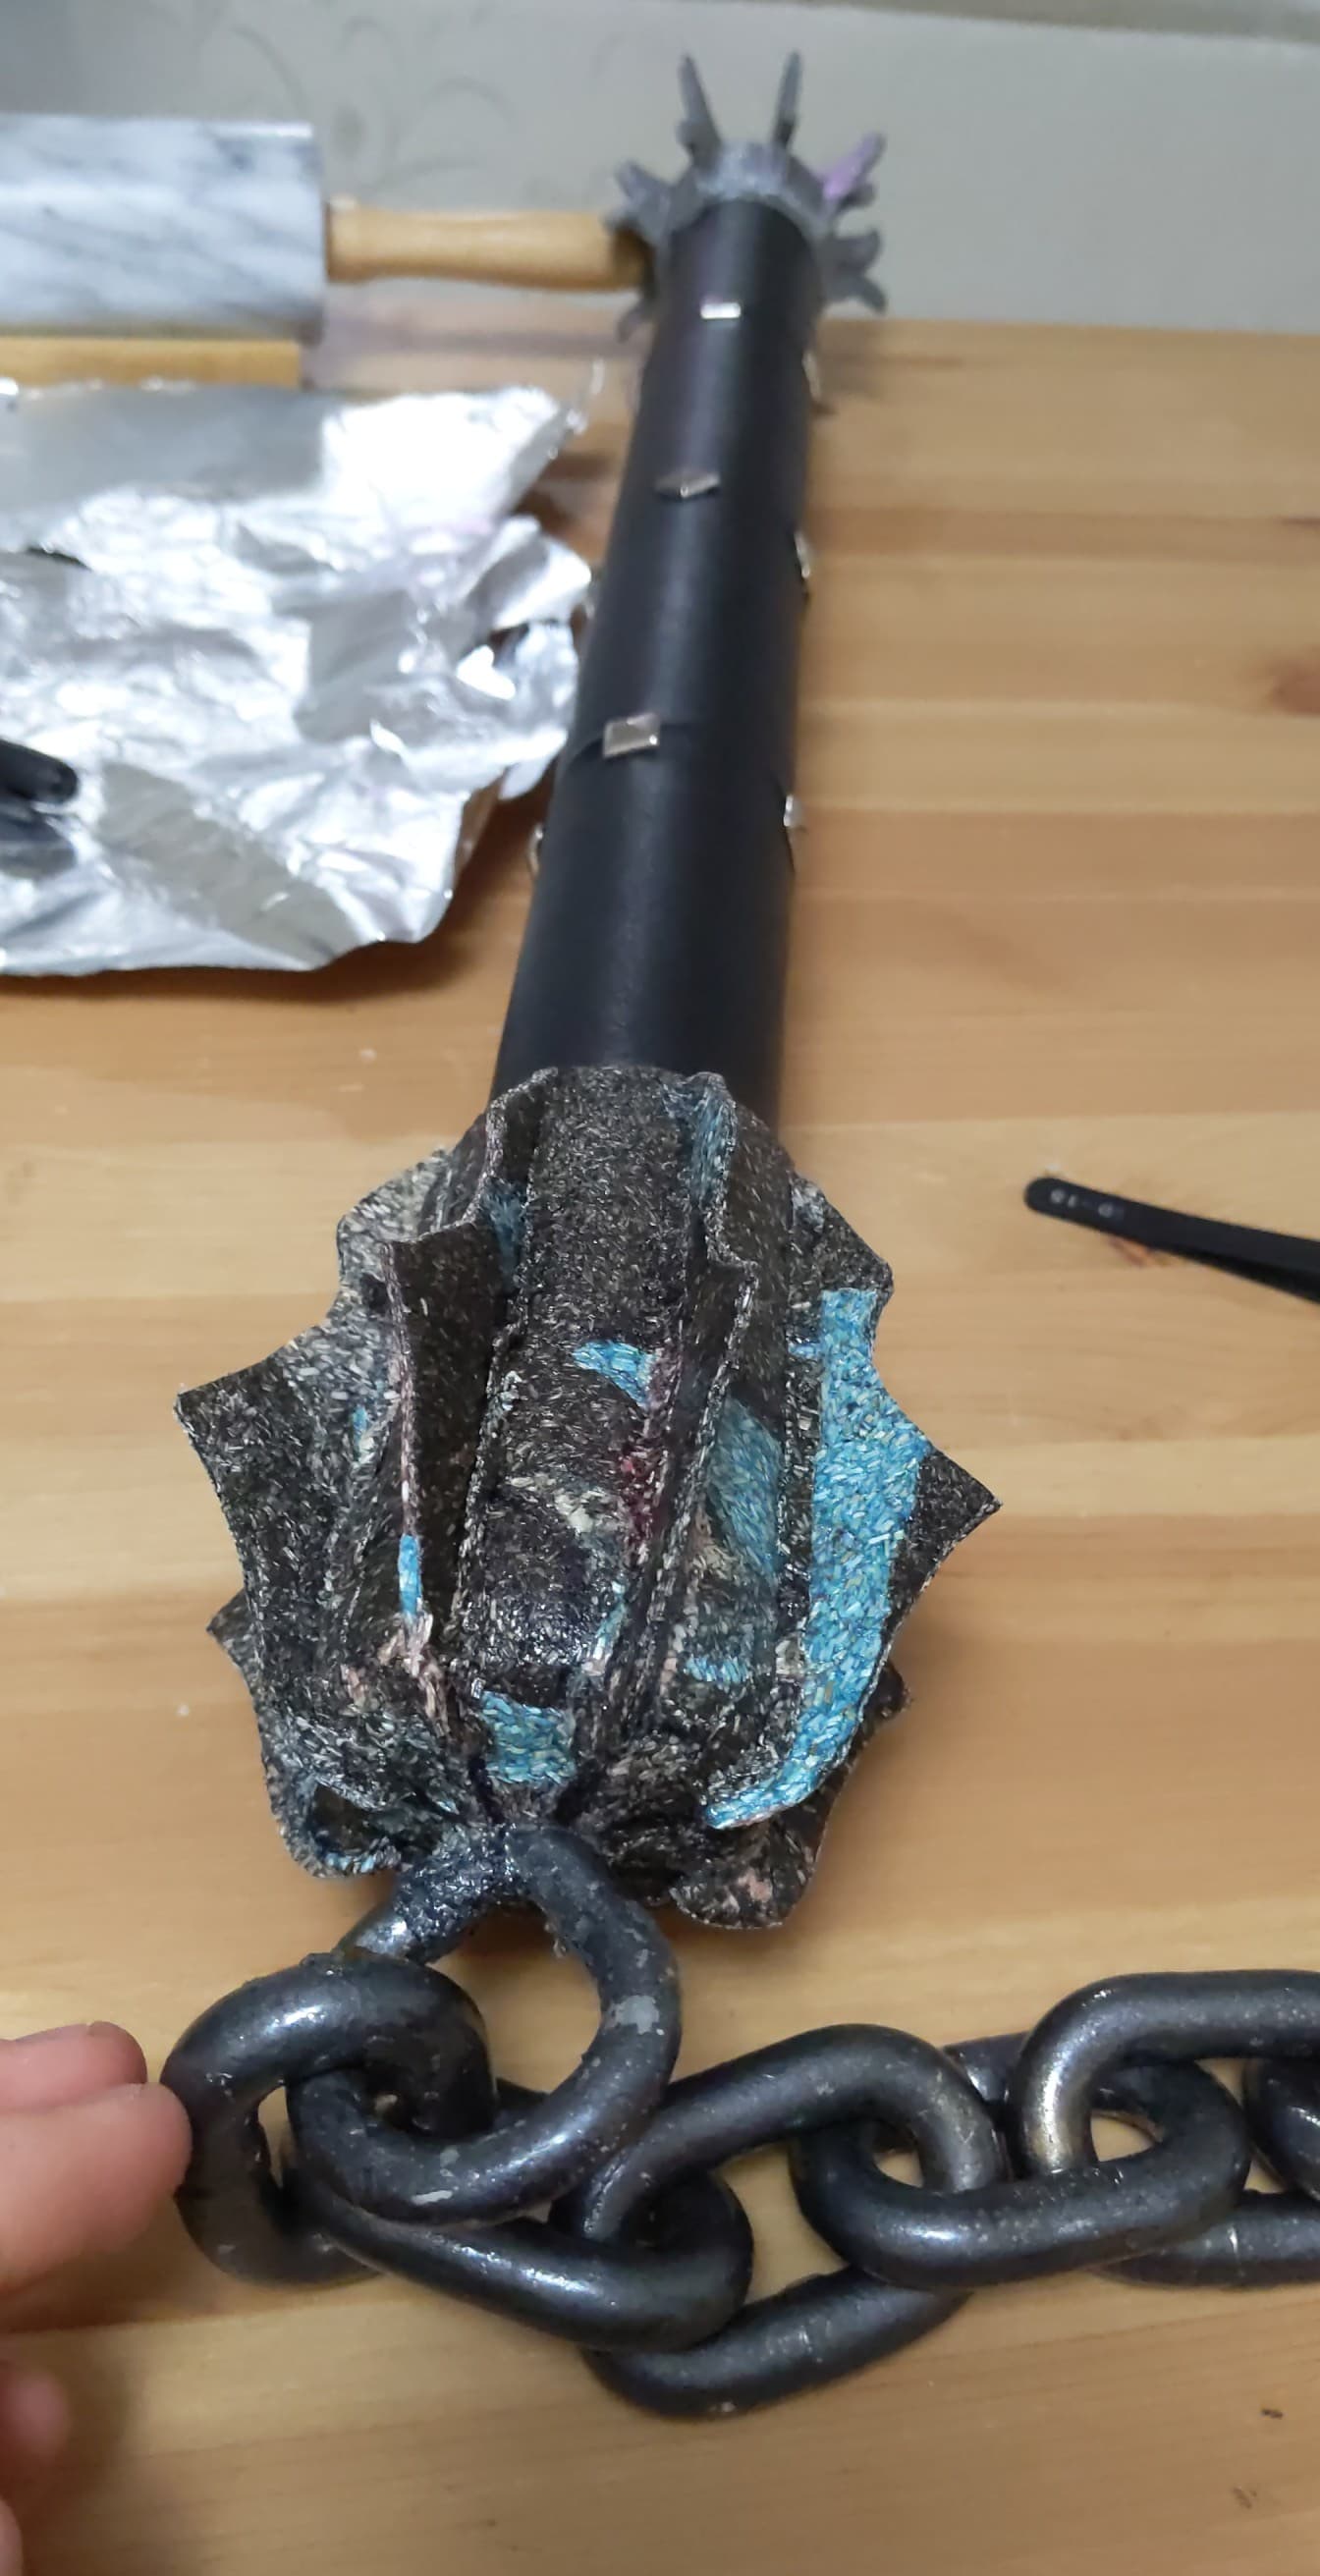
Then it was just a matter of painting, and viola!
Smoothing
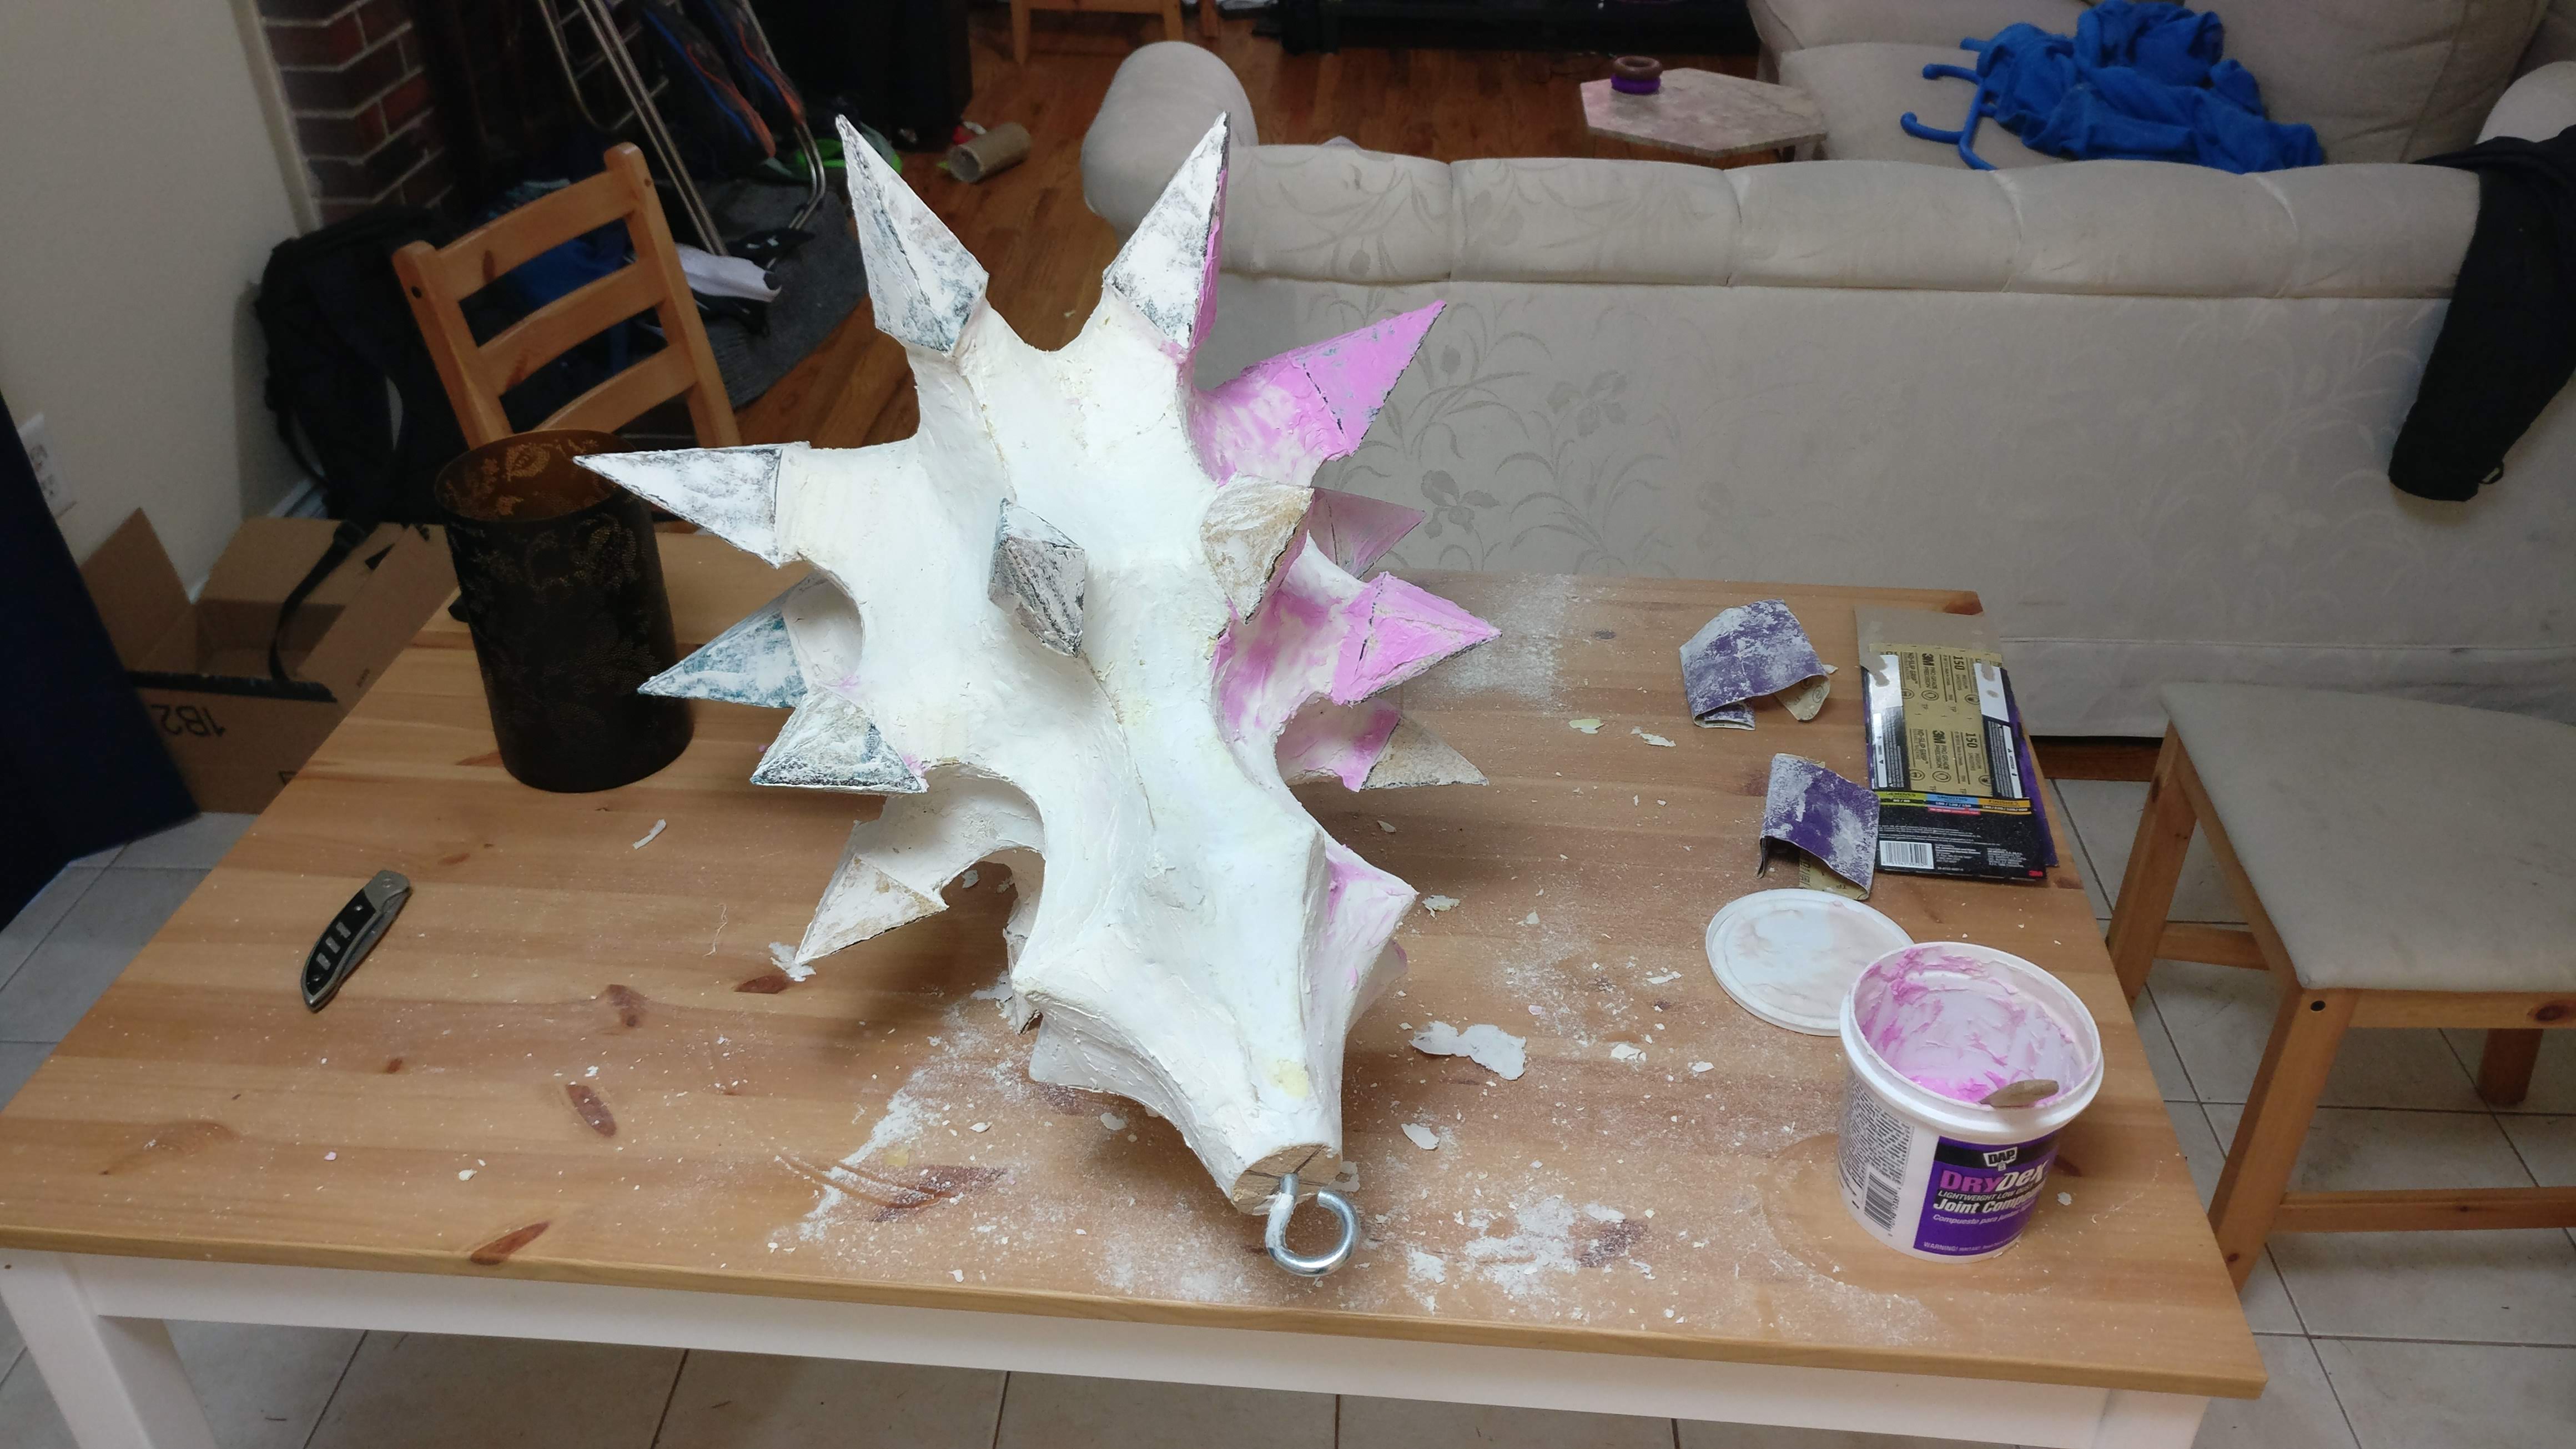
The foam was fairly rough and had little bubbles, so I needed to add something over the top to have a single smooth solid layer. This took a bit of consideration, and I hit upon something when trying spackling. I did several layers of this and it sunk in nicely. Did get crumbly once dried, but I forged on - maybe paint will fix that.
Well, it got all spackled and there were some cracks, but let’s peg that down to artistic license - it’s looking pretty good shape-wise!
Paint
Just went for a few layers of a nice classic metal gray. Tried a few different grays before finally settling on light and matte:


Second thoughts, more paint, and then glue
It still didn’t look quite right, and furthermore the spackle kept cracking. I was poking around online and saw some suggestions to handle similar issues and also get a nice shine to a final product: a layer of glue. Dries clear, and you’re essentially plastic coating. Worth a shot! (did not consider the possibility it might look bad) Painted that on over the paint, and yeah it turned out really well! Even the treeflx on the handle got the treatment.
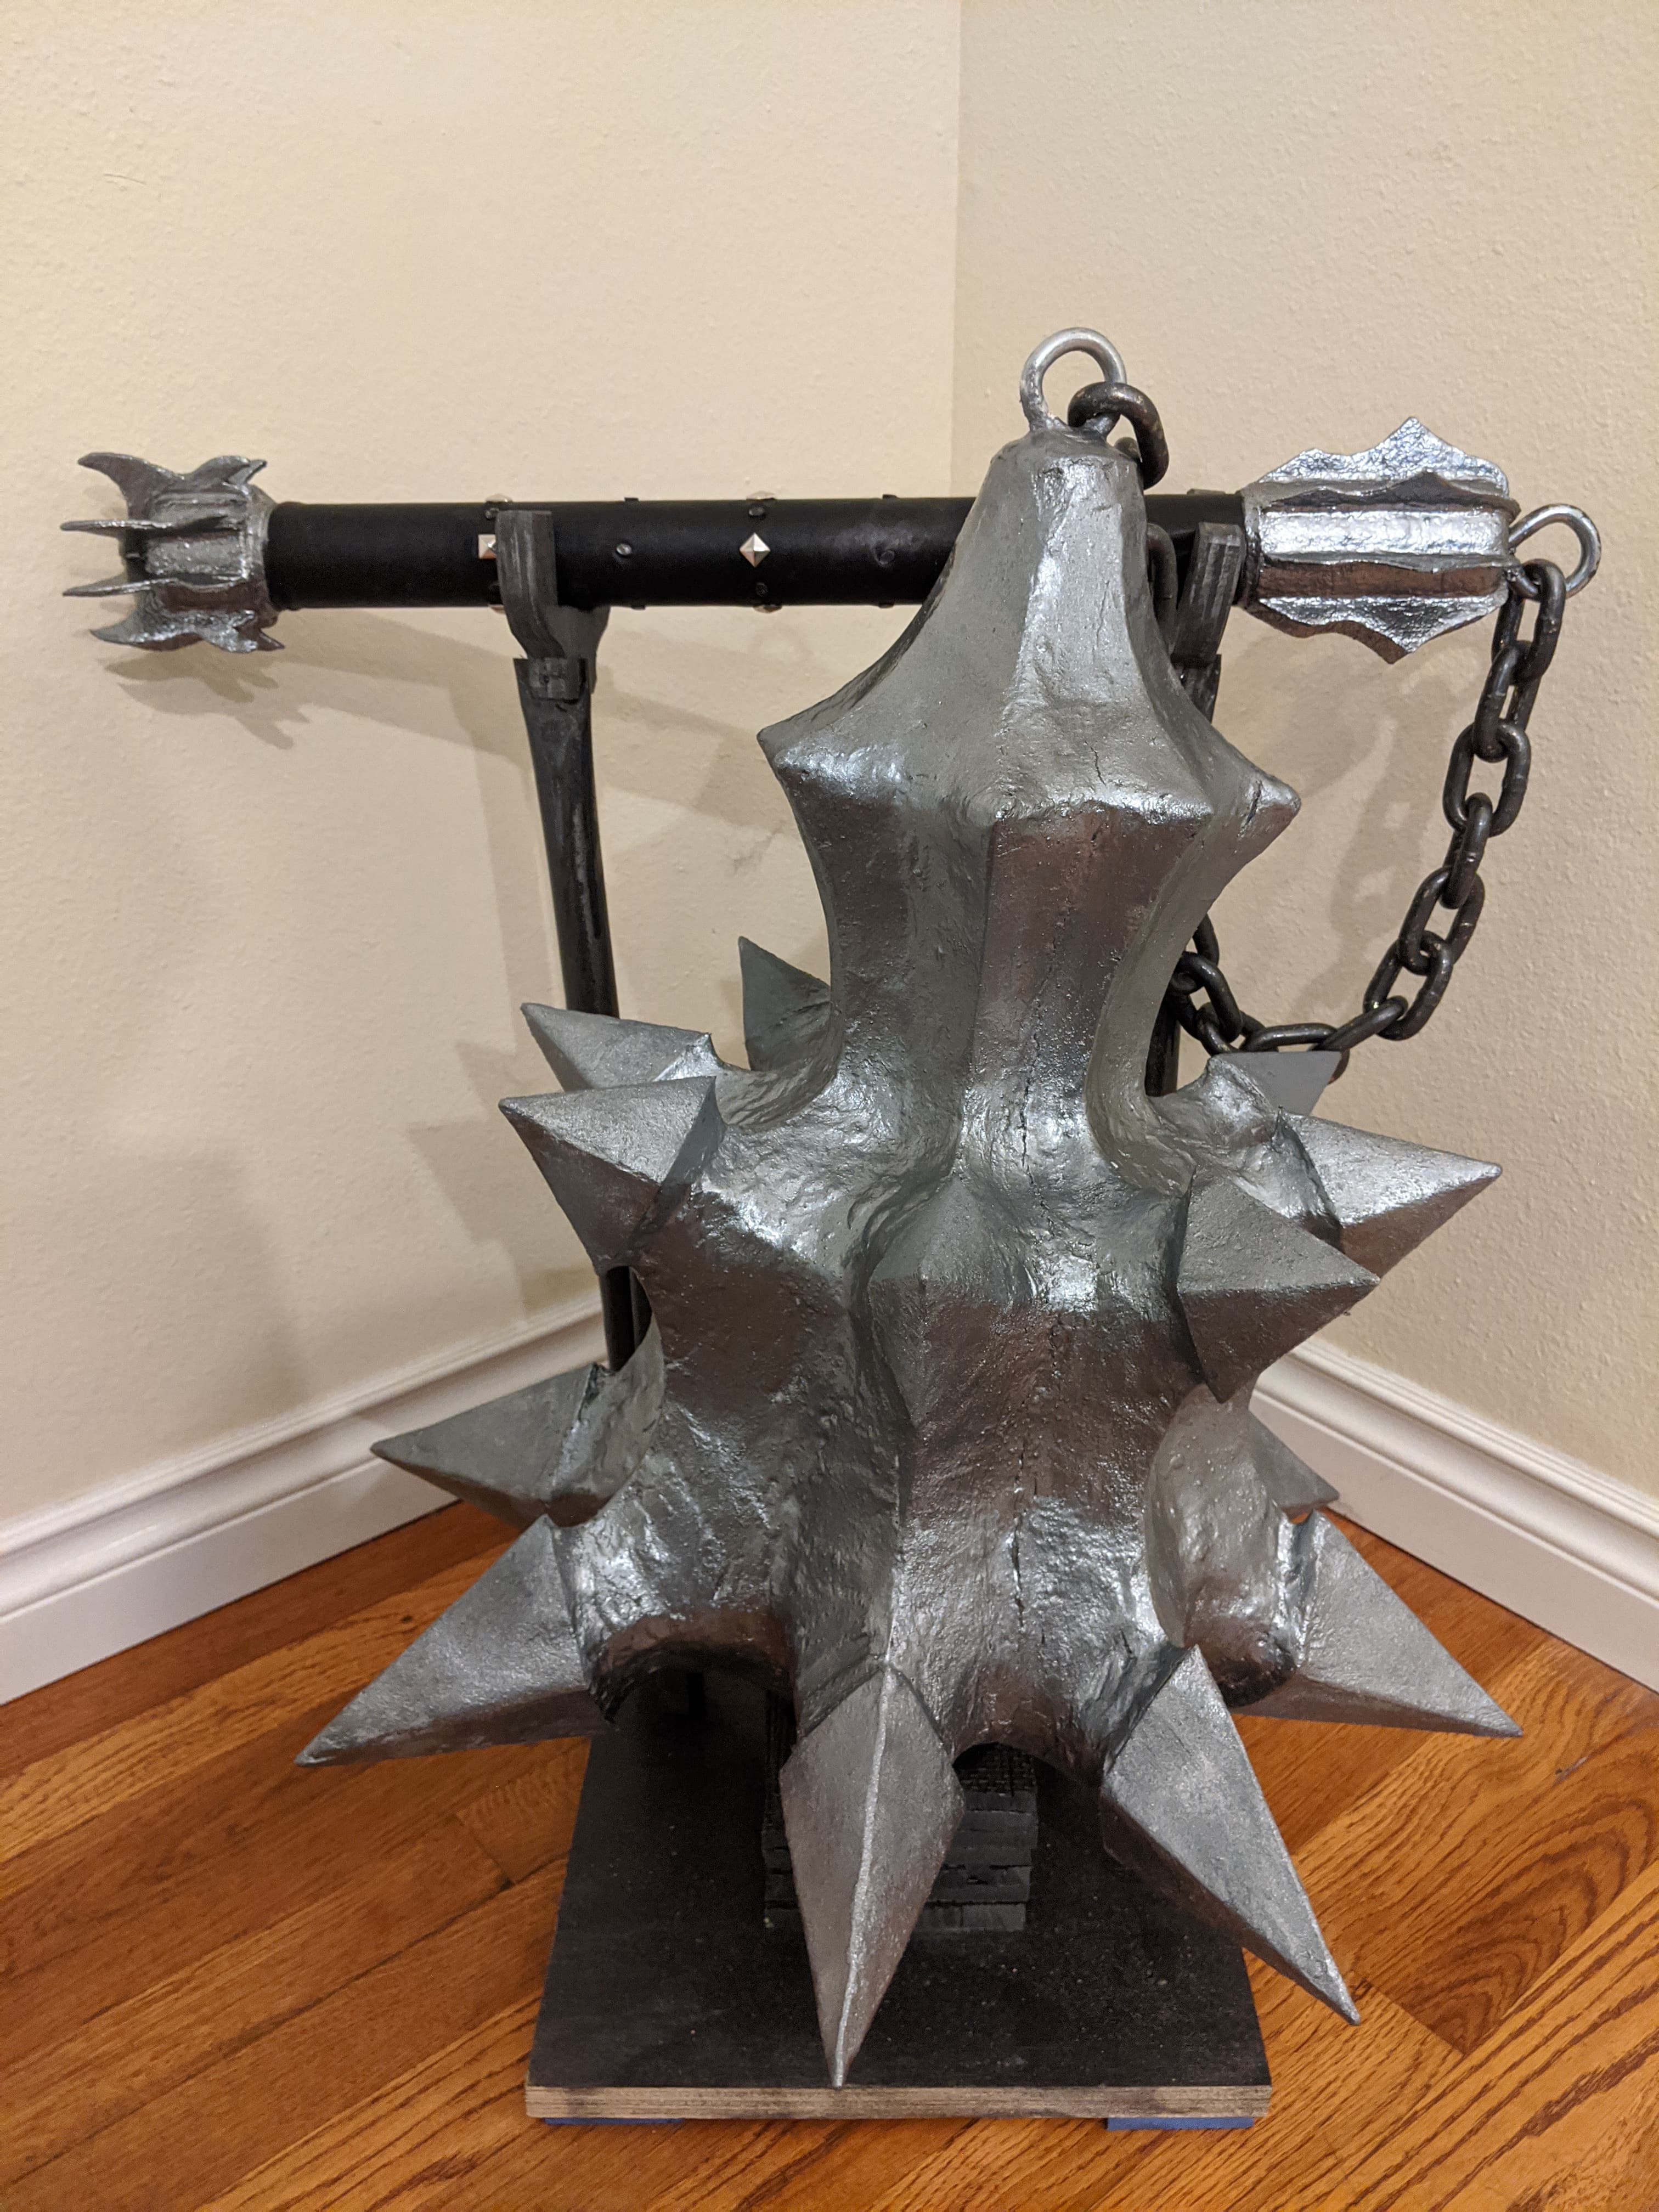
A stand
The stand was honestly a rush job: some padding for the bottom spike to take the weight, coouple of sticks to ensure it sat upright, and a holder for the handle. I don’t look at the stand much, it’s not important.
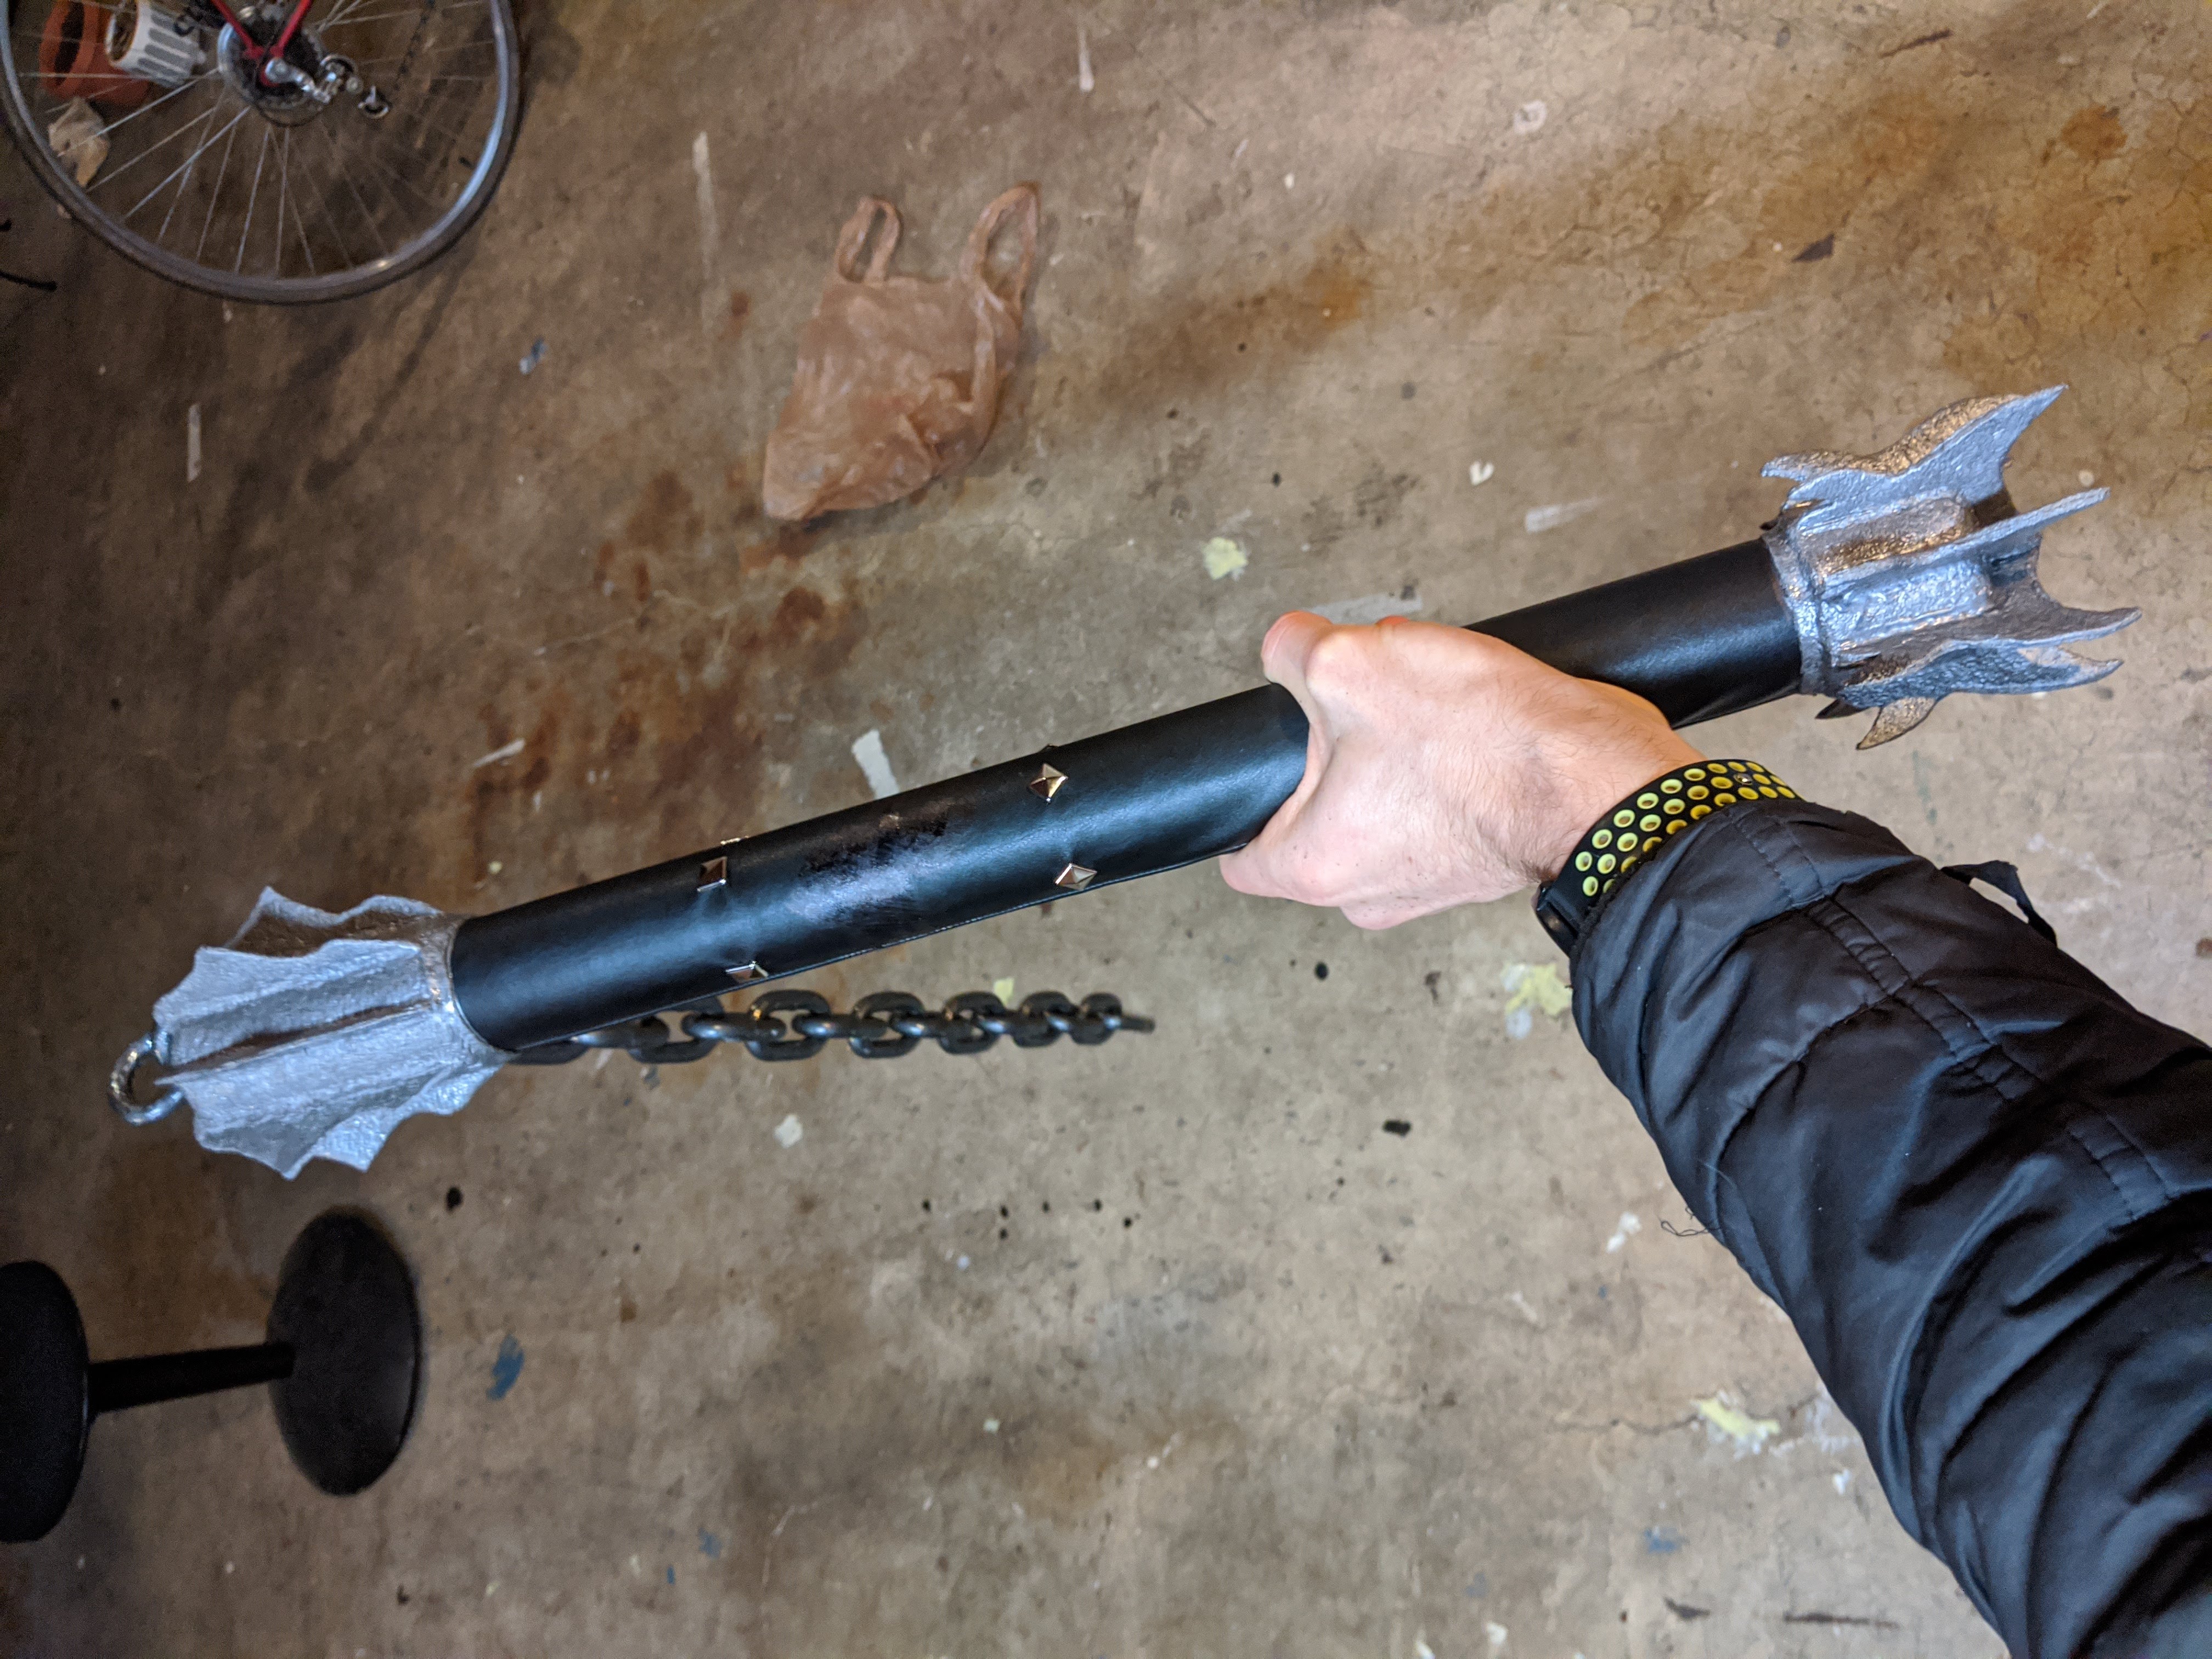
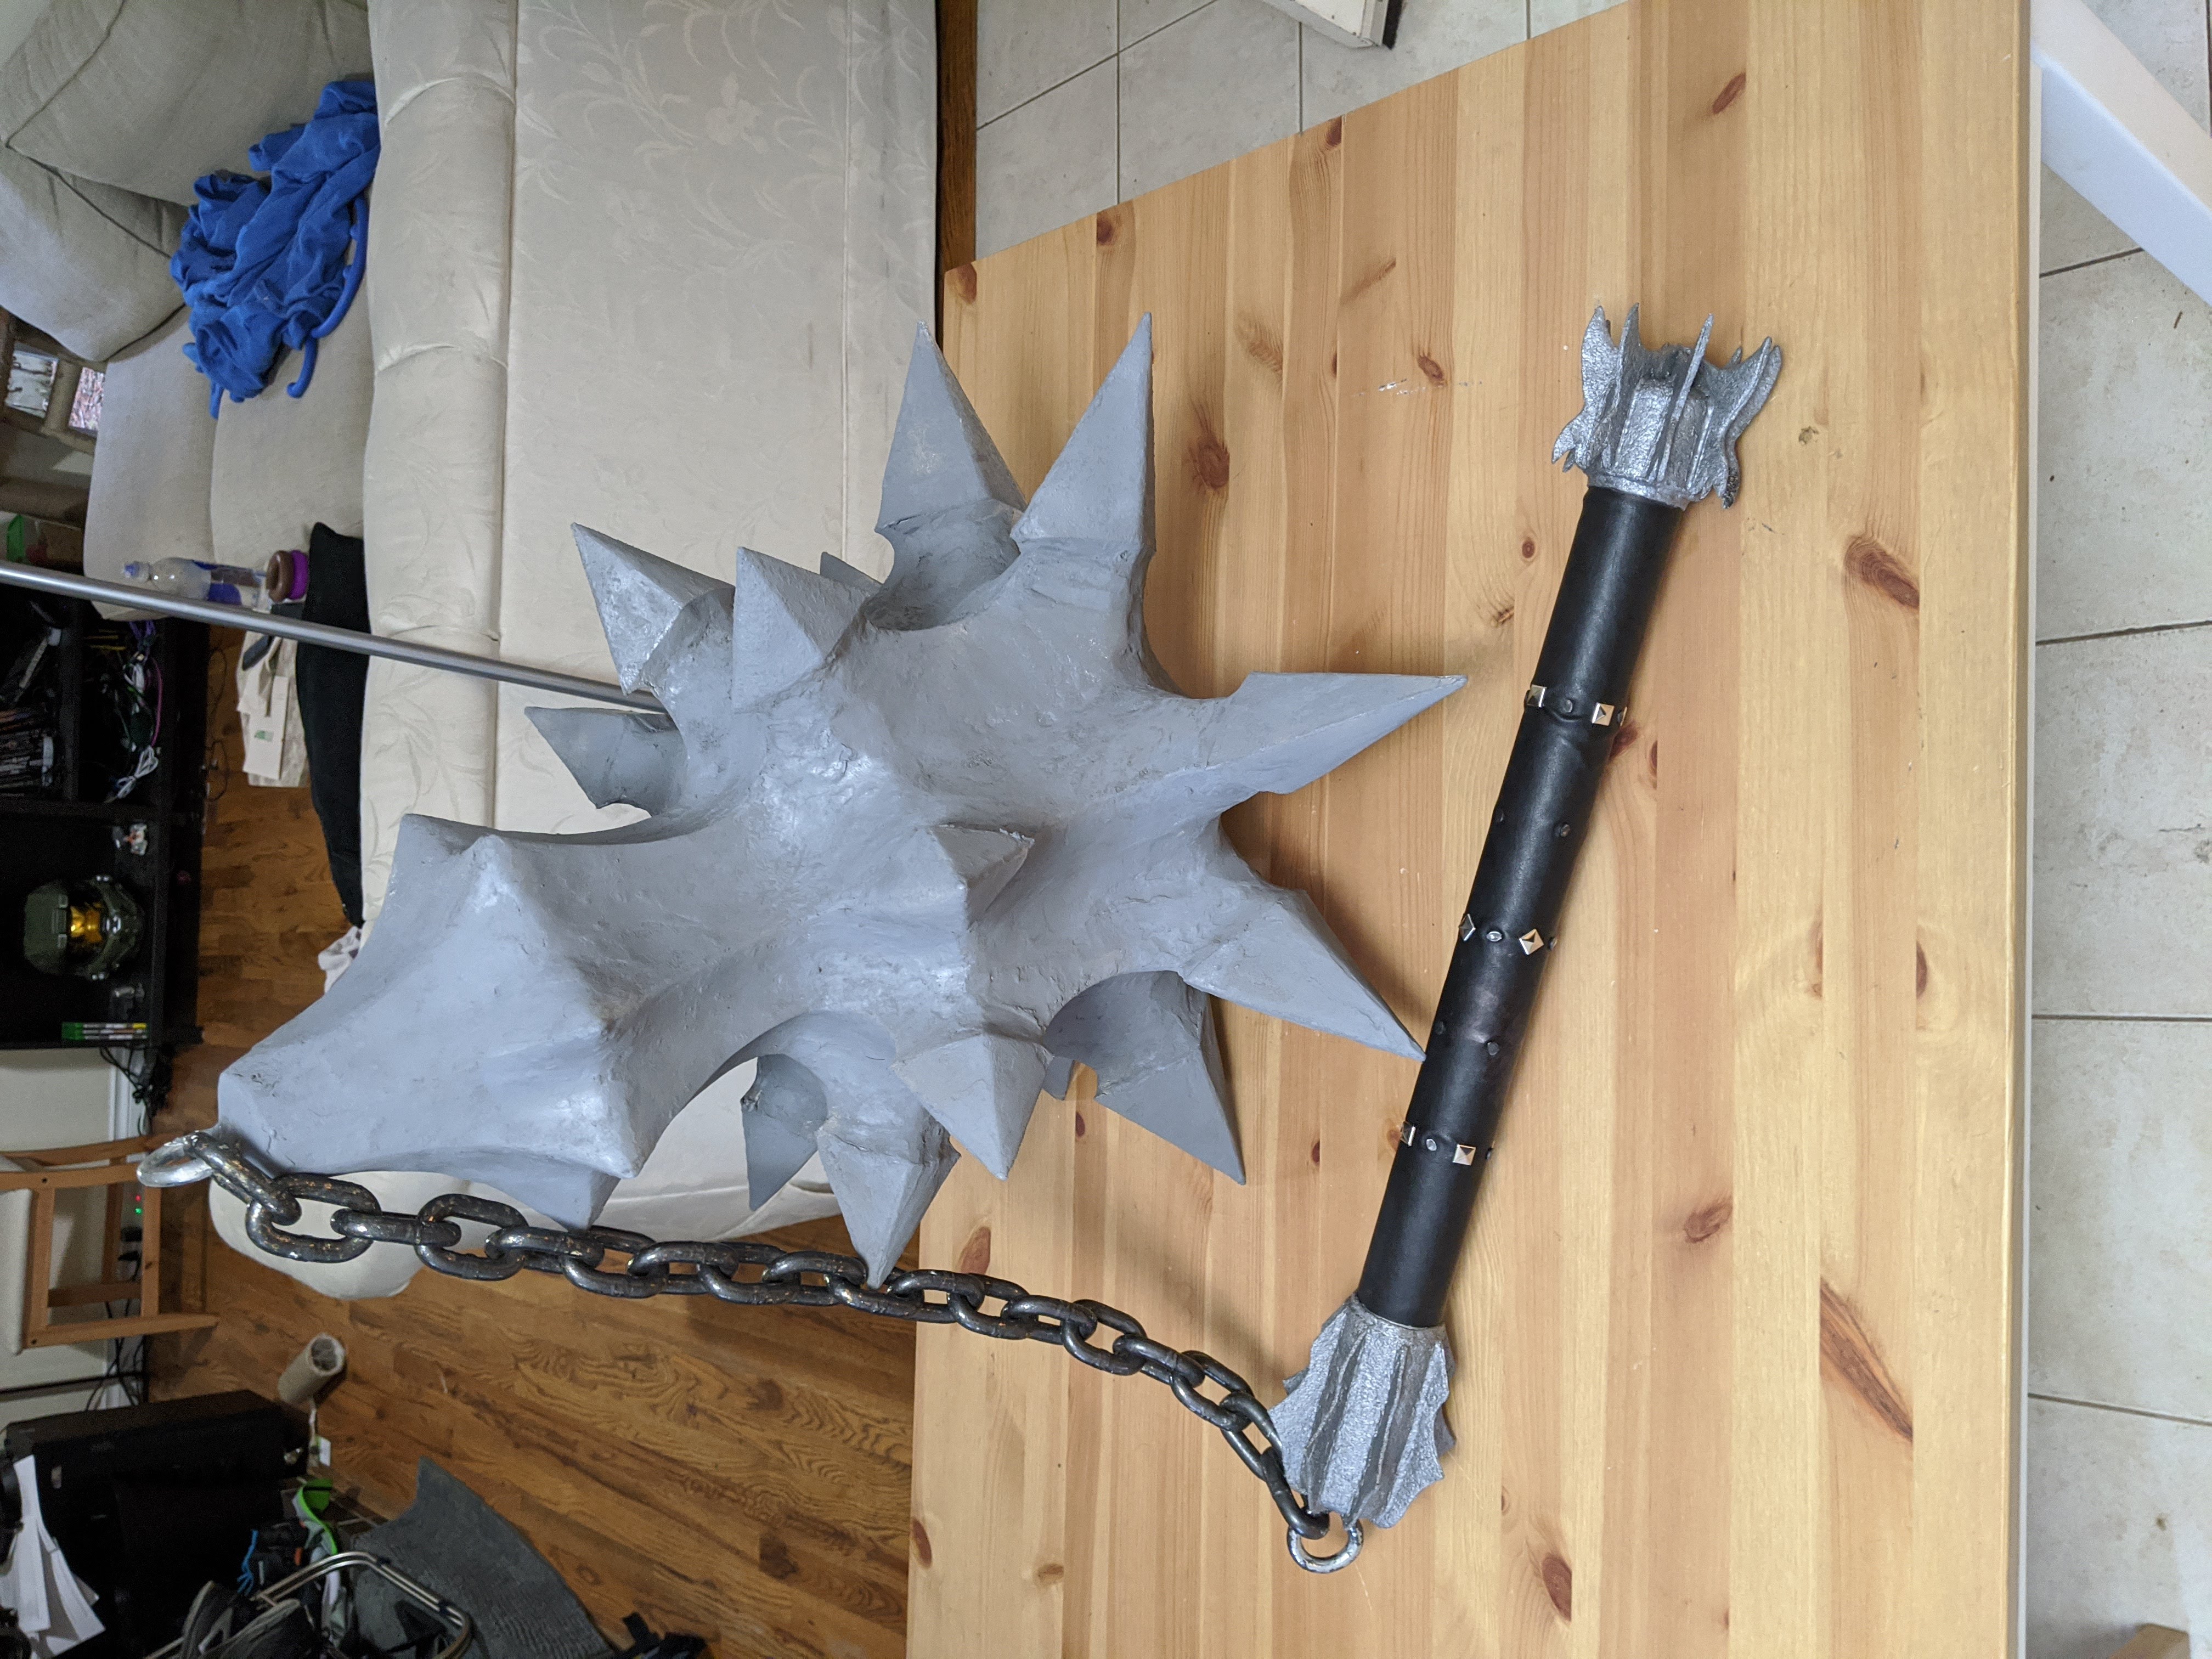
Final product
And here’s how it turned out!
I’m really pleased with this. A nice glossy sheen from that glue layer, but also has imperfections and cracks that sort of say aging and use has happened to this. If I made it again I think I would have done more experiments with materials at the start, but overall I have no real complaints. The actual mace head itself is hefty, but not unusably so; what adds the weight is the lever-arm force from the handle, since you can’t grab the chain at the point. Go back and look at the shot from the film now and consider where The Witch King holds the handle himself … and then behind the scenes they say an extra lifted it from below. Understandable.
Let’s compare to other versions found online …
Hey, I got pretty close! Shoulda looked at this earlier for inspiration, but was also very vindicating to know that I got that close by just looking at frames from the films.
Templates
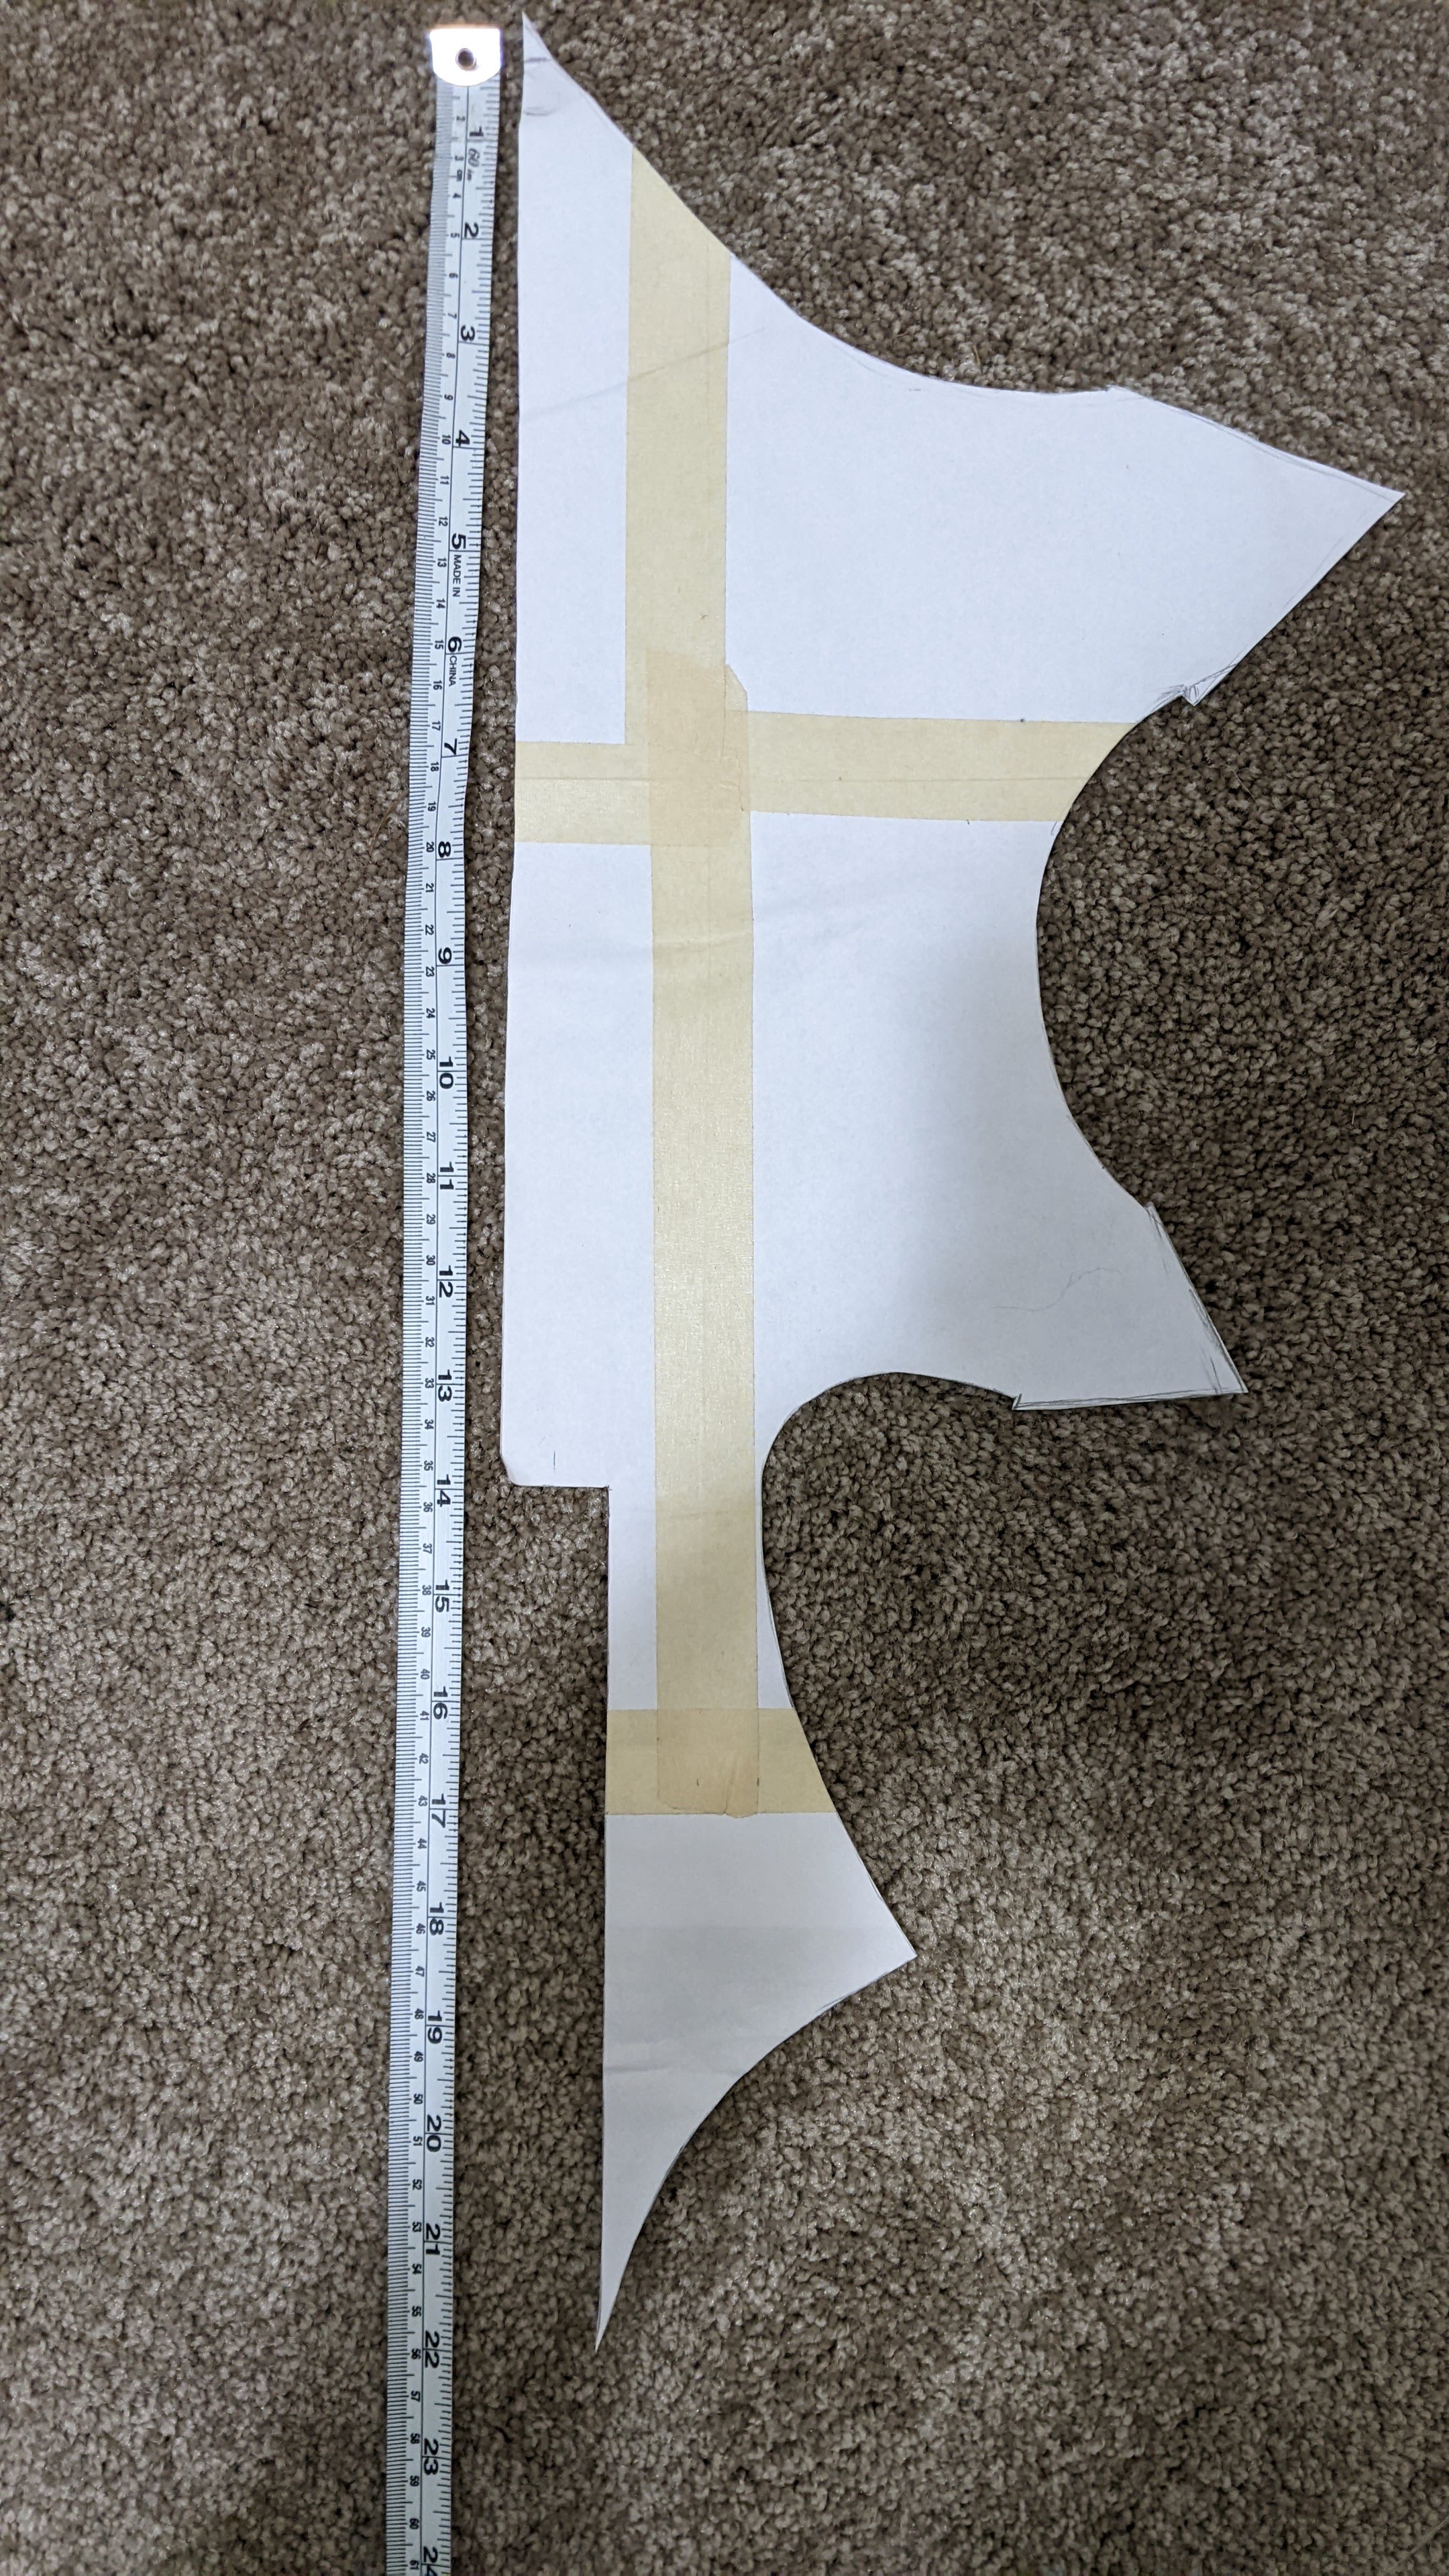
Here’s a photo of the template I used to sketch the mace head skeleton onto wood for cutting, next to a measuring tape - in case you want to make your own:
and here’s the templates I used for the two ends of the handle. The chain-end is the more spiky.
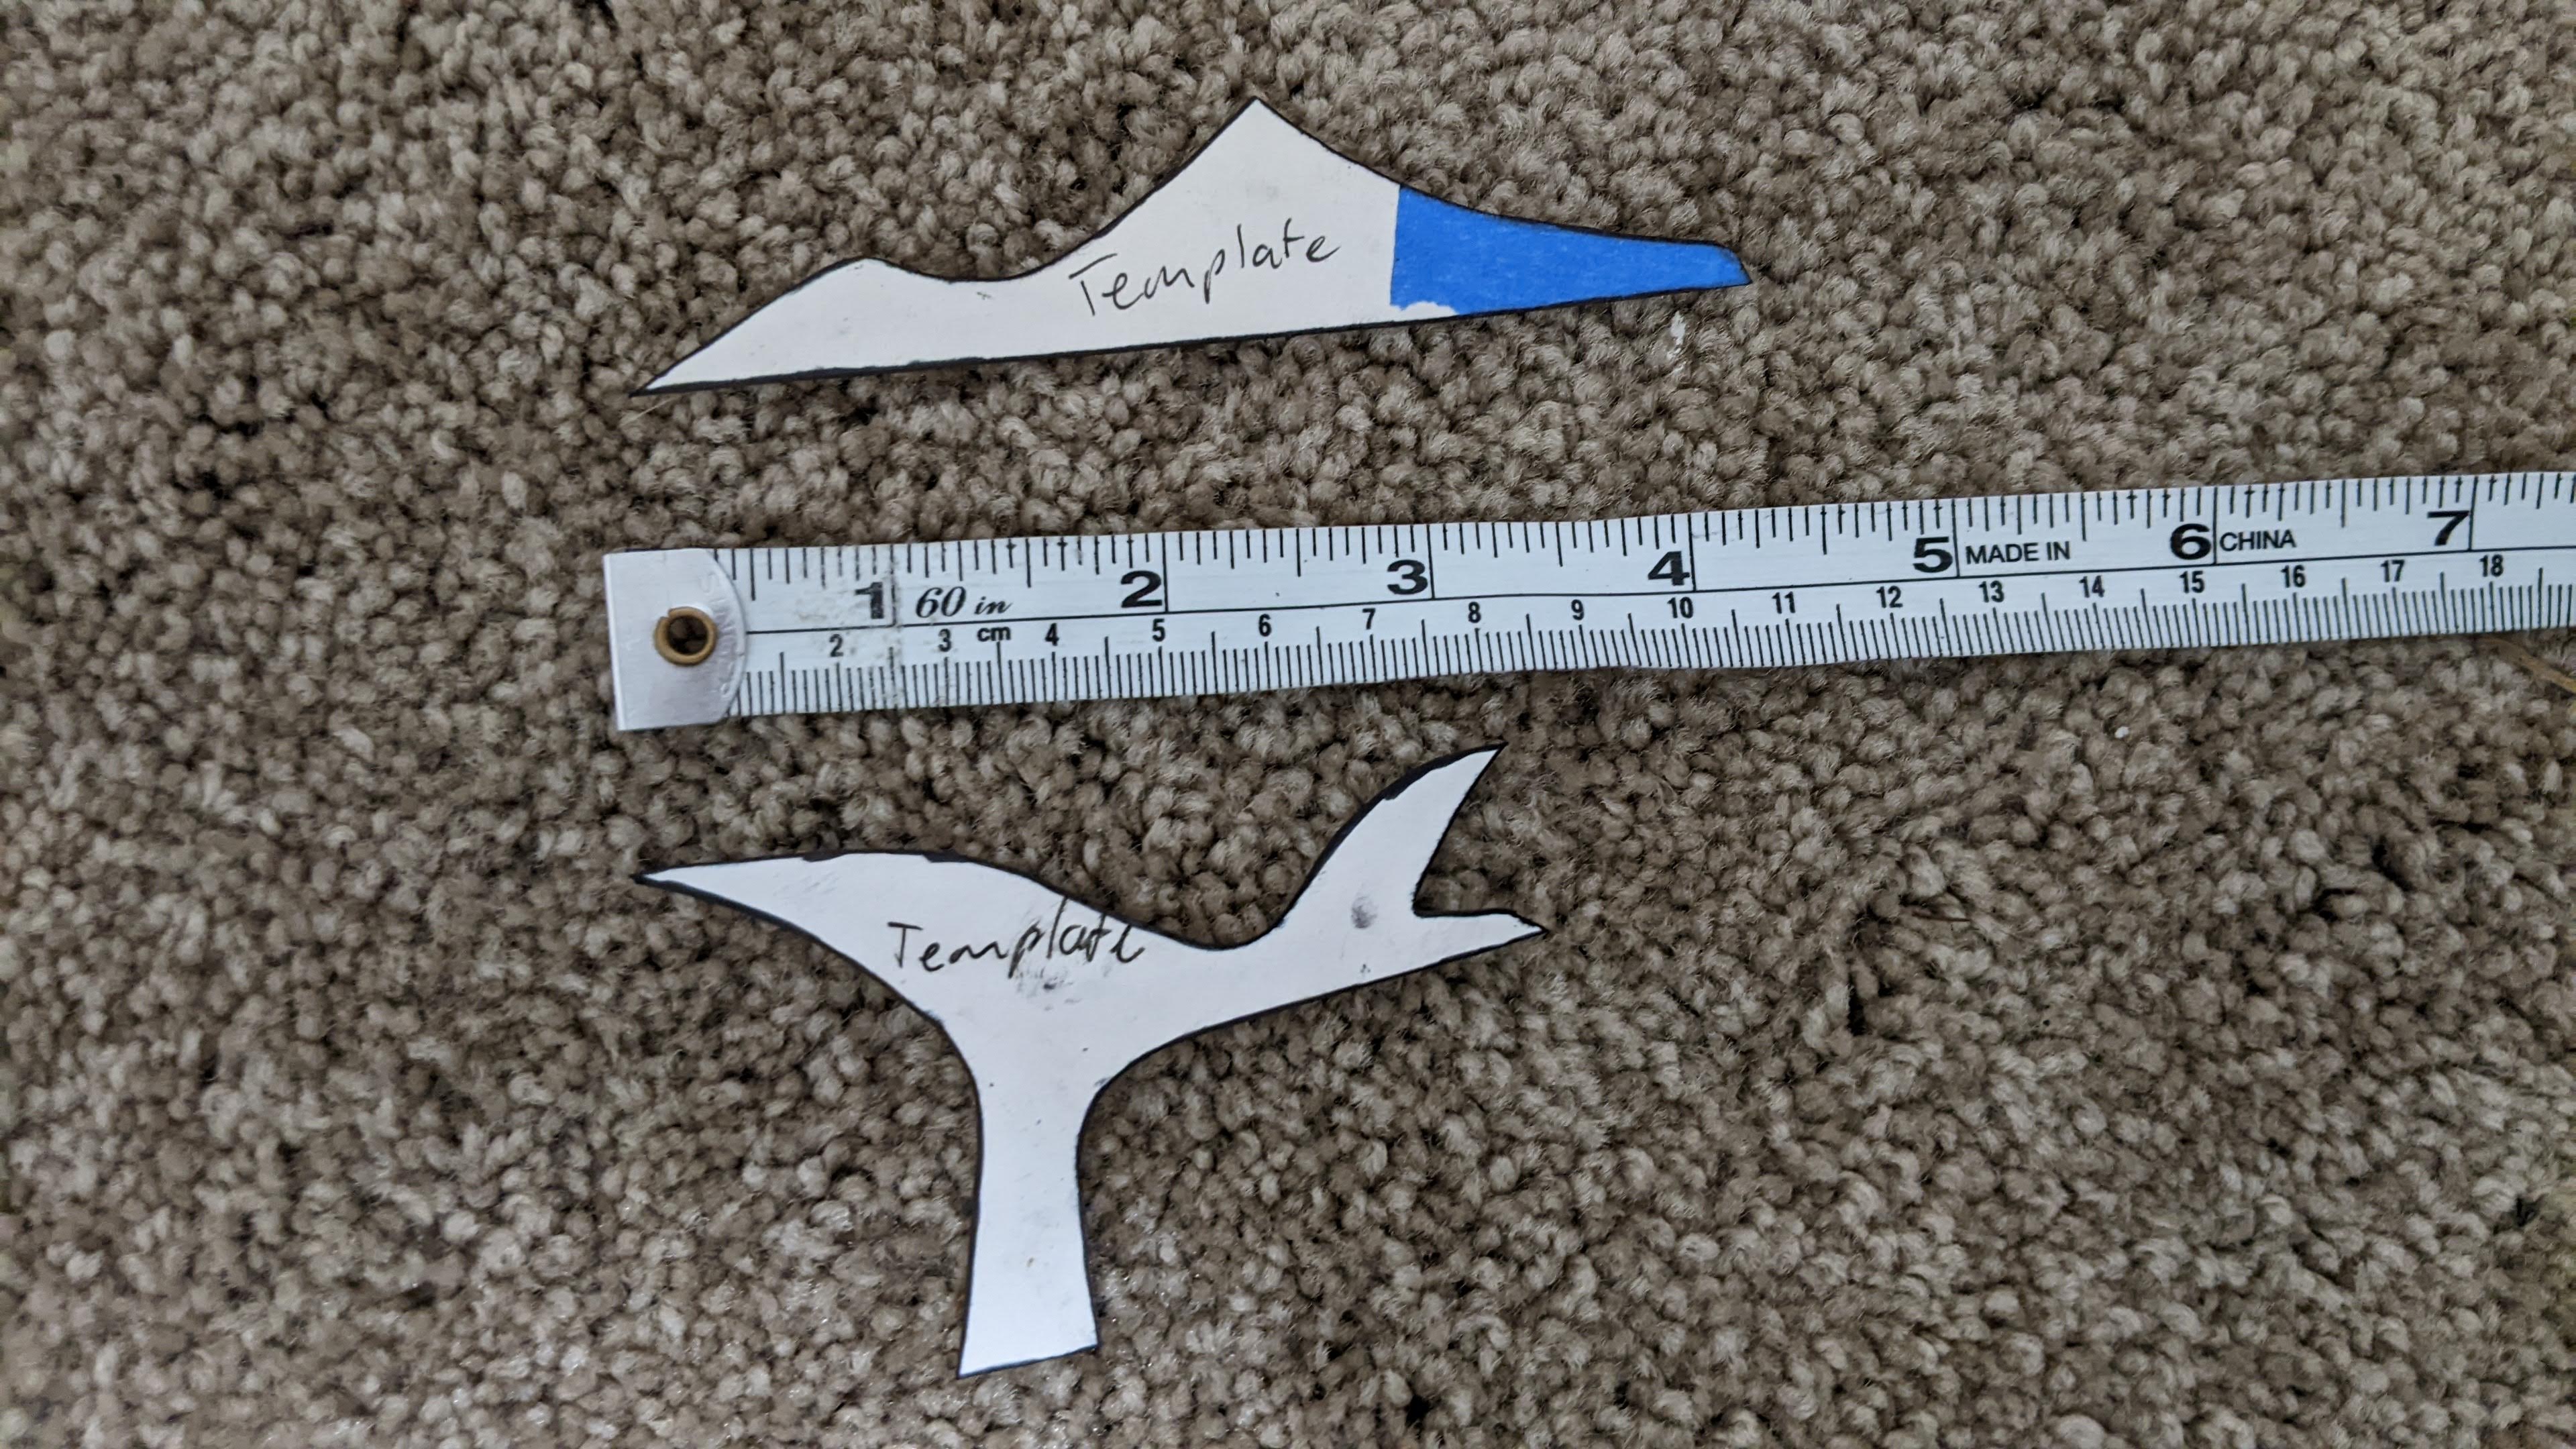
You be the judge of how accurate these are. Finally, the templates for the mace spikes. The smaller spike covers:
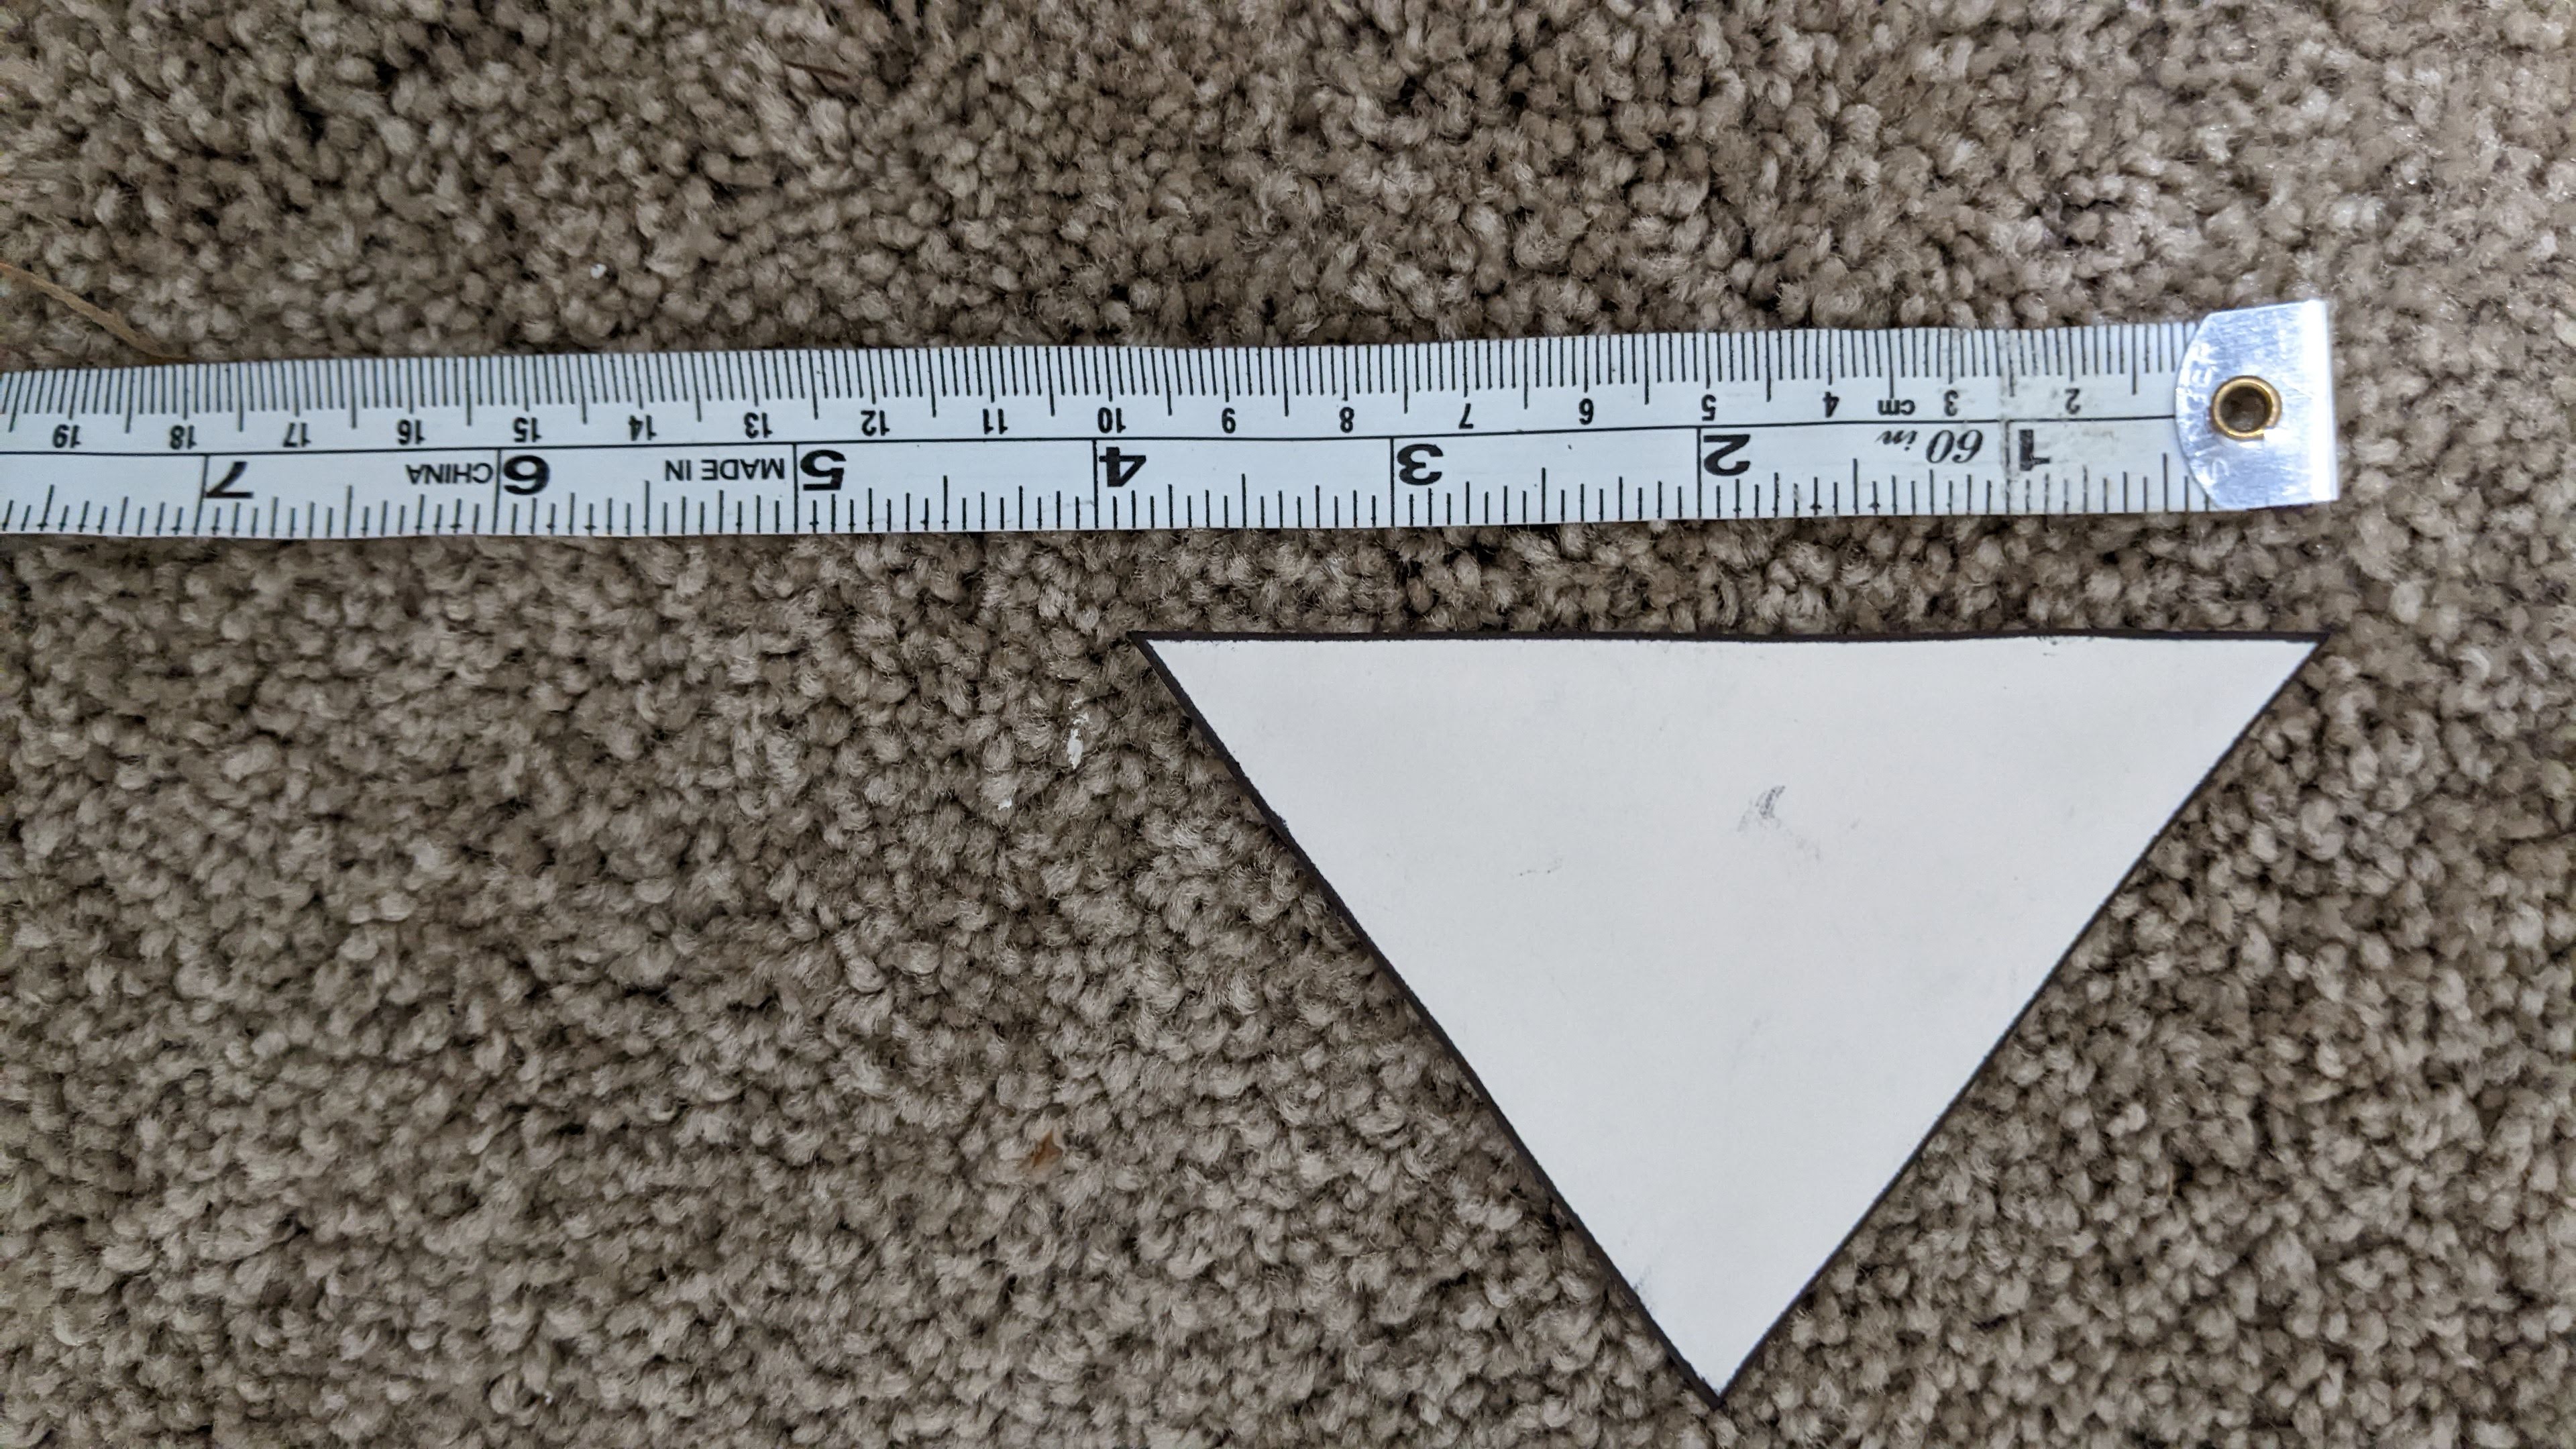
and the same for the larger spikes. These were folded and connected along the long edge:
