The Witch King's Armour
“The spikes somehow evoke the crown of thorns. I don’t know quite what that means”
I first had the thought of making replica armour of the Witch-King of Angmar several years ago, made a start, faltered, put it aside … and then came the pandemic and with it loads of time at home alone. So while the gauntlets were started in 2018, most of this happened in 2020 - and also in a bit of a weird order. I kept jumping around between parts, using productive procrastination.
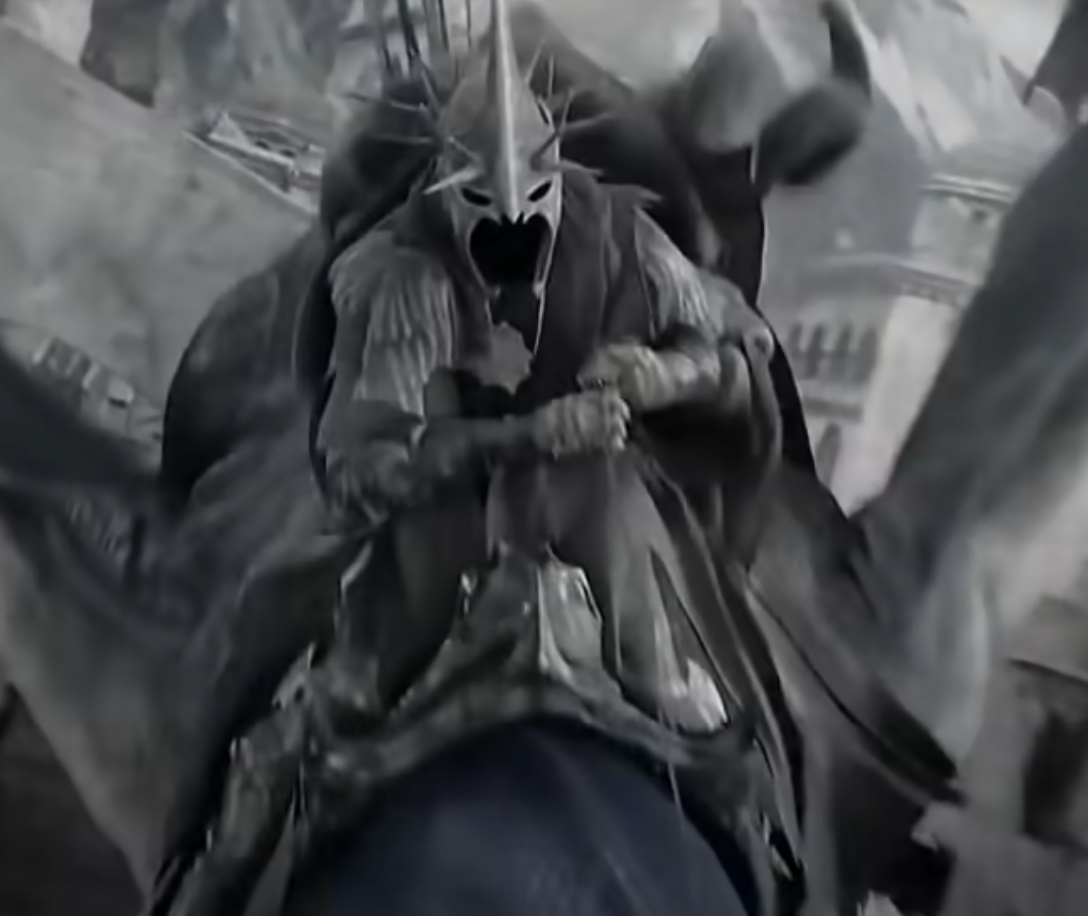
As with the flail, there are not many clear shots in the film - except for the helmet - and I did a lot of frame-by-frame watching, and guesswork - here’s a compilation with most of the Witch-King scenes, and gee there’s not many clear still shots. I tried to not look at other people’s attempts too much so it was my own version as much as possible, with one exception - I had started from a template of the gauntlets. Can’t remember where I got it from - sorry to whoever made it, you deserve the credit.
Contents
Materials
This was not as ad-hoc in terms of materials as other projects, but certainly it was in terms of design. Back in 2018 I had discovered treeflx, and thought this would be perfect for armour - and whose armour to start with but The Witch King’s! I’m ambitious.
This stuff is wonderful - comes in thick sheets and its heat-moldable at reasonable temperatures. I would microwave it, use a rolling pin to flatten it out, repeat a few times until it was thin enough, and then draw on the surface with a marker and cut it out with scissors (I cut it fairly thin). Any offcuts can be heated up and rolled back together to make new sheets. Furthermore, anytime a piece goes badly, it can just be squished back together and rerolled and cut. If you cut too small, heat-add some more on. It’s amazing stuff.
At first I didn’t have the idea of making it that thin, so parts of the gauntlets are really really thick, which in retrospect probably slowed me down since I was having a hard time cutting and getting it right. Once I thought of making it really thin, that part became easy.
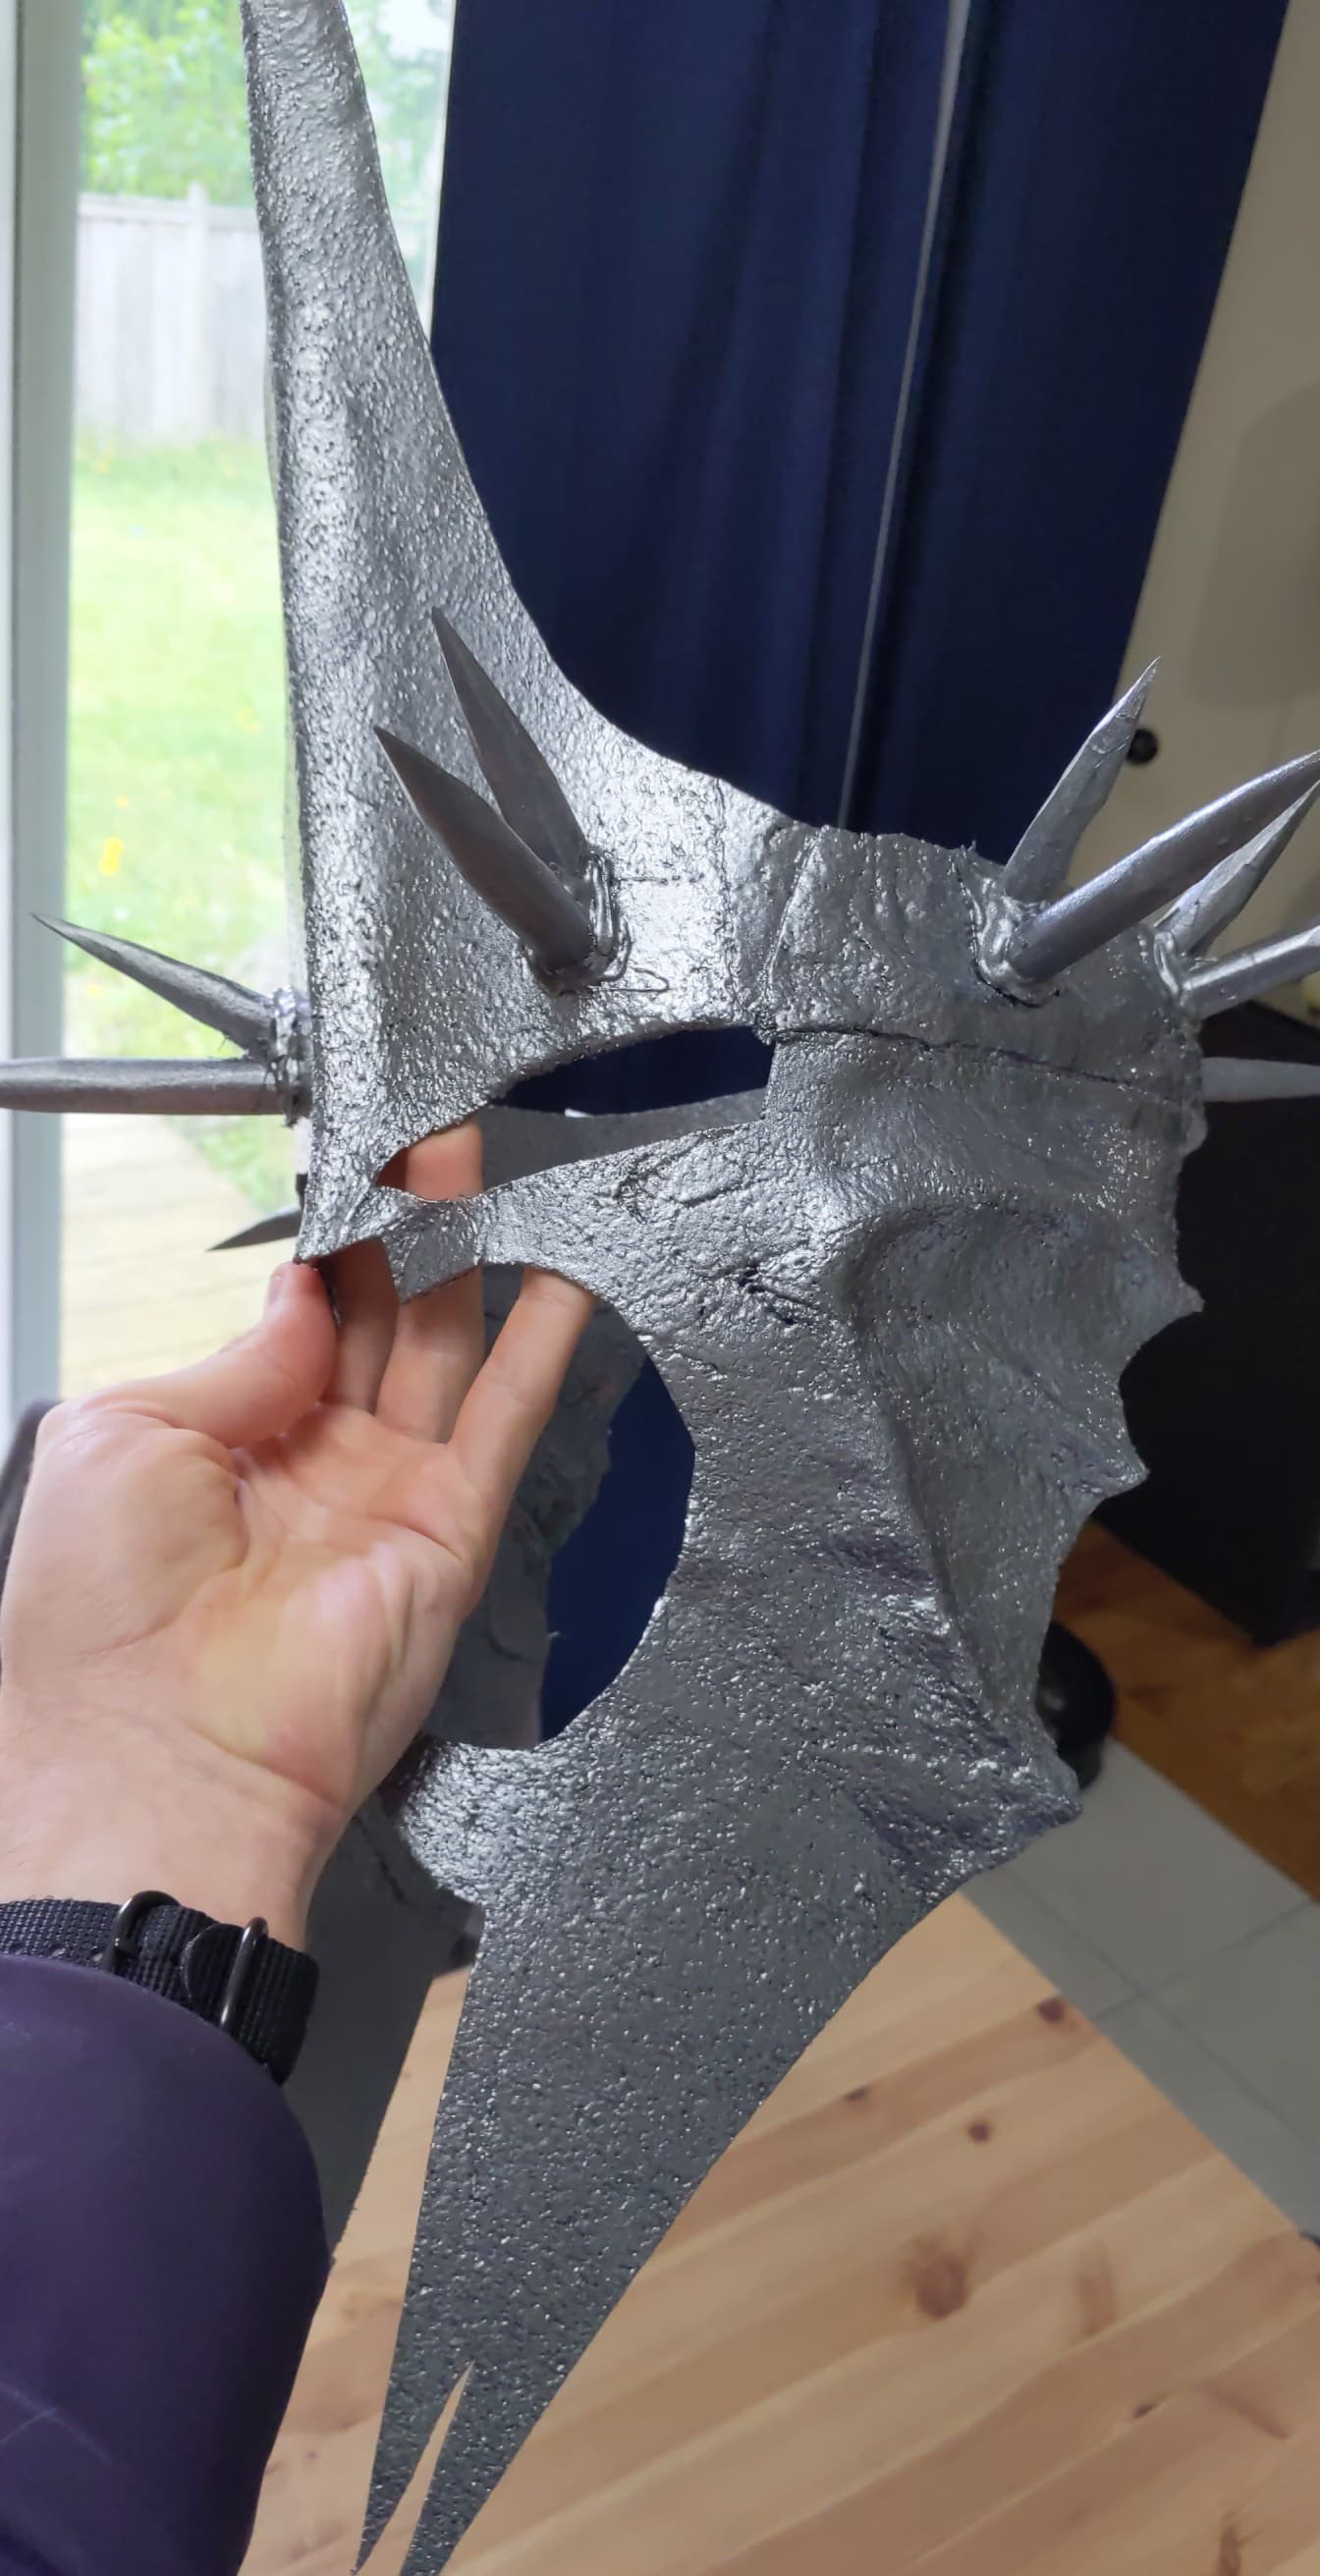
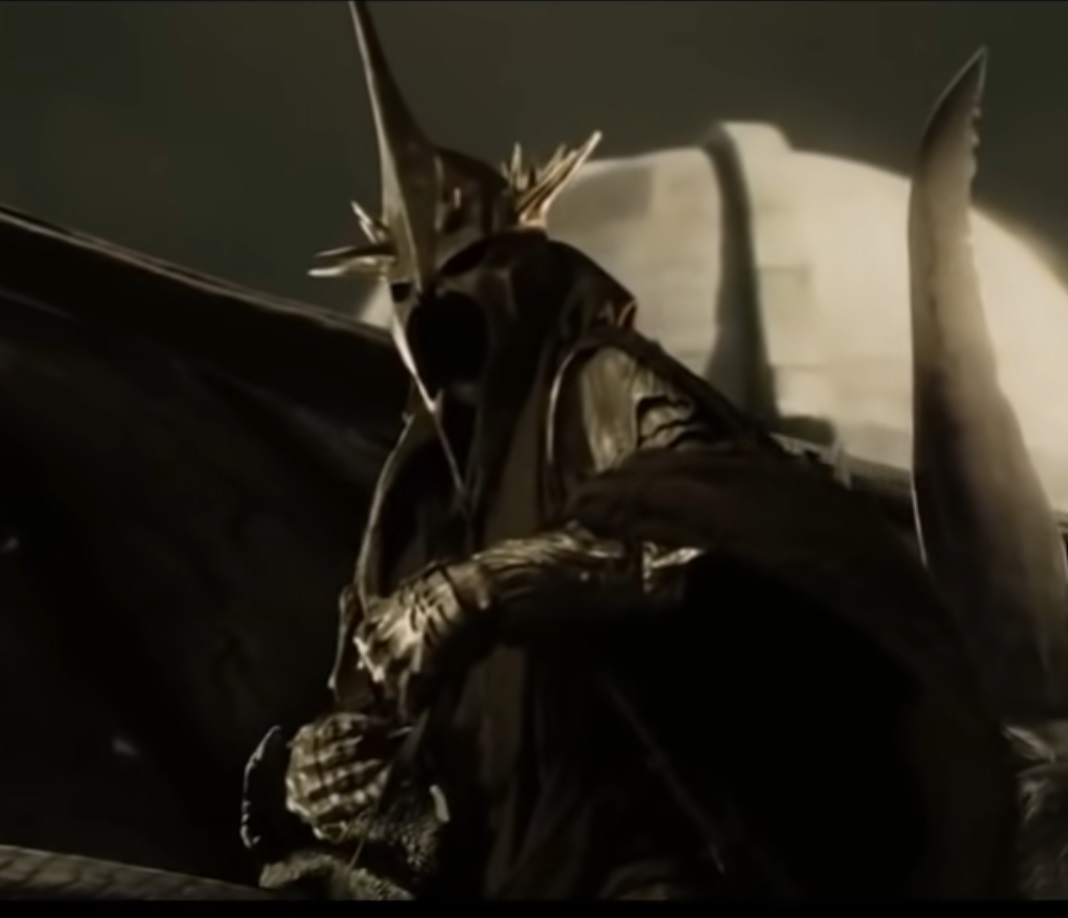
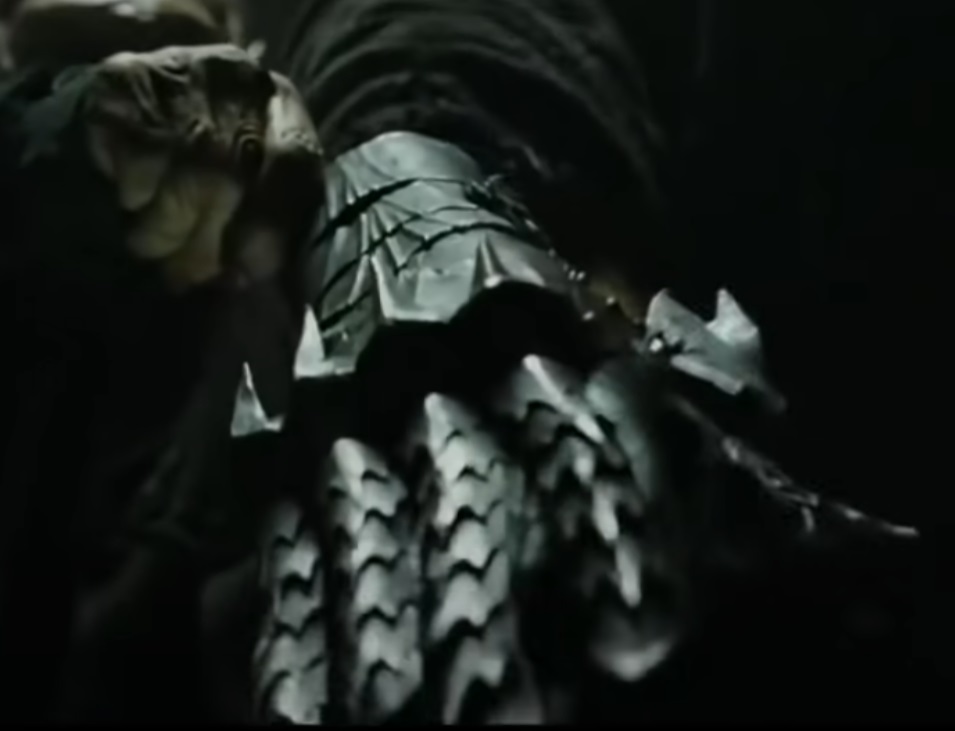
Treeflx also gave me a really nice texture that appeared to be in the film too. Take a look at this closeup:

and then a closeup of my painted treeflx (spoiler alert):
I’m not far from the correct texture. I suppose it’s due to the grainy nature of treeflx, and I didn’t do a thick layer of primer before painting - but that was deliberate. I wanted that texture.
Templates
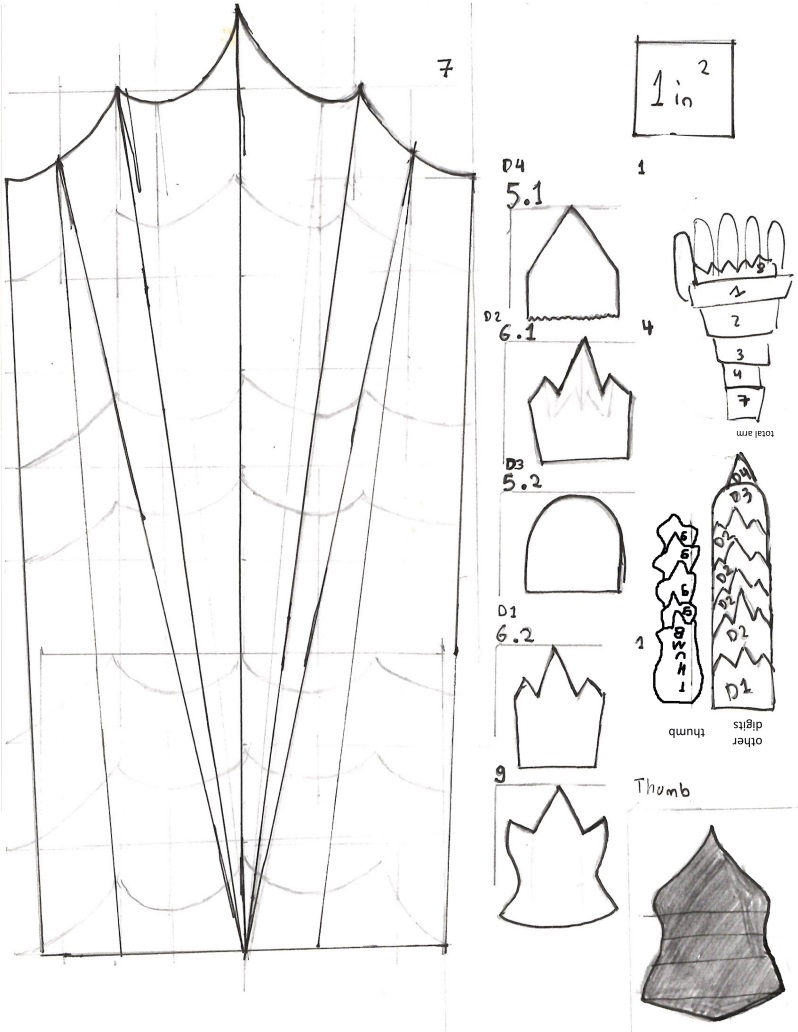
I kept all my templates, and can attach them at the end as images, with scale in the images. These came from either the gauntlet template I started with and adjusted slightly, or painstakingly watching the relevant scenes, drawing something, cutting, testing, redrawing, and so on. They aren’t perfect, if I did some of them again I’d probably tweak a bit, but they’re a decent starting point.
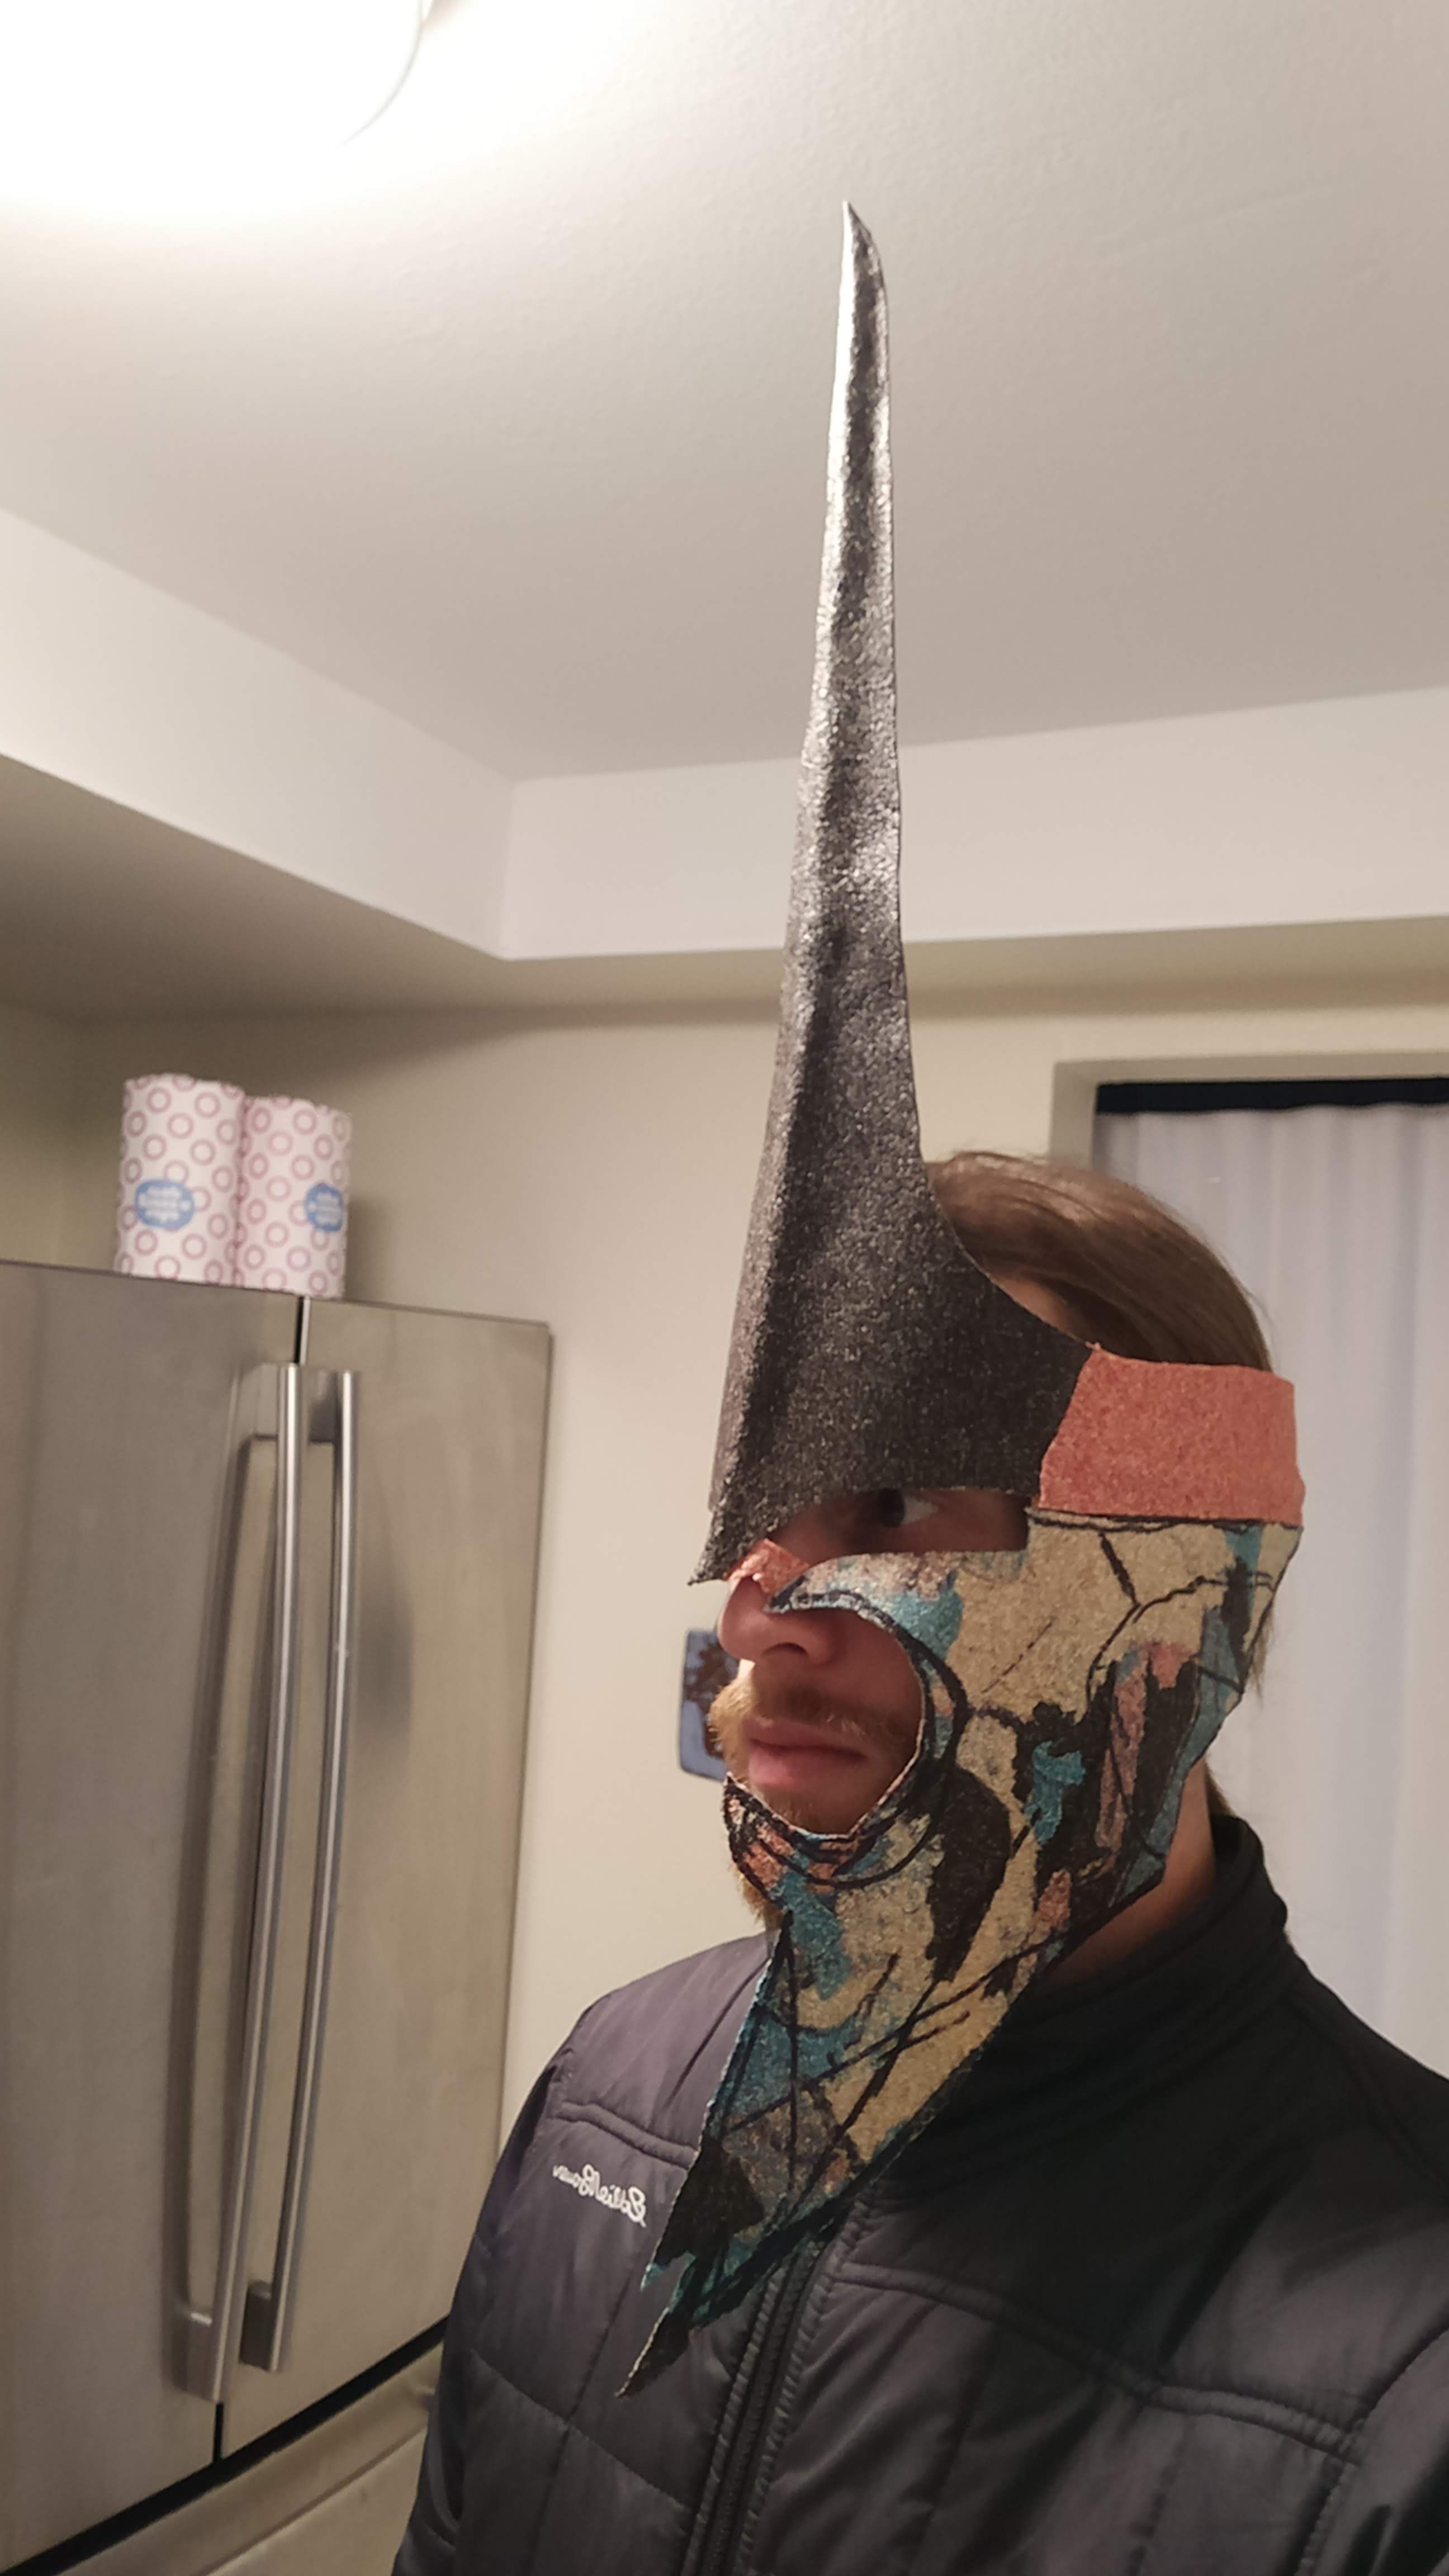
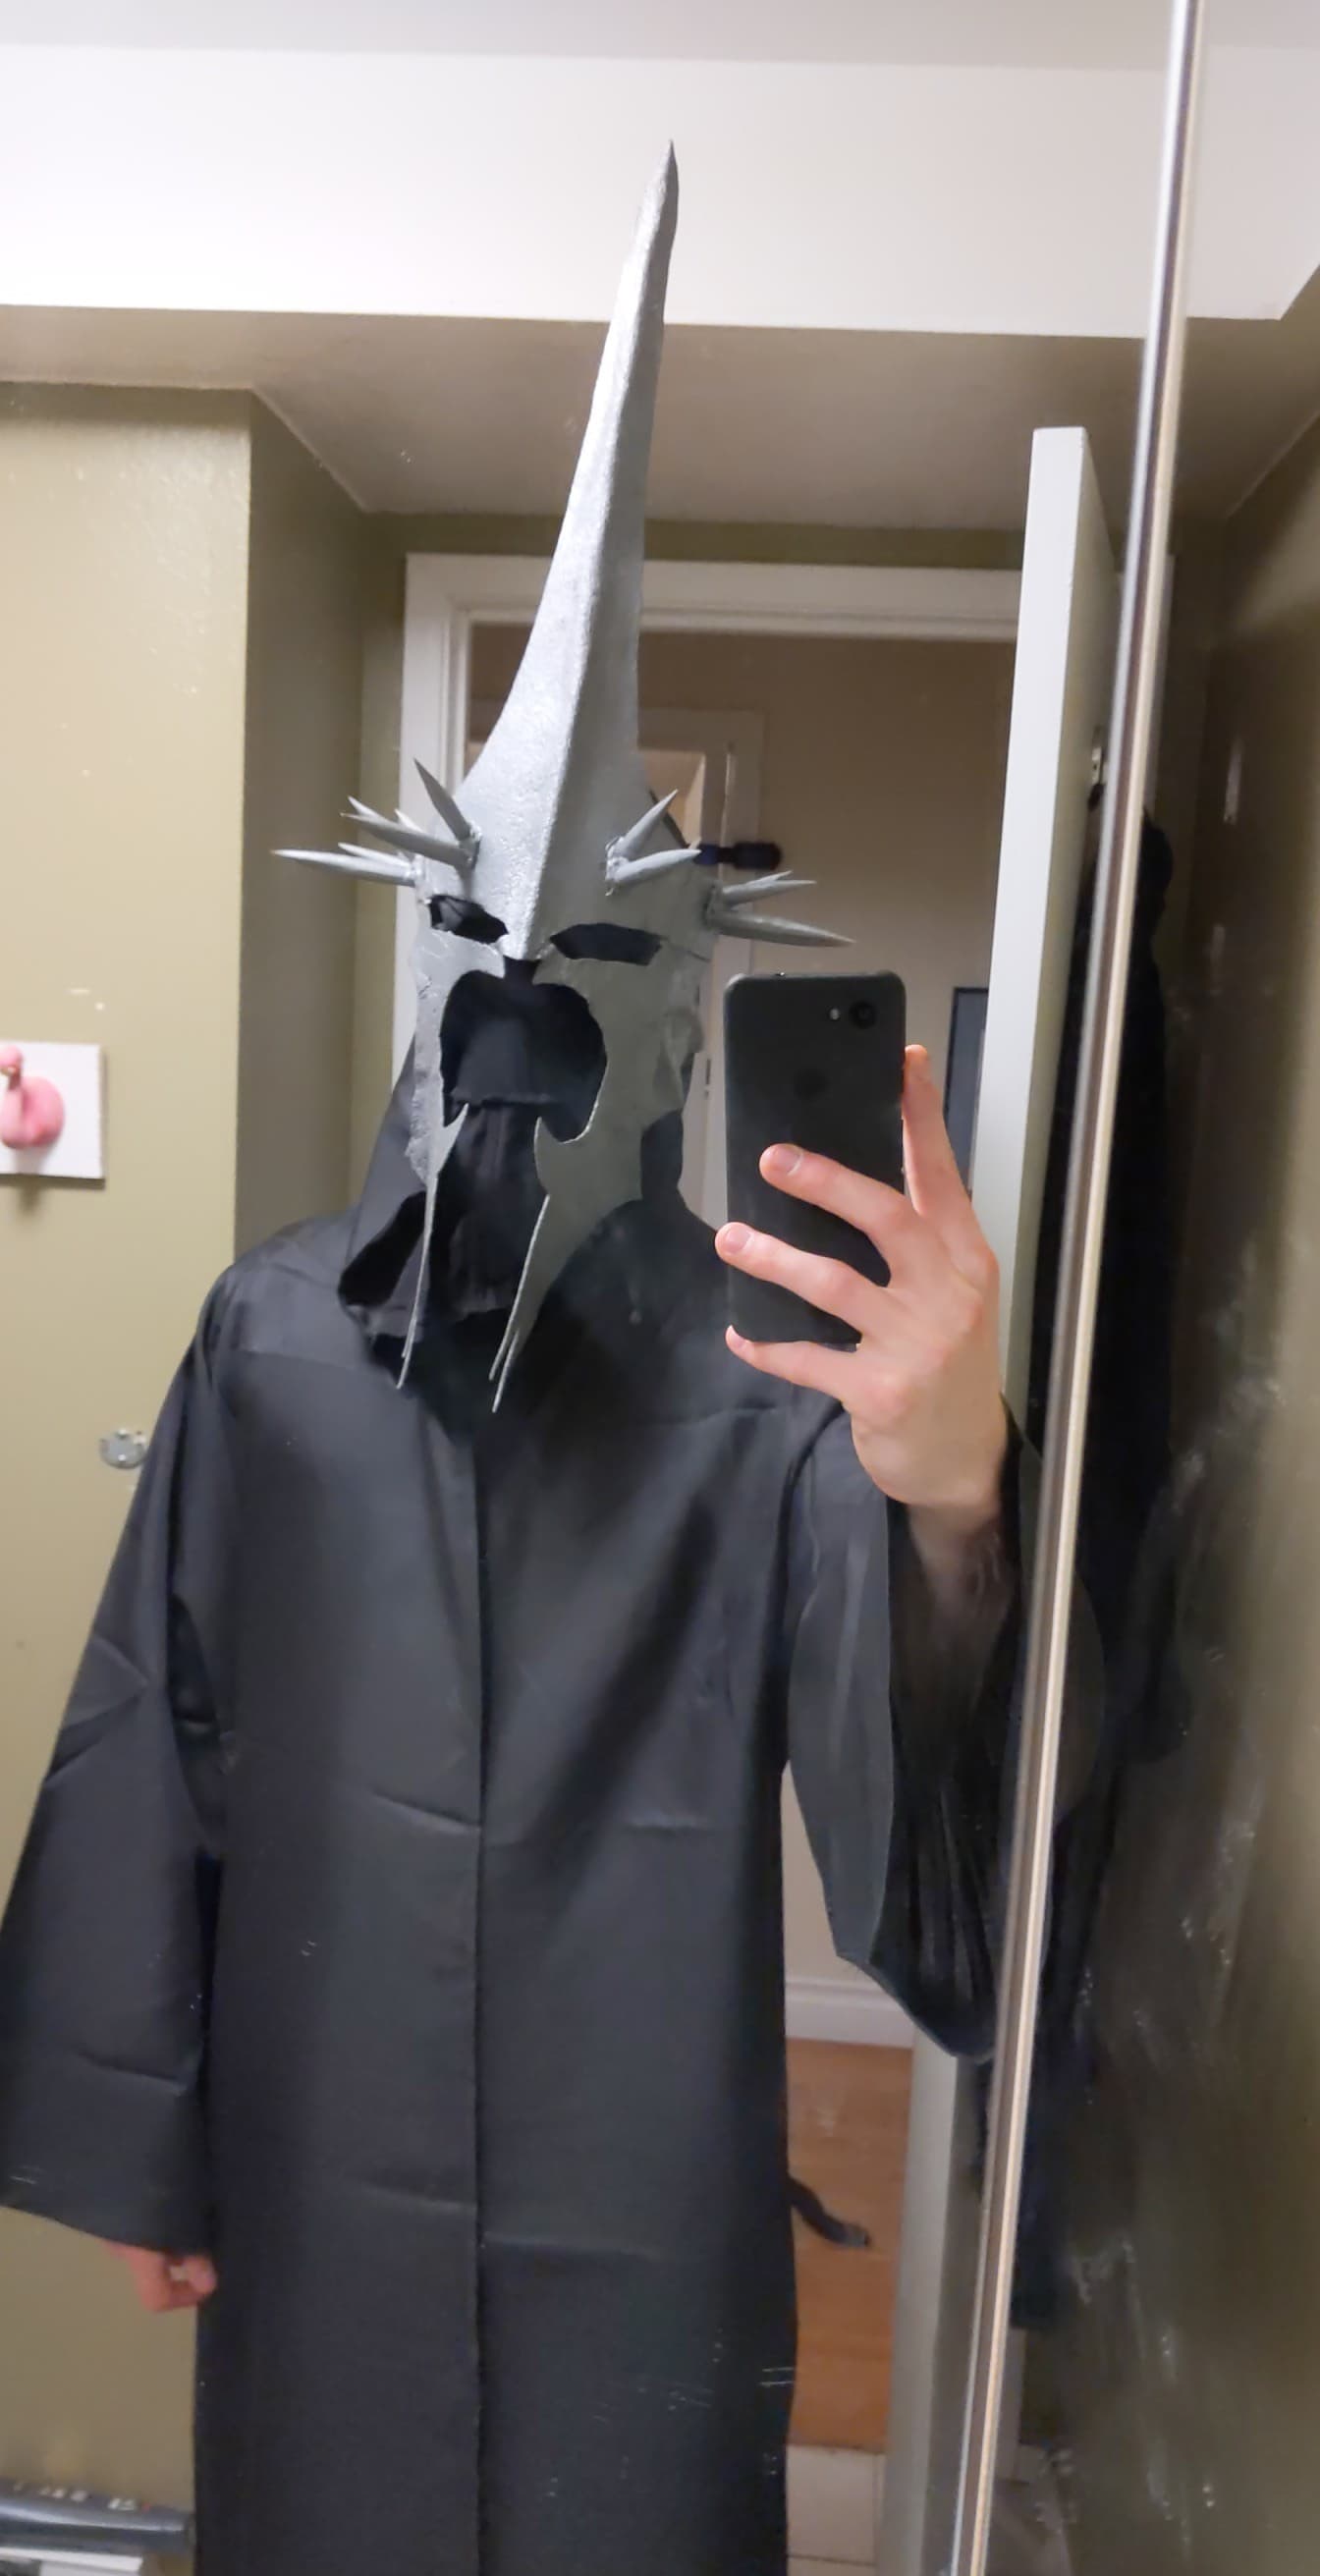
The helmet
This was my favourite part of the entire build, as it’s just so iconic and noticeable, but also a difficult one to start - look at it:

Where do you start? After much consideration, I broke it down into:
- a headband from one temple to the other around the back of the head
- a forehead piece that leads into that central spike, that also formed the upper halves of the eyes and had the nose bridge
- each cheek, which would form the lower half of each eye
Each of these I could make separately and then heat-mold together at the end. This strategy worked out quite well.
The Forehead Spike
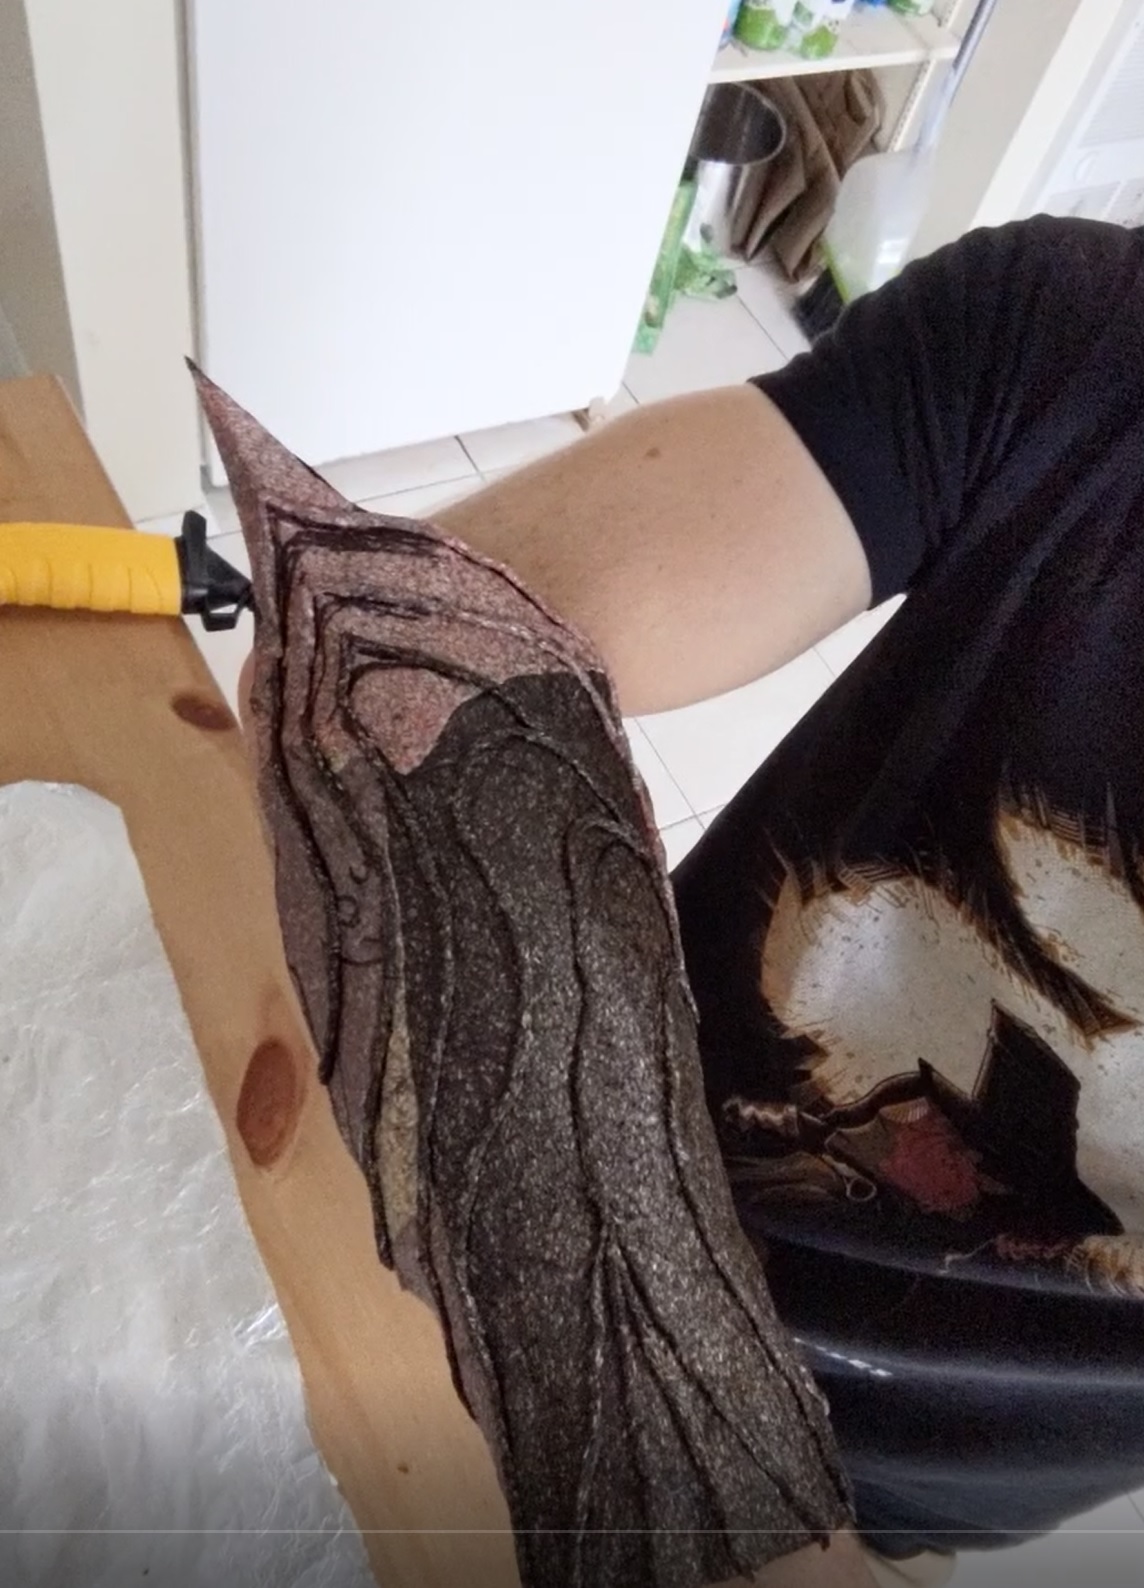
I rolled together two sheets to create a really long sheet as this spike was approximately a foot long (guessing from the films and actor and scaling down to my size). Simple to draw, and just had to make sure it didn’t taper too strongly. Here’s an initial version that mostly stayed the same:
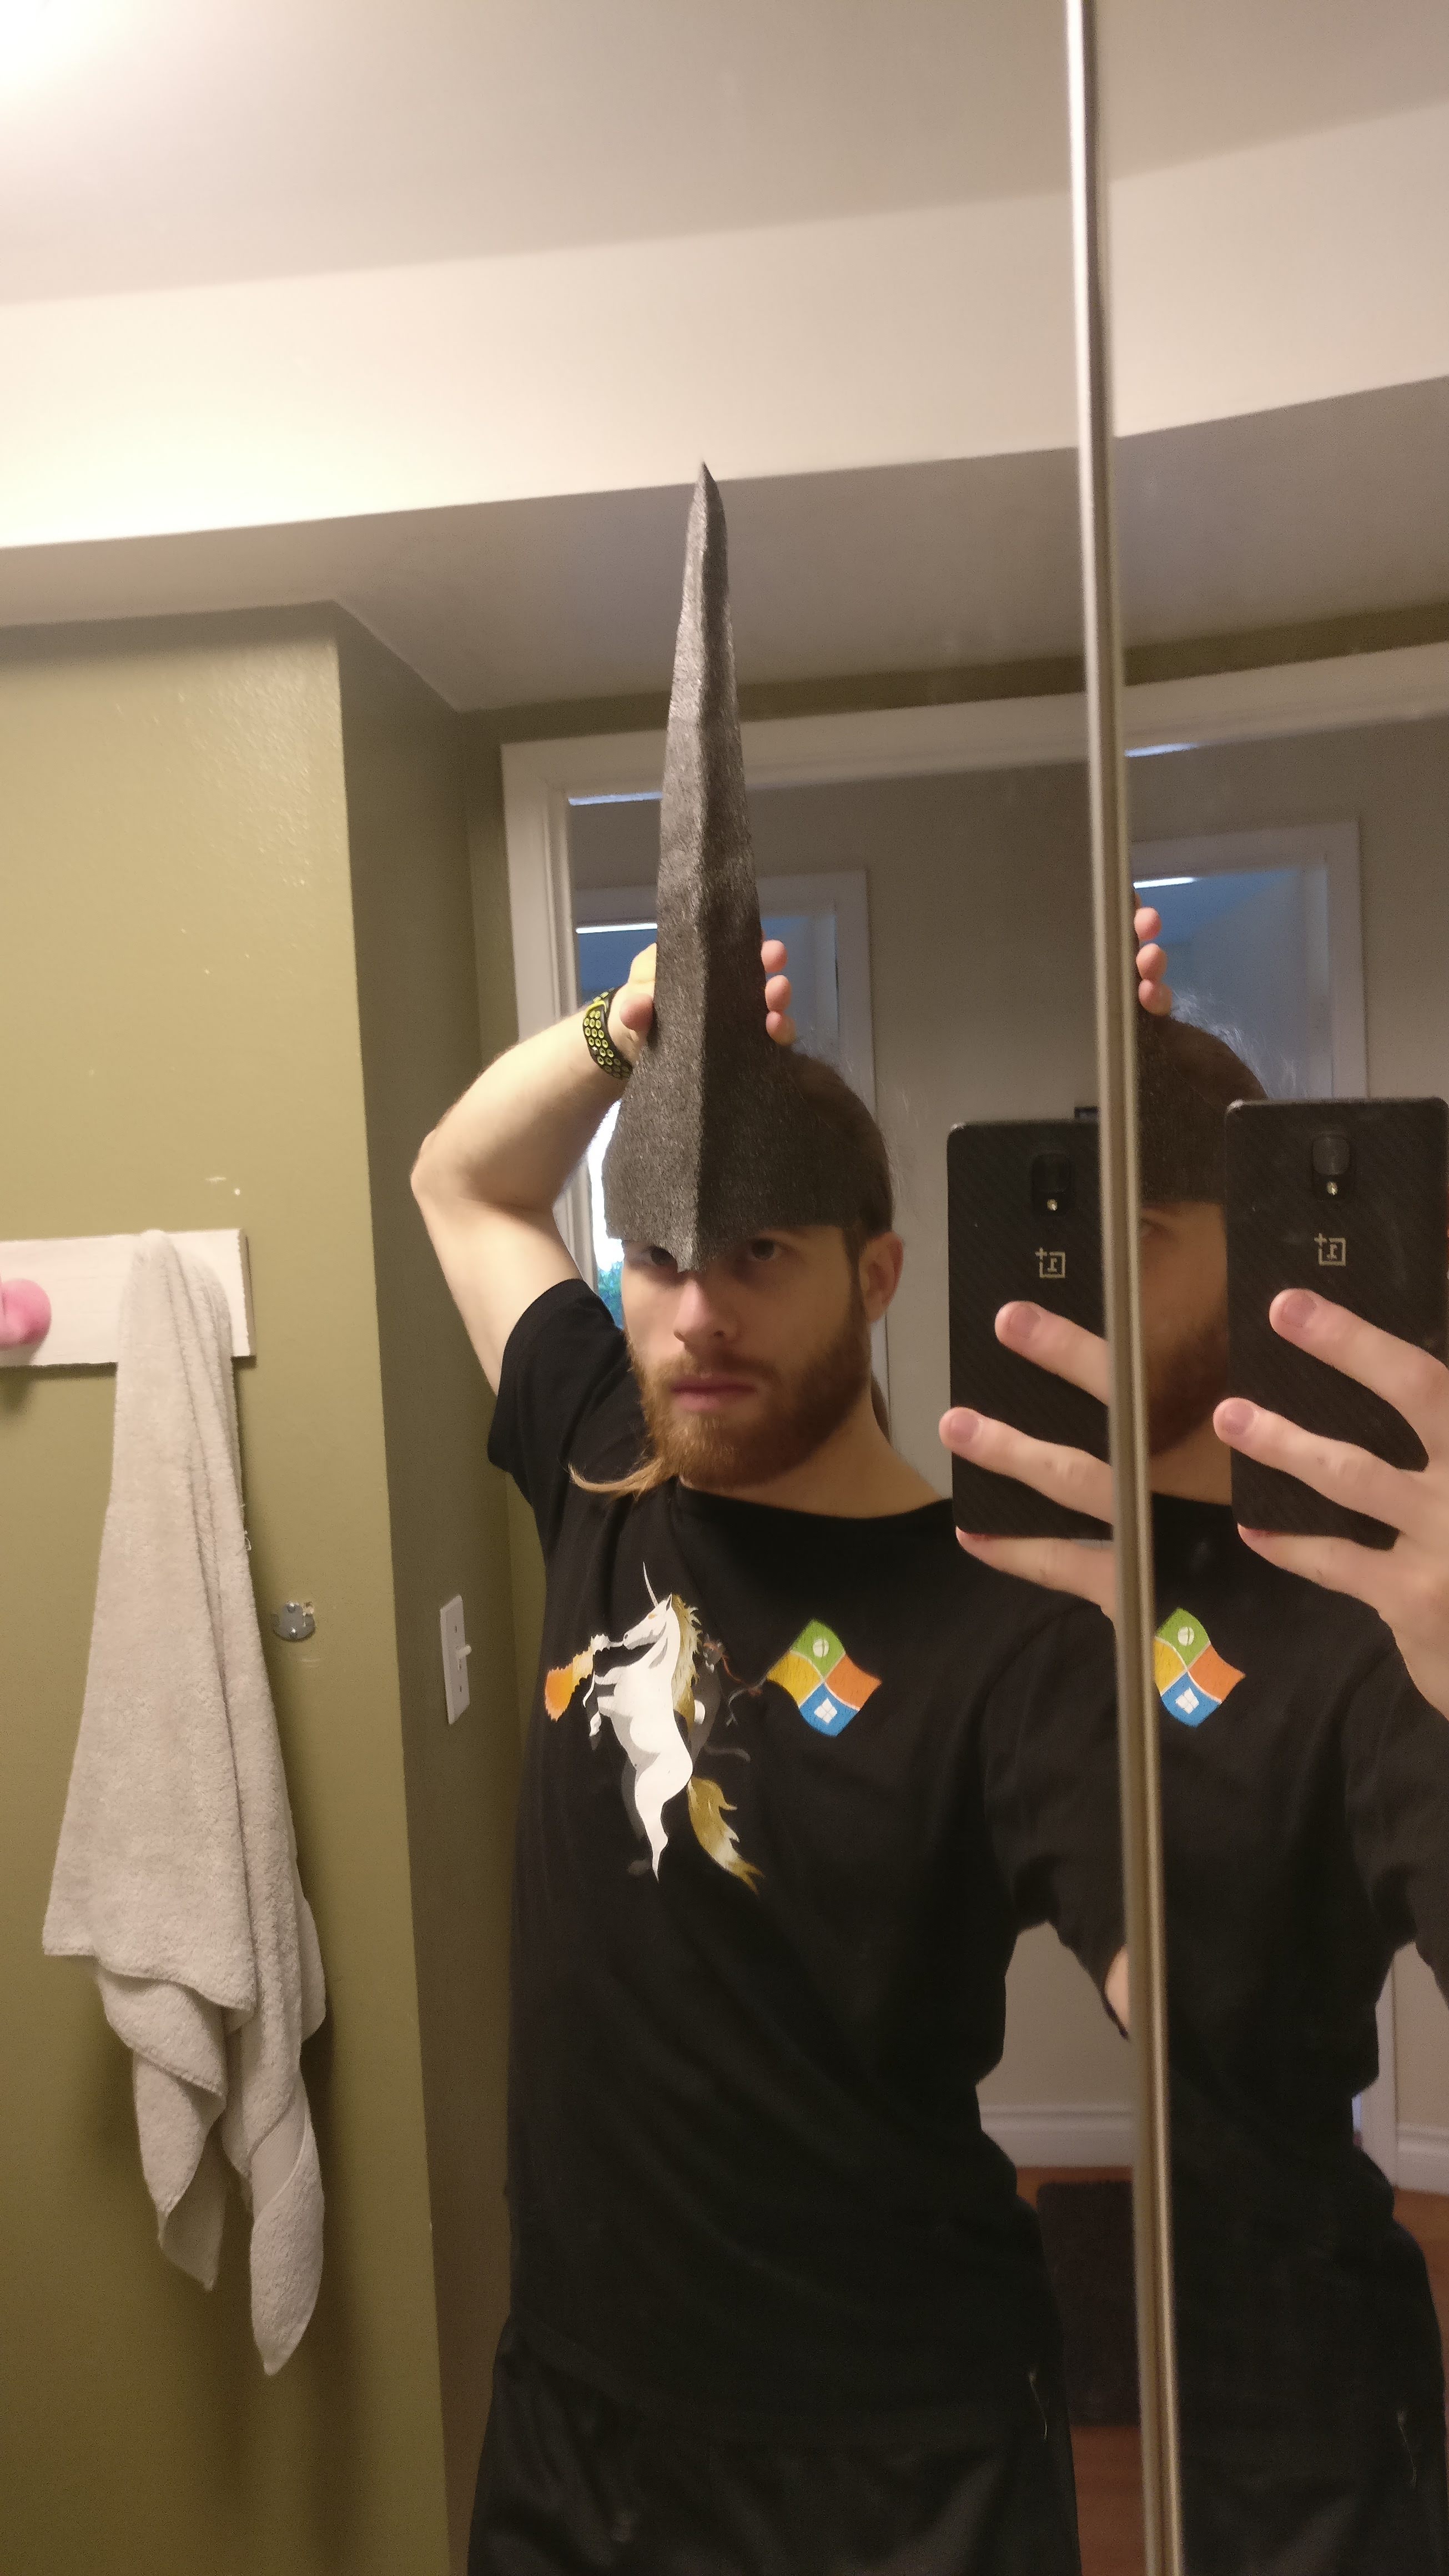
I used my finger and a butter knife while the treeflx was hot to fold it all around that centre crease, and just pressed it against my nose for the nose bridge. I think the only other changes after that were slightly thinning the spike at the top; otherwise, I hit close to bullseye first go.
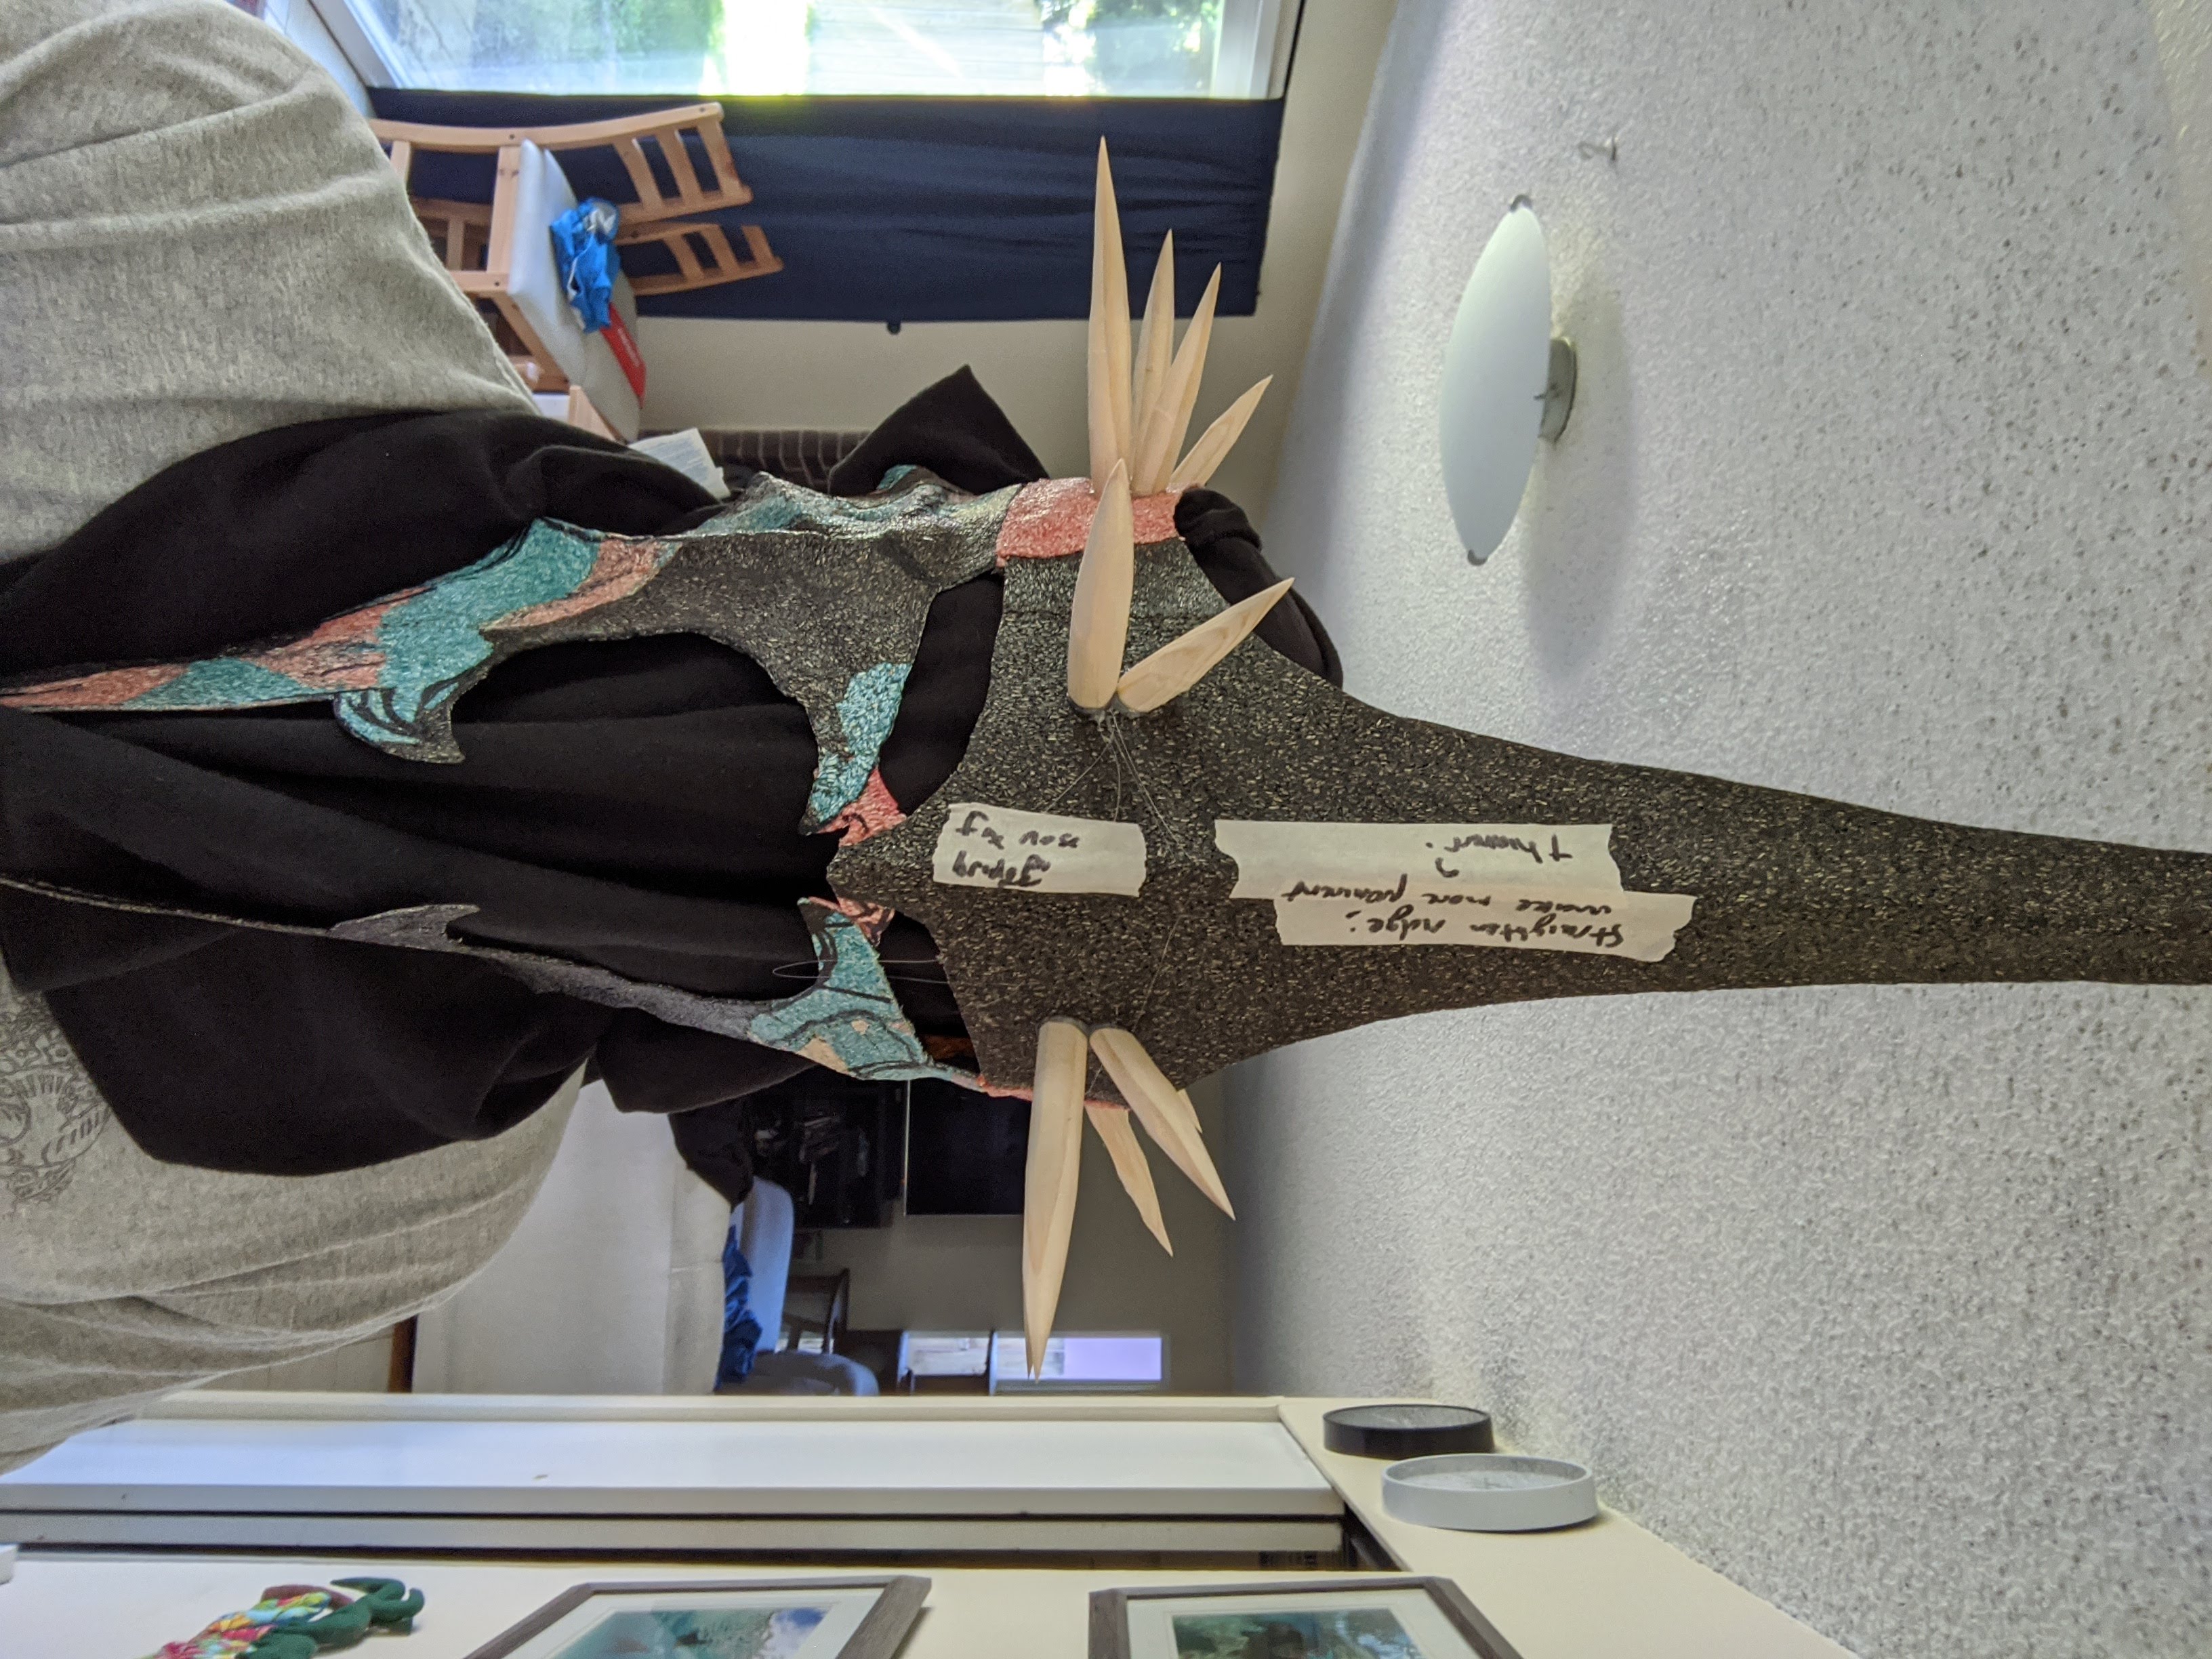
The Band
This was a strip an inch or two wide, wrapped it around my head, cut to an appropriate length; pretty easy. I made sure to make this longer than felt necessary, since the front part of the helmet was supposed to sit out from my face a bunch, so I could cover my face in black cloth to give the illusion of an empty helmet that the film does so well. The spikes were two to three inches, cut from 15mm dowel and belt-sanded into spikes. Hot glue stuck them on nicely - although hey occasionally fall off. They’re at least easy to stick back on so I haven’t bothered with anything stronger.
The Cheeks
The cheeks took a lot of back and forth, especially for minor tweaking, in front of a mirror. One thing I like about treeflx is that you can write on it, so I would make changes, wear it a bit, see how I liked it, compare to the pictures I had, and then write down my notes exactly on the piece itself where the changes needed to be. You can find the template I started from at the bottom of this page.
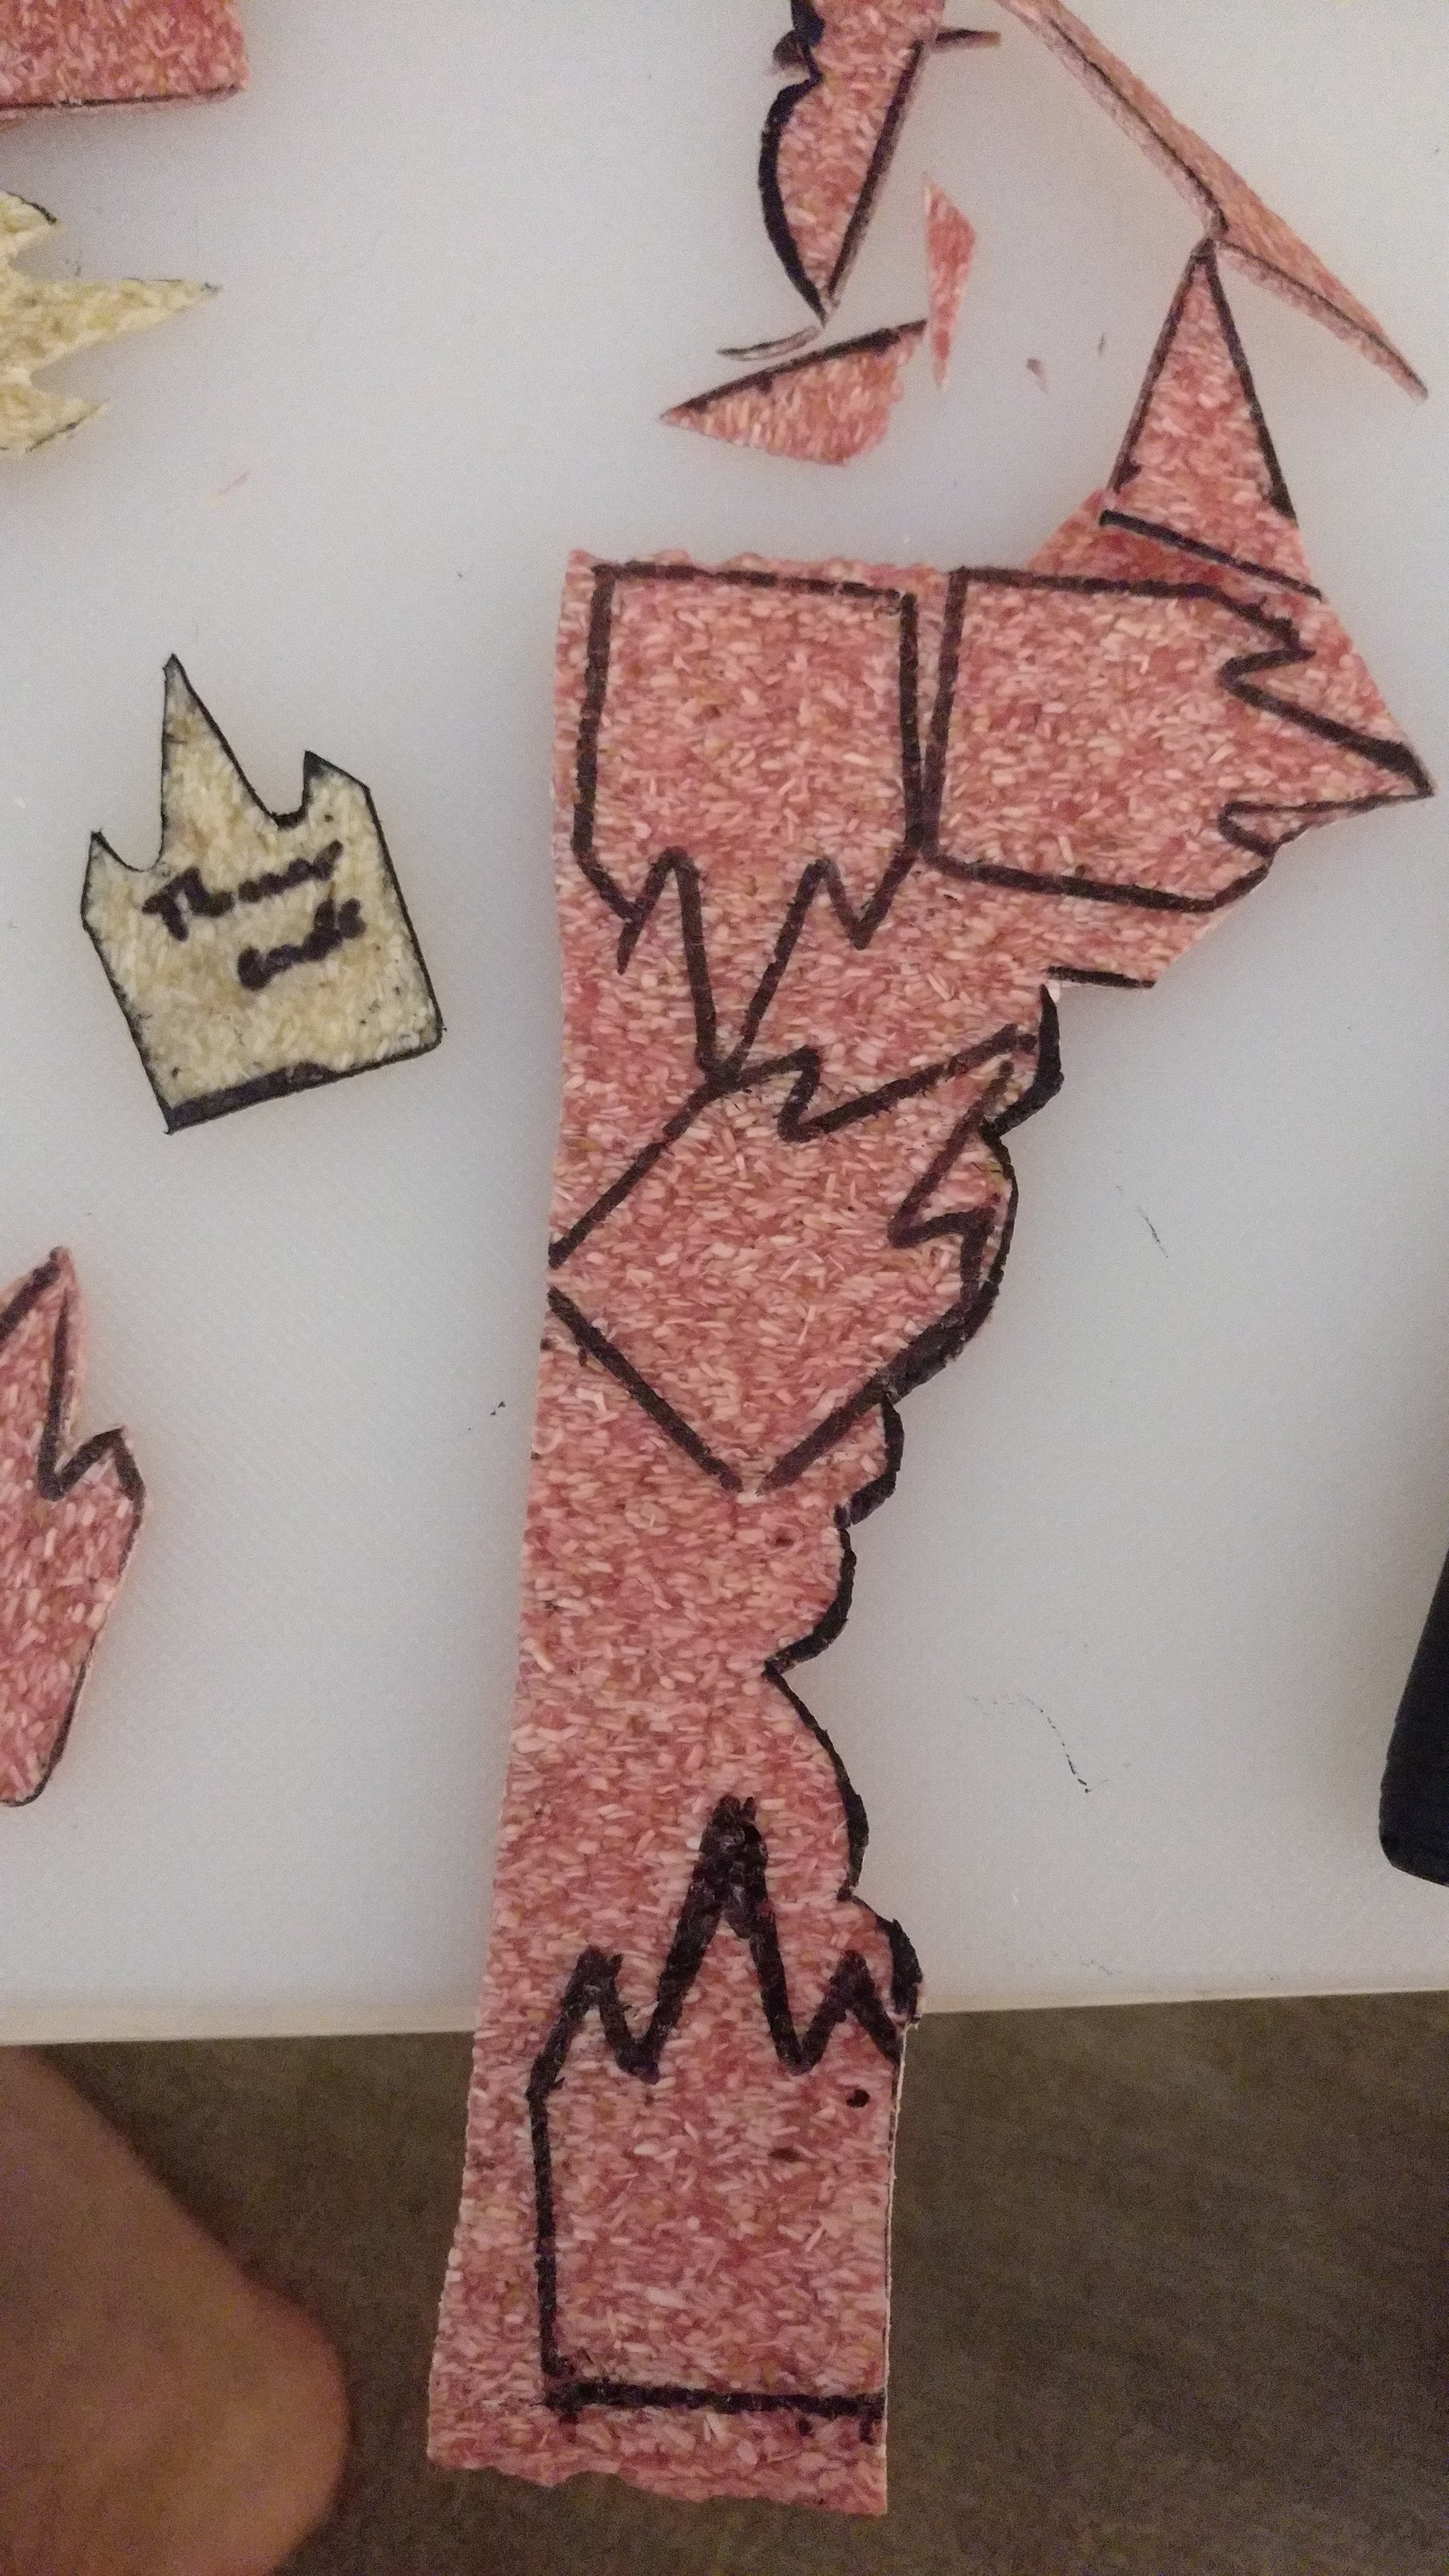
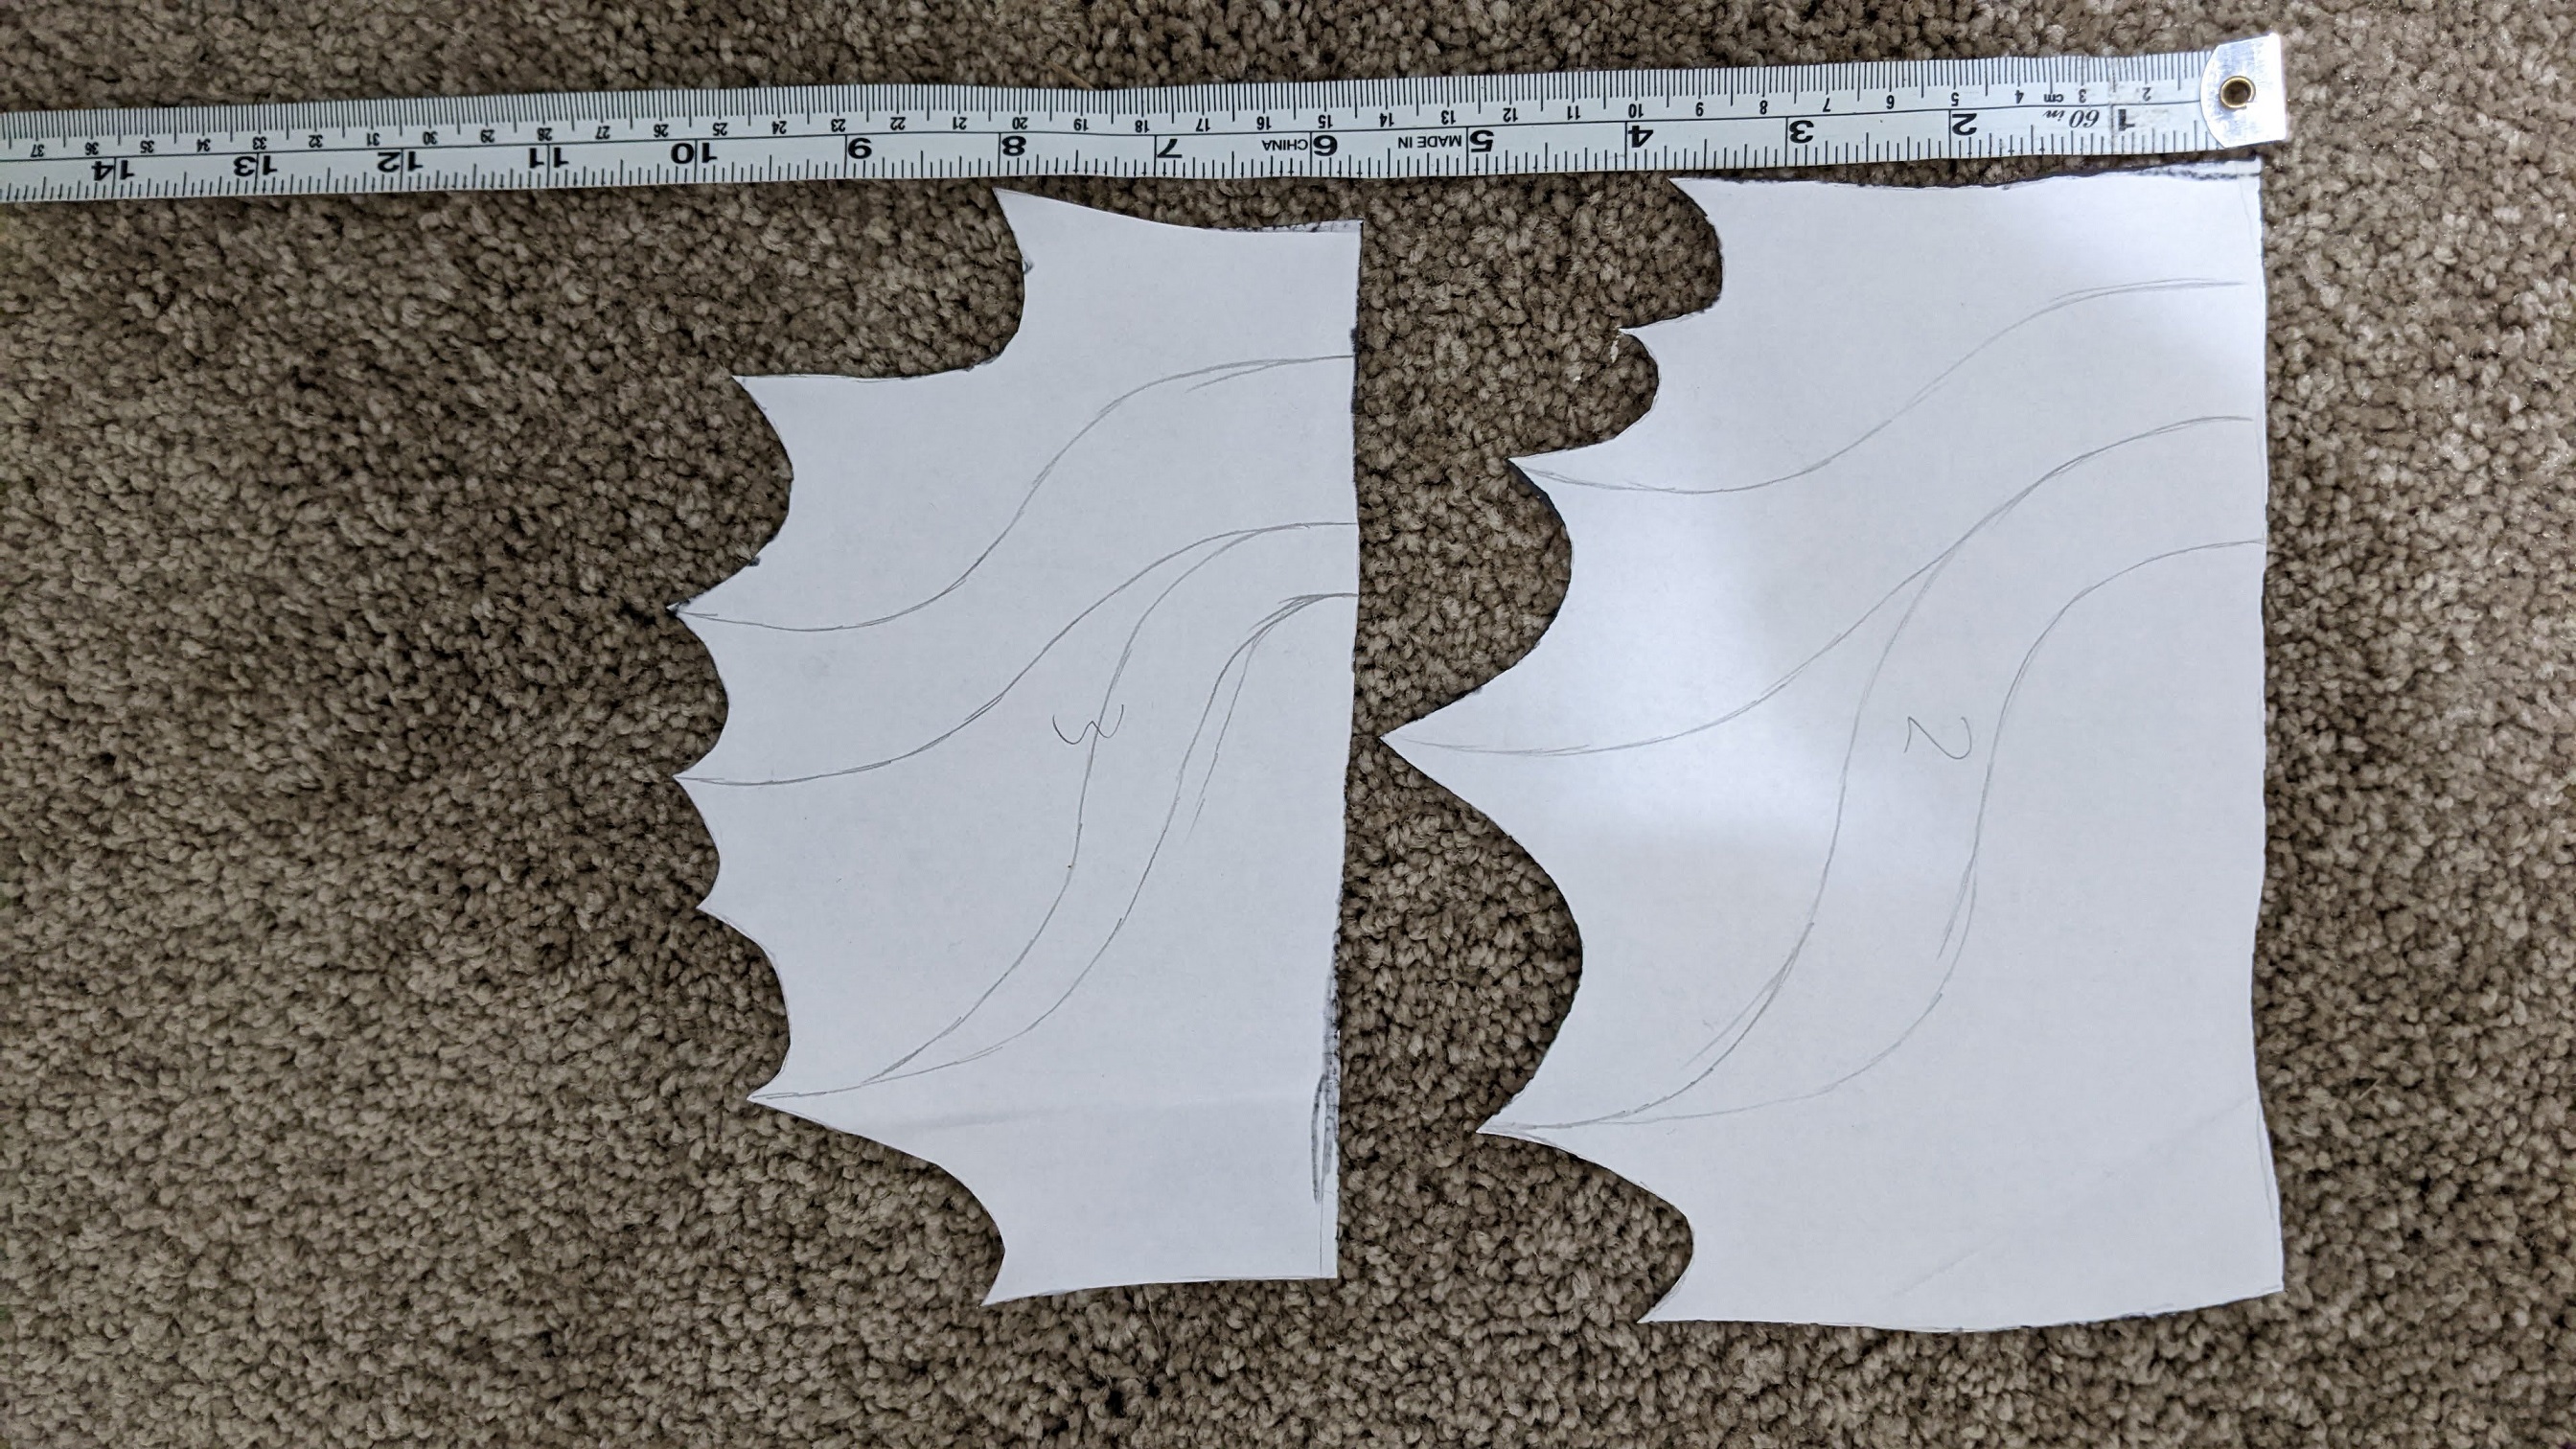
The cheeks are not flat pieces; they curve with the face a bit and have their own waves and so on. Templates only got me so far, but I think I started from a strong spot. Here you can see I’ve drawn some attempts, molded them back in, and cut new attempts:
This stage had a lot of size adjustment - how long do I make those cheek spikes? How far down and also in front of my face should they go? The recurved spikes back up - how close should they meet in the middle? Many question, sand much close watching of various films clips happened. You can see my experiments with different lengths here, compare the left and the right:
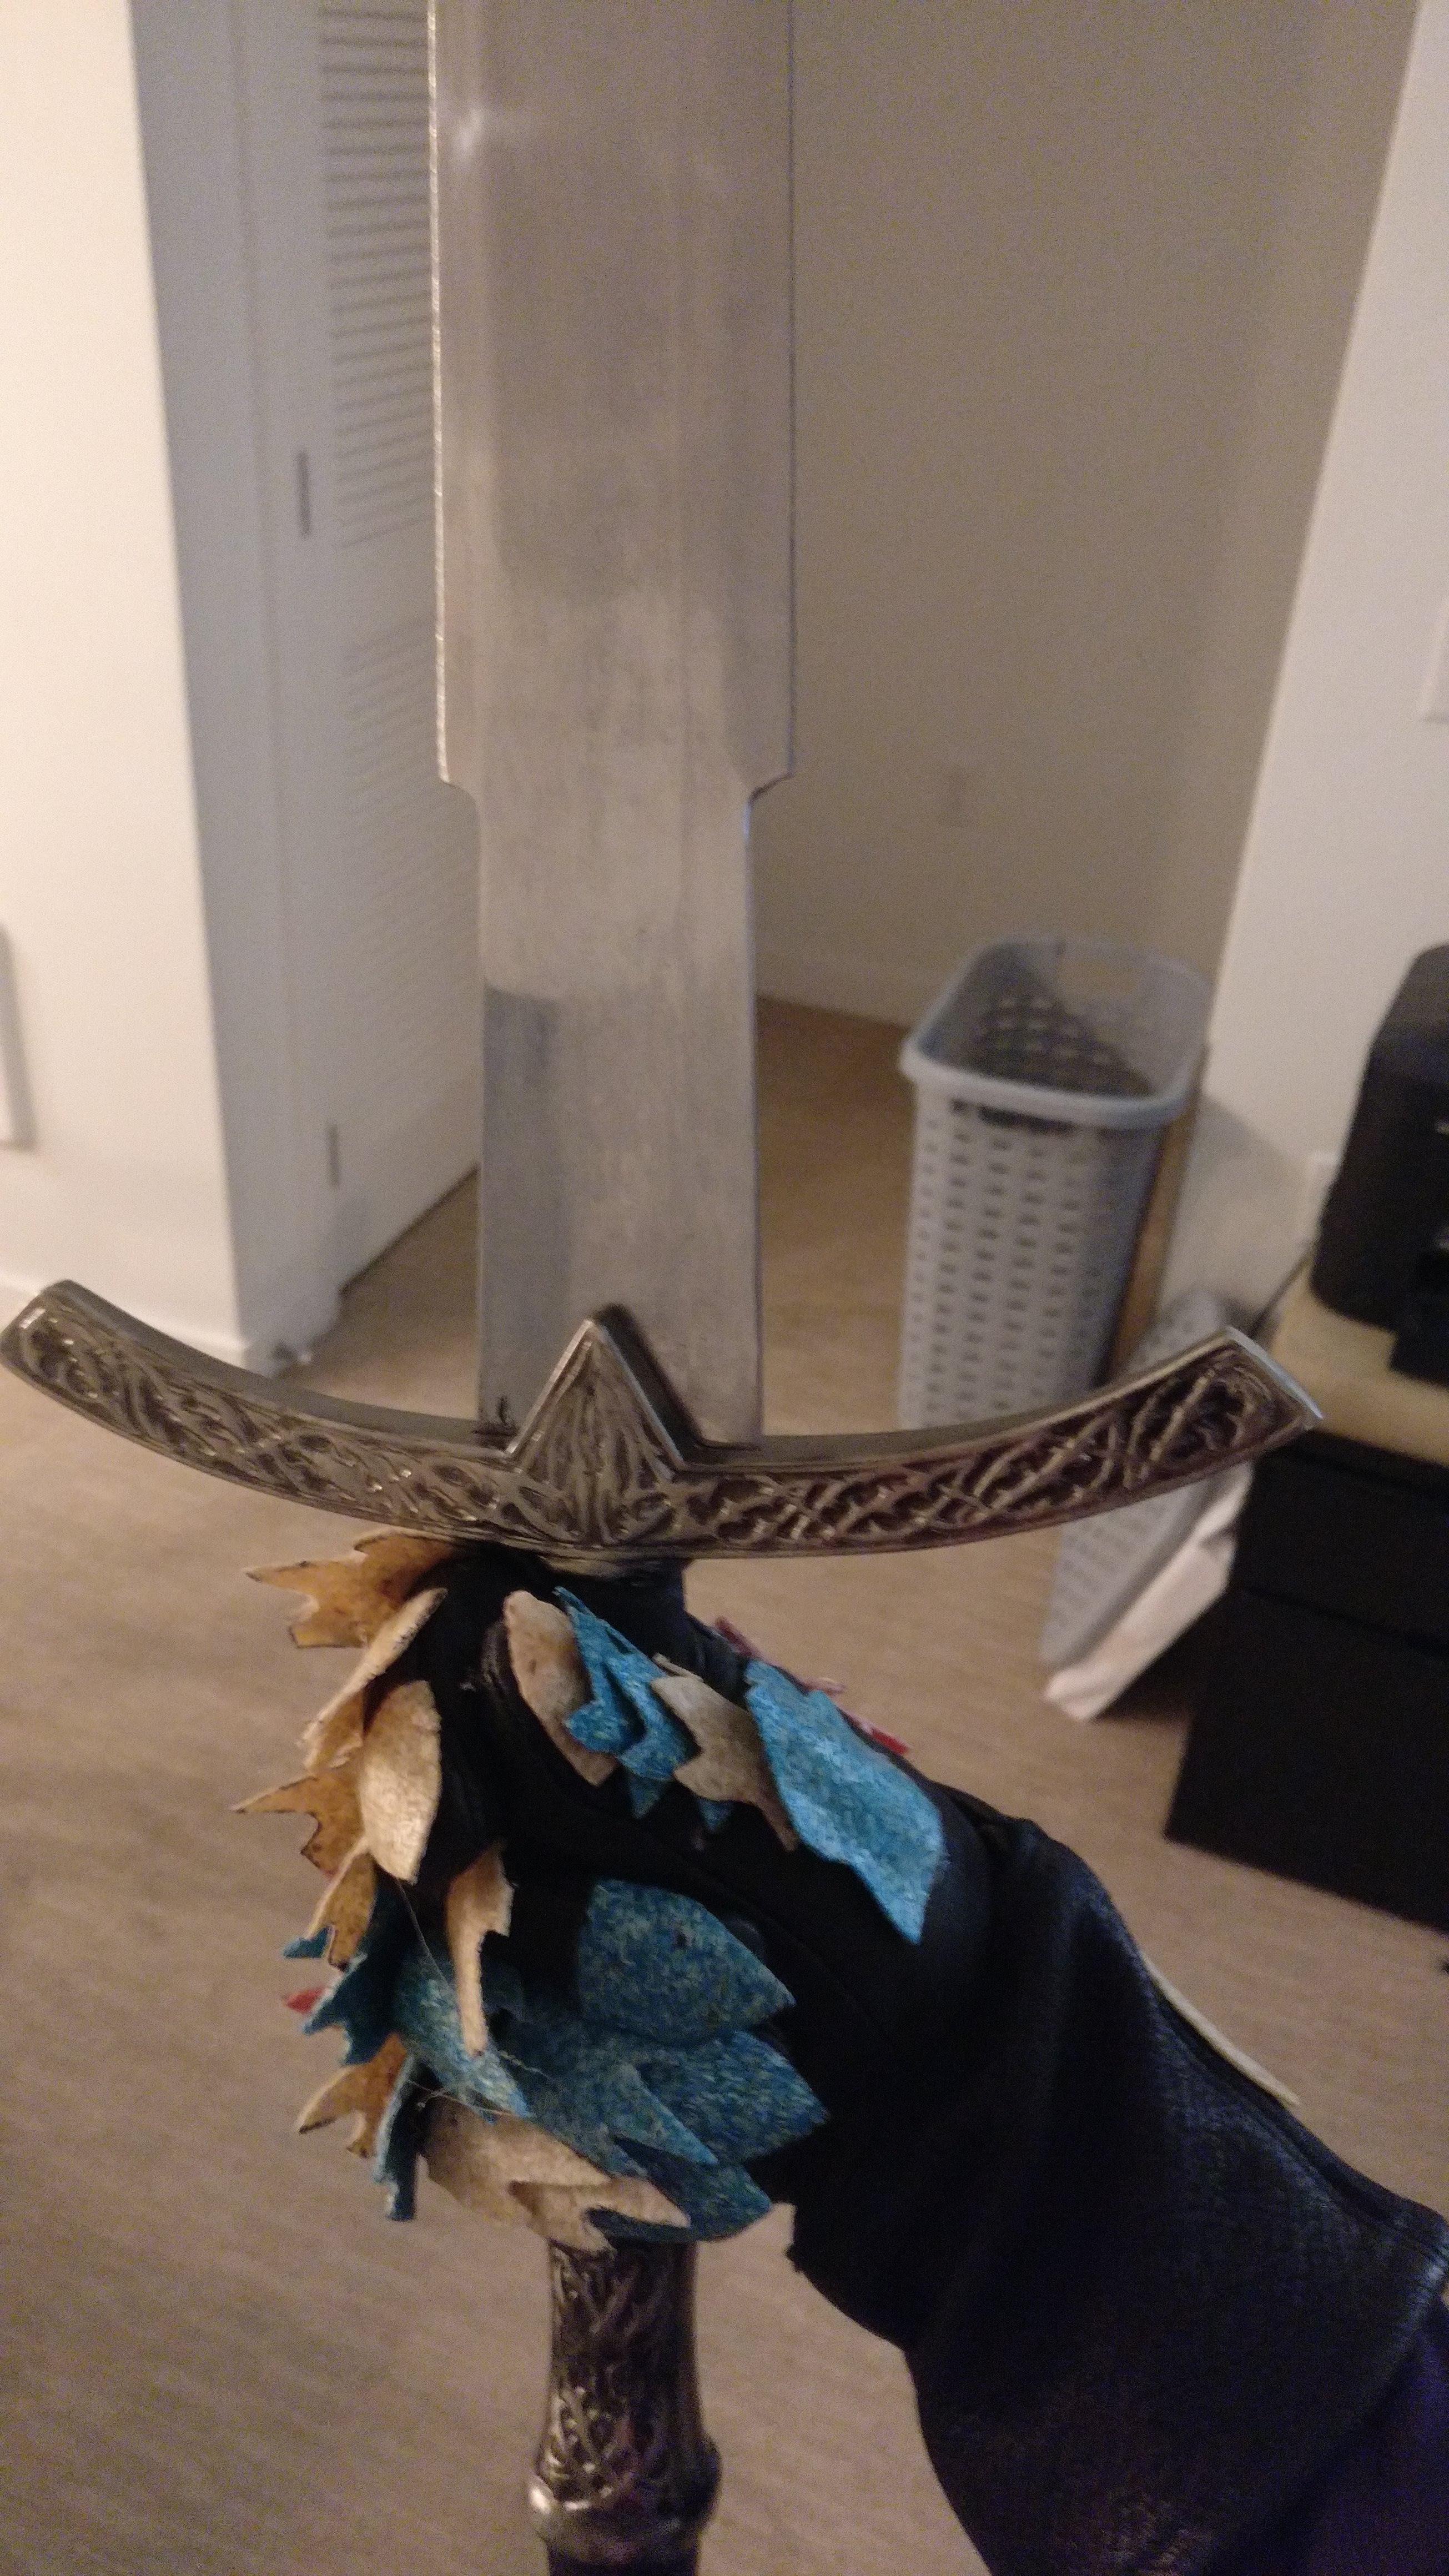
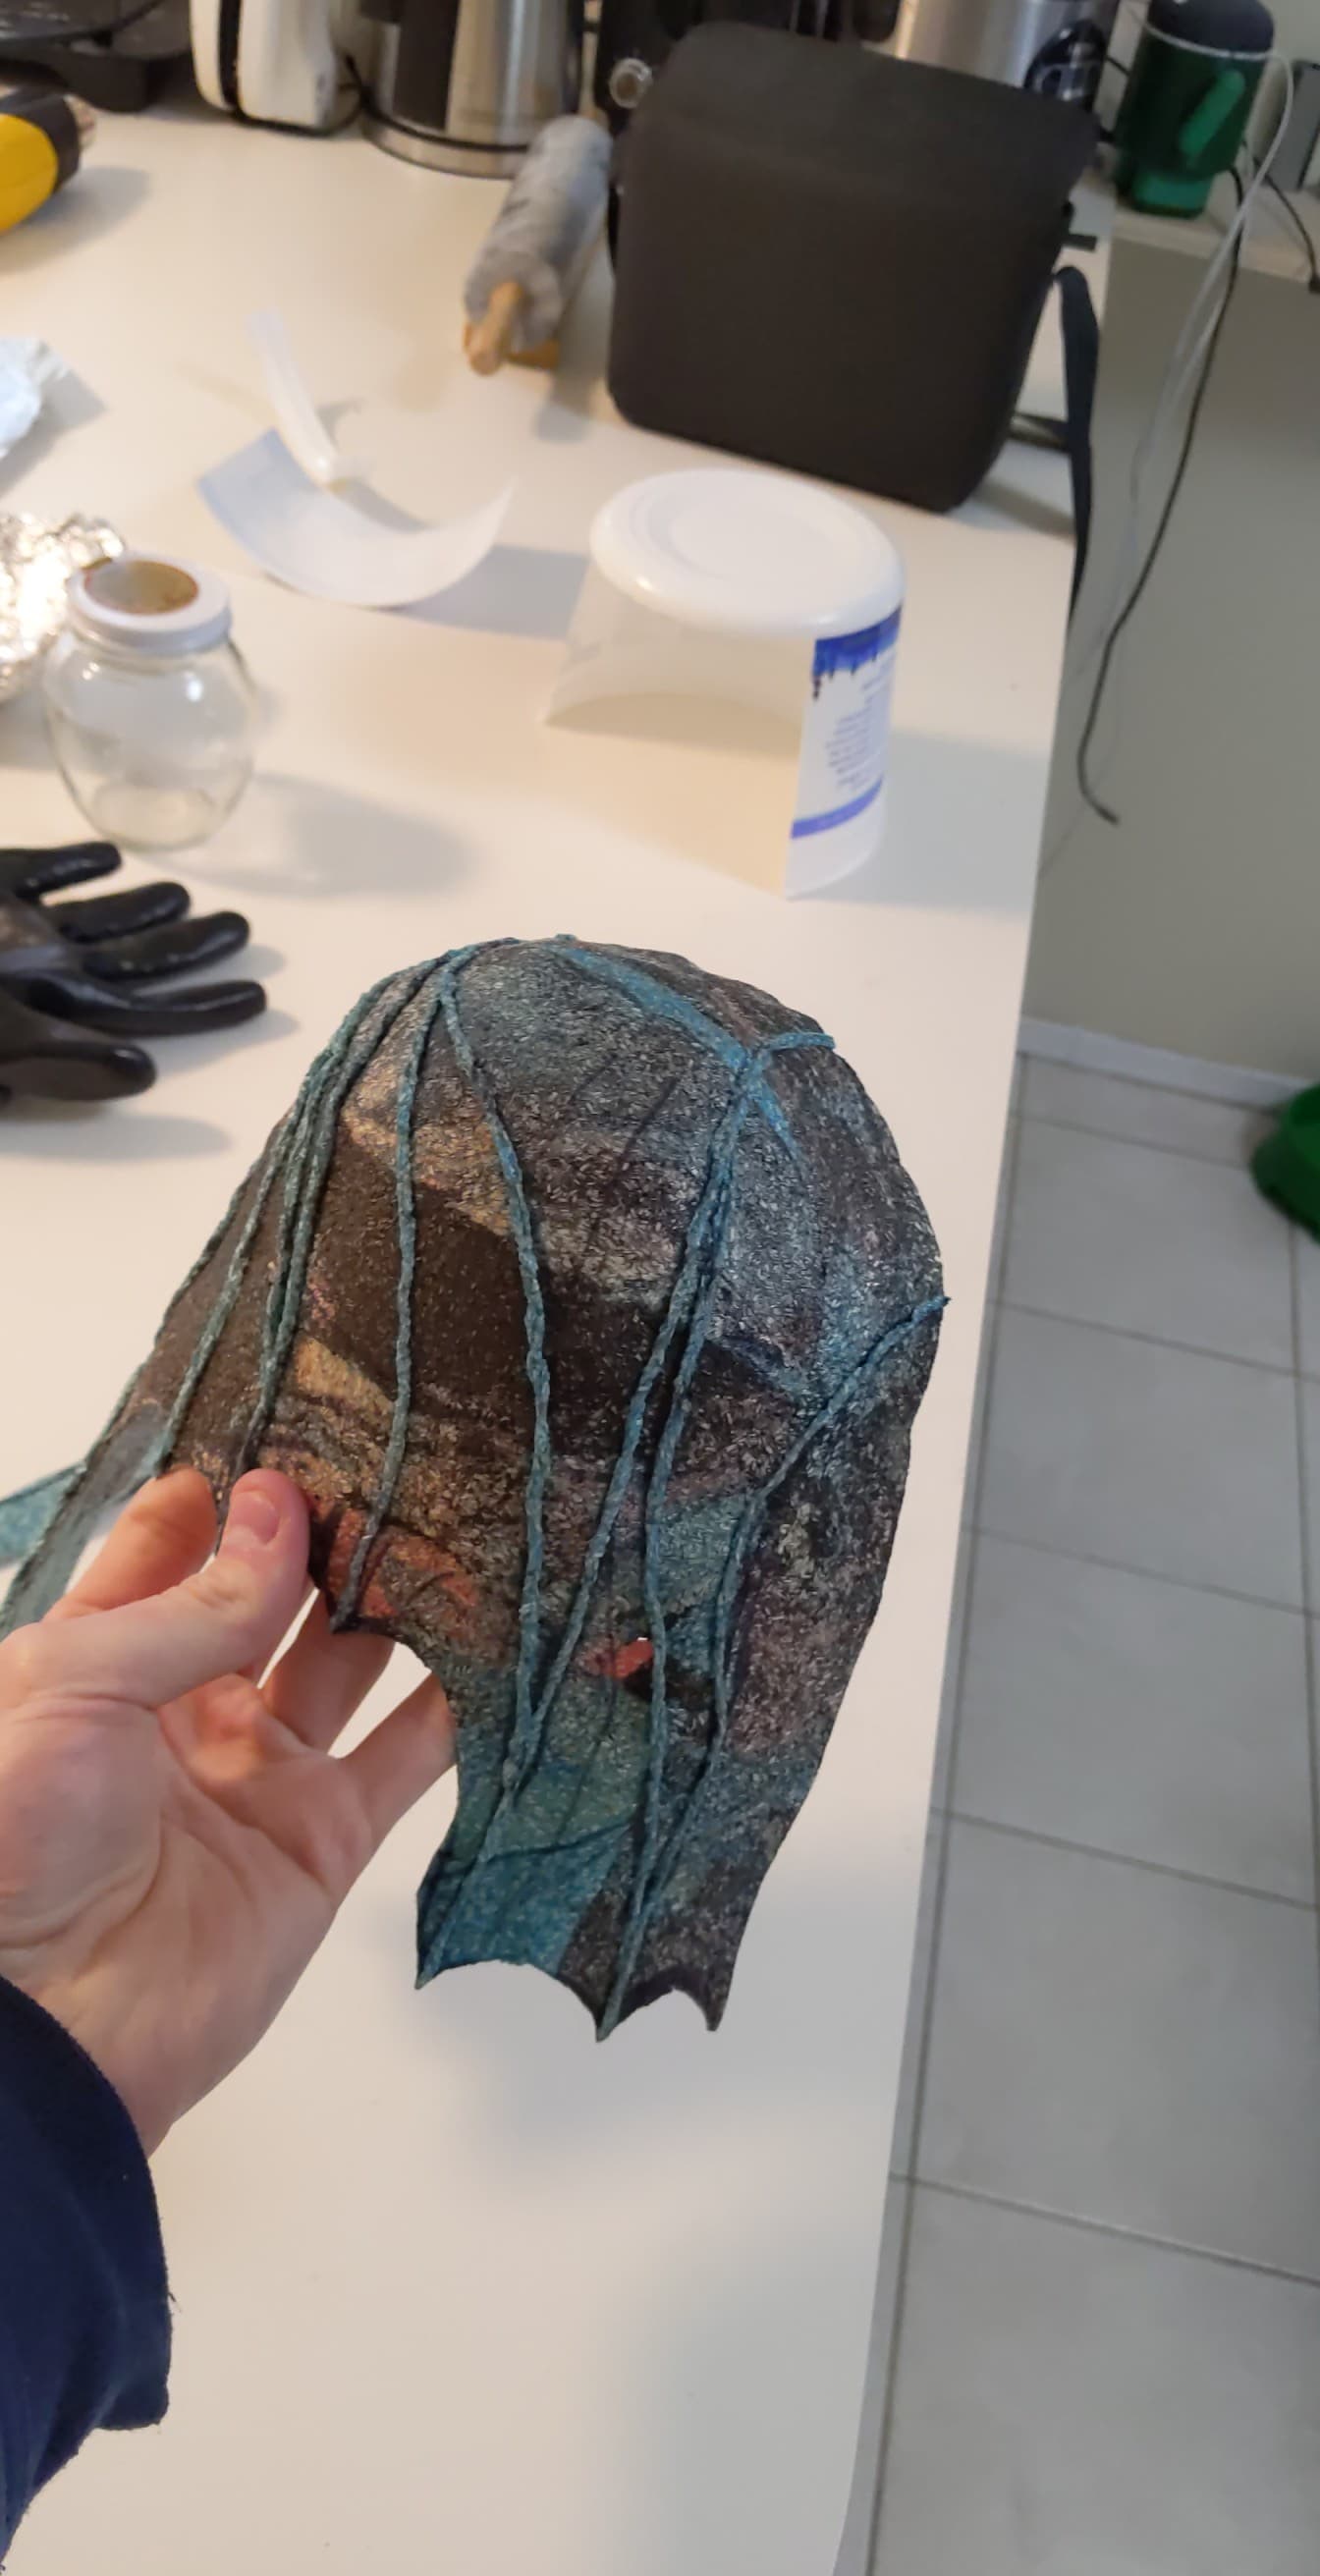
I eventually just picked something that seemed right to me - remember, I’m sizing this to my head - and went with it. Then came the finer detail. Take a look at the cheeks around the ear-level: there’s these deep grooves that lead to a webbed/bat-wing style look. This was just many iterations of heating, molding by hand, cooling, checking, wearing, repeat. For those who want to try this at home, sorry I don’t have an exact method for you to follow. Here’s an in progress shot:
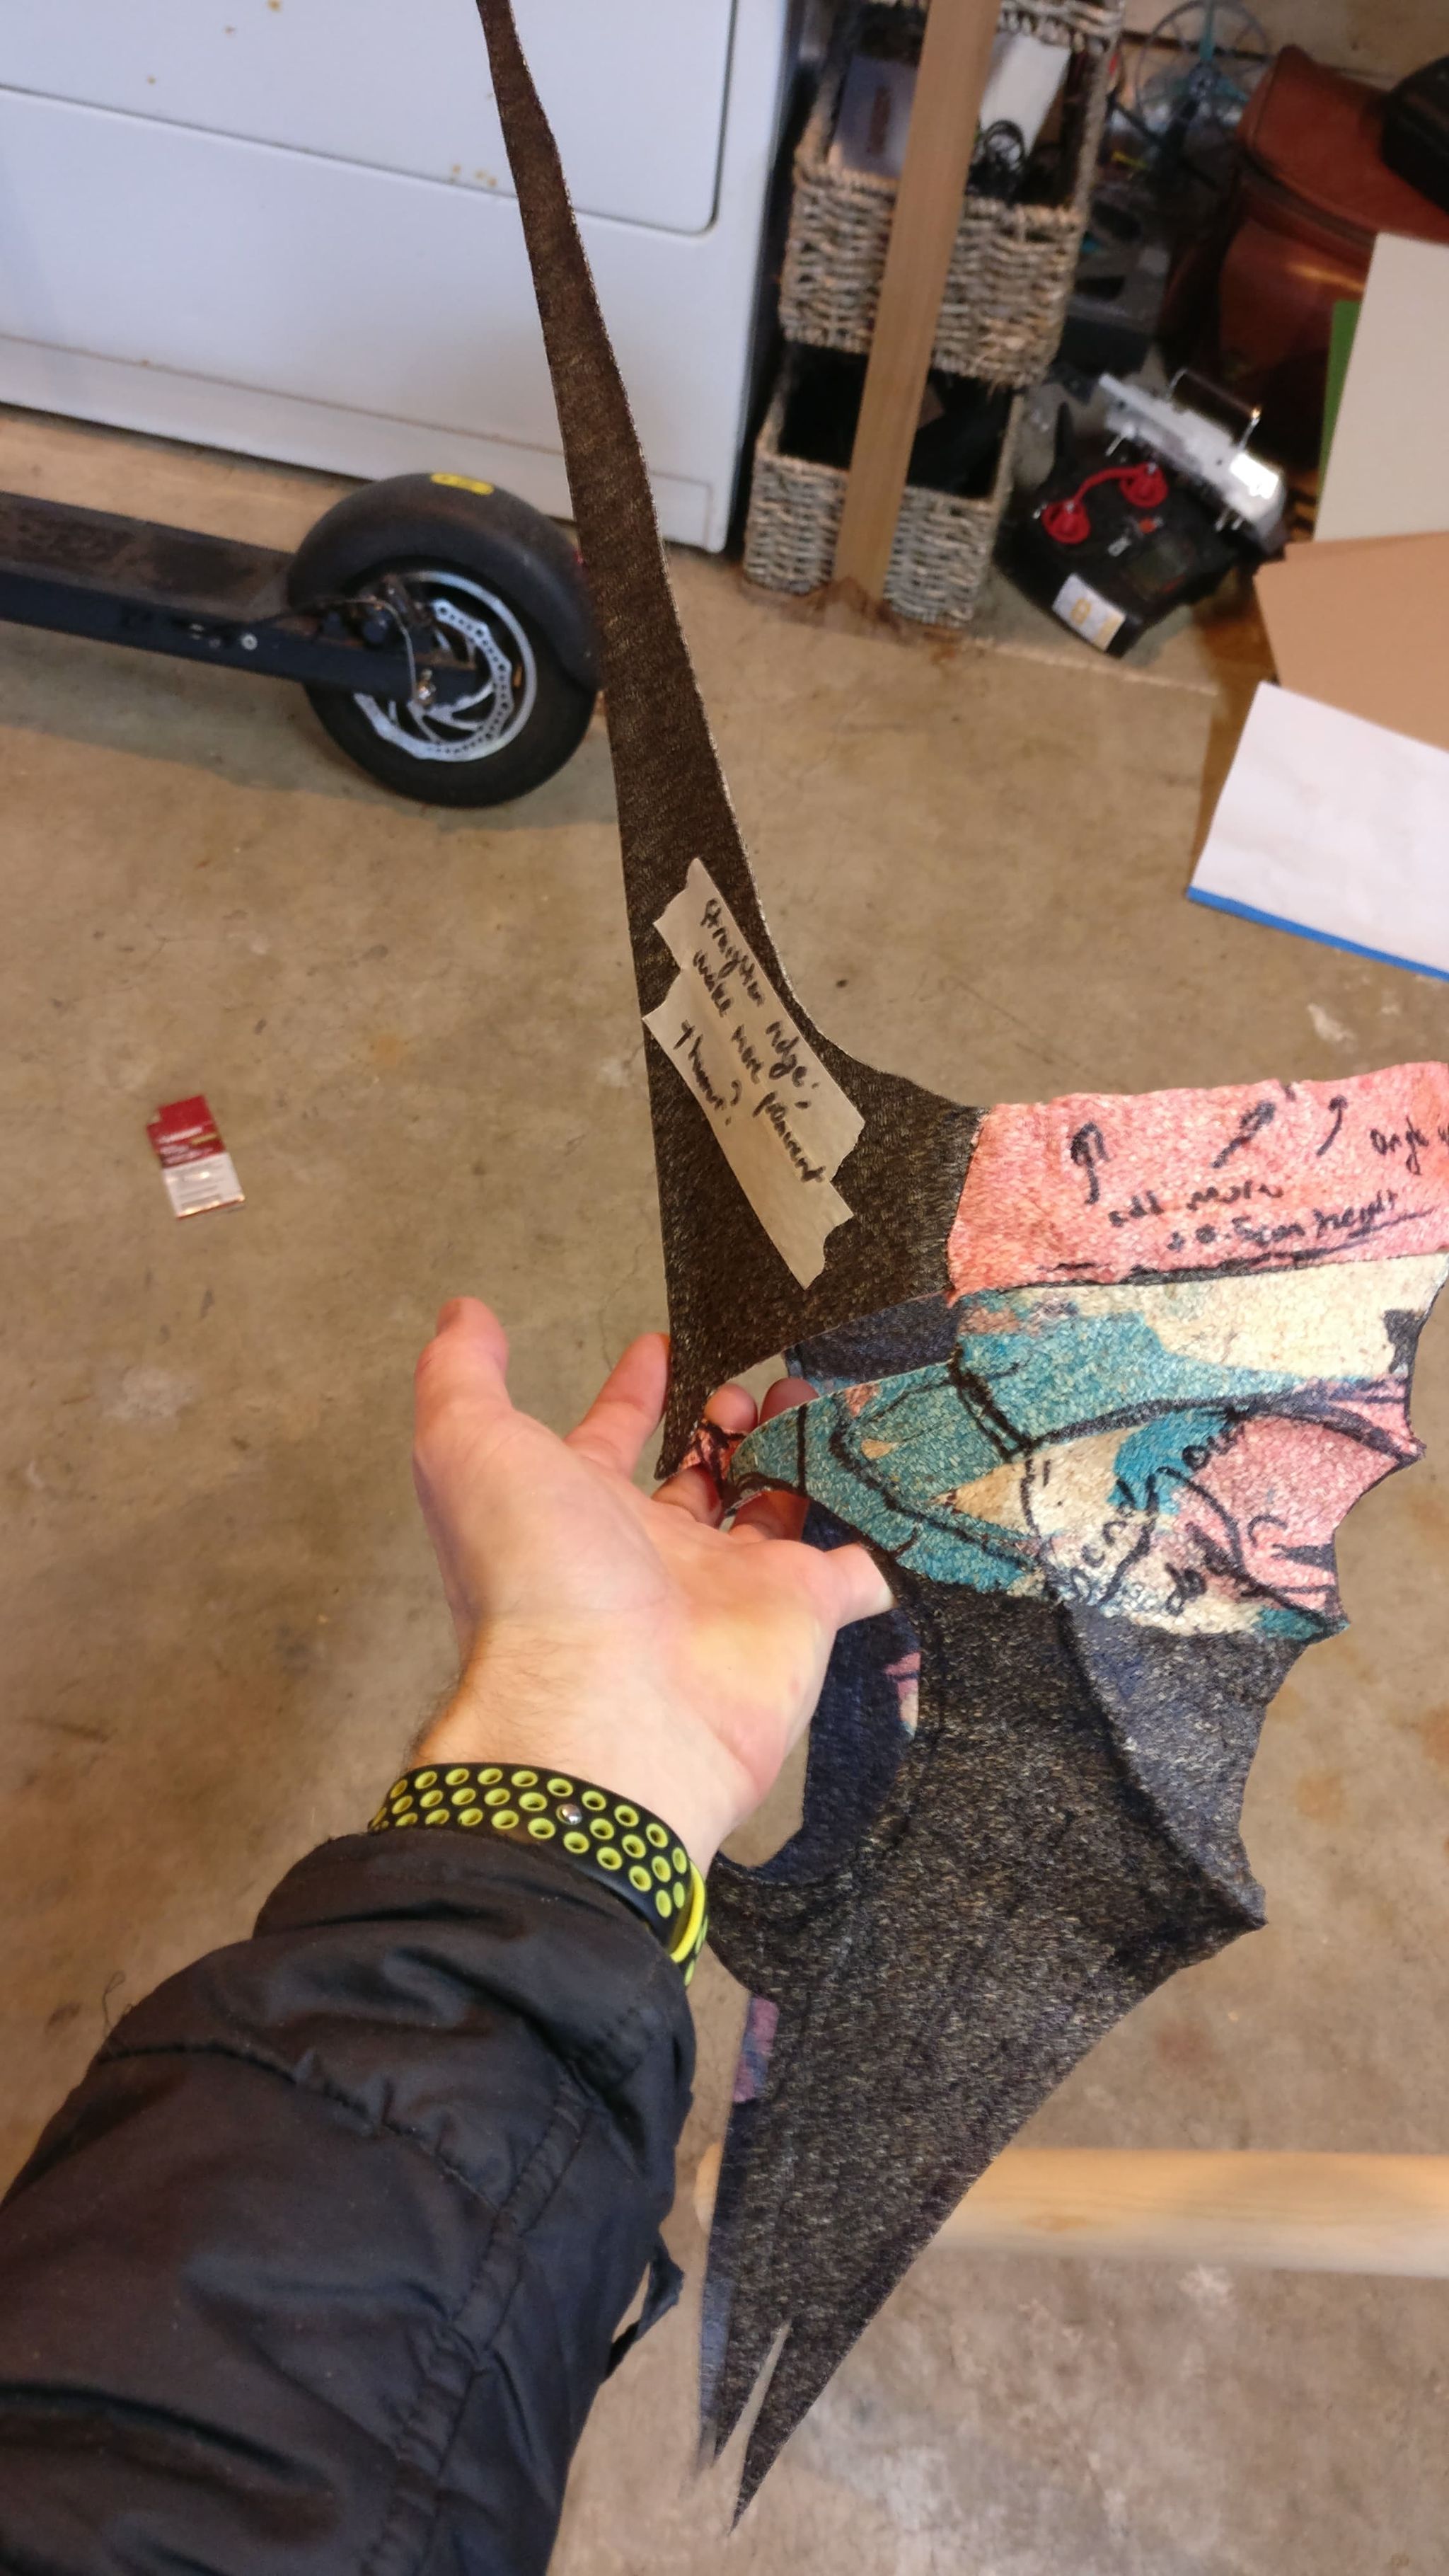
As an aside, you can see the history of the piece right there - previous lines and text squished in, previous pieces I used molded back into this cheek piece, and also notes for future changes on the band and the spike.
All of these pieces attached quite easily together with heat molding - just heat the treeflx join edges up, squish them together, squish it some more so there isn’t an obvious seam, and bam done.
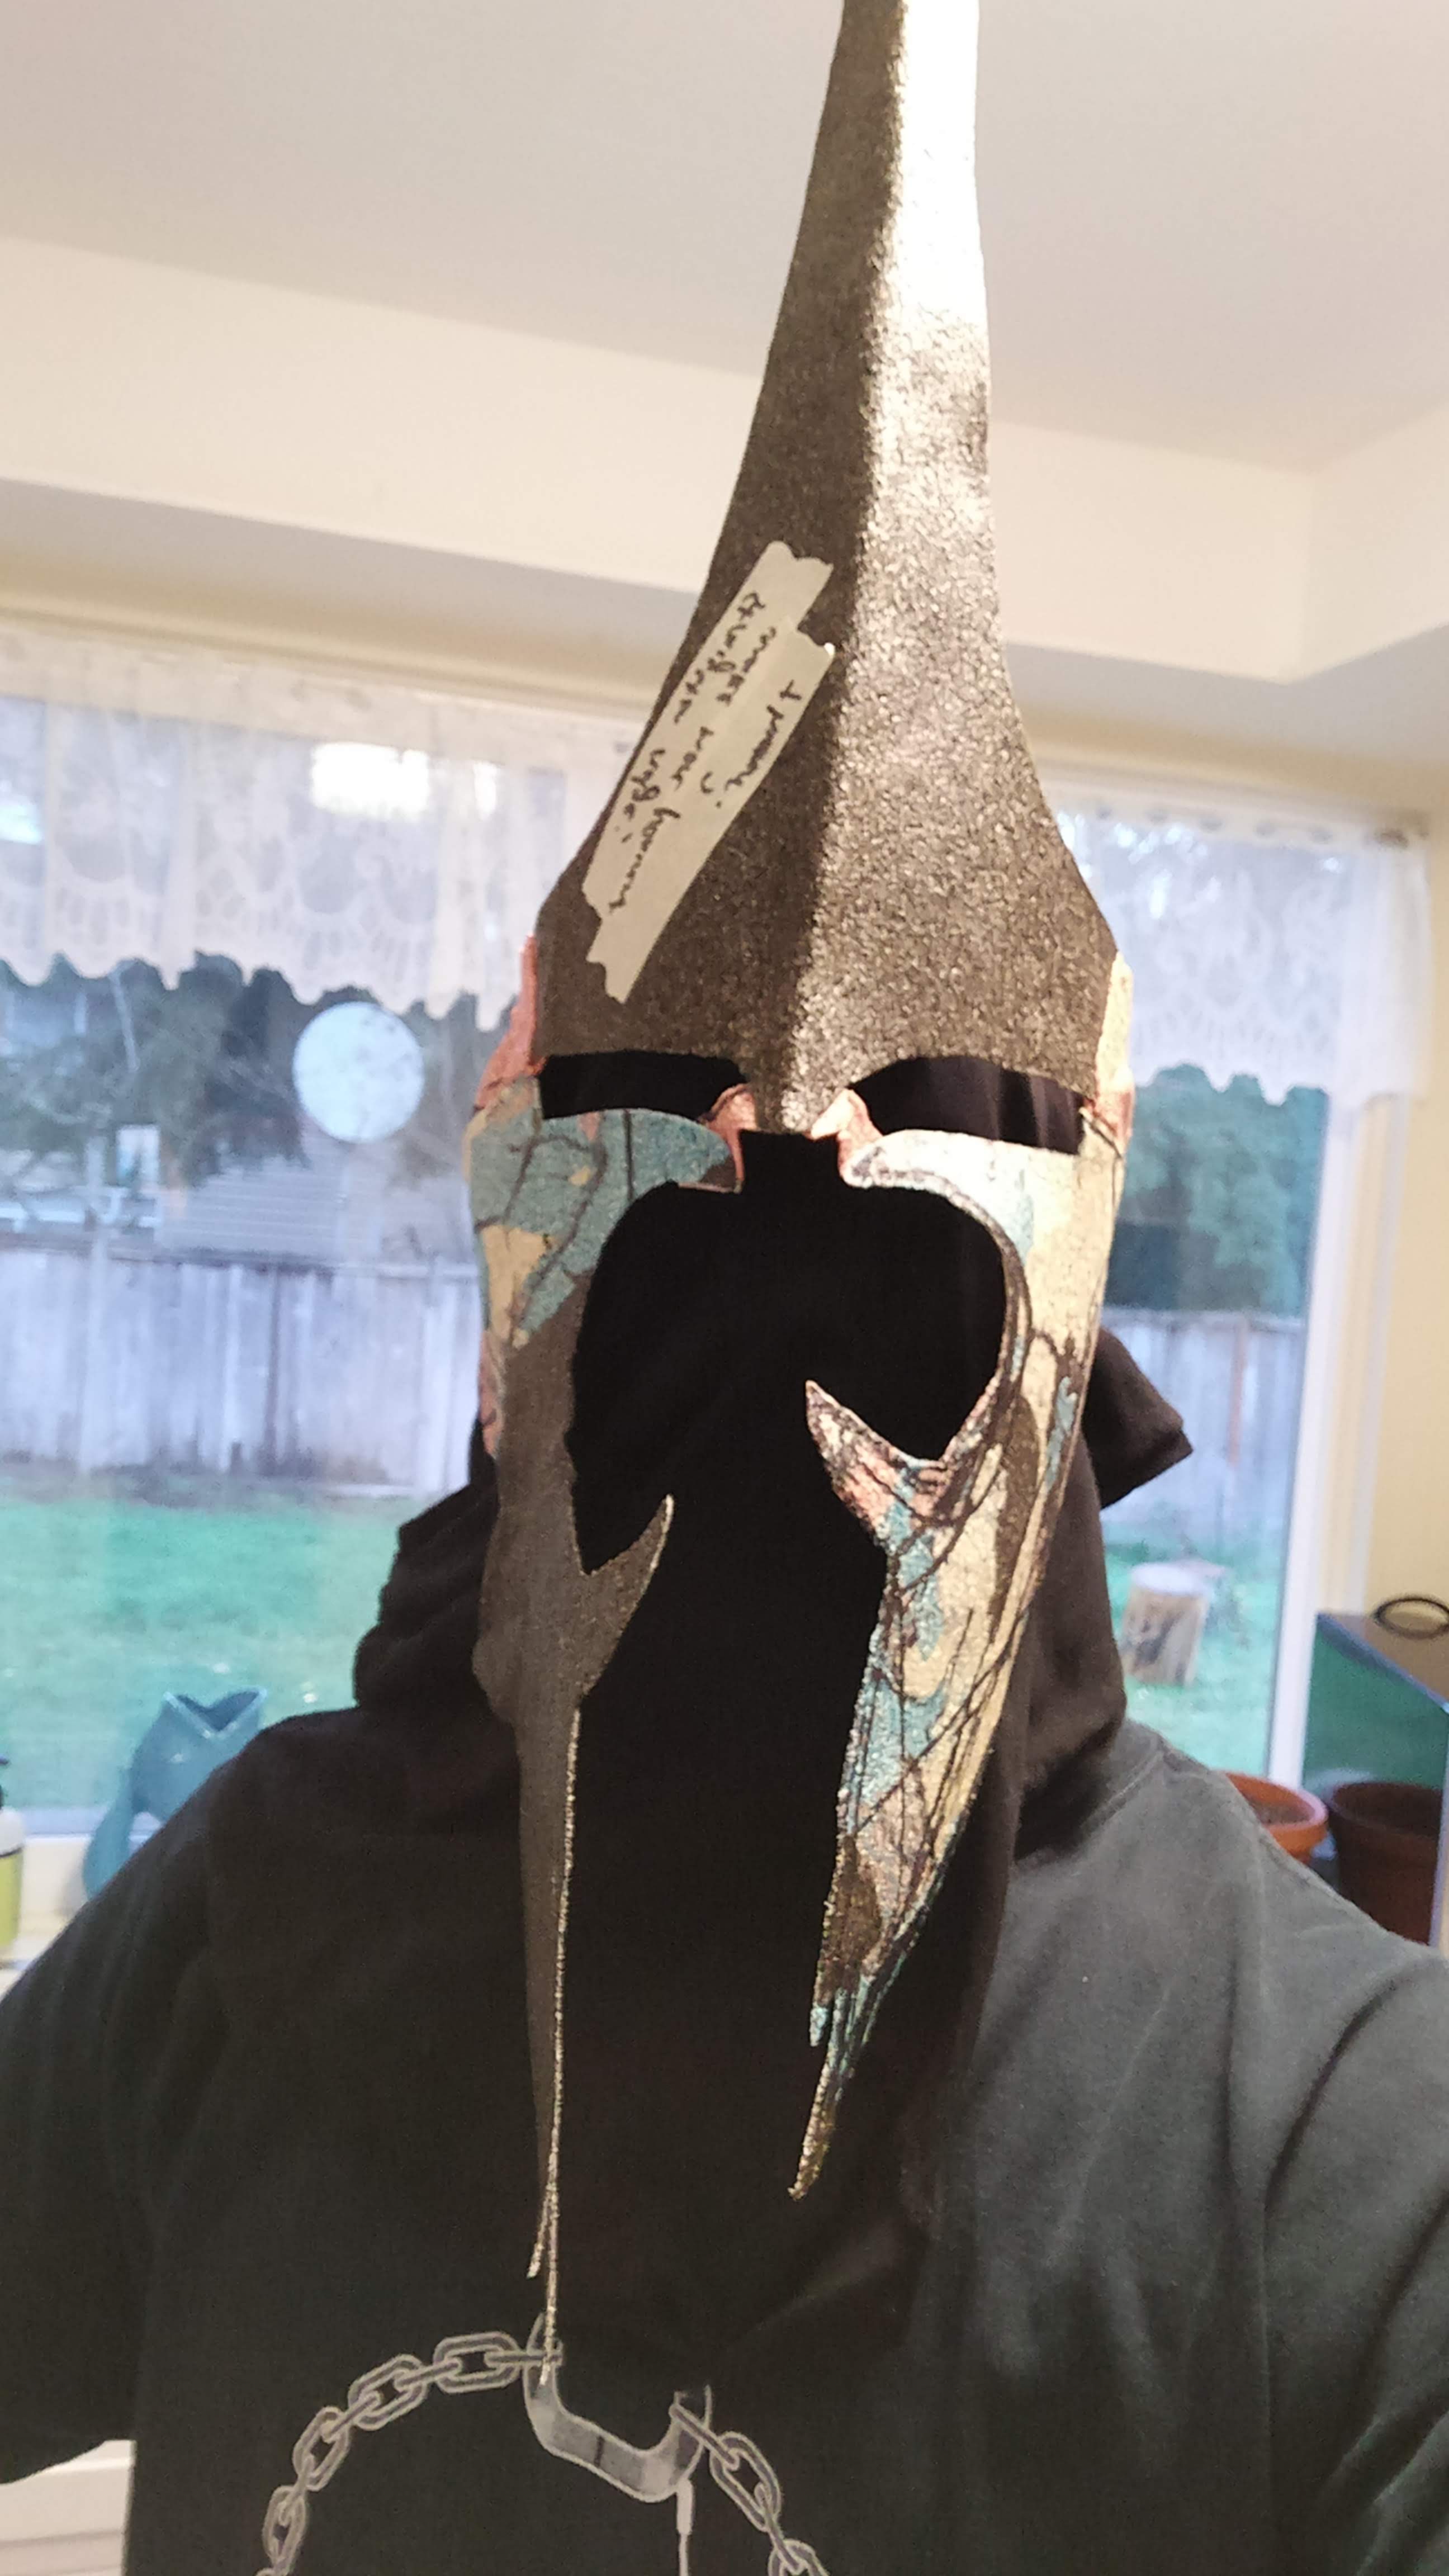
Final before painting
The black covering for my head is a sleeve of a shirt that I sewed one end shut on. Simple, does the job. I certainly can’t see well, but there’s enough other impracticalities with this entire costume that I’m not stressed there - for example, gotta try not to stab someone in the face as I walk past them.
Looking back, I think my spikes are not as angled as the film prop:
But you know what, it’s probably ok. No one has called me out on this.
The gauntlets
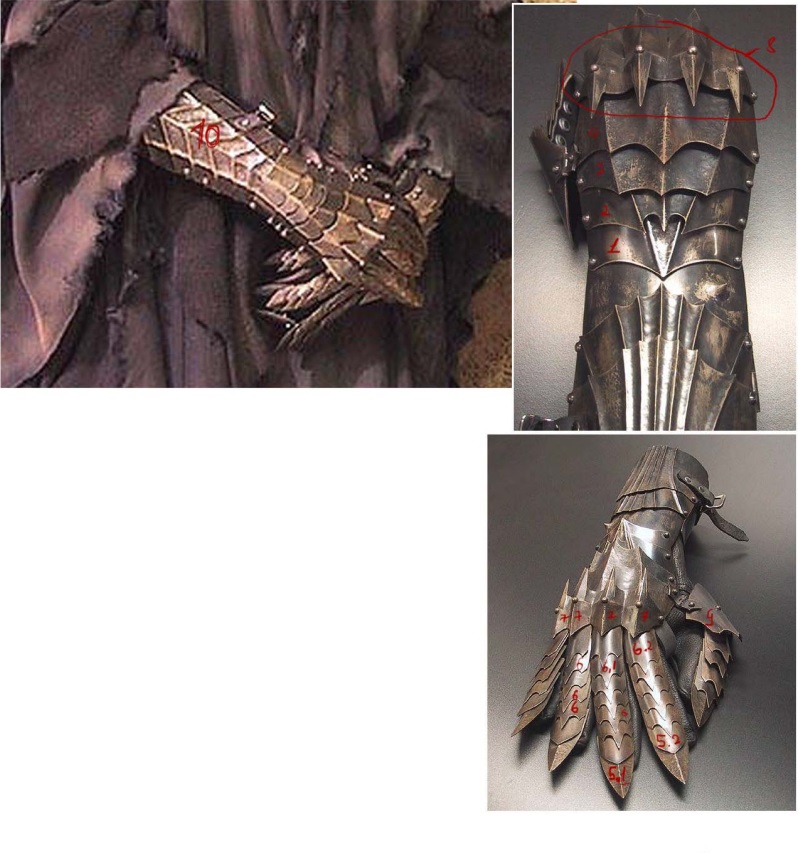
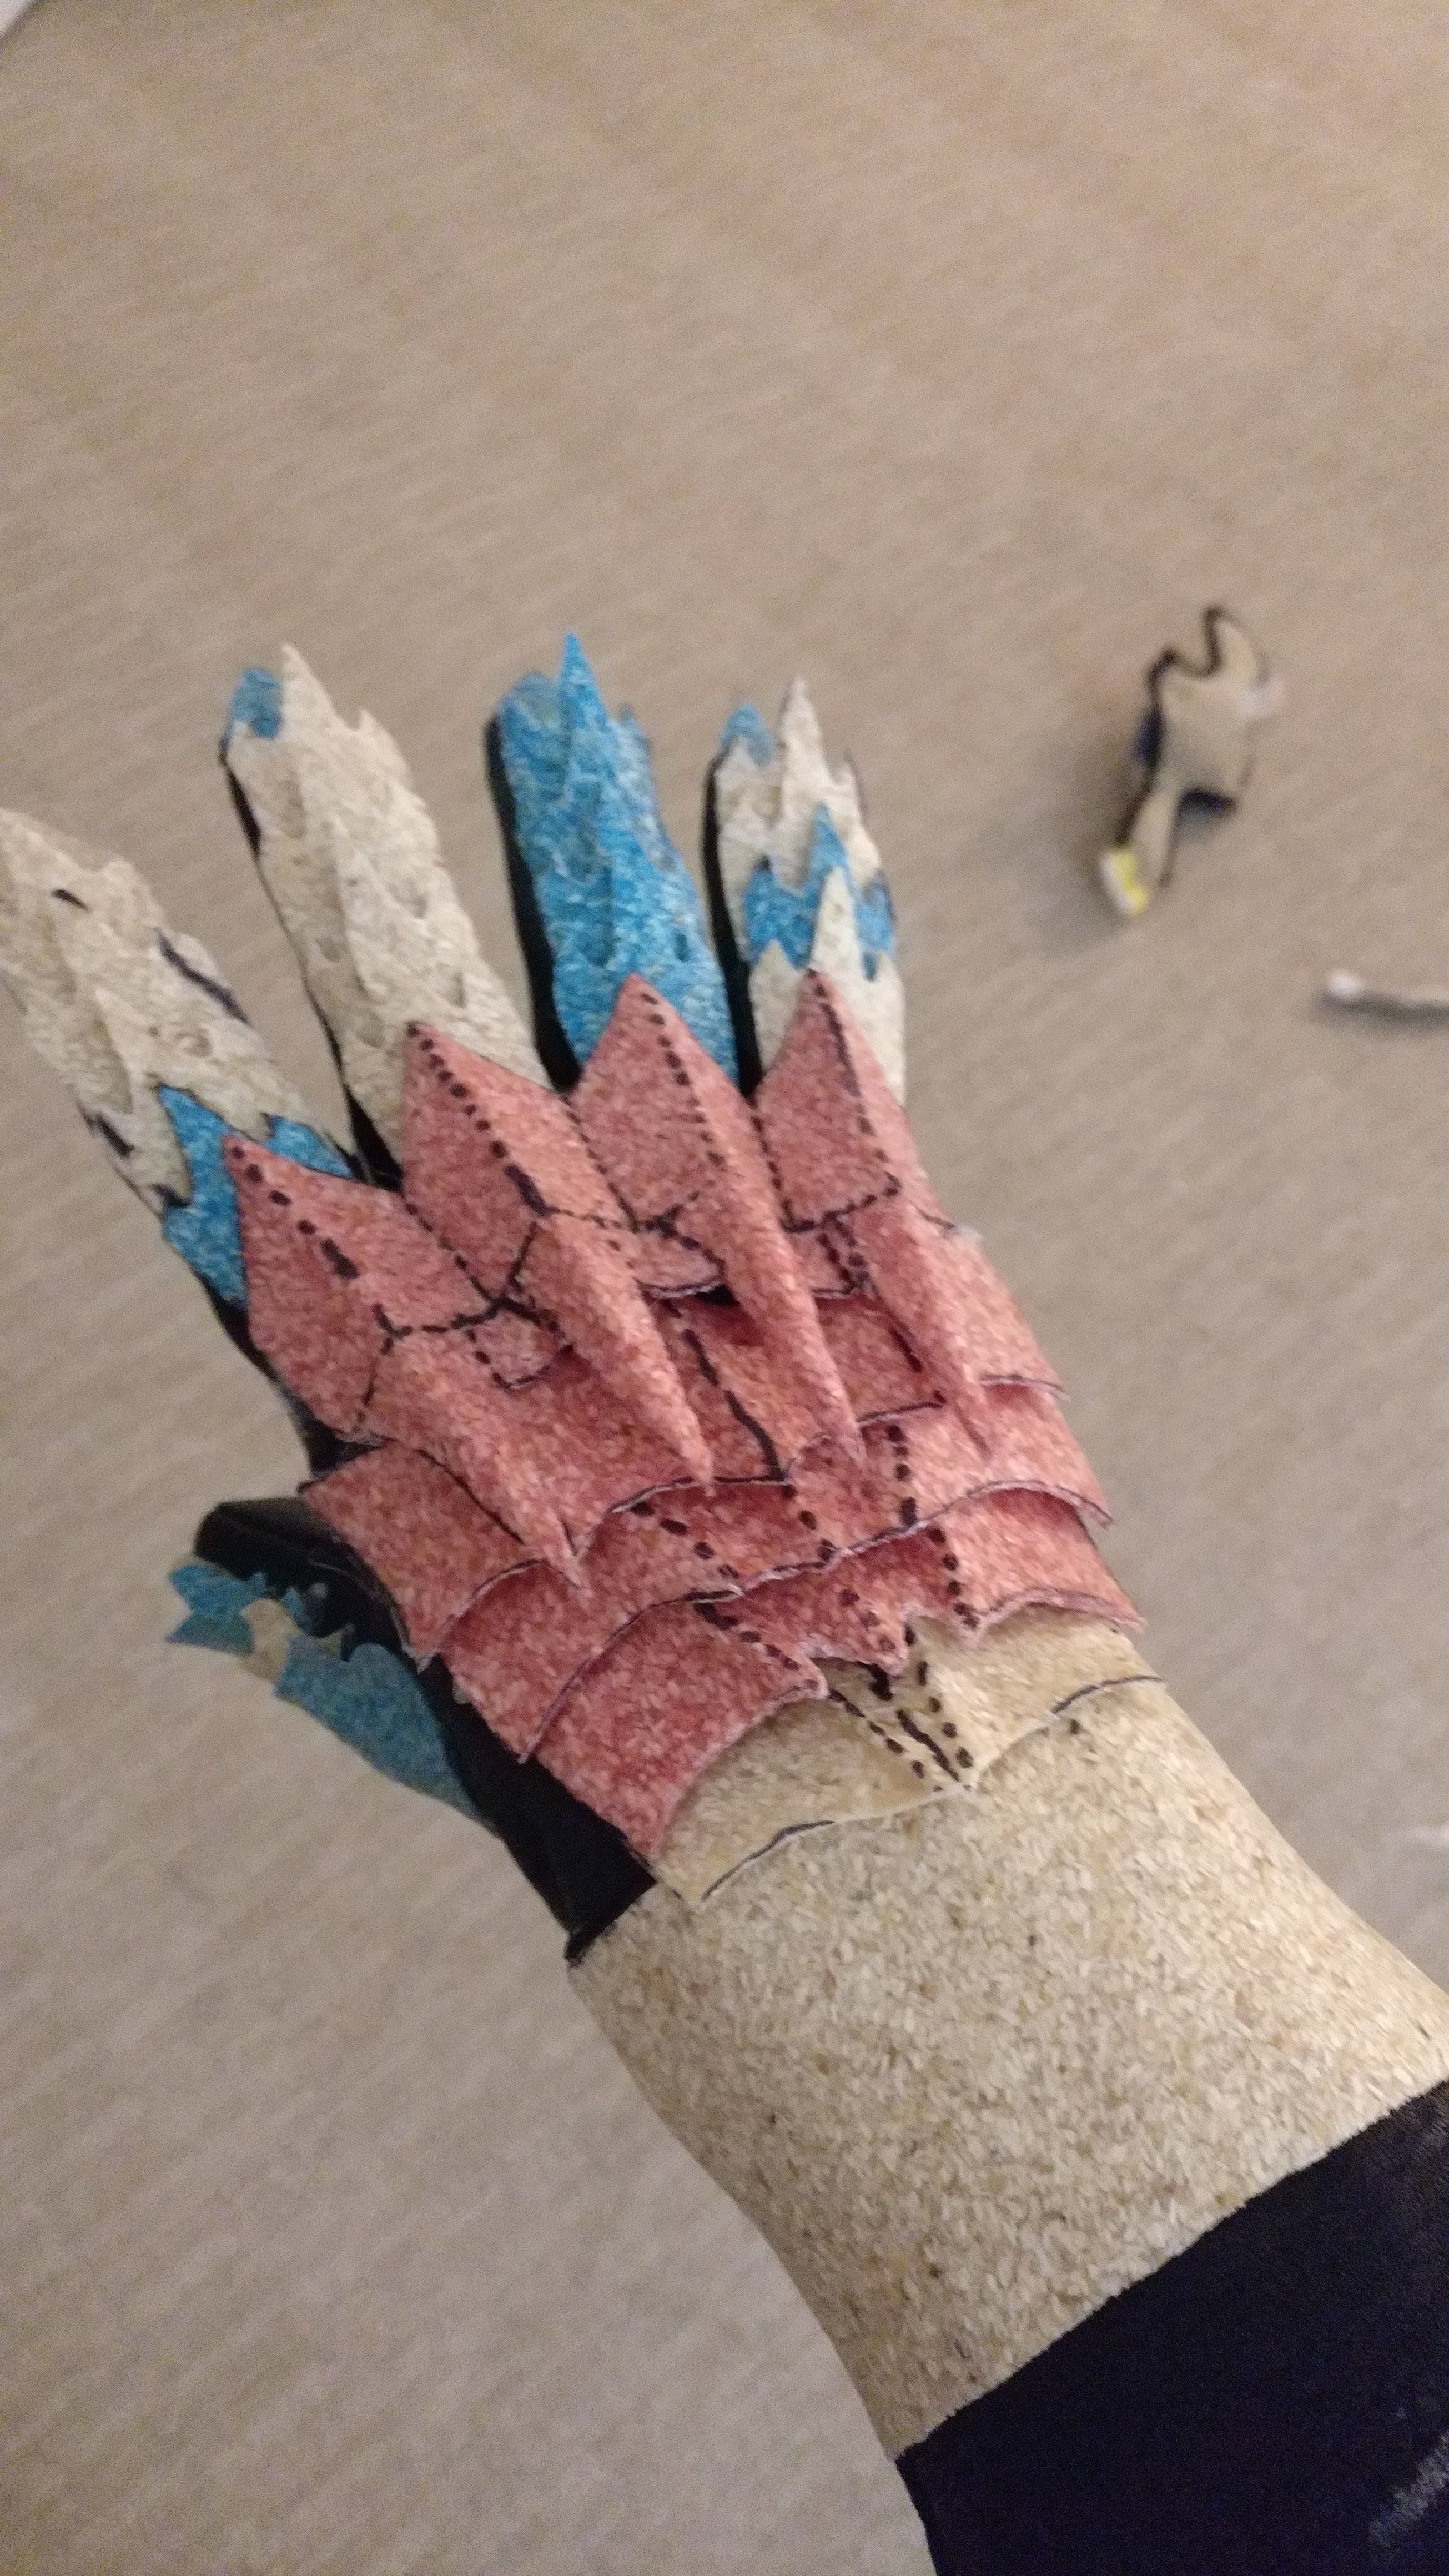
As I said at the beginning, I had originally found a template online for these and worked from that. I bought some basic black pleather gloves with long wrists online, and looking at the gauntlets from the film, things seemed obvious:
They’re made of little spiky plates lined along the fingers, with some back-of-hand plates that are bigger, with a bit of a webbed bat-wing pattern. This was also clear from the templates:
I did a few iterations of the first spiky plate before settling on a design that was big enough to wrap around my finger, but not prohibitively big. Once I had that, it was just a matter of cutting them all out from a plate of treeflx and gluing them to my fingers.
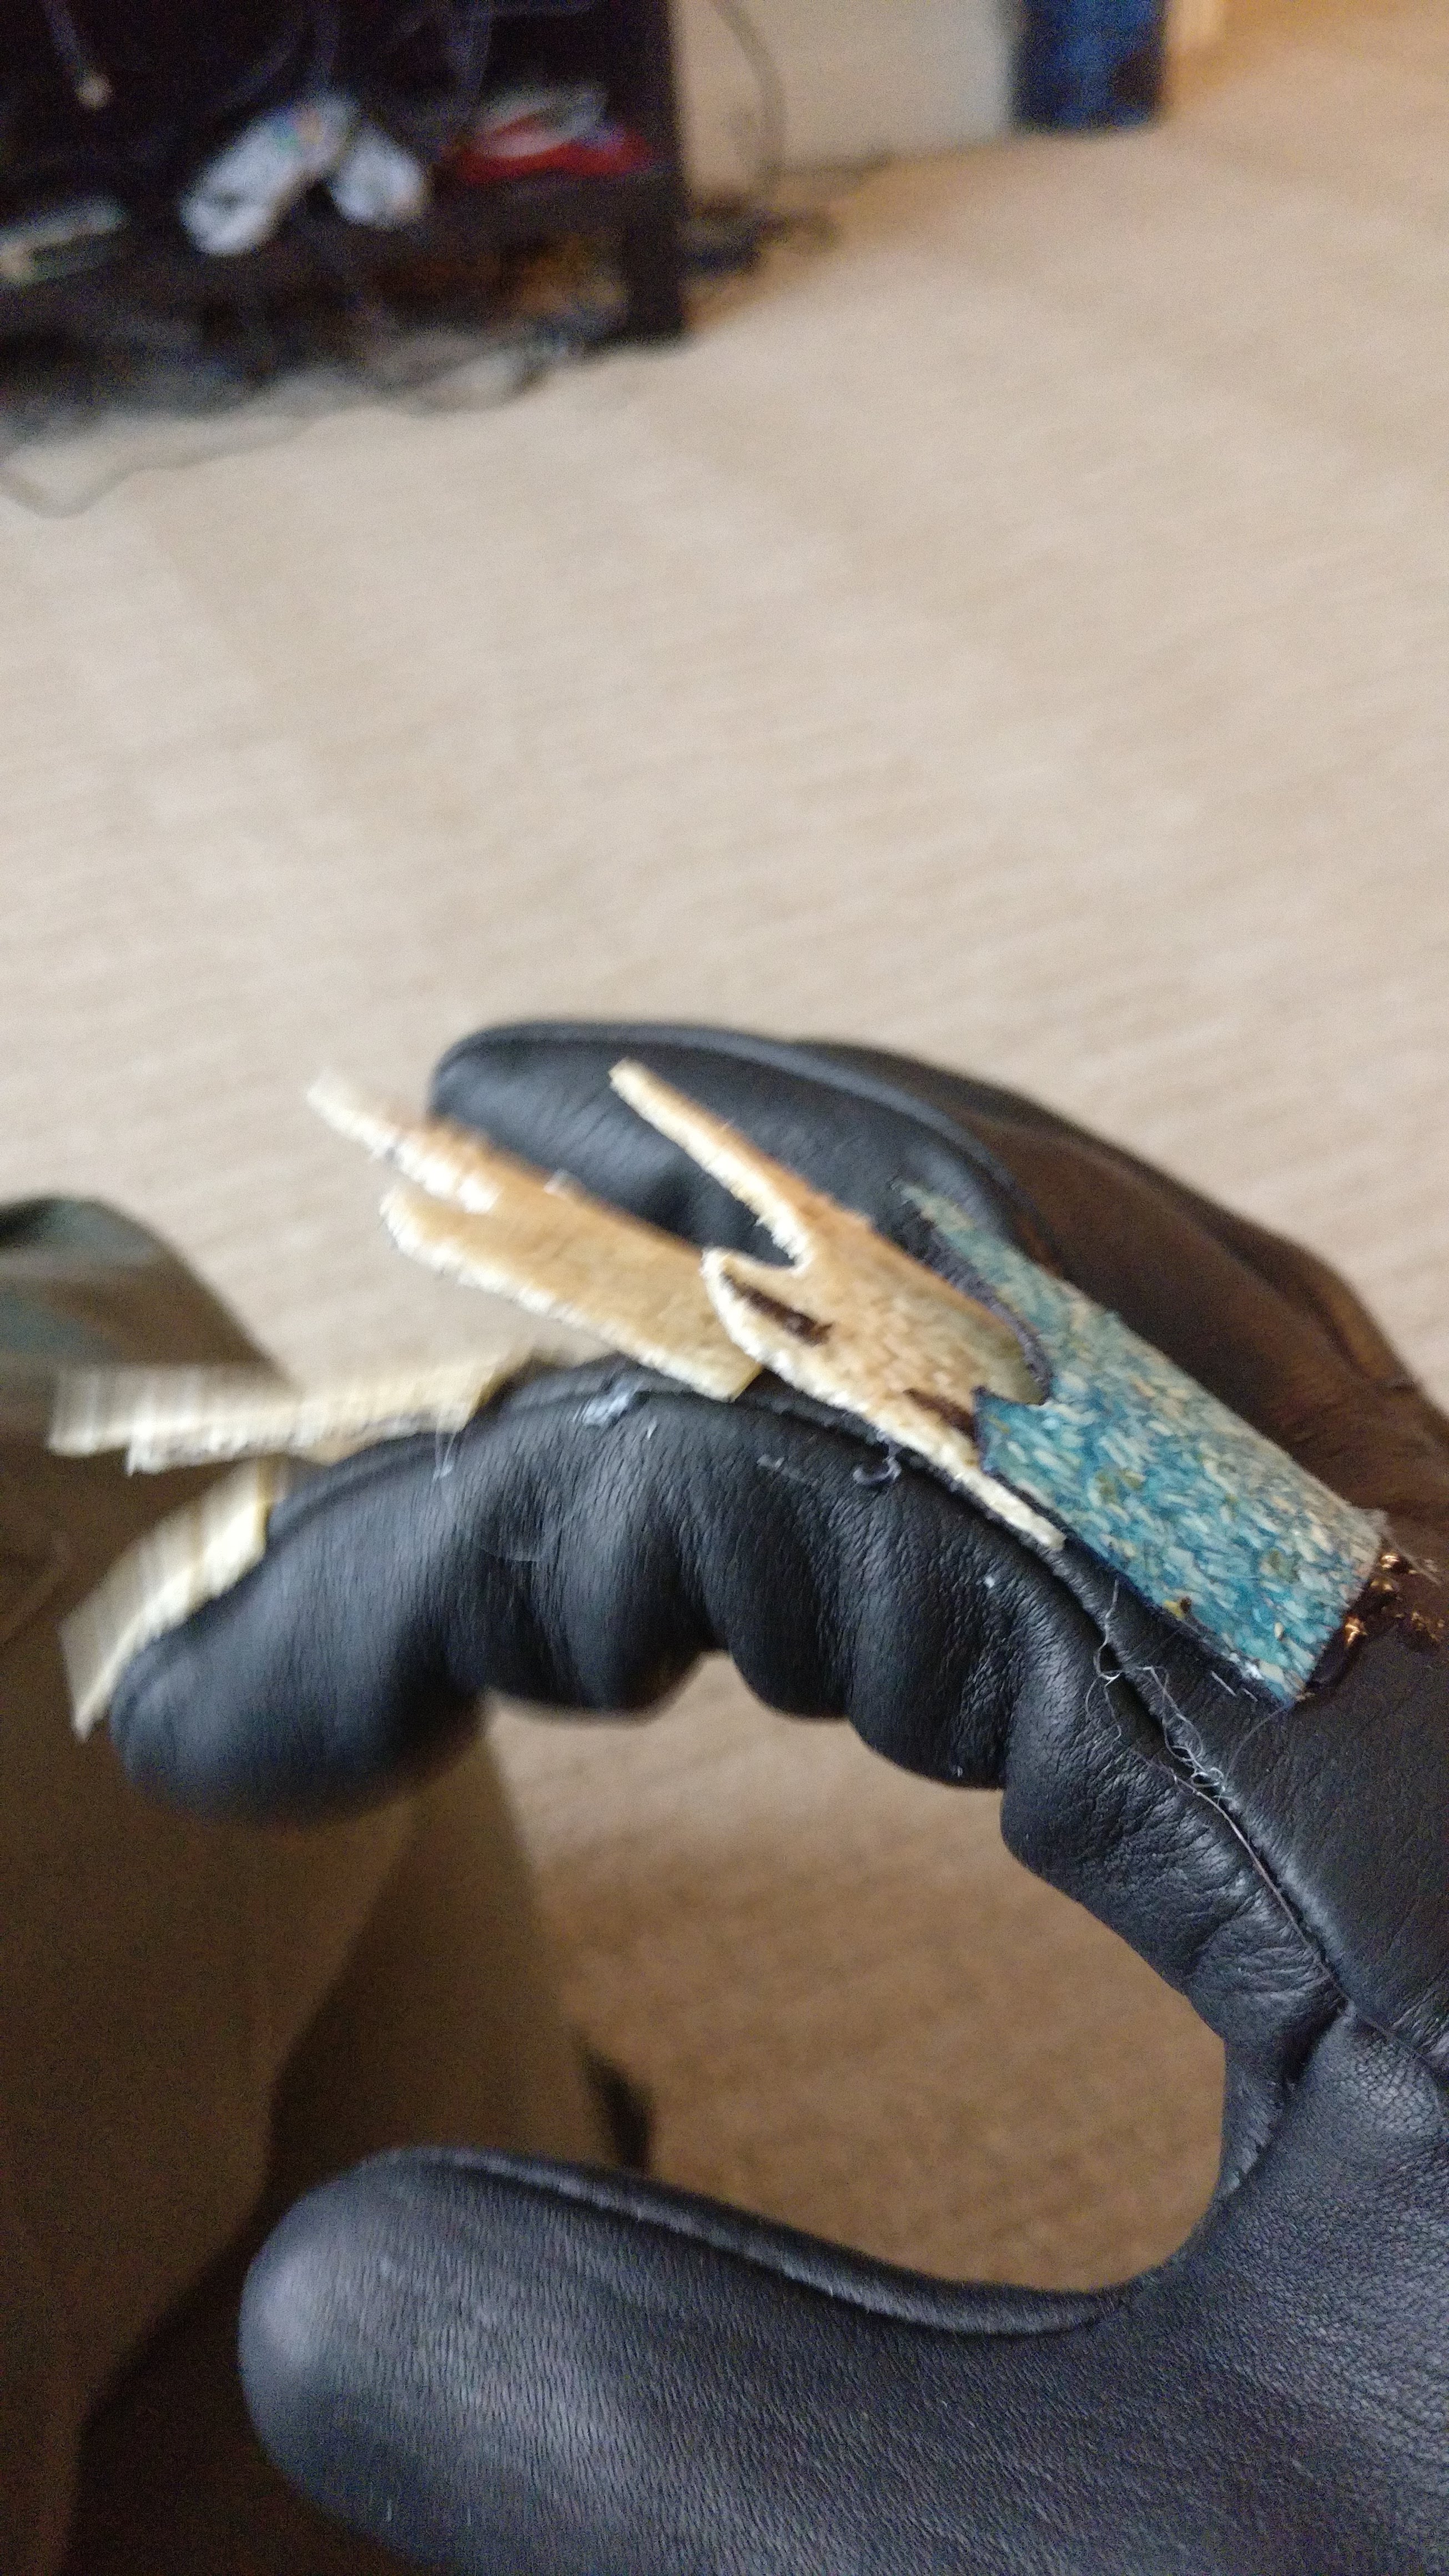
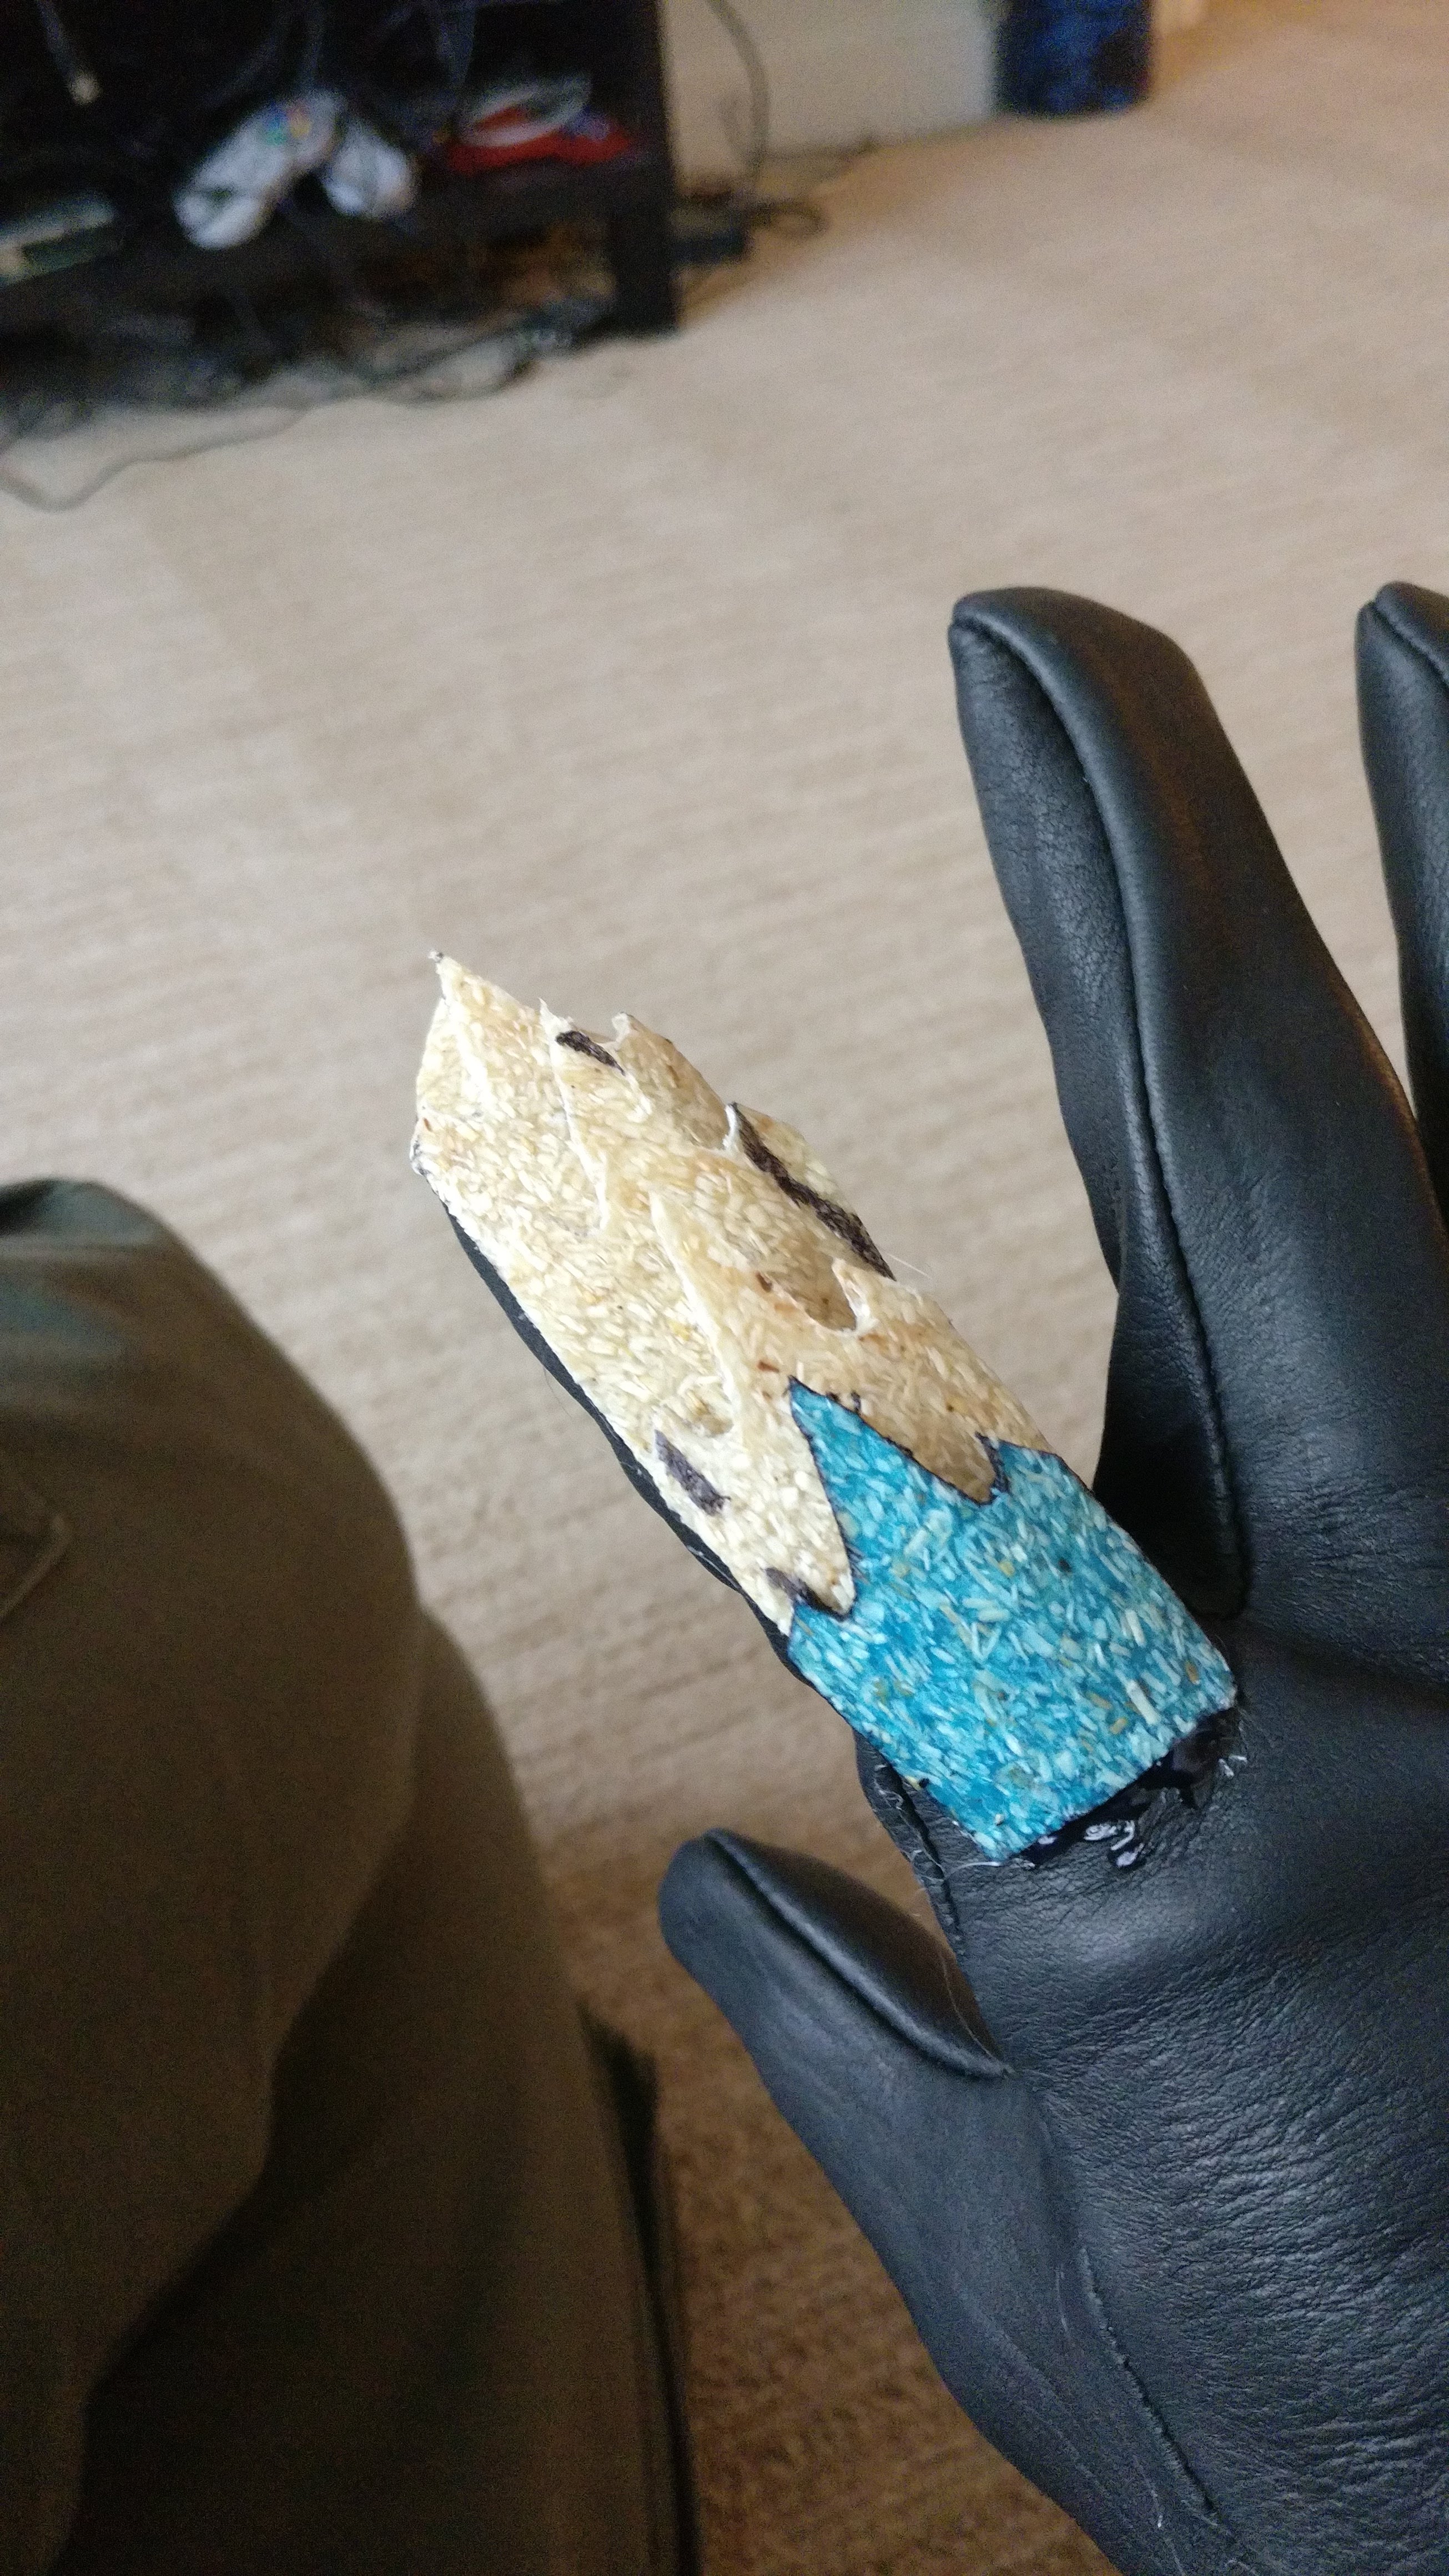
As I said before, I wish I had thought of flattening the treeflx earlier, if only to make cutting easier. At least I was efficient in other ways:
This …. just took ages. You know what else takes ages? Watching all the Lord of the Rings films. At least I could do this in the background as I worked. One of the more difficult parts of this was I only had one hand to mold and glue - since the other hand had to be in the glove so things were pressed on in the right way while hot. Yes, I could have bought a fake hand … alas for hindsight.
Every so often I would check functionality - could I curl my hand without pieces breaking off, could I grip things, etc, just to make sure I wasn’t losing that.
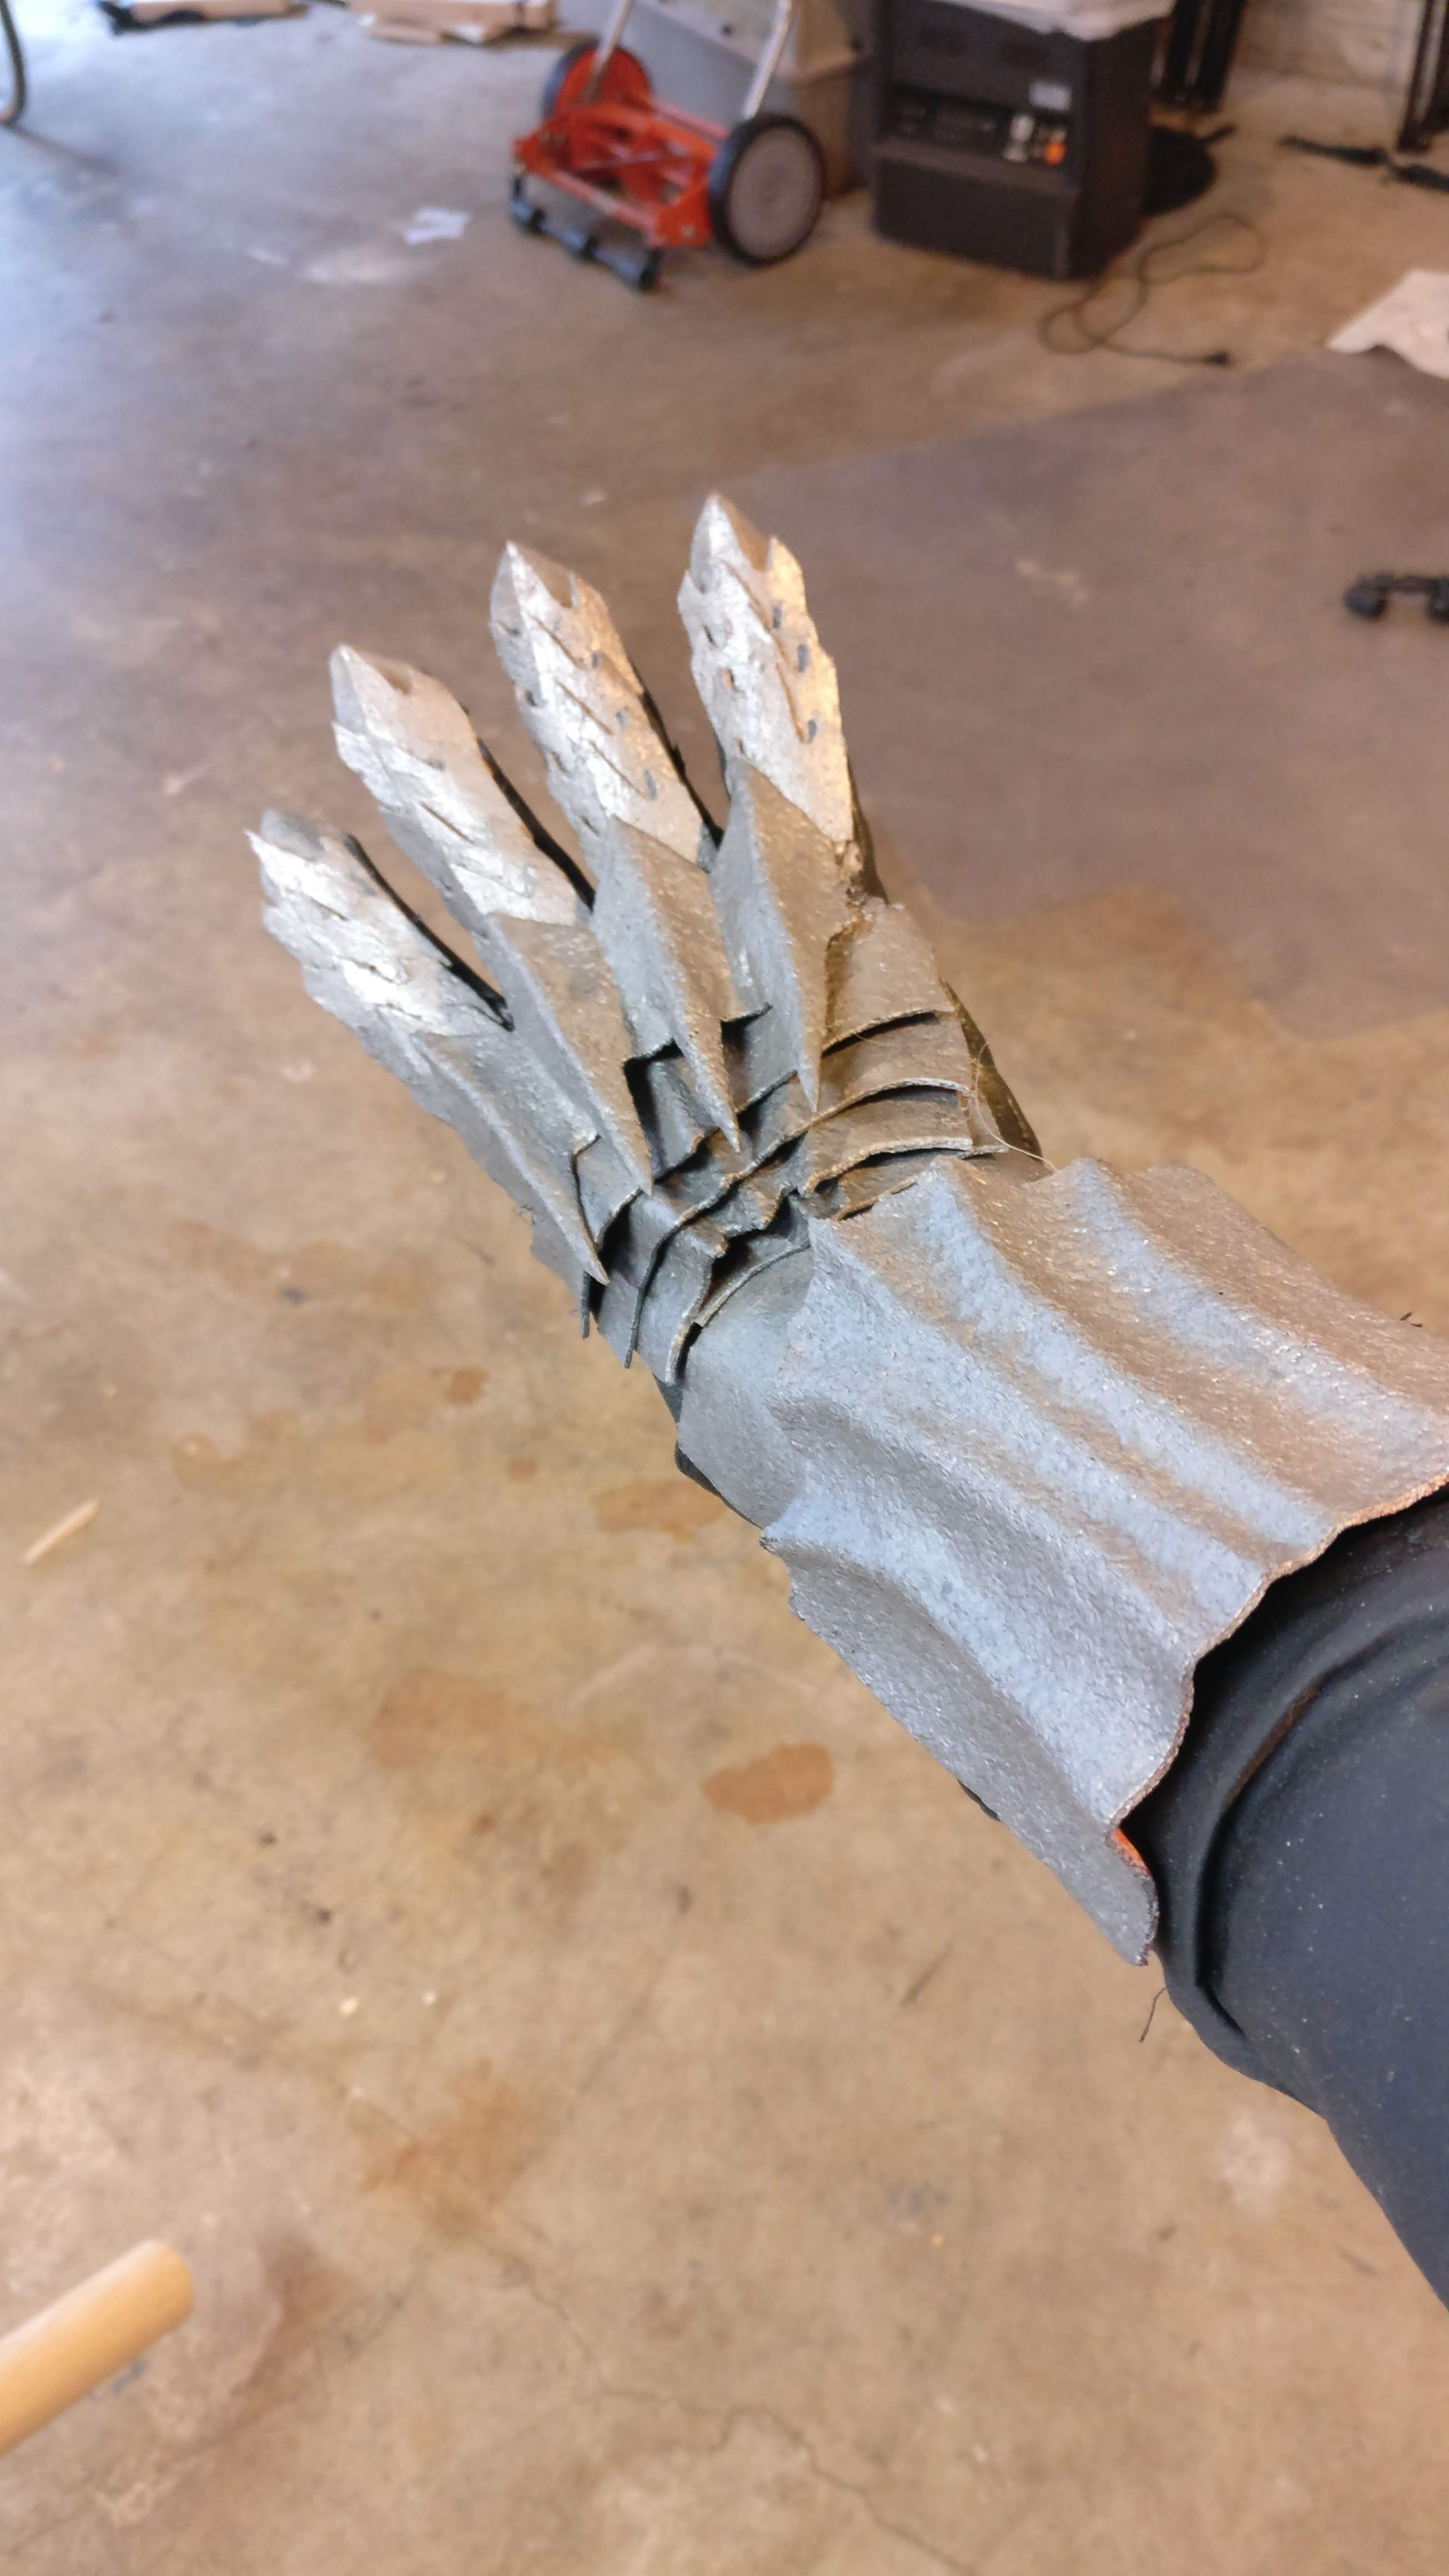
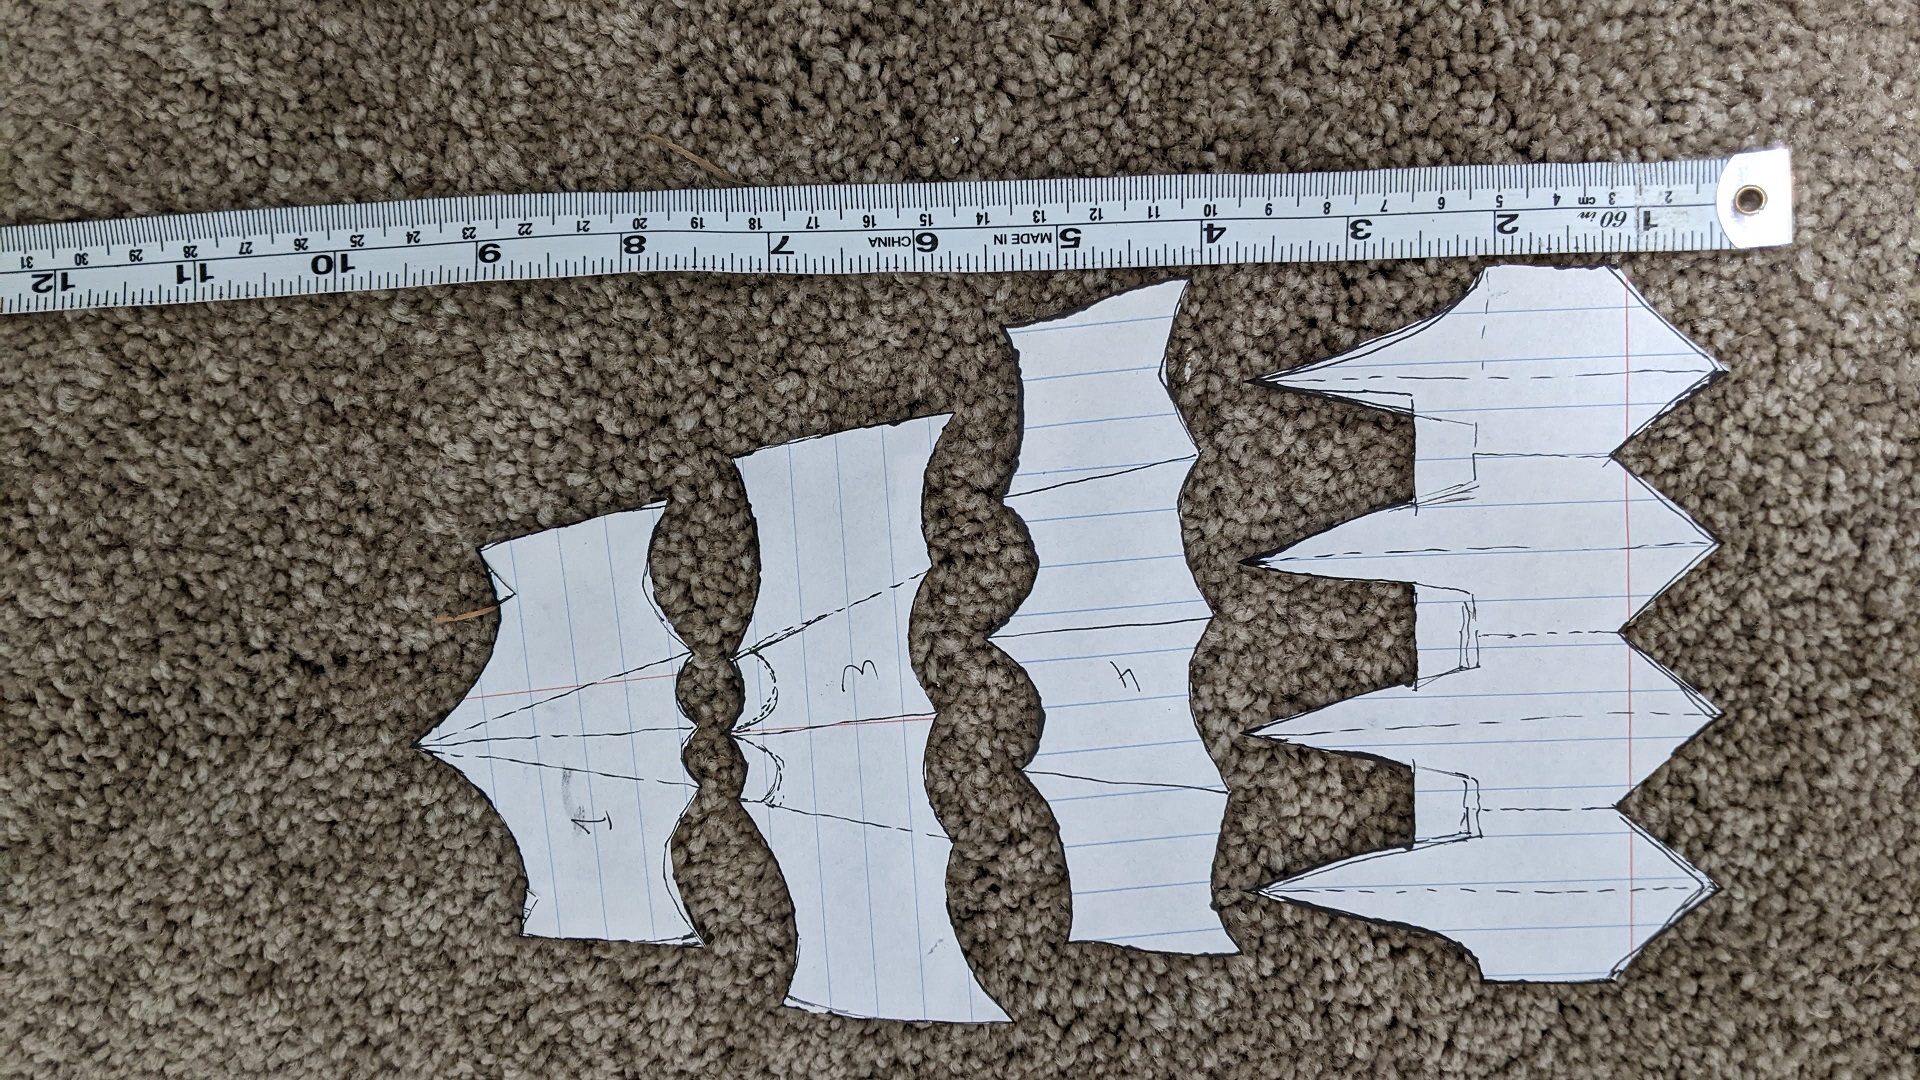
The knuckles and the back of the hand came next - let’s take a look at the templates:
Again, there’s many ribbed/webbed/whatever plates leading down the back of the hand, and this has proved difficult over the years in that whenever I take it out to wear it I inevitably have to reglue some part of this - the pieces are just not a nice shape to sit on the hand. Ah well. Cut from template, mold with two hands, stick to back of one hand, repeat.
I worked all the way down to that flat piece on the wrist, which also hit the end of the glove and I figured that was a good stopping point for the gauntlets - at the time I wasn’t sure if I would do a wrist piece or not.
The rest of the arm
This part involved the most guesswork. There’s probably less than 5 seconds total where you can see the shoulder/upper arm/wrist armour of the Witch King at all, let alone clearly. It’s in a few broad shots, where I think the entire character is completely CGI:

These weren’t particularly helpful, so I didn’t overindex on them. Then there’s a few close ups where you can see the shoulders easier, as well as a separate shot I used for the wrist. Let’s start with the wrist.
The wrist
This is most clearly seen in the shot that pans down from behind, facing Eowyn, as W-K lifts his flail - “clearly seen”, yeah right.
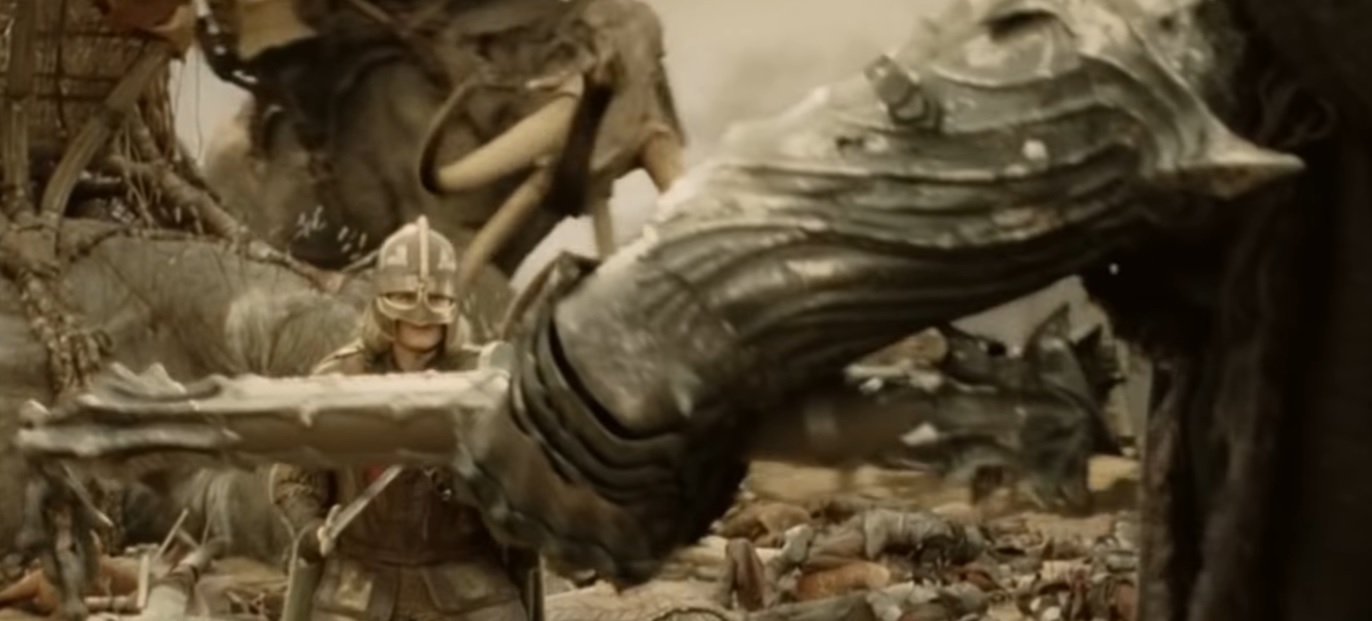
So again, I watched that scene to death. Here’s my notes:
- goes from gauntlet to elbow
- there’s lines that curl around and along the forearm that are either sunken in or raised. I think raised.
- There’s that honking great elbow spike
- The elbow piece appears to be separate from the forearm
- a bunch of other detail like straps and connection points
Good grief. I tried some experiments with a fluted piece near the start of the wrist, that would lead into this, but it didn’t feel right:
First off, I made a decision: only one piece, no spearate elbow piece or wrist piece from the main forearm piece. This is already getting immensely complicated and elbows are a pain. I flattened out one large sheet, heated it up, and just straight up pressed it onto my arm. Not comfortable at all, but it’s not hot enough to burn me and it worked. The raised grooves were easy, just really thin cuts rolled into cylinders and heat-pressed on, taking care to keep them raised. I kinda winged the patterns a bit, cos we get to see so little. The elbow spike I made separately, and gave it some structure to make it more robust, and then heat-attached it to the end of the arm. Here’s the attempt thus far:
Those ridges need to be smoothed down, but otherwise I was quite happy! Again this was difficult since I could only use one hand at a time and I’m heavily right handed, but I made do.
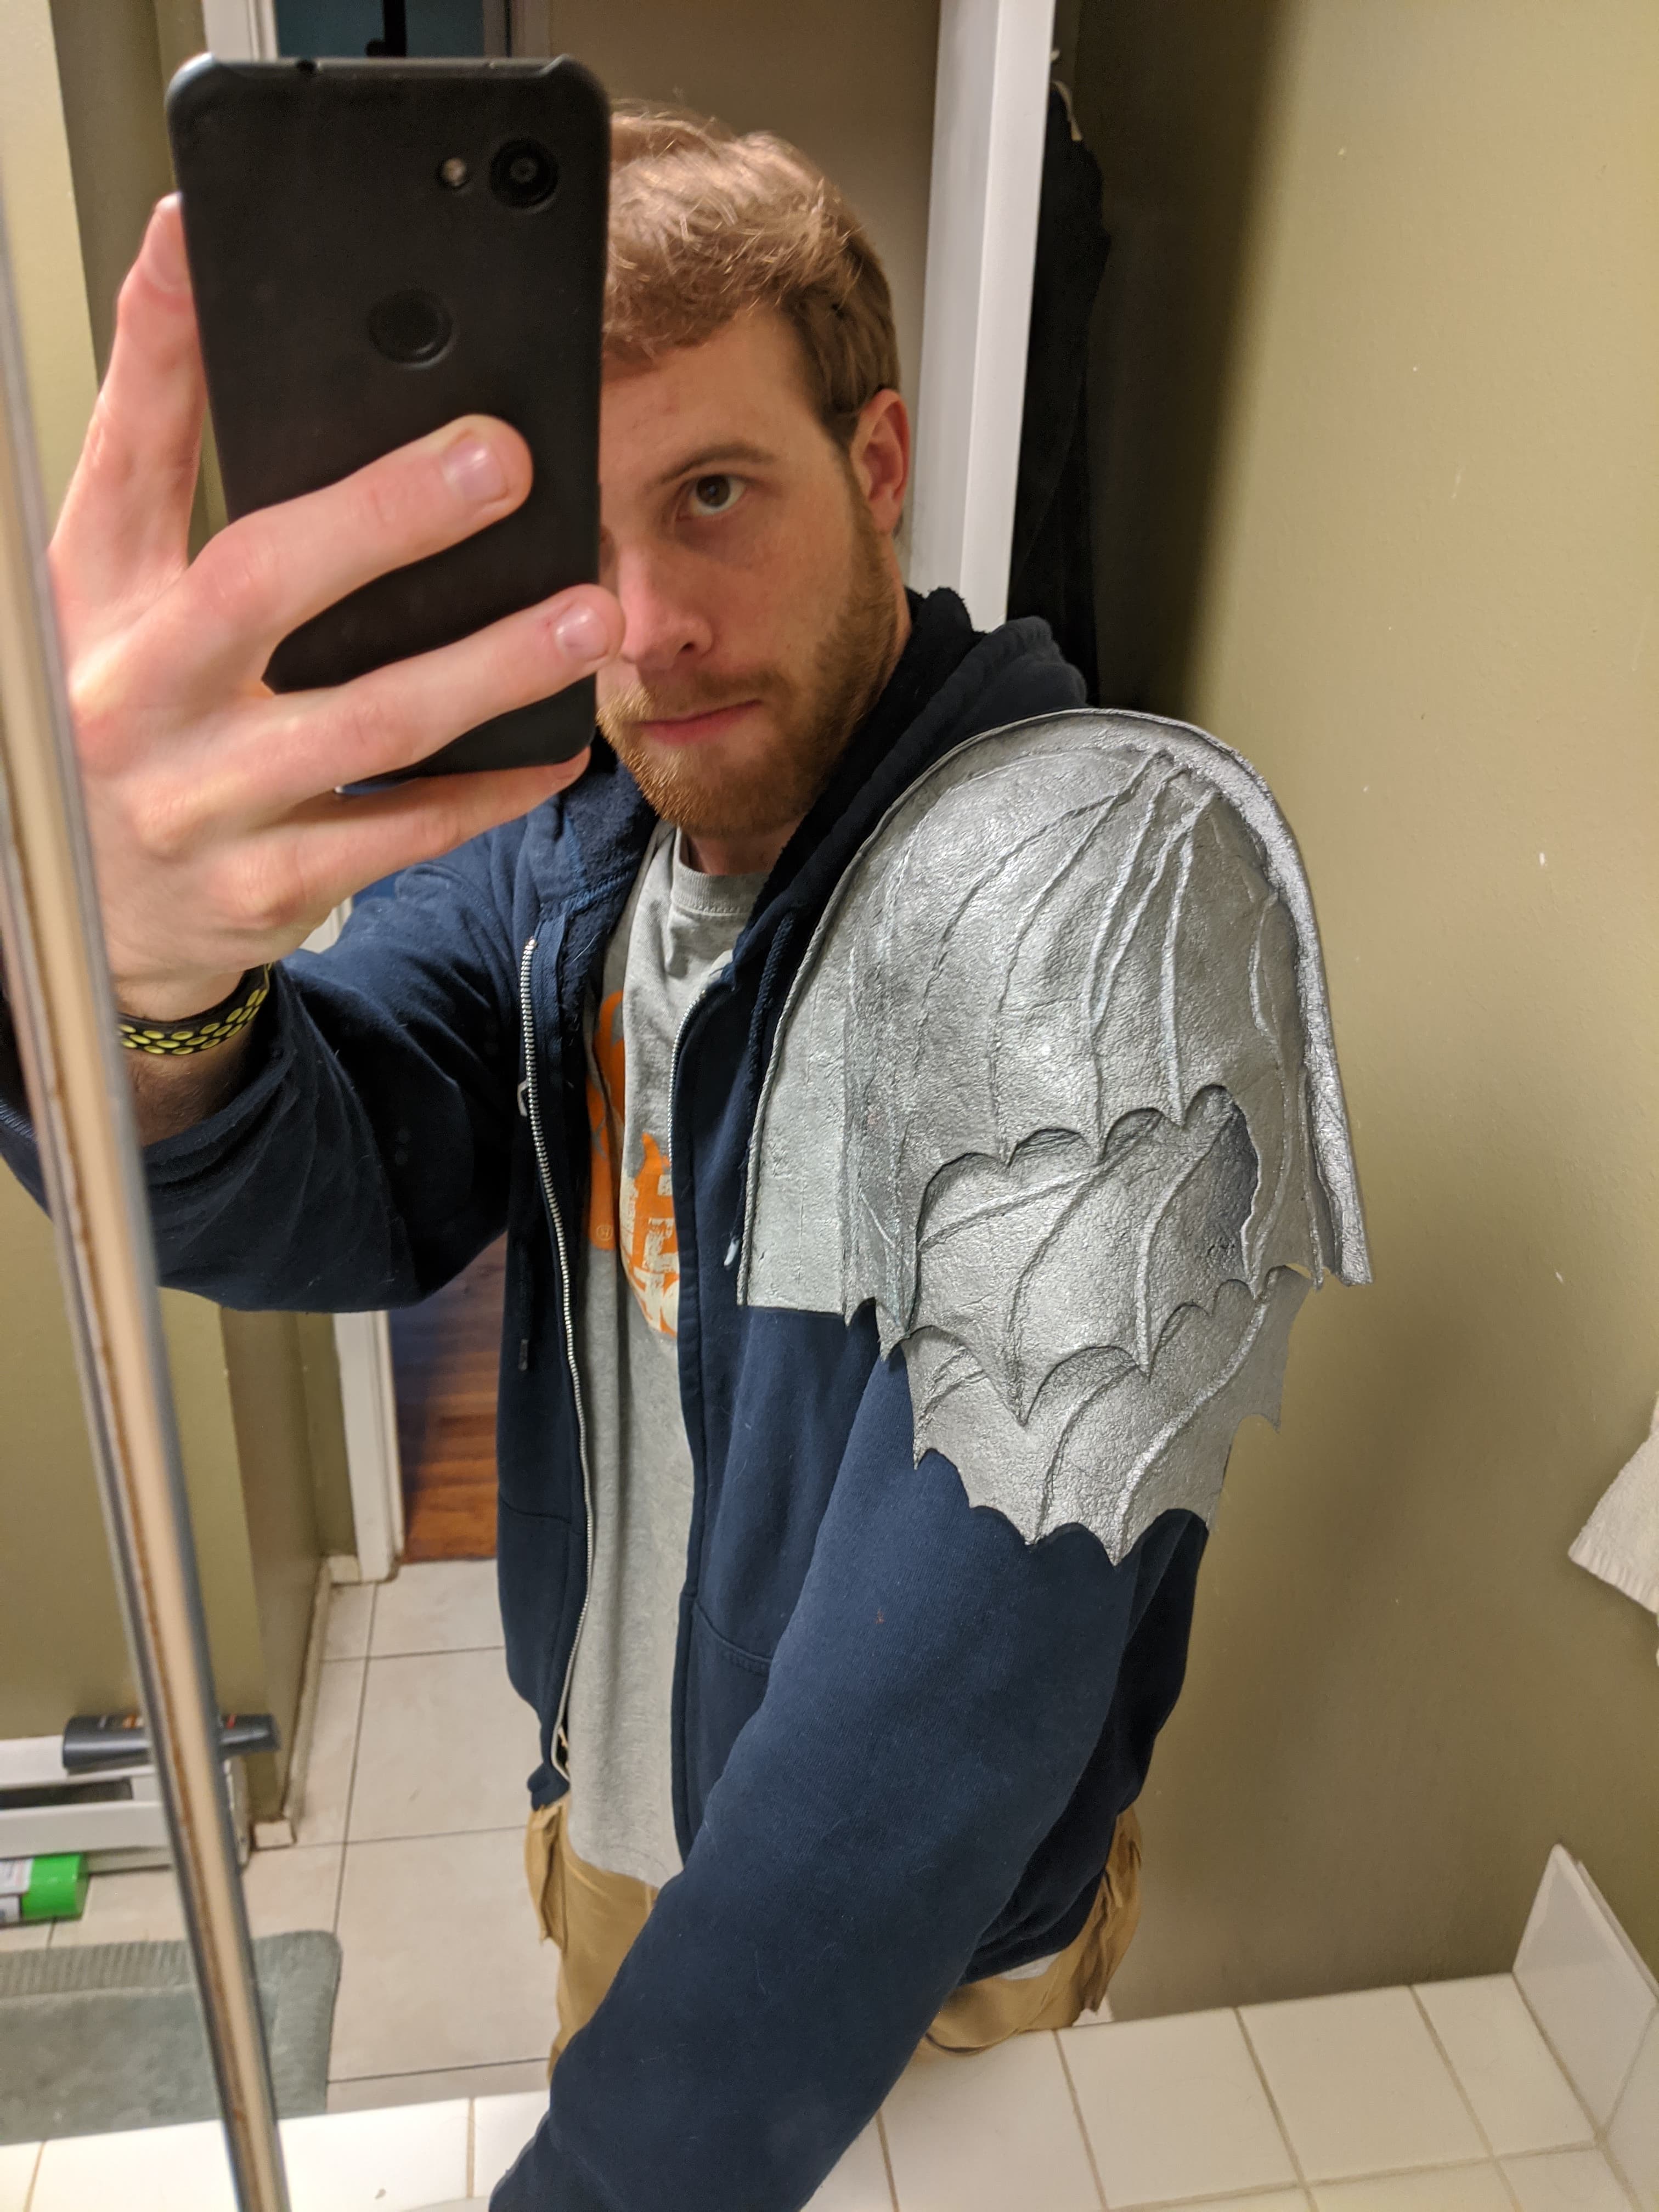
Shoulders
Let’s examine the few shreds of footage there are of the shoulders:
Notes:
- there’s a … bar? wall? That sticks out, at the closest line to the body
- Again, swirling ridges whose pattern I can guess at
- webbed bottom
- several plates below that. Possibly 3, maybe more
I decided to just do three plates total, including the shoulder, cos it really started extending down my arm, and if all you see of these plates is the webbed ending then I might as well not make much of them, and they all have to squish onto my arm.
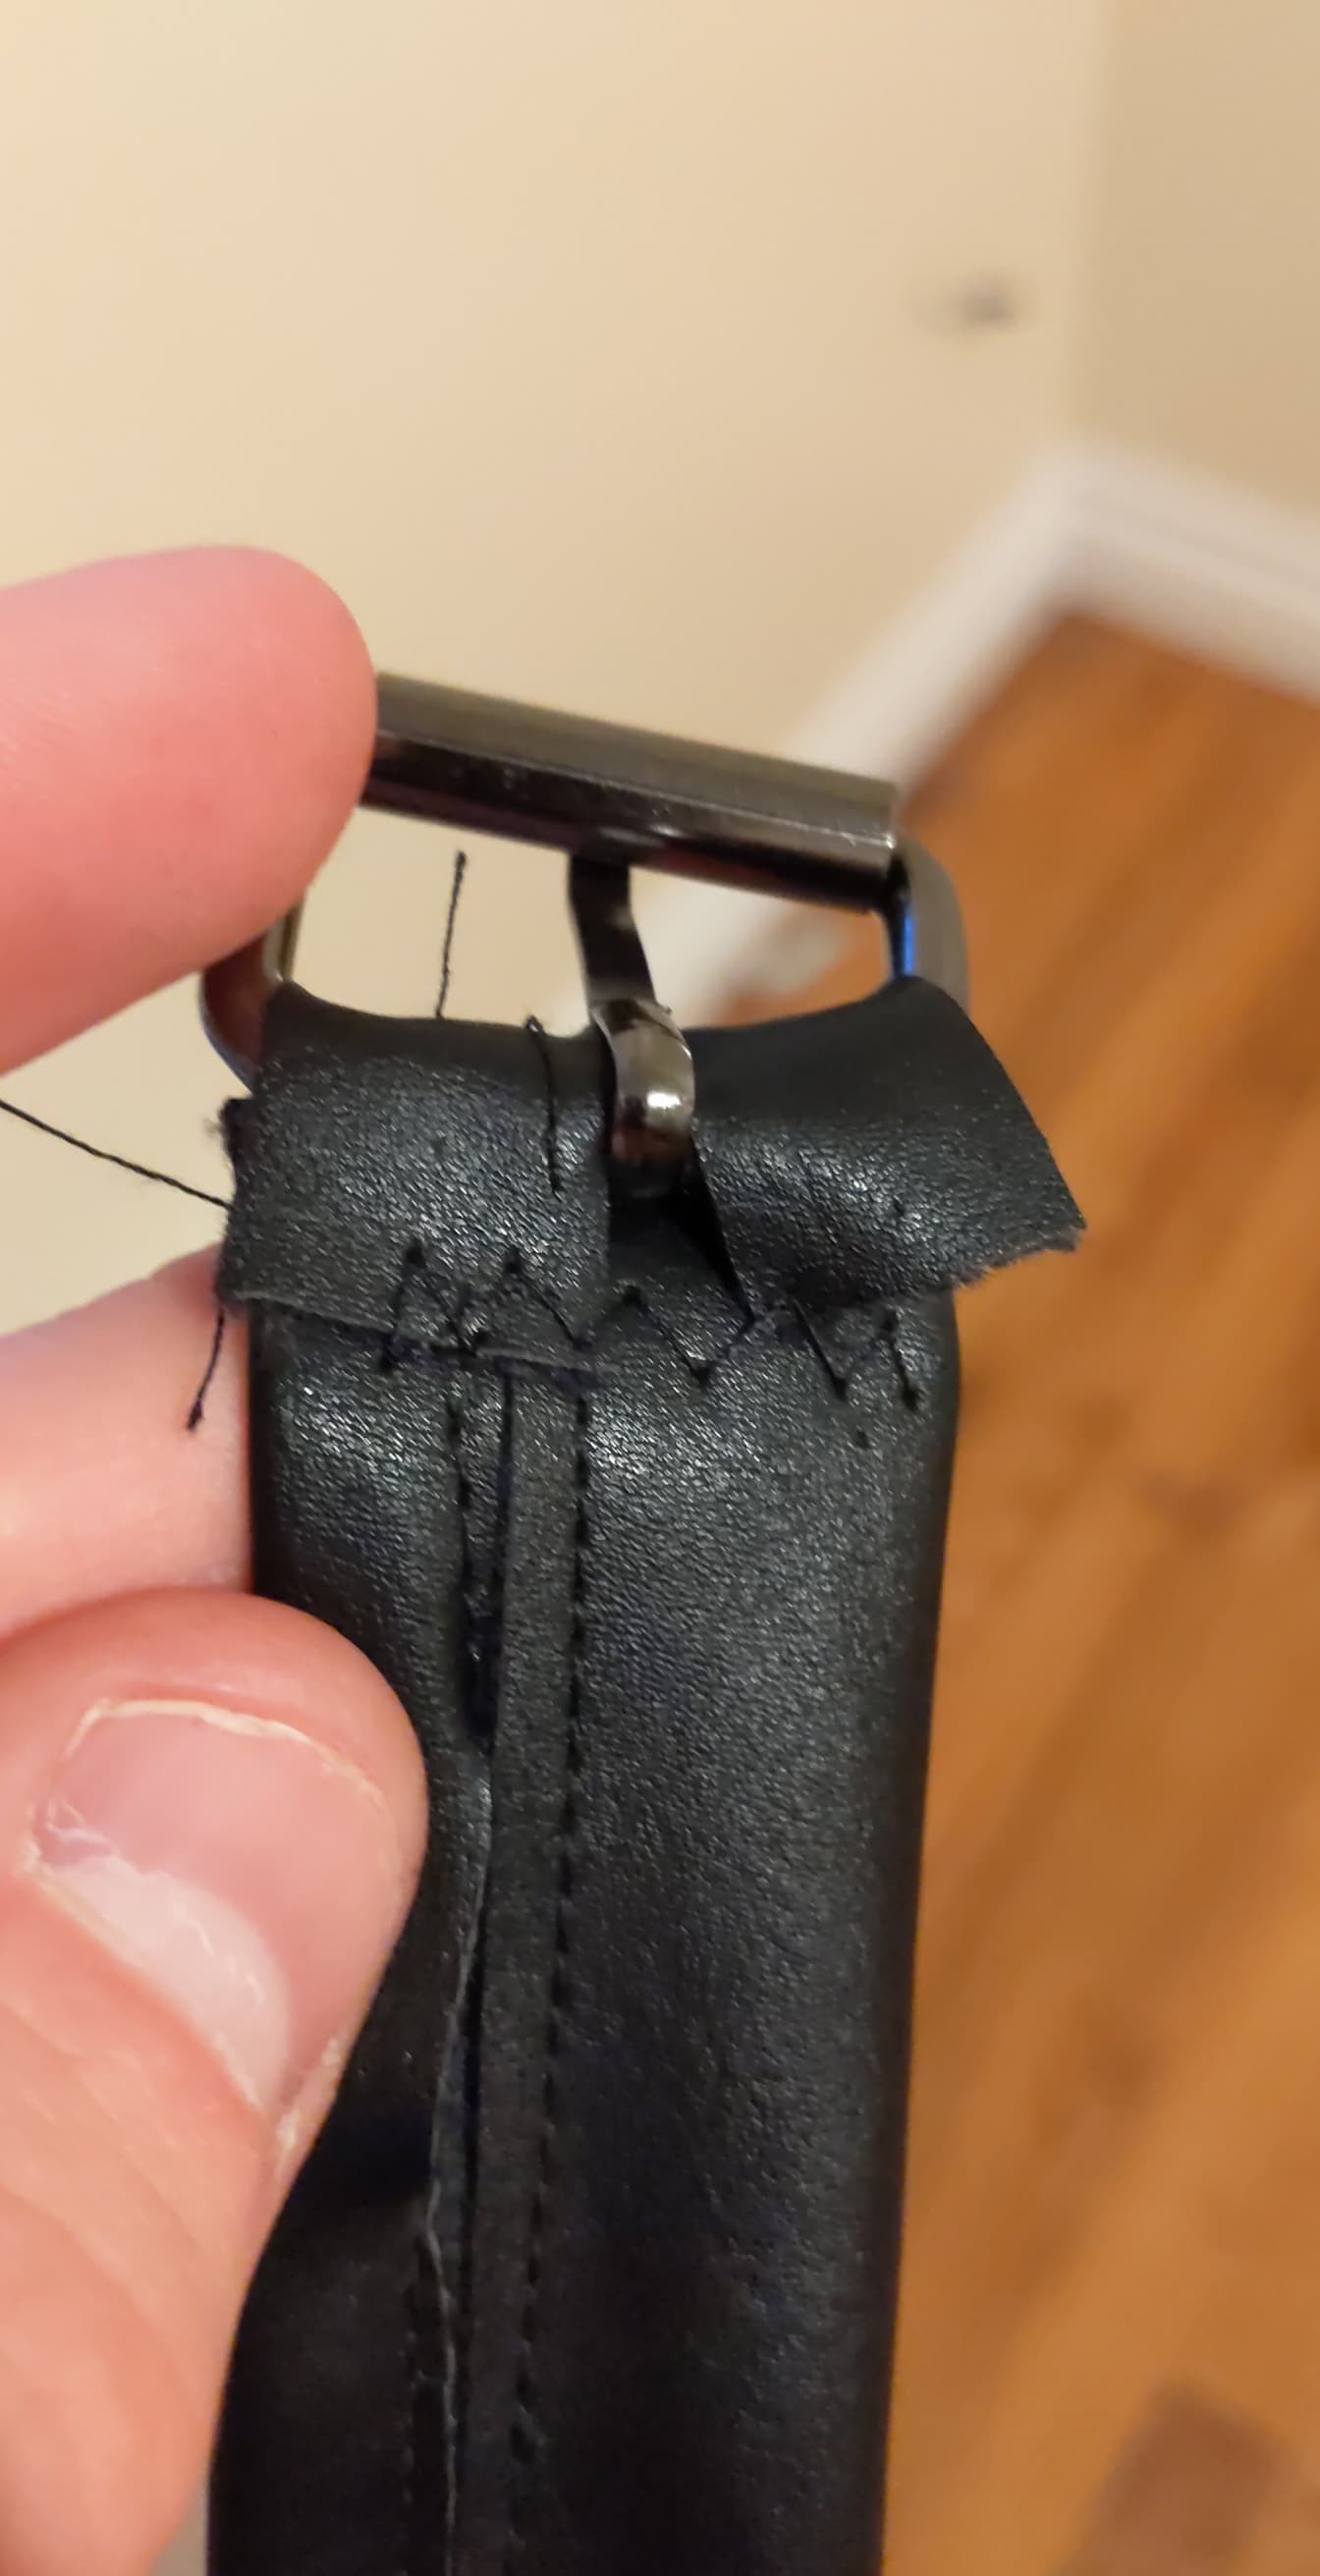
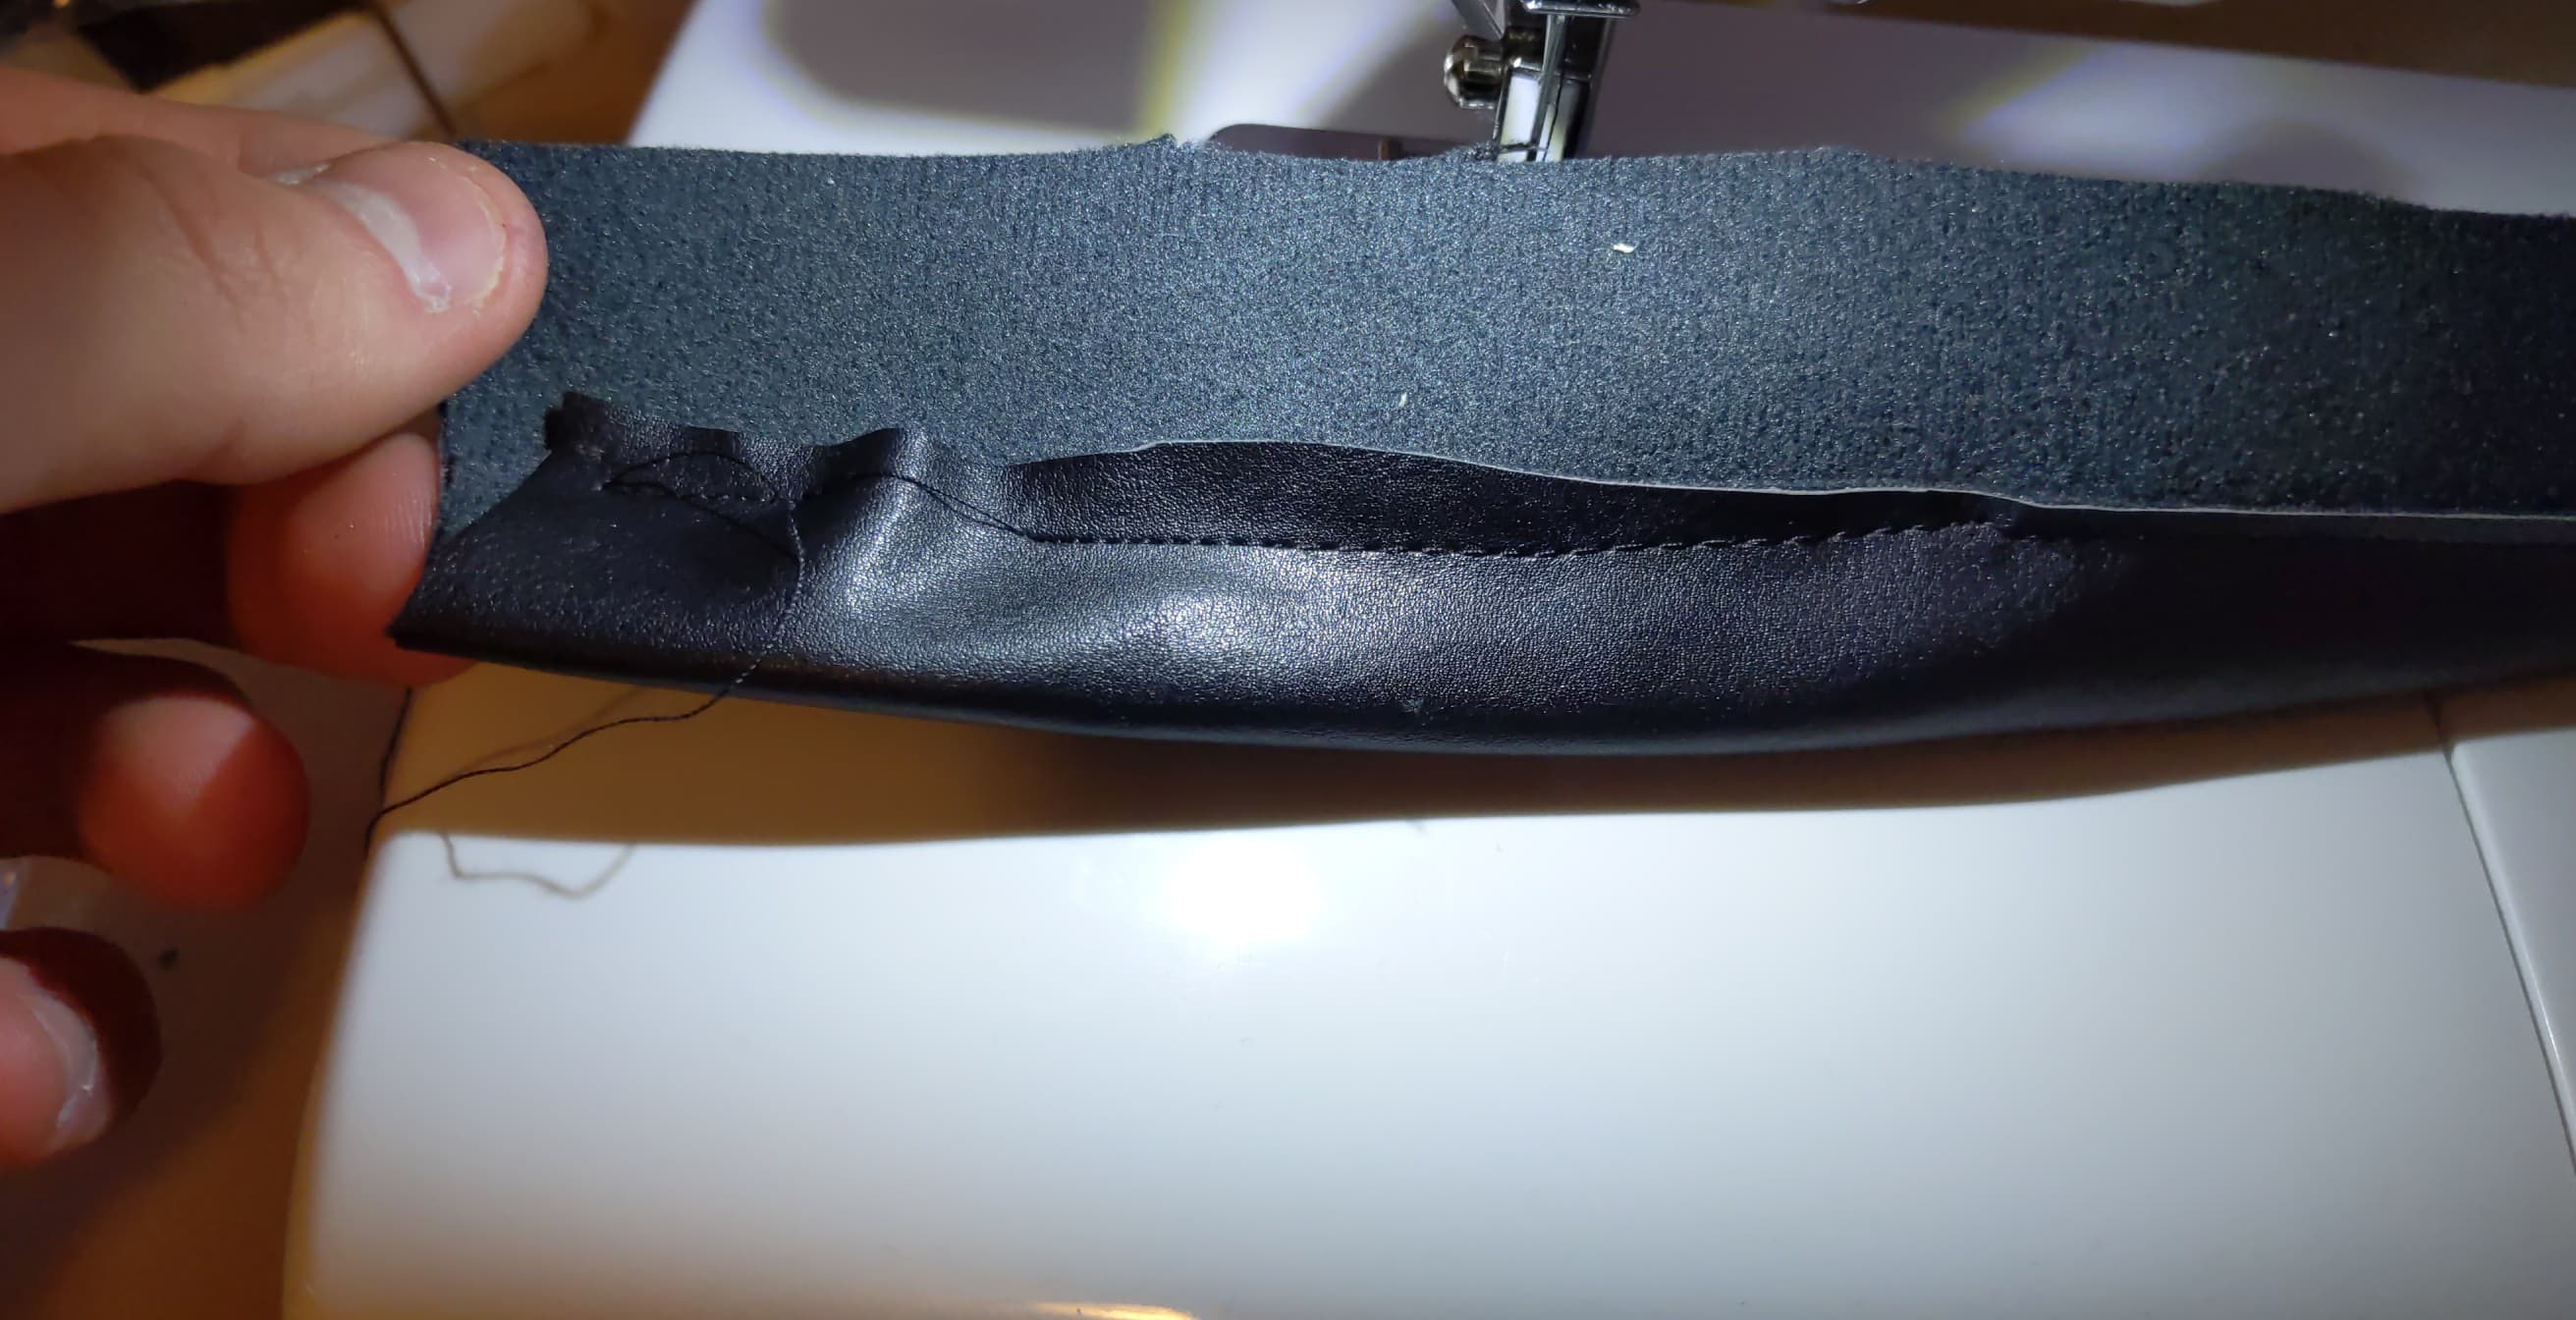
There’s also the question of how these will attach to my arm. I decided on straps and buckles, attached on the inside of all the pieces at the right points (somehow), and buckled under my arm. For the shoulder piece, theoretically it would also rest atop my shoulder and so stay on that way. There’s perhaps better ways, but this ended up working. I made my own straps from left-over pleather, by sewing long cylinders, sewing buckles onto the end, and then using small screws and washers to hold these to the armour. This final part was not great, but it meant they could rotate, instead of being glued in. Here’s a photo
I started with the shoulder piece, as that was the biggest and probably the most defining. A large plate, rolled thin, heated and pressed against my own shoulder to get the basic shape. I padded this out to a nice rounded shape with an orange and my hands, as I felt it should be more filled than my scrawny lil shoulder, and more even. For the webbed end I just picked a design and cut it out:
That ridge that sticks out was a long thin strip that was heat-molded onto the end, and this took several goes to get it sticking strongly at a right angle. Another bar on top, and it was working pretty well. Again, all this was was major guesswork from a few tiny frames. The ridges I added last, and this was retrospectively a mistake, so I did this differently for the other shoulder. I suppose one was going to be a test case anyway, and I ended up liking the test case. The curved shape made it really hard to smooth the ridges out properly, which is so much easier on a flat surface. Regardless, I was happy with the final product:
You’ll also note the next two pieces in that photo (and they’re all painted, I did not document this properly at the time). These followed fairly simply, in that I largely copied the ridges, the webbed end, etc, and just made sure to make them short so they would fit one under the other, and without going too far down my arm. I also made sure to not make anything too uniform (ridge placement, webbed end, etc), as I felt this armour exhibited a bit of … not haphazard design, but not the standard uniformity one expects of armour. I did left-right mirror every piece though.
Bringing it all together
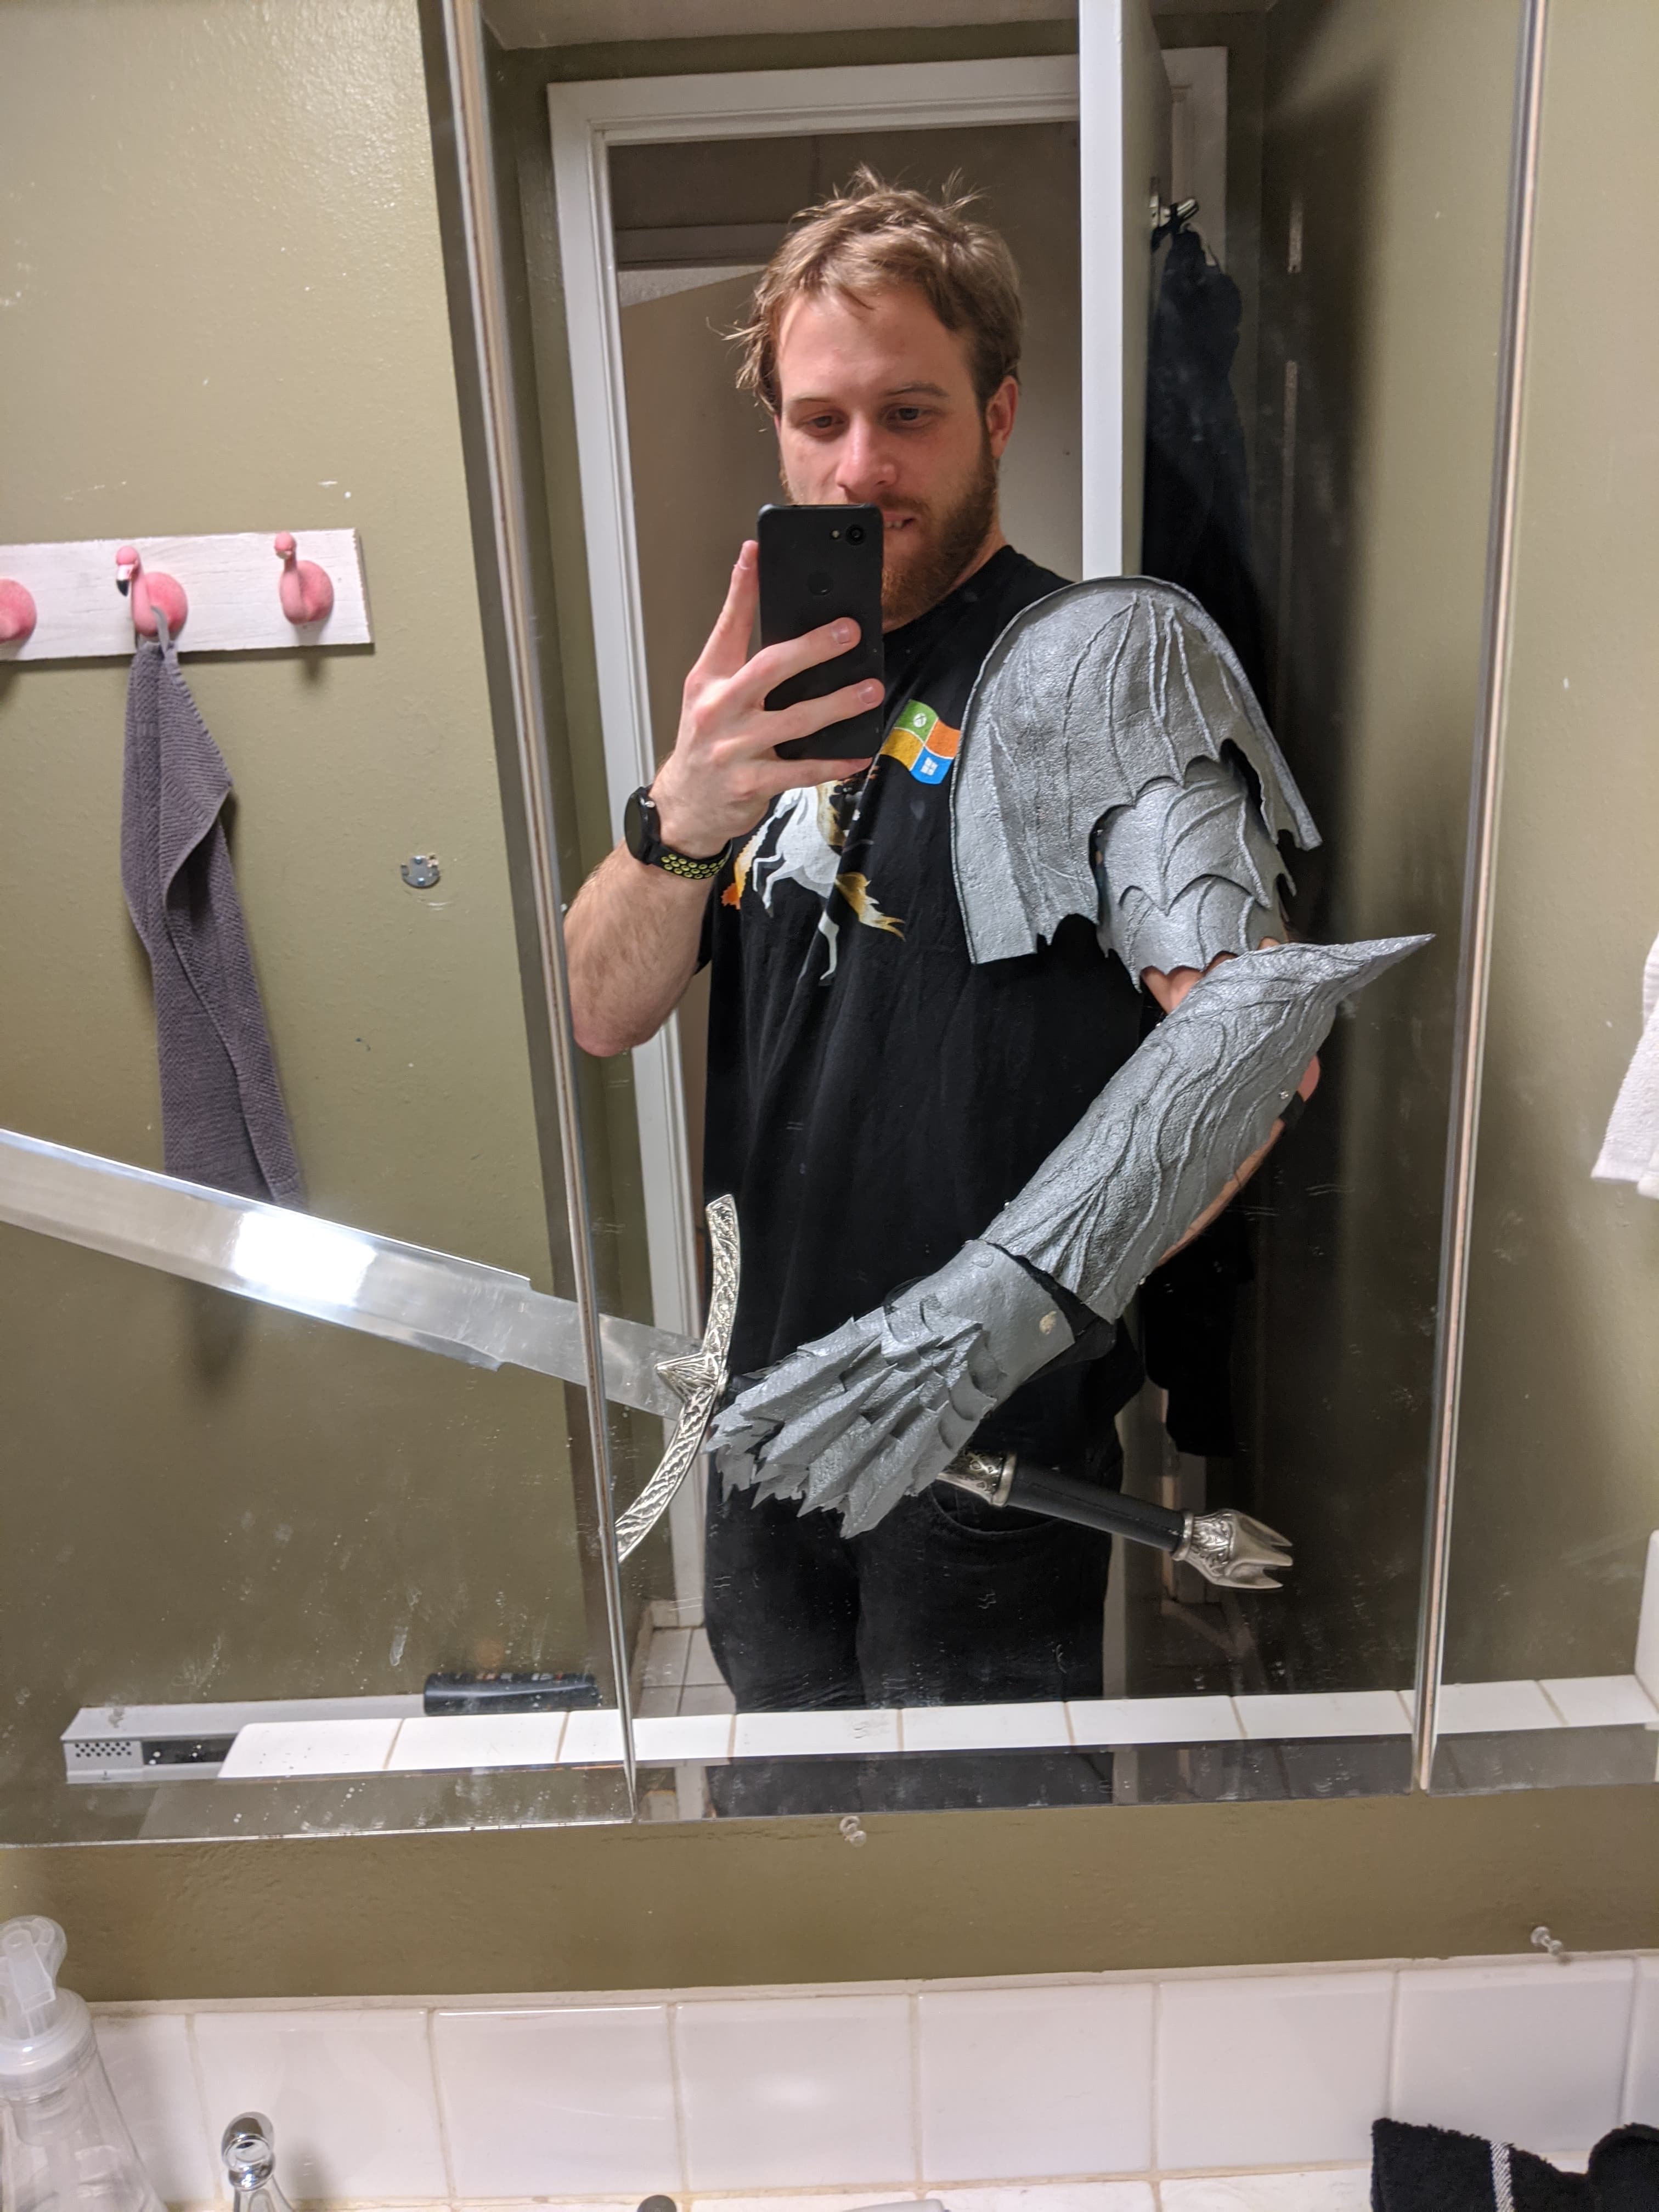
It felt so great to put this all on, it came together really well!
Painting
I actually had decided on painting back when I started the gauntlets, in that i picked some spray paint colours and gave it go, and followed this theme when I finished each piece incrementally, as you can see in some of the above photos.
But as with the flail, I felt this was too … matte, and went with the glue treatment and a slightly different gray, something more worn and metallic. I think Home Depot called it “hammered steel”, which felt quite appropriate for armour.
Layer of new paint, layer of glue, and these pieces were looking schmicko:
The cloak
I wanted a long black cloak with wide sleeves, and a hood. Someone online linked me to one they found online for general costume-ness, and they’d used this for their Witch-King build. Sounds good to me. Bought one, but it was too … clean, as you can see in the photo. This needed to be aged. Tatty. Worn. The actual one in the film looks thicker and heavier, and the purchased one was thin, light, and wavy. However, there’s a practical element: costumes are hot and I was going to sweat in this. Might as well keep it light.
I subjected the cloak to some fast wear-and-tear, including brushing it with various string wire brushes intended for cleaning up metal, slashing it a bit, sewing bits together to create intentional folds so it didn’t sit too straight, and then also weighing it down - I sewed steel ball bearings that I had lying around into the bottom hem, just to keep it from being too floaty.
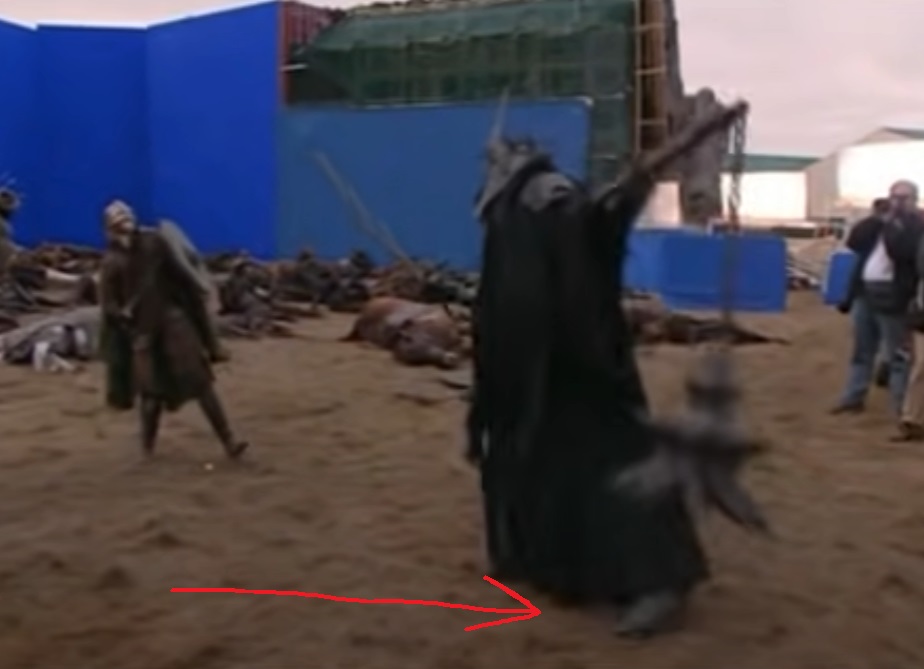
Sabatons
These were a lot of effort for perhaps something not necessary. Impractical to wear, at least. But you can see sabatons in the film - or rather, I could, due to how closely I was watching. Briefly, in the full body shots from before, and snippets in the behind-the-scenes:
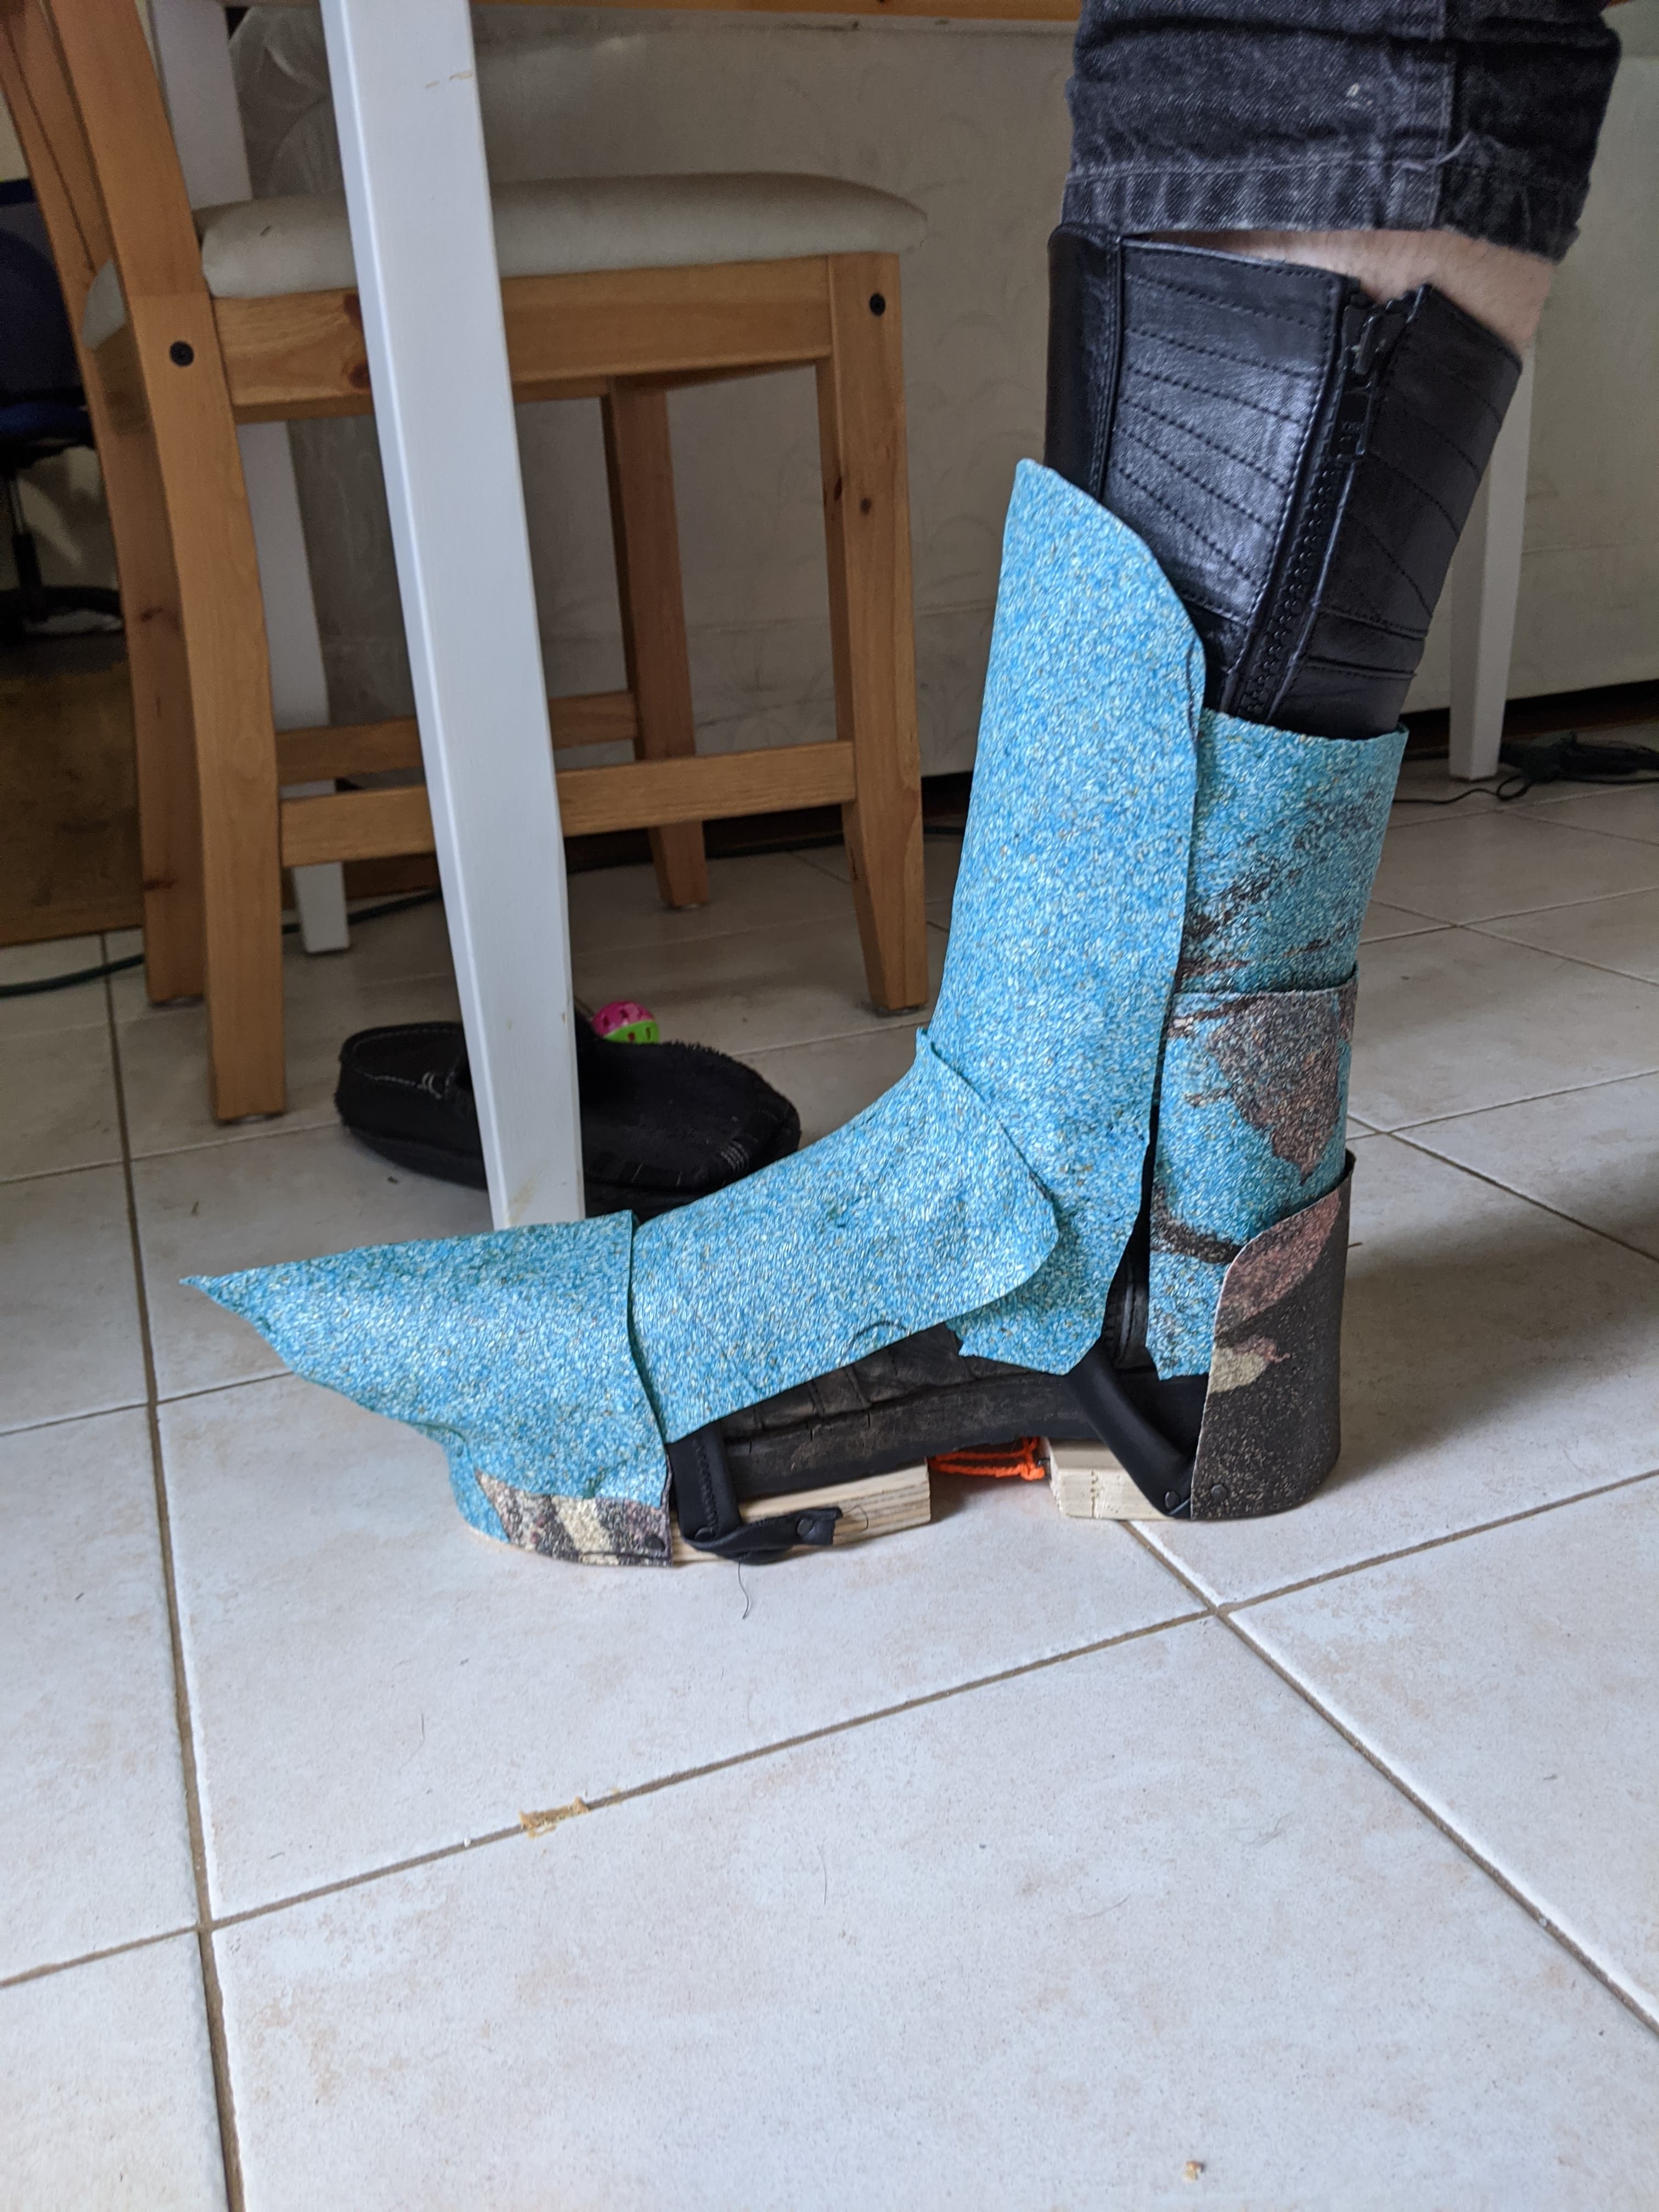
And this was also an opportunity to add some height - the actor who played the Witch King was a huge man, and I’m … not. Some more height would be nice, really get that looming feel. To give myself height, I started off by making a boot shape from some left over 7-ply wood, and holding my shoes in with plates of treeflx:
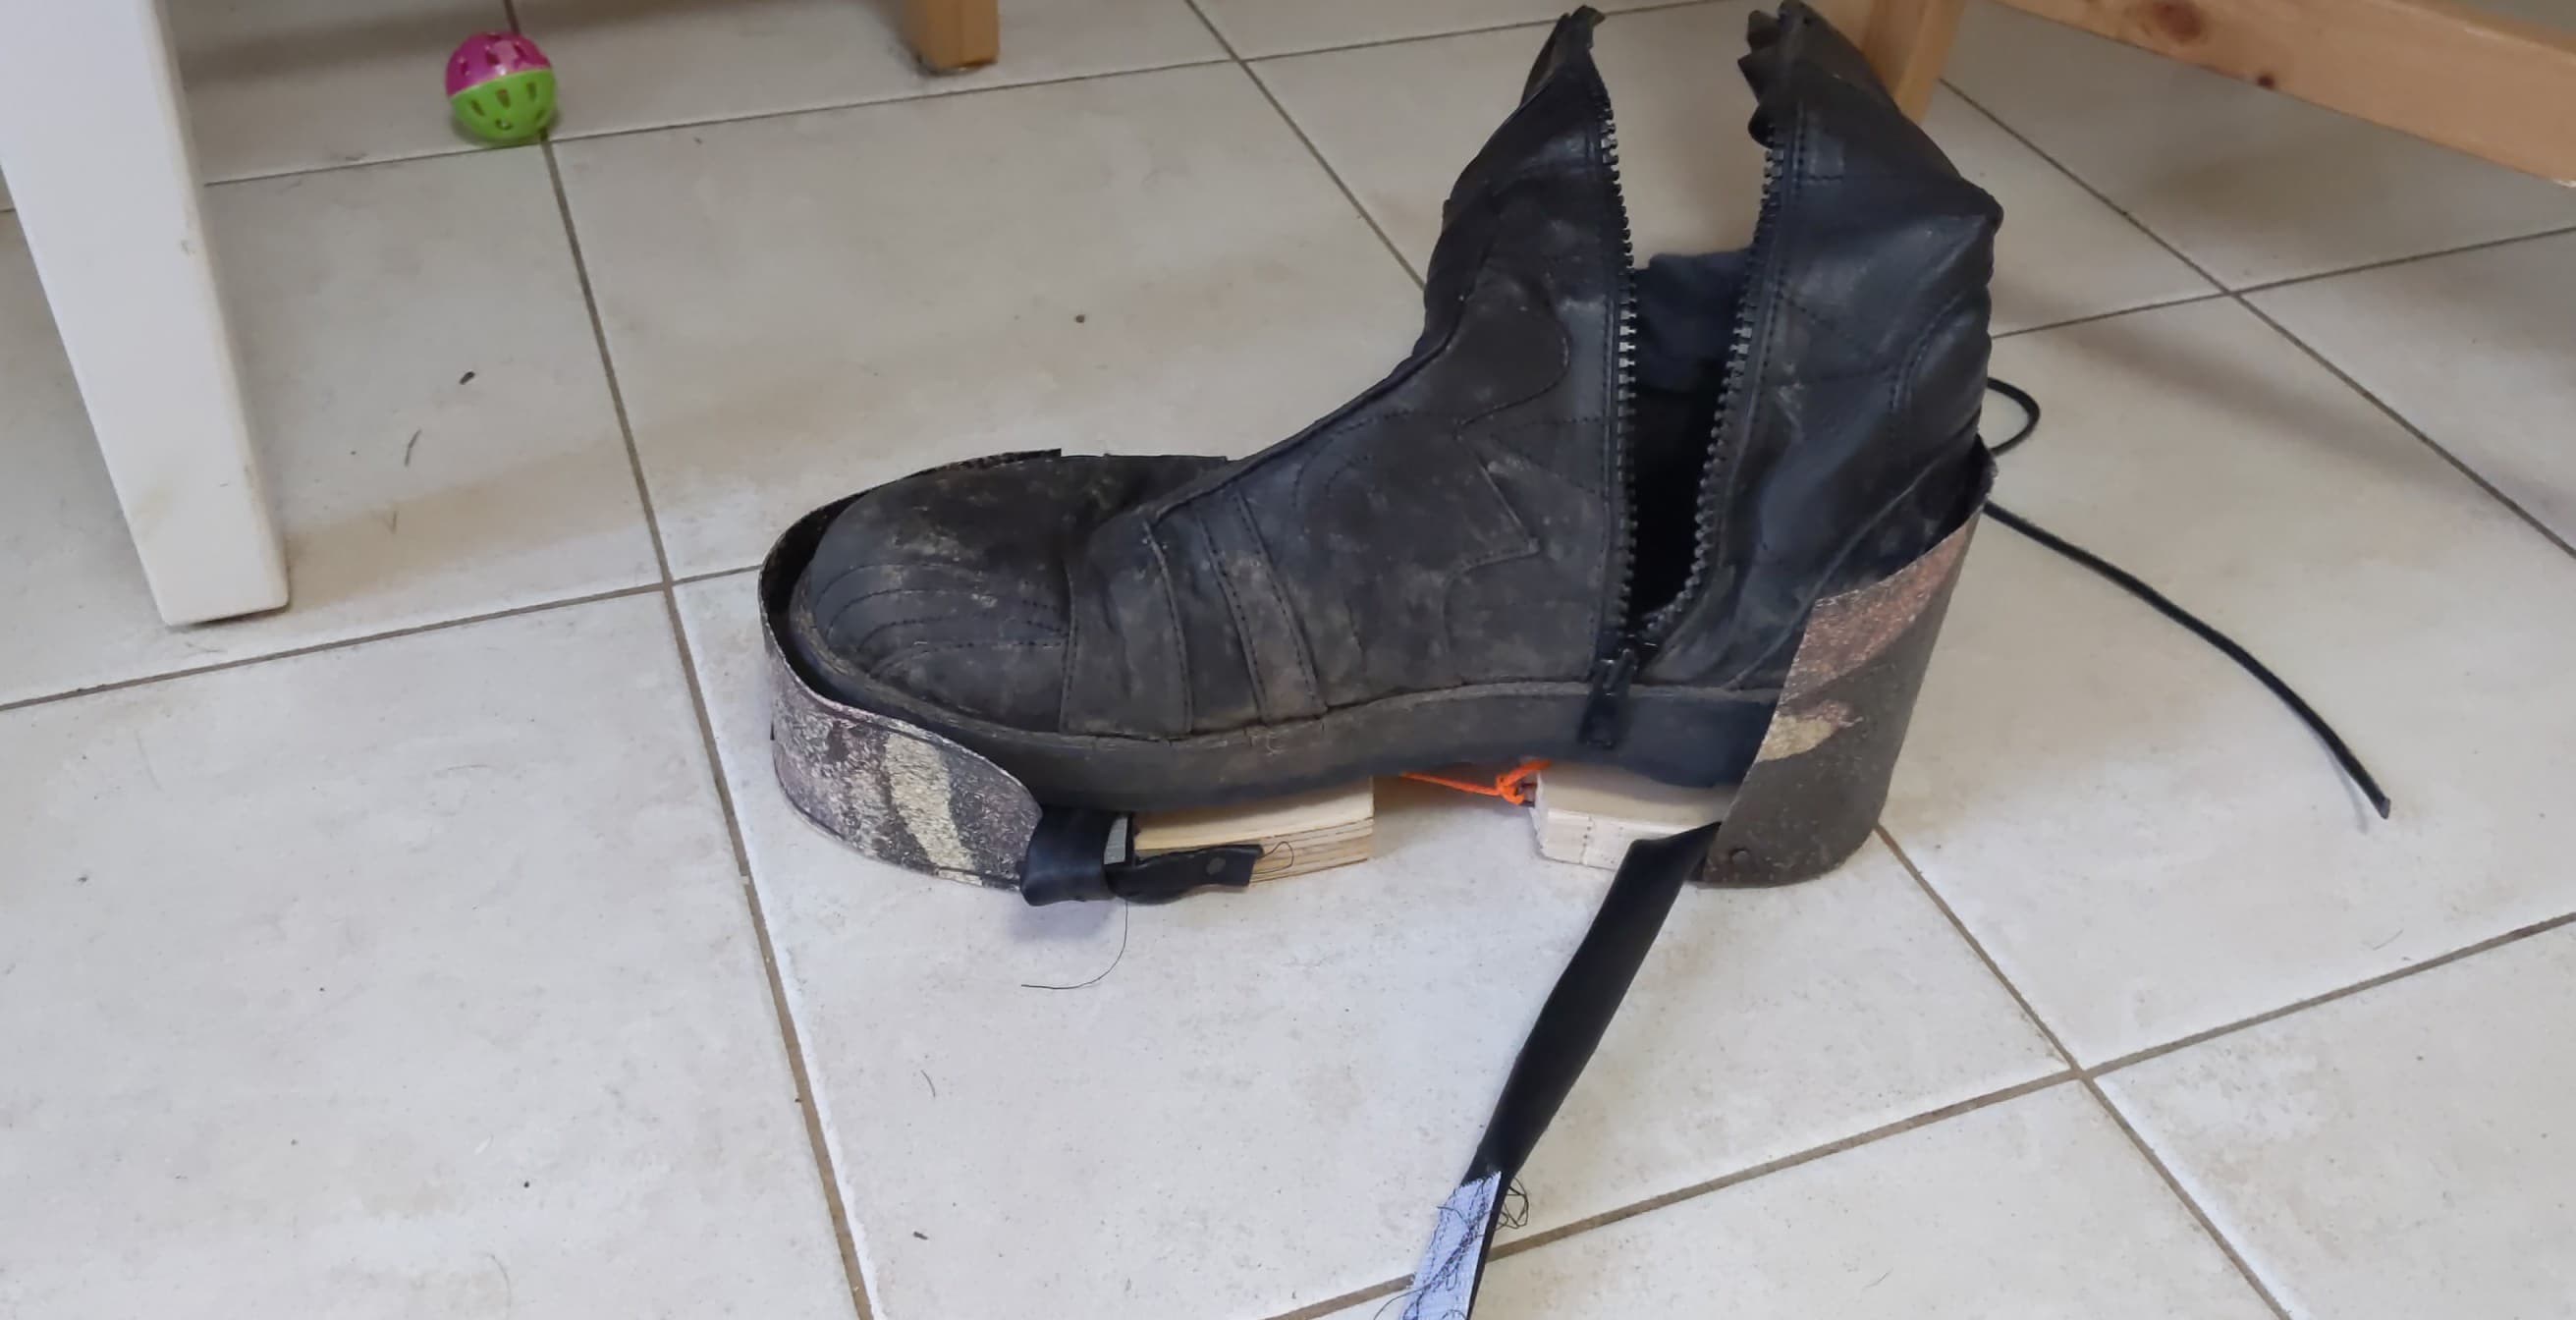
I wanted to not have an entirely rigid sole, hence the split pieces that would be loosely connected, so I could still bend my foot. There’s next to no footage of sabatons from the film (maybe a tiny snippet), so I kinda just … made sabatons from my imagination. Had to be able to get shoes in and out easily, so I designed them with a lot of pieces that could come apart. You can see the overlaps here:
The toe spike is raised there and as soon as I did it people pointed out it looked stupid and not proper, so I later moved it down but don’t have an unpainted photo.
This was a lot of heating treeflx and pressing it against different parts of my shoe or leg, and then smoothing it out to make sure the pieces didn’t have weird creases. I then bought two long leather straps and threaded them through holes made in each piece, to tie off at the ends. Takes a while, but works and looks nice and medieval.
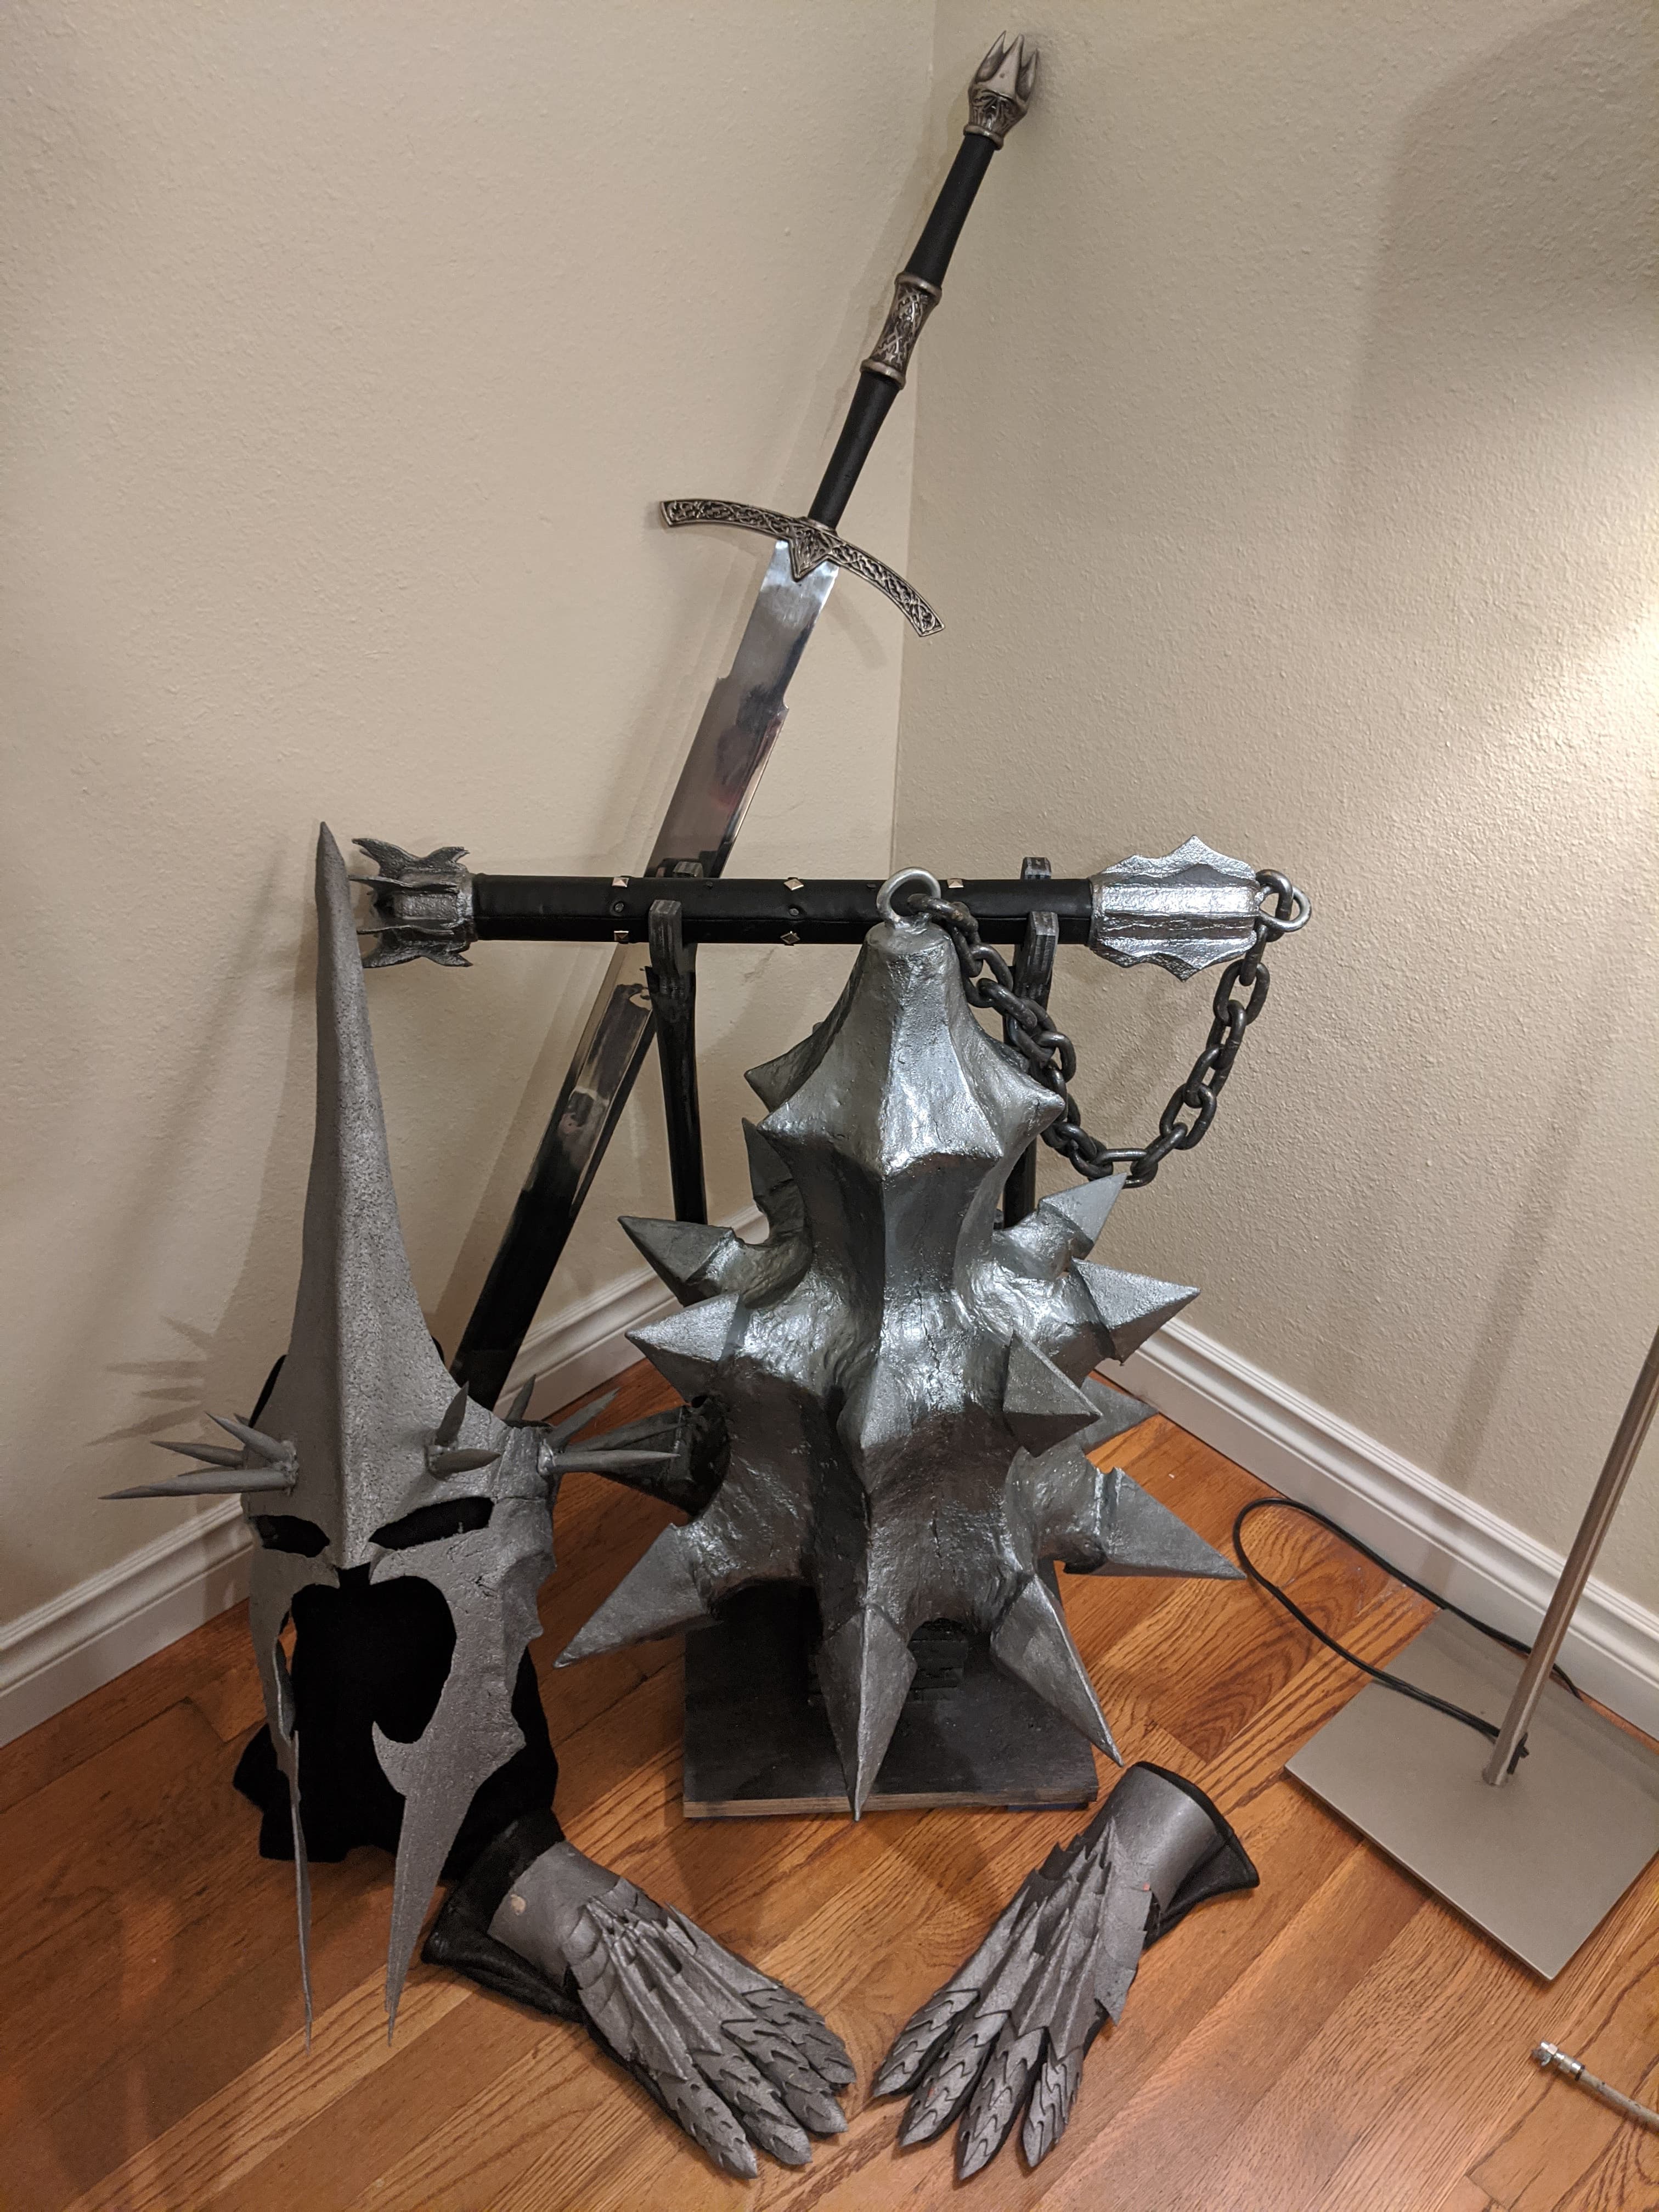
A stand
Far be it from me to just purchase a mannequin. I made something akin to a crucifix out of 2mm box section steel and bent the arms into the position I wanted, so the head rested on the top of the cross, and the arms came off the sides.
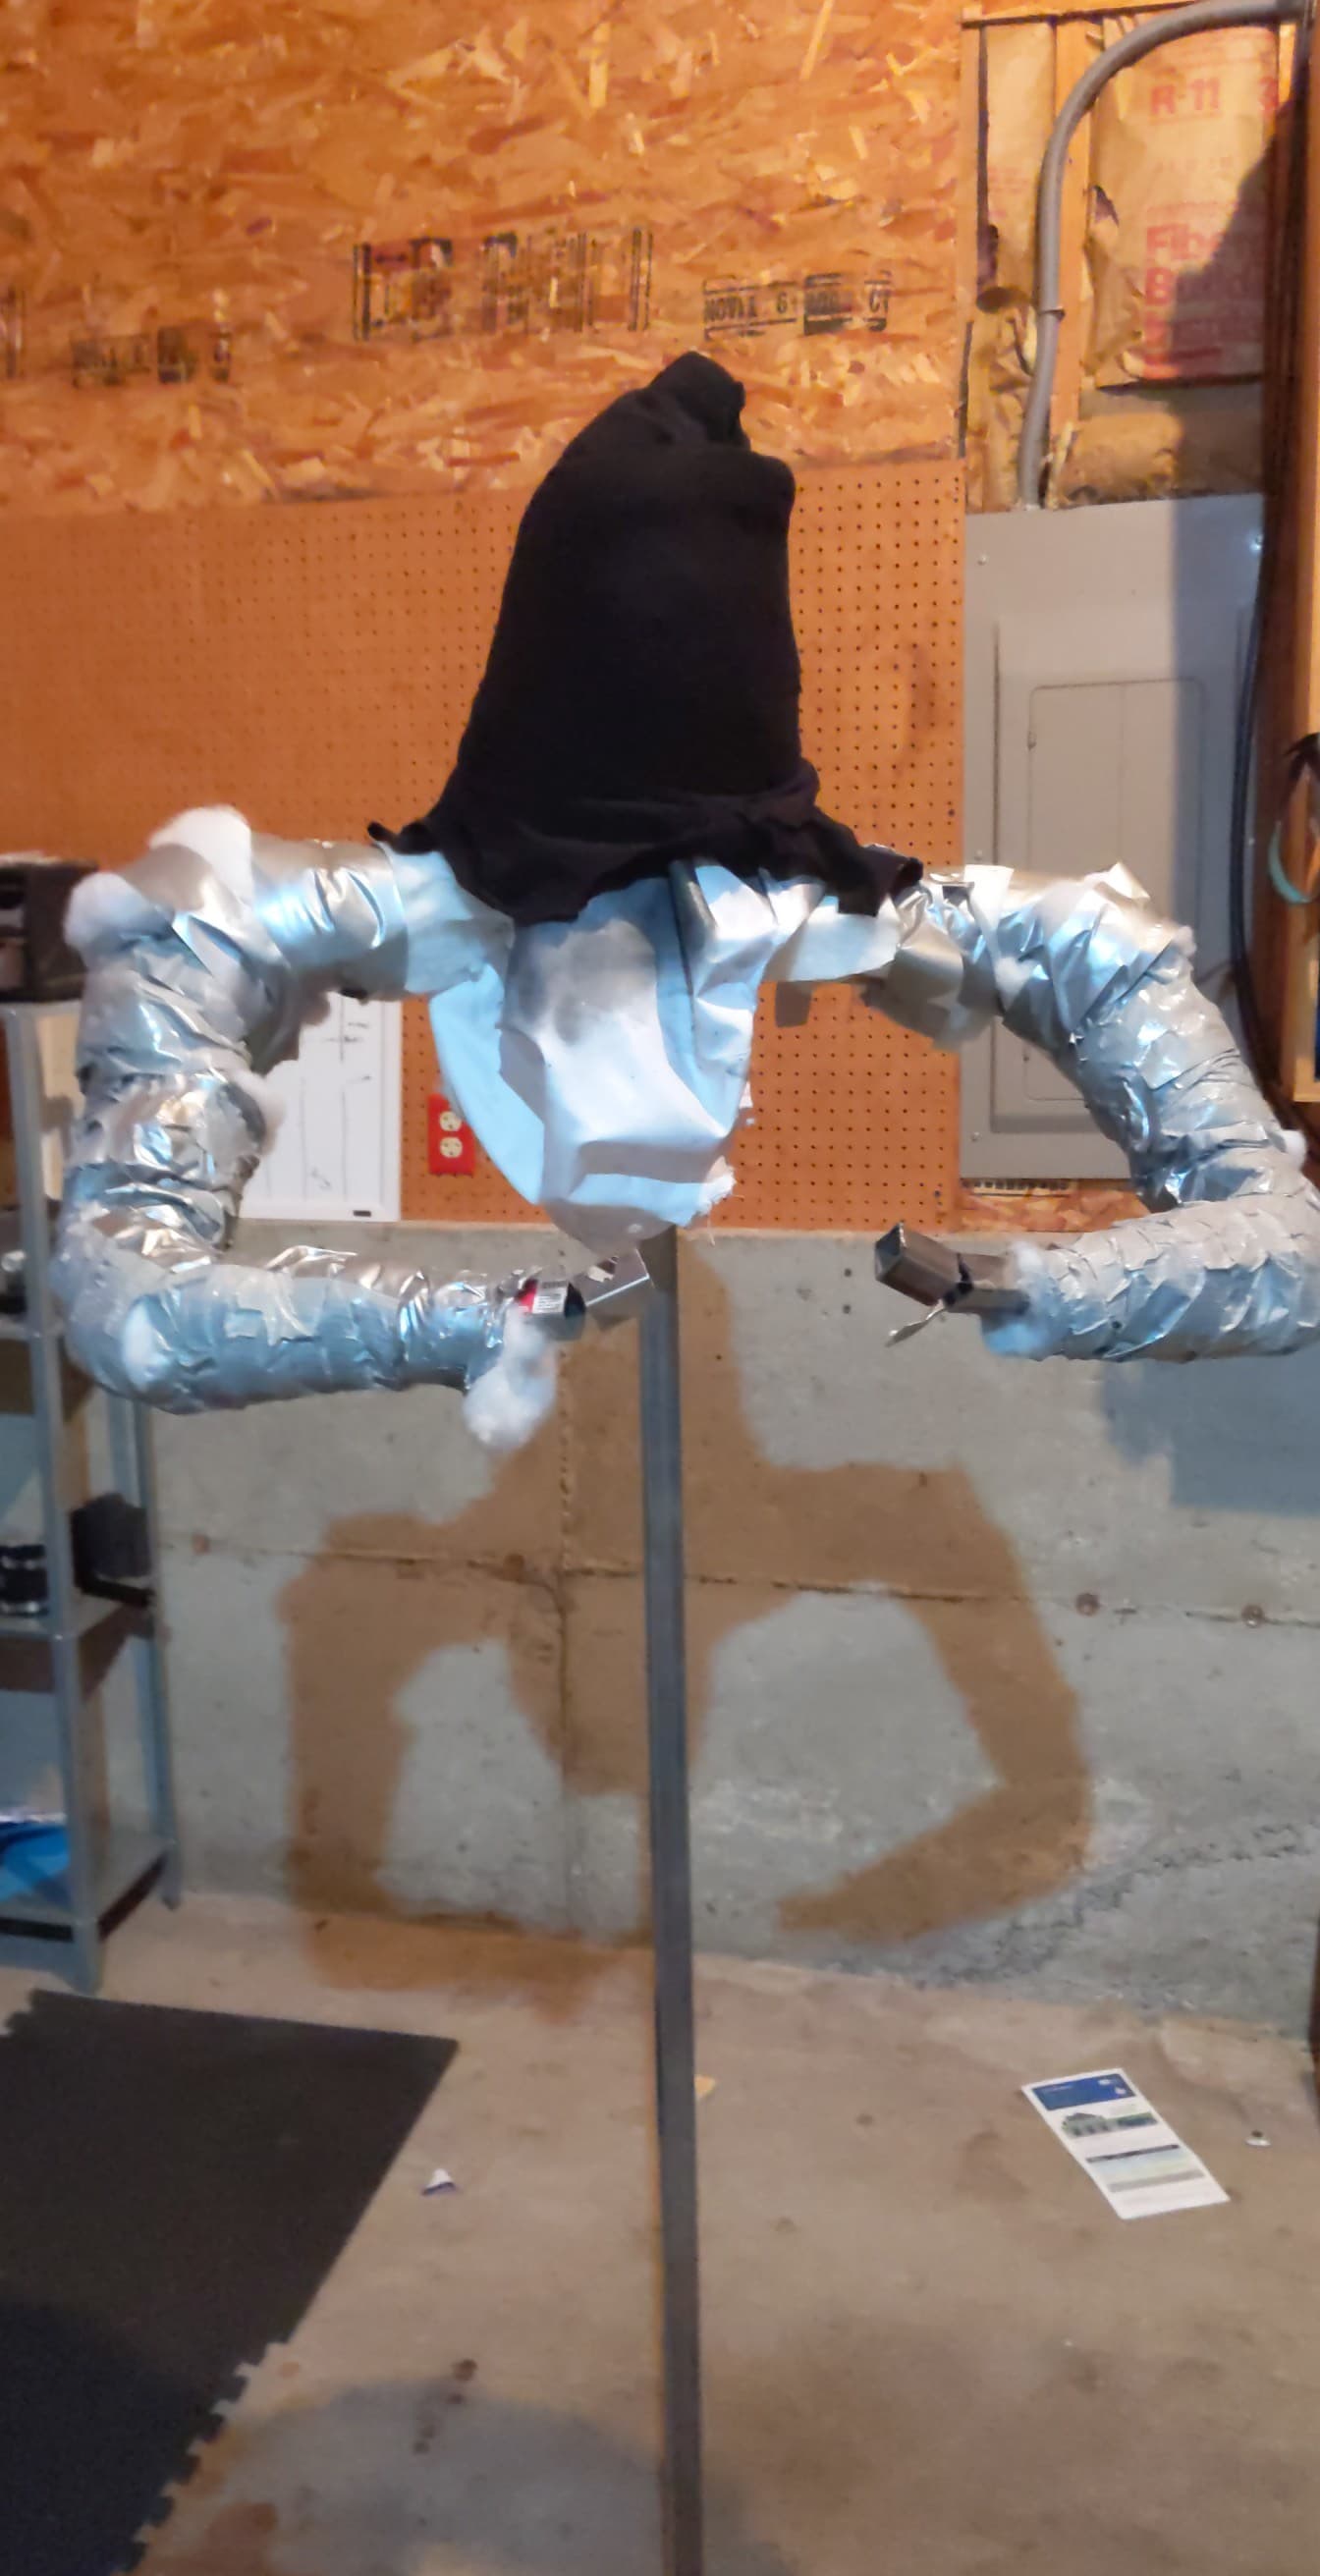
Duct-tape around my arms, subsequently ripped off (ouch), gave a relatively solid shape for the arms. Combining that with a lot of space-filling stuffing padded everything out nicely, including the head.
Final product
And here’s how it turned out!
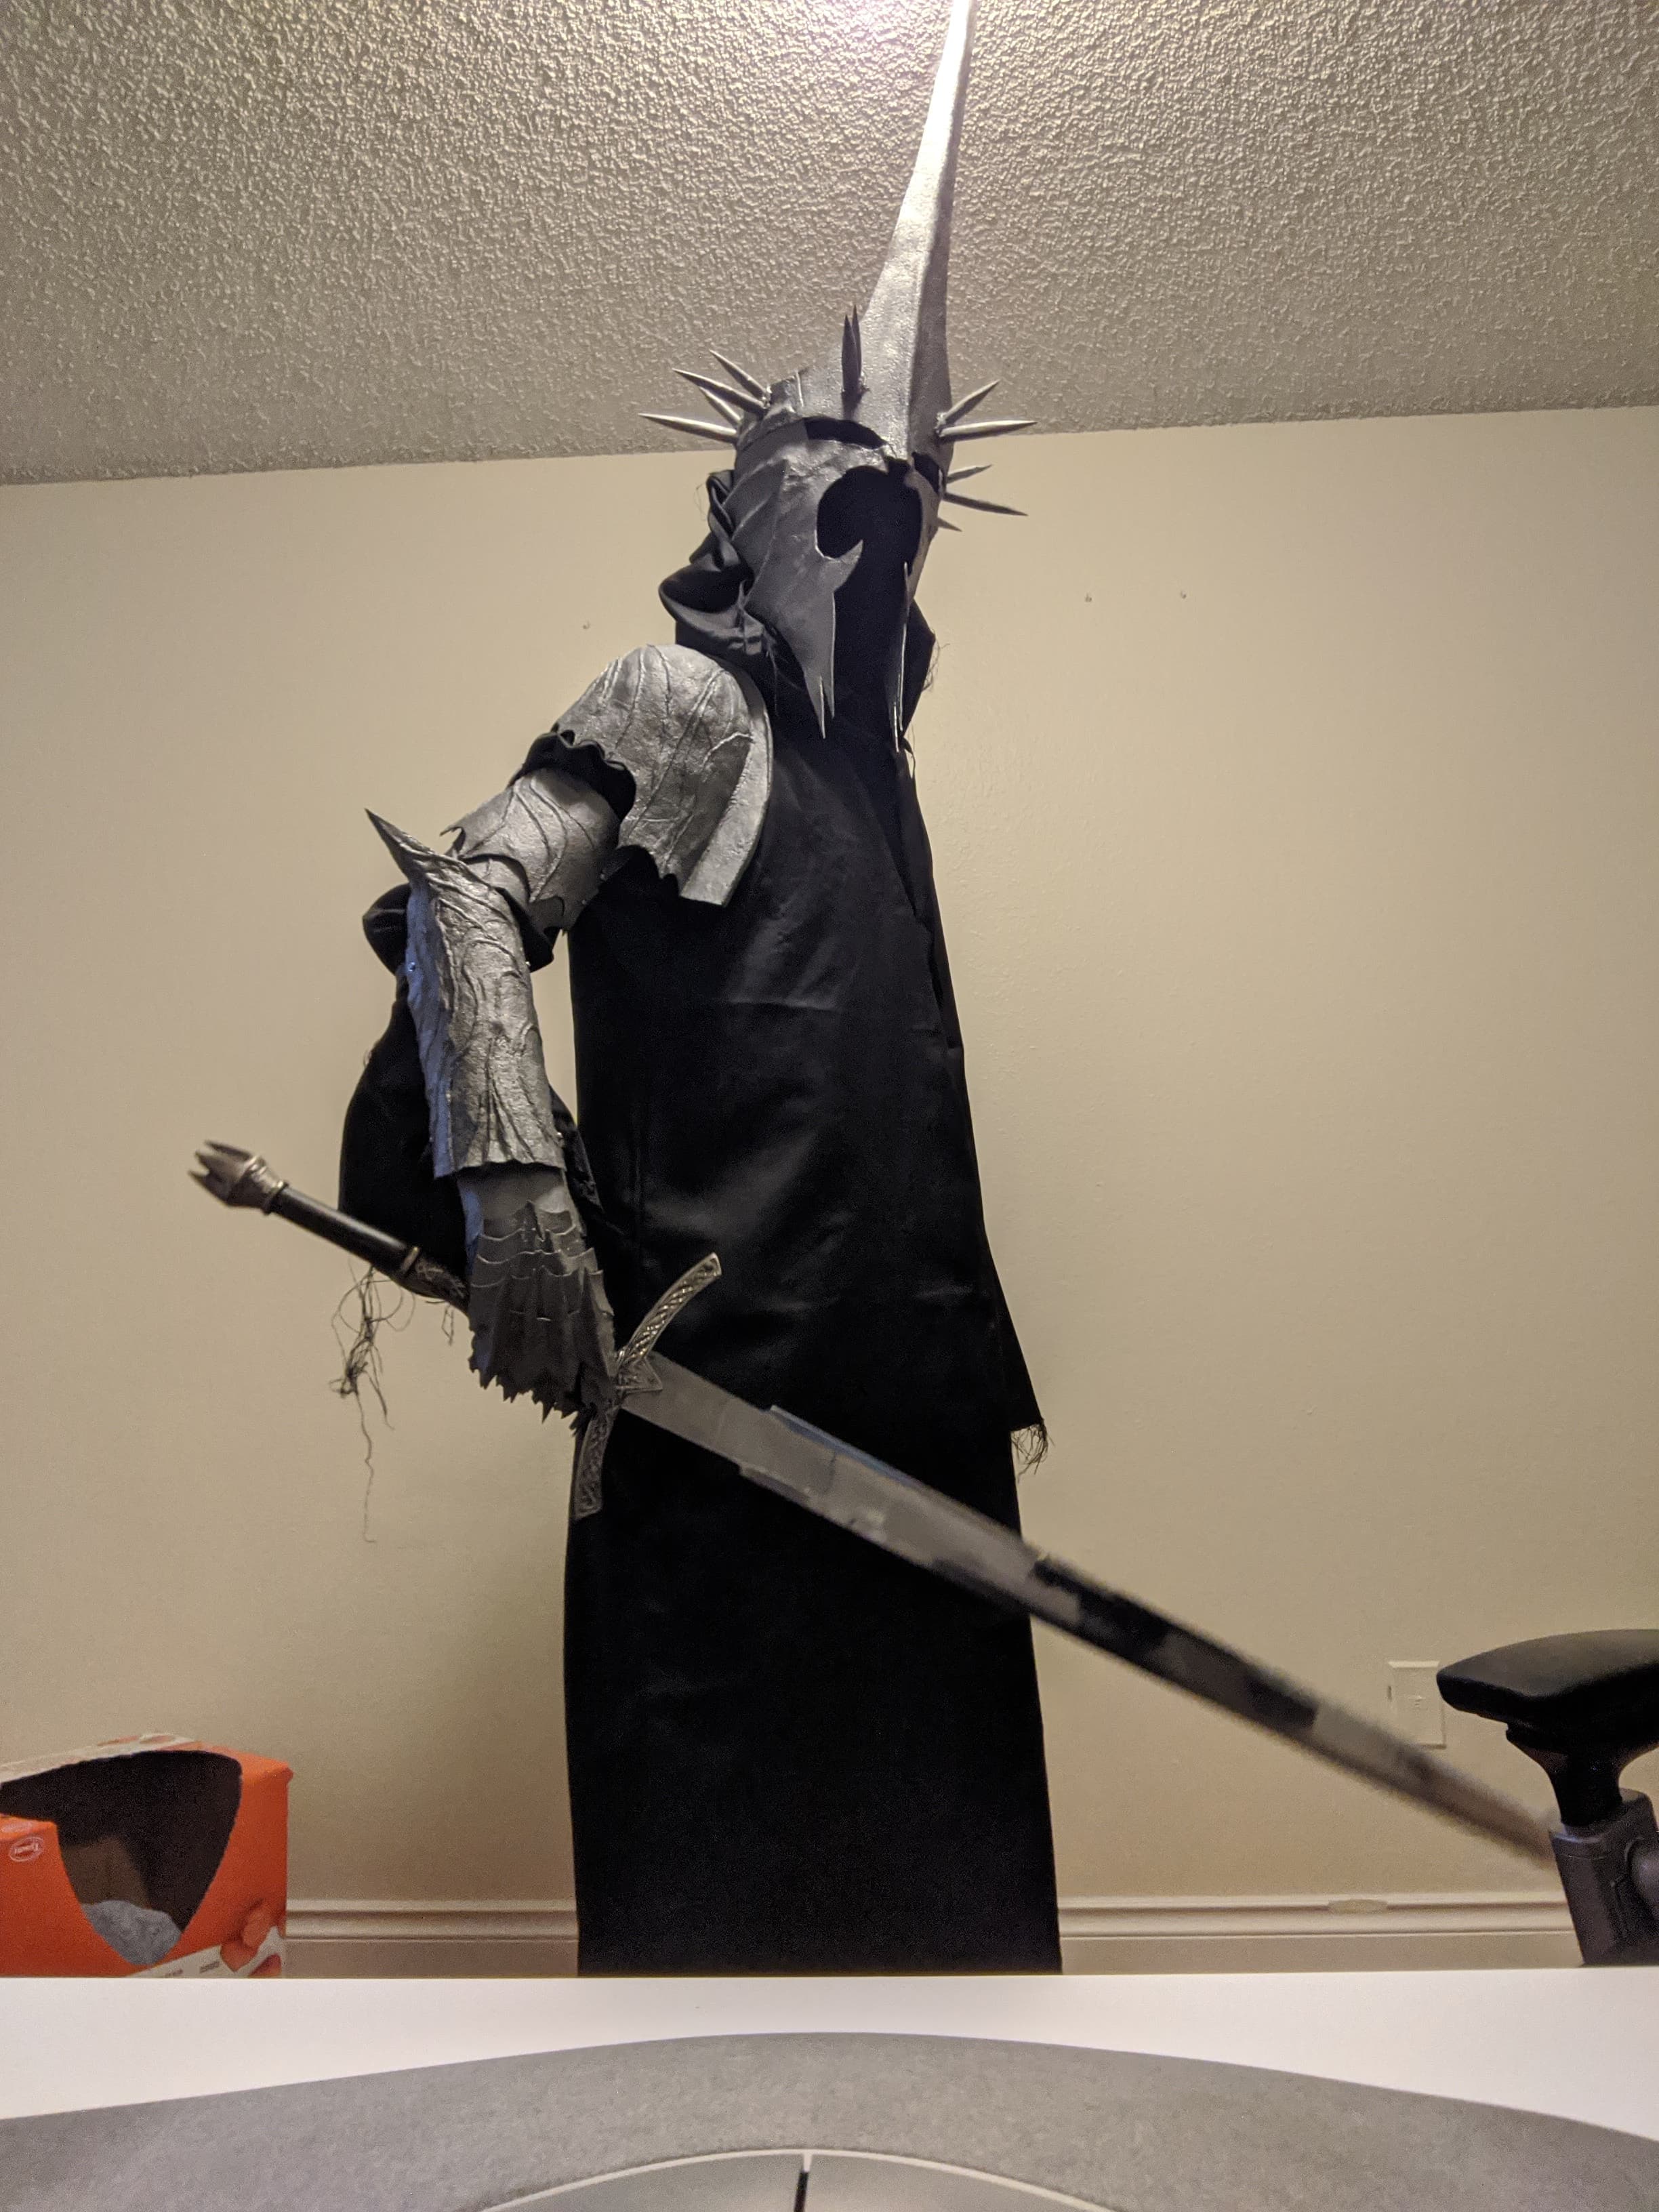
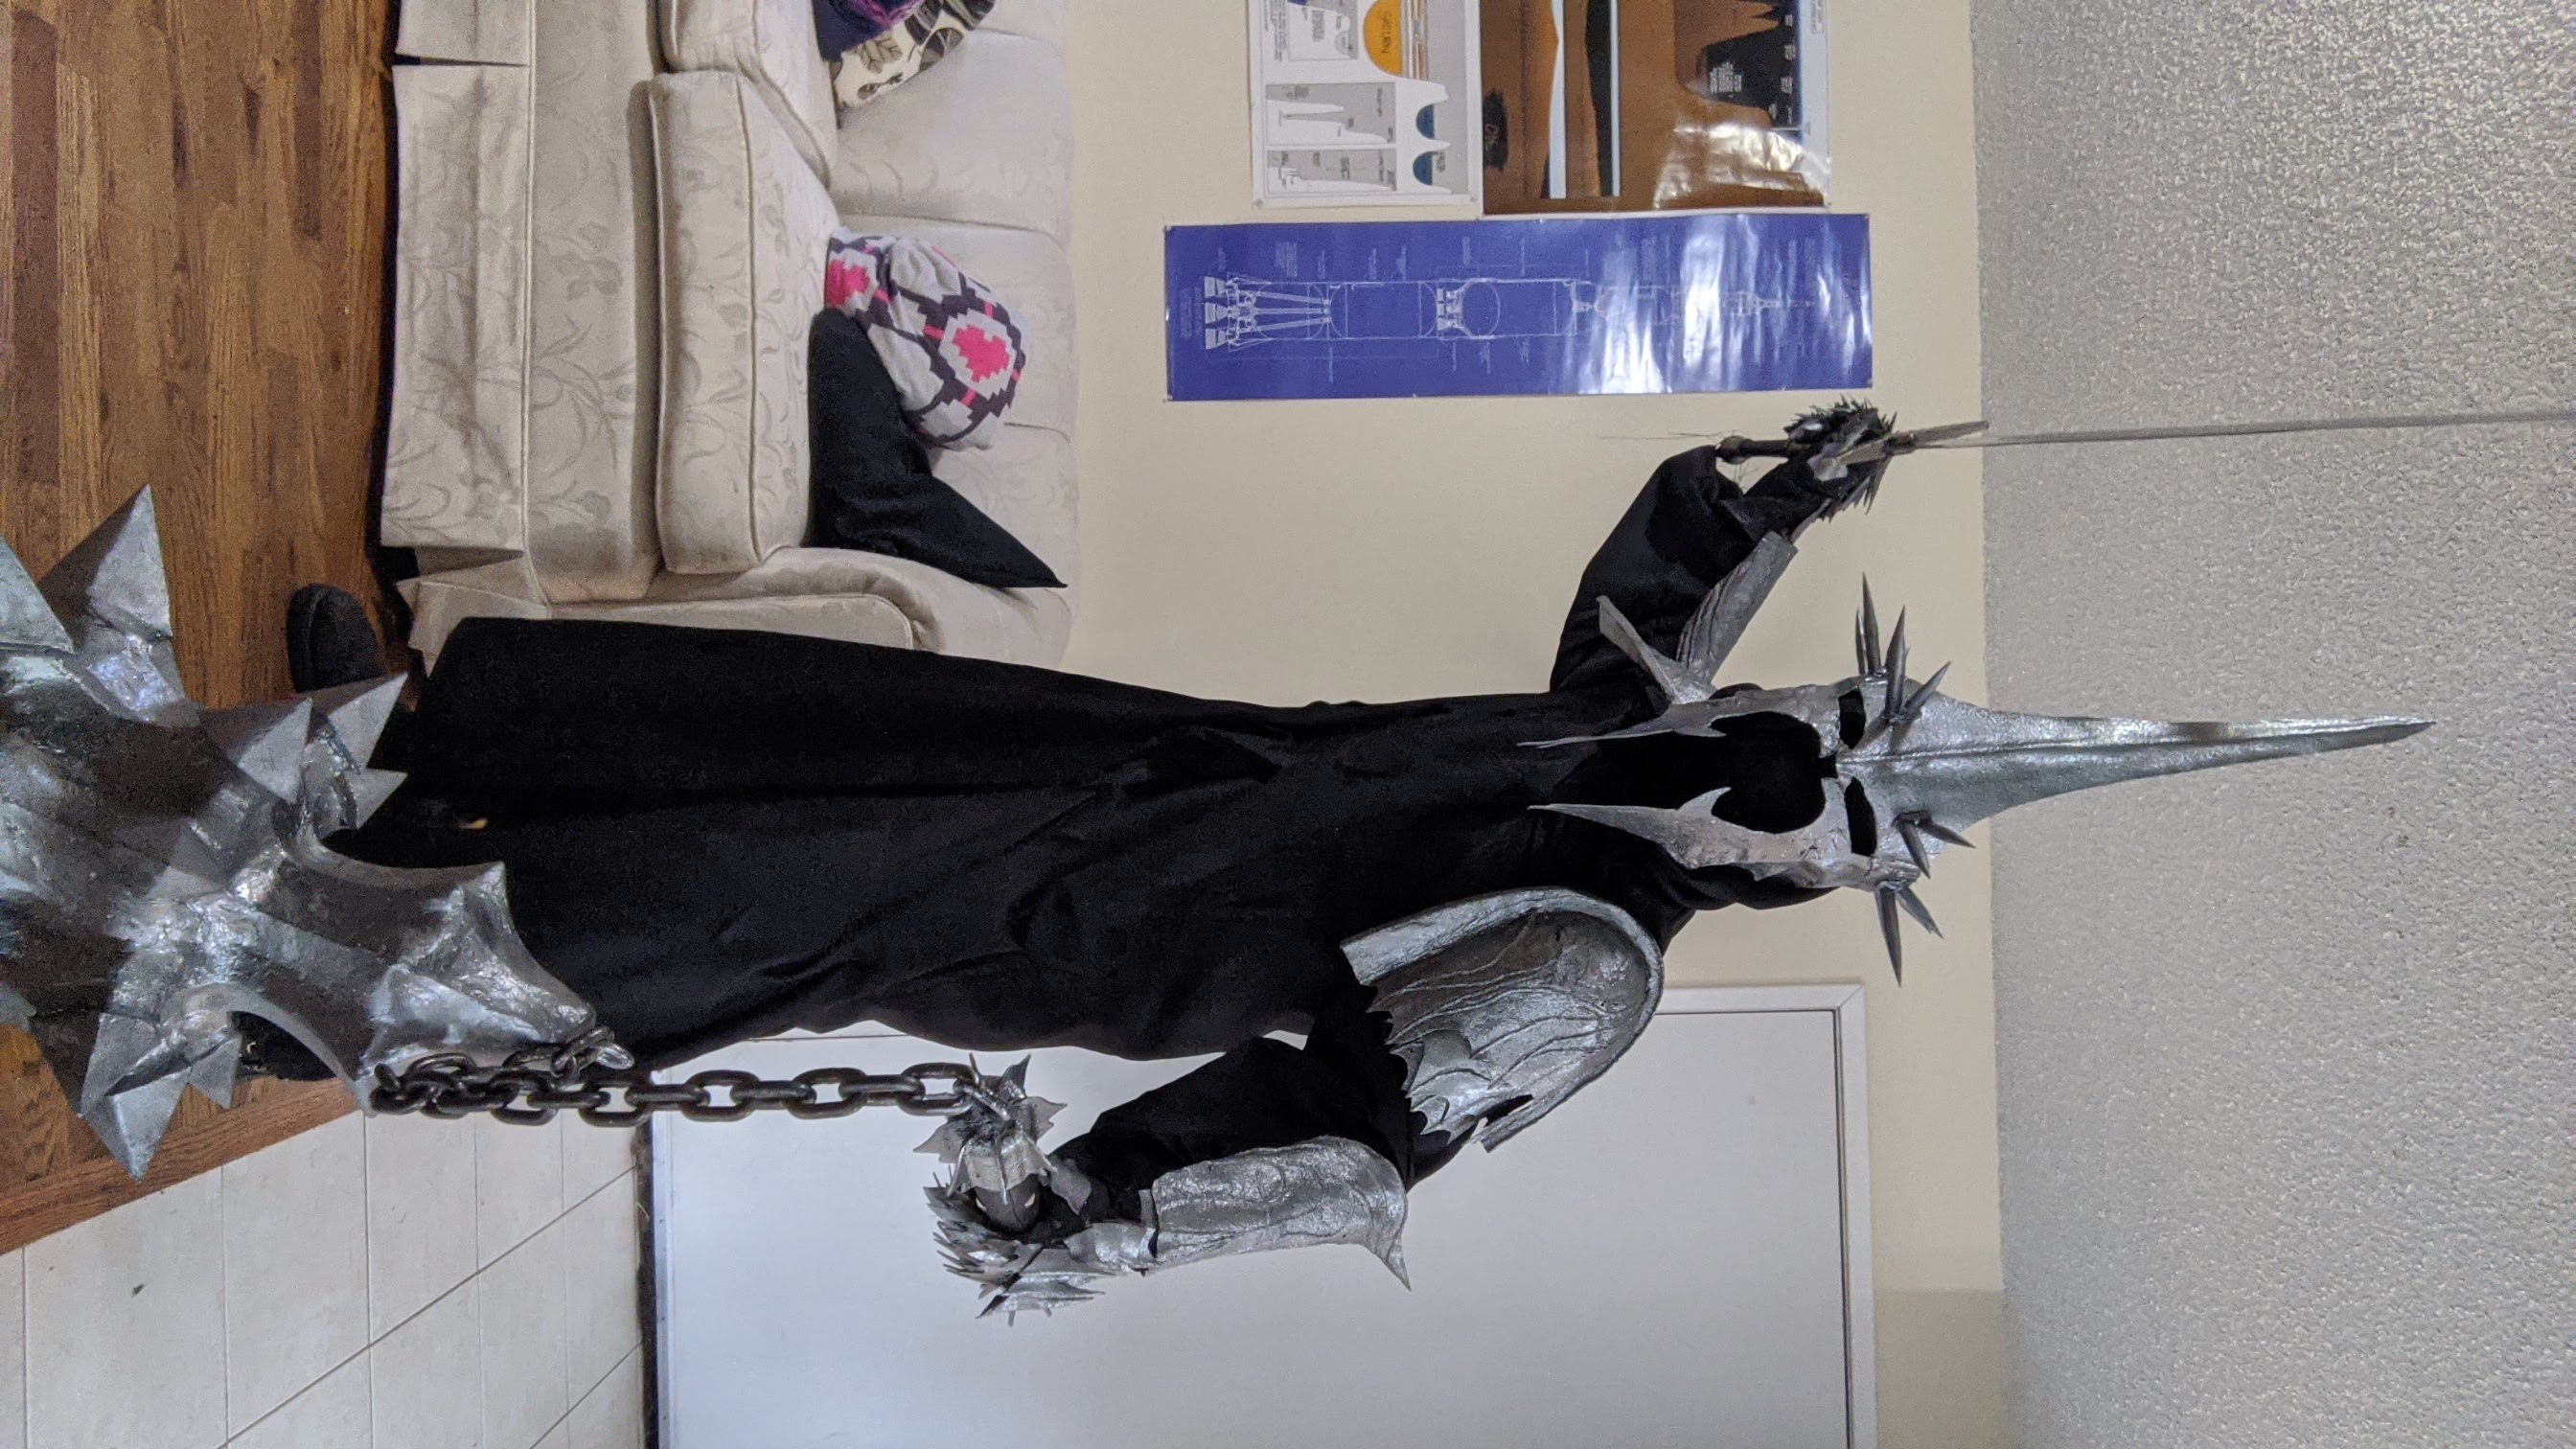
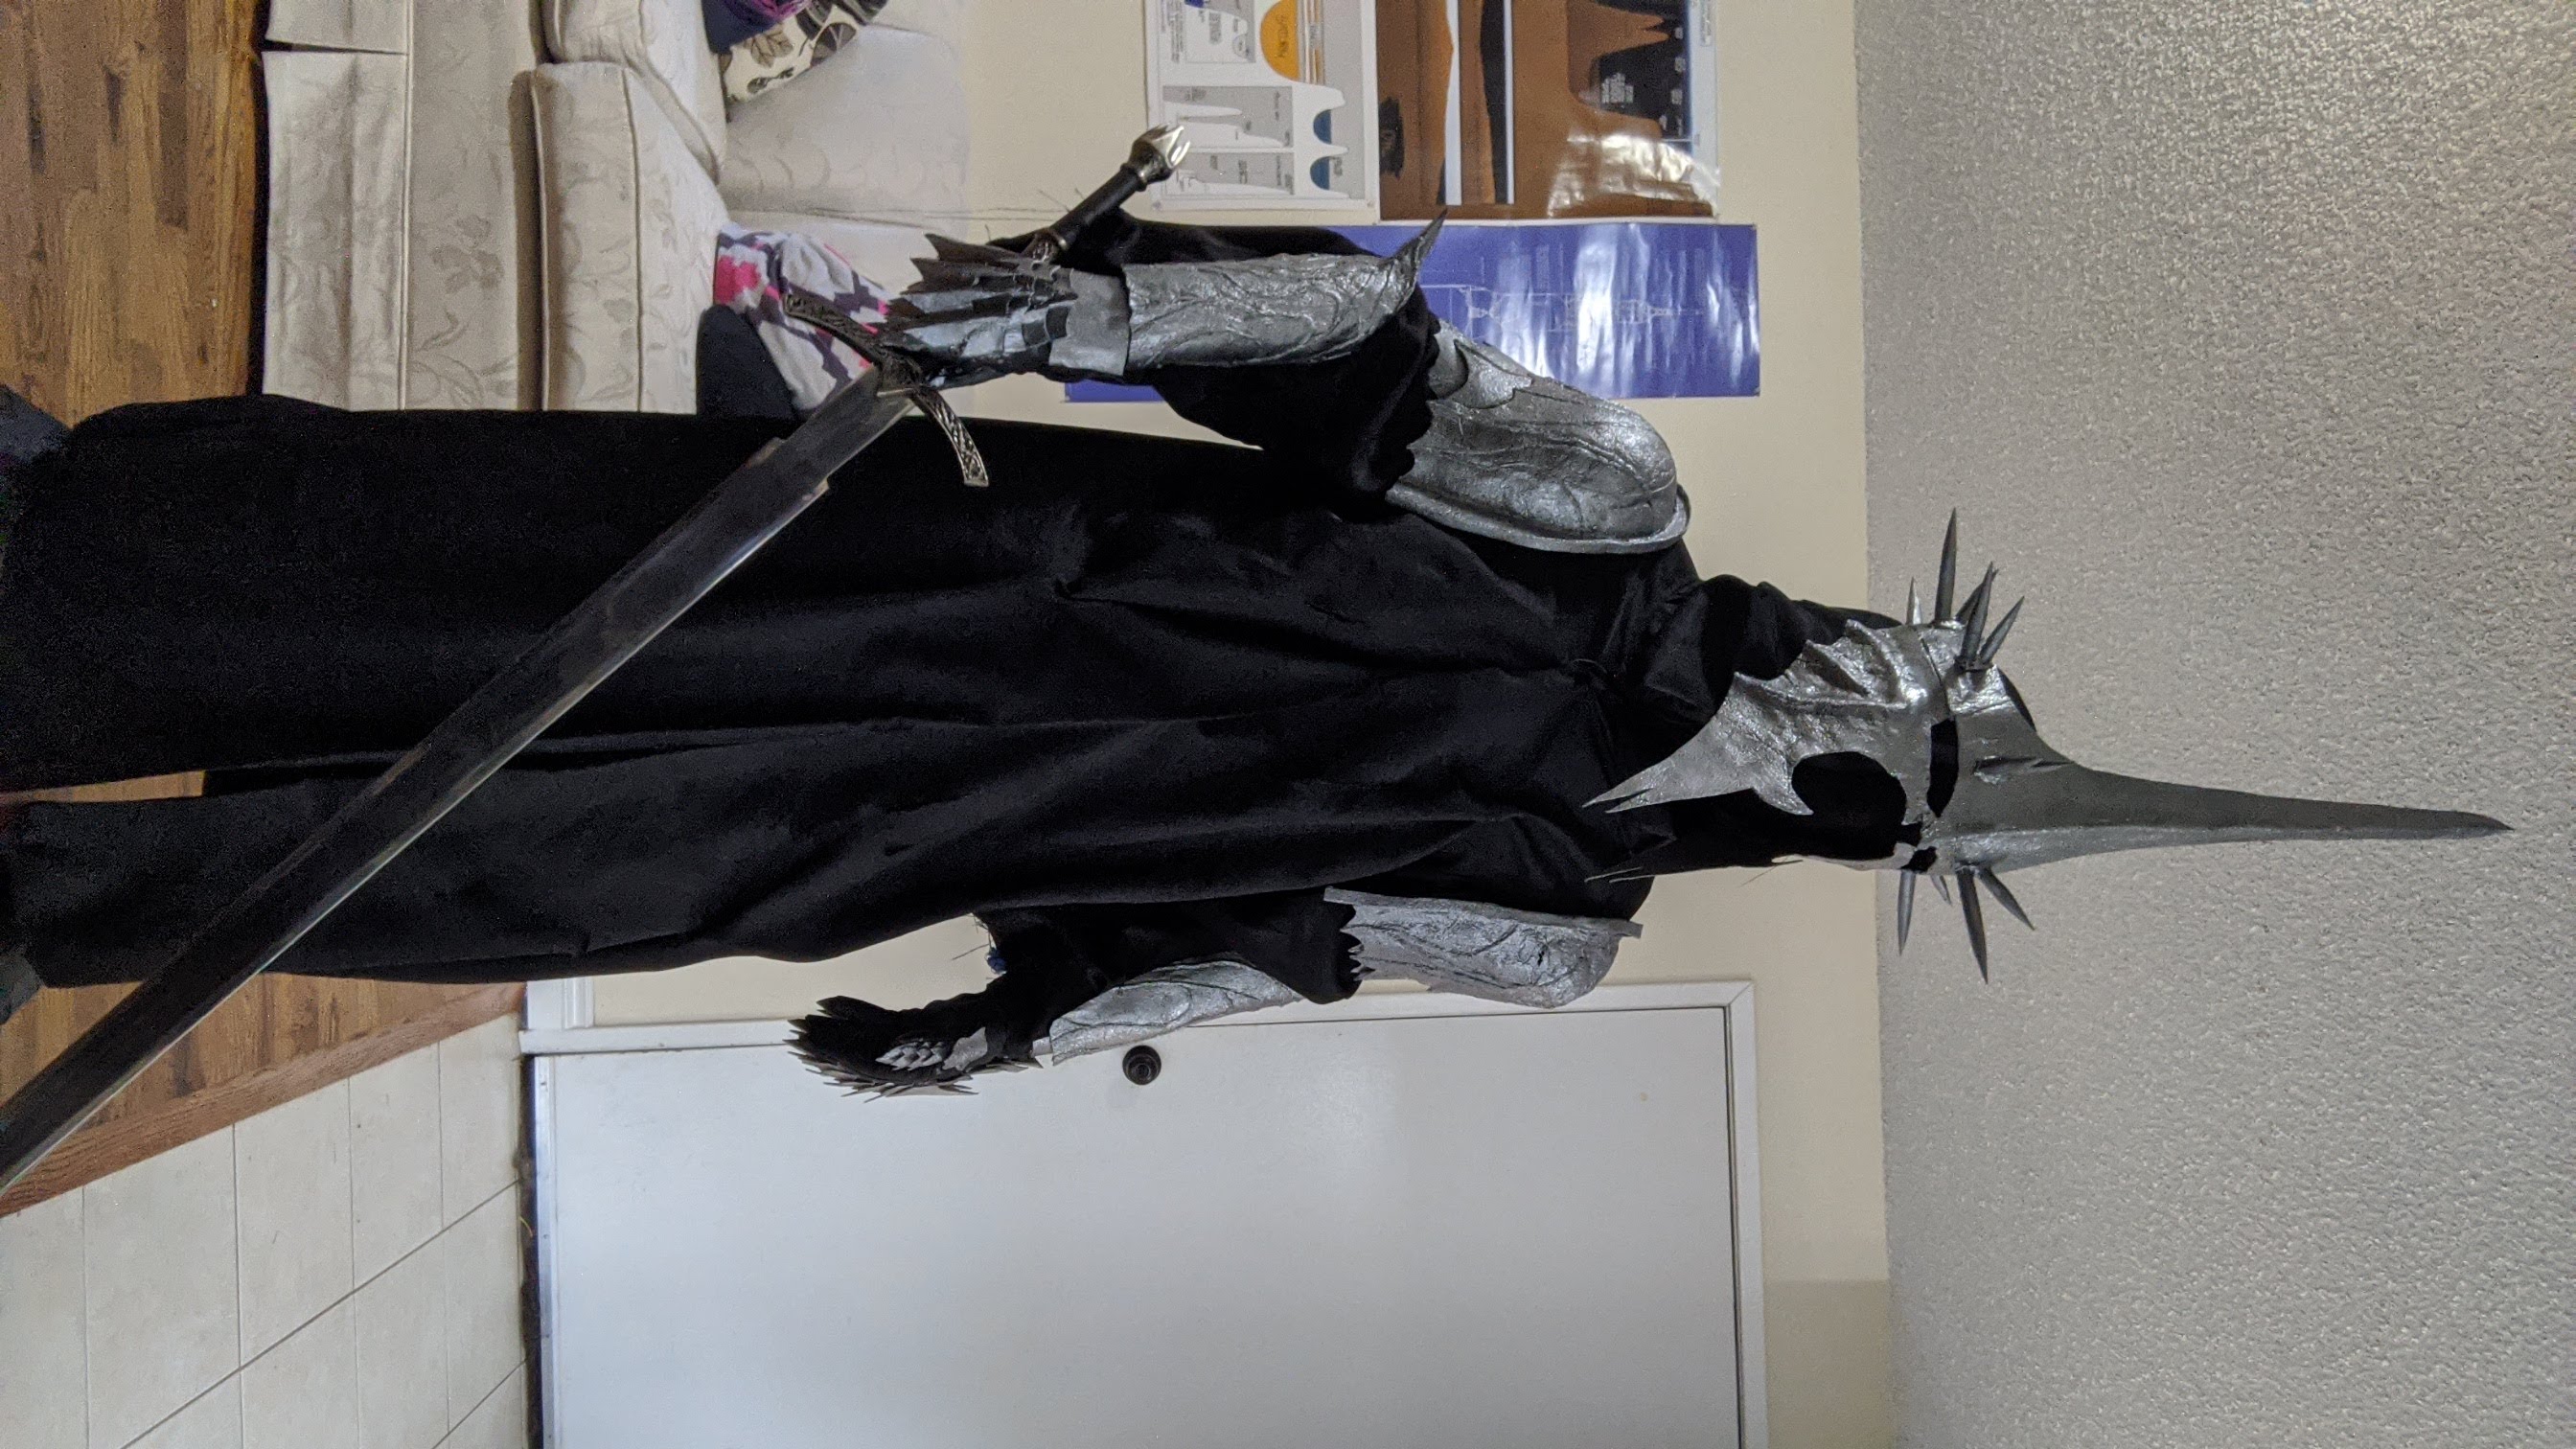
I’m really pleased with this, the helmet especially. There aren’t many people who would notice the other arm pieces I suspect, but the helmet is the centre piece, the main eye-draw, the, well, crown. It ended up fantastic, although I often forget my head is a good foot taller than it should be and door frames are annoying. Everything is annoying, frankly - I wore this to a halloween part and ended up taking half of it off for most of it, just to be able to eat, drink, and chat reasonably.
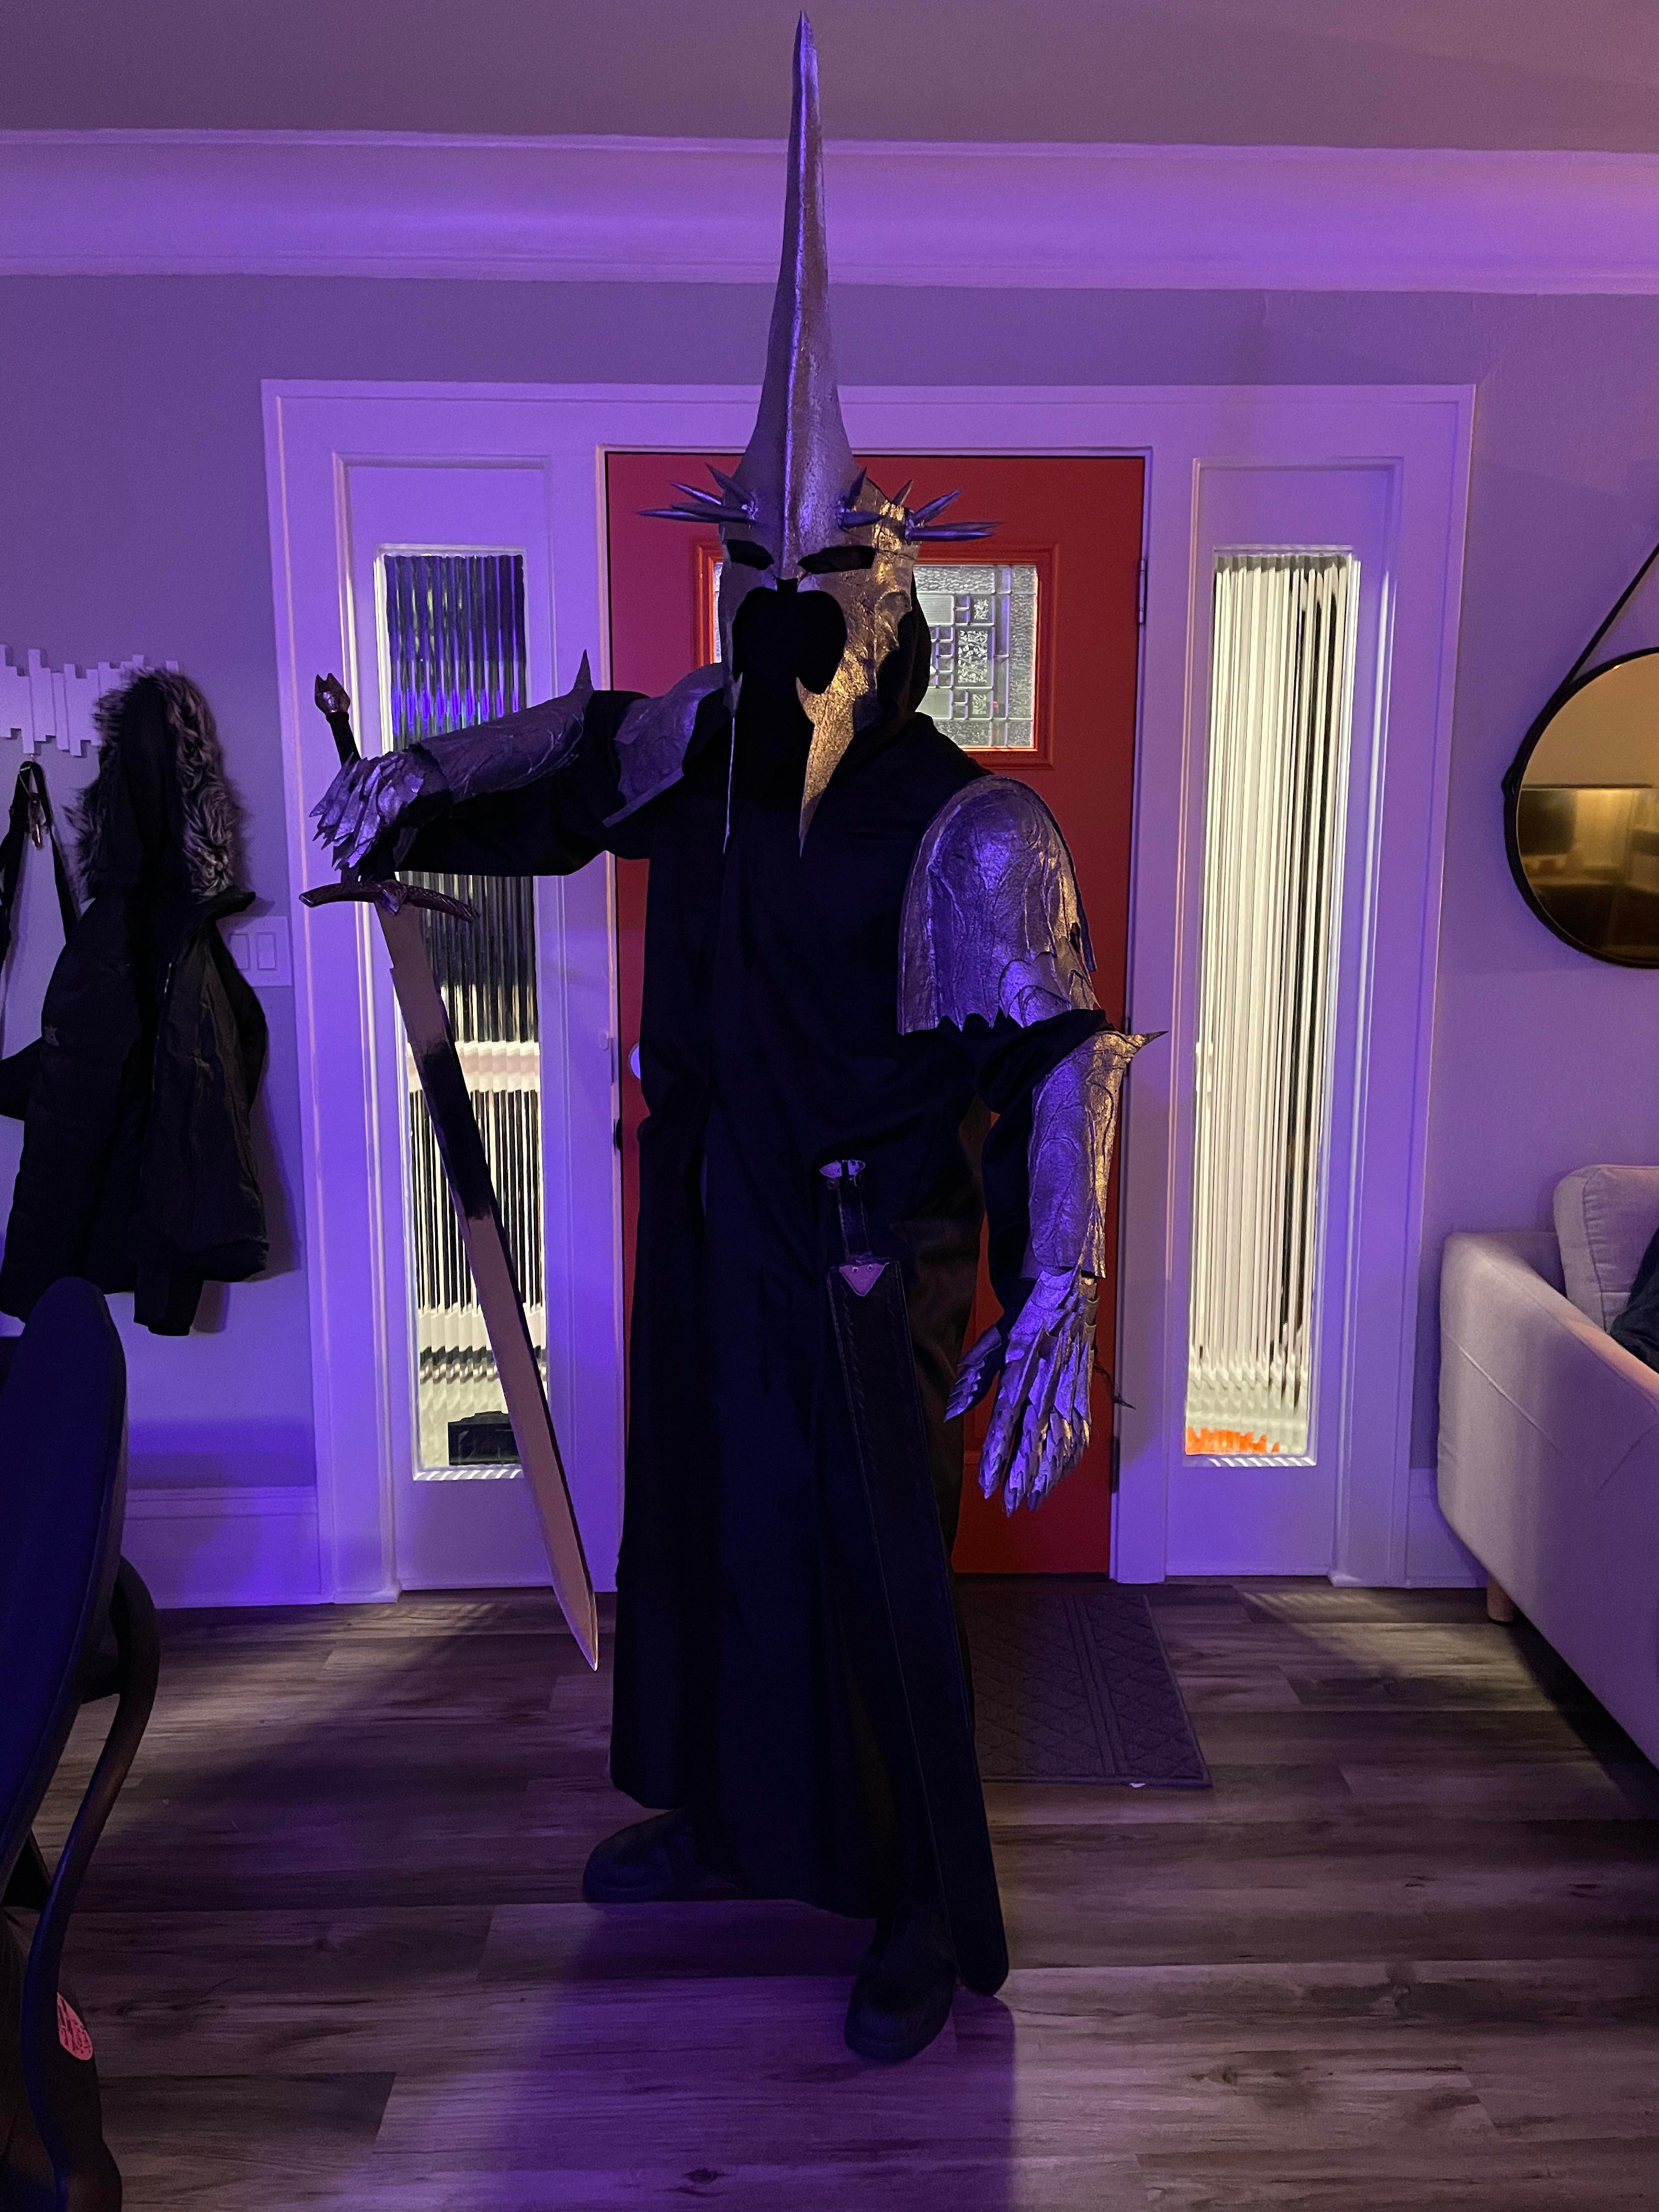
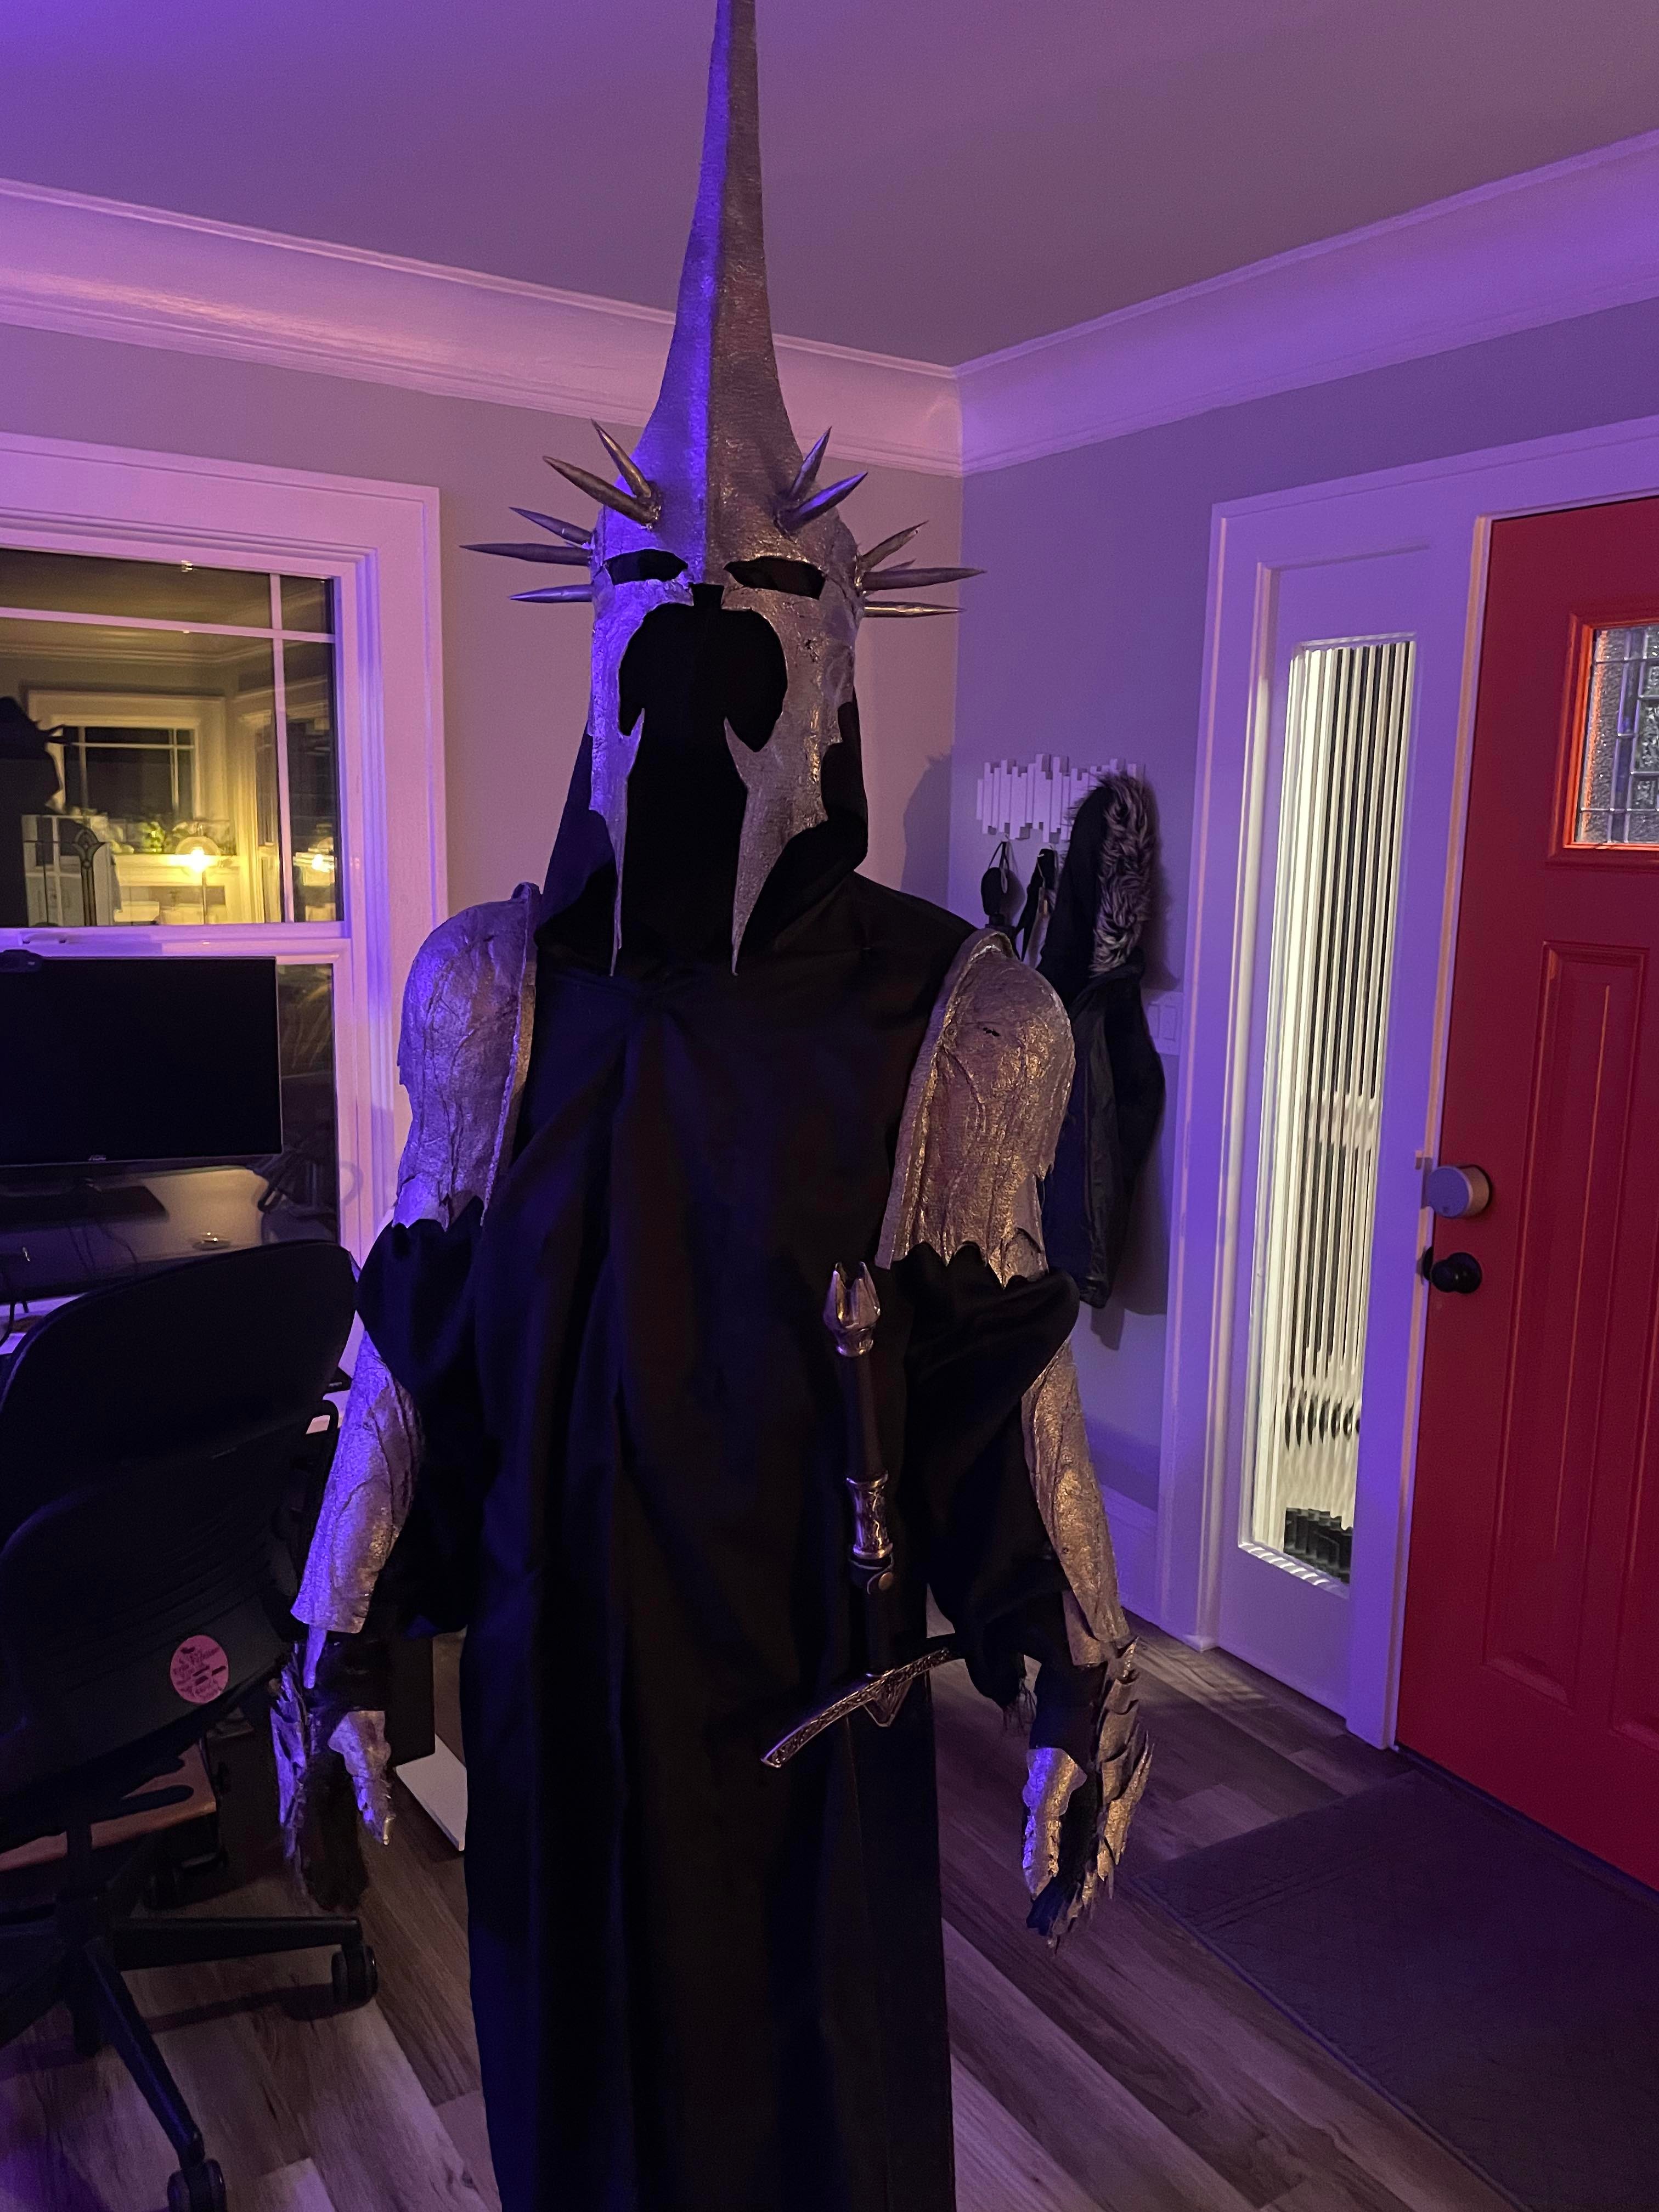
Even then I had to watch out that I didn’t accidentally stab people. But that helmet looms and just looks so good. Here’s a shot from a friend’s halloween party, and I dined out on compliments all evening, including many repetitions of my favourite “Where’d you buy this … wait seriously? You made this?!?!”
I didn’t make the sword, by the way. Purchased that online years ago, $70 or something.
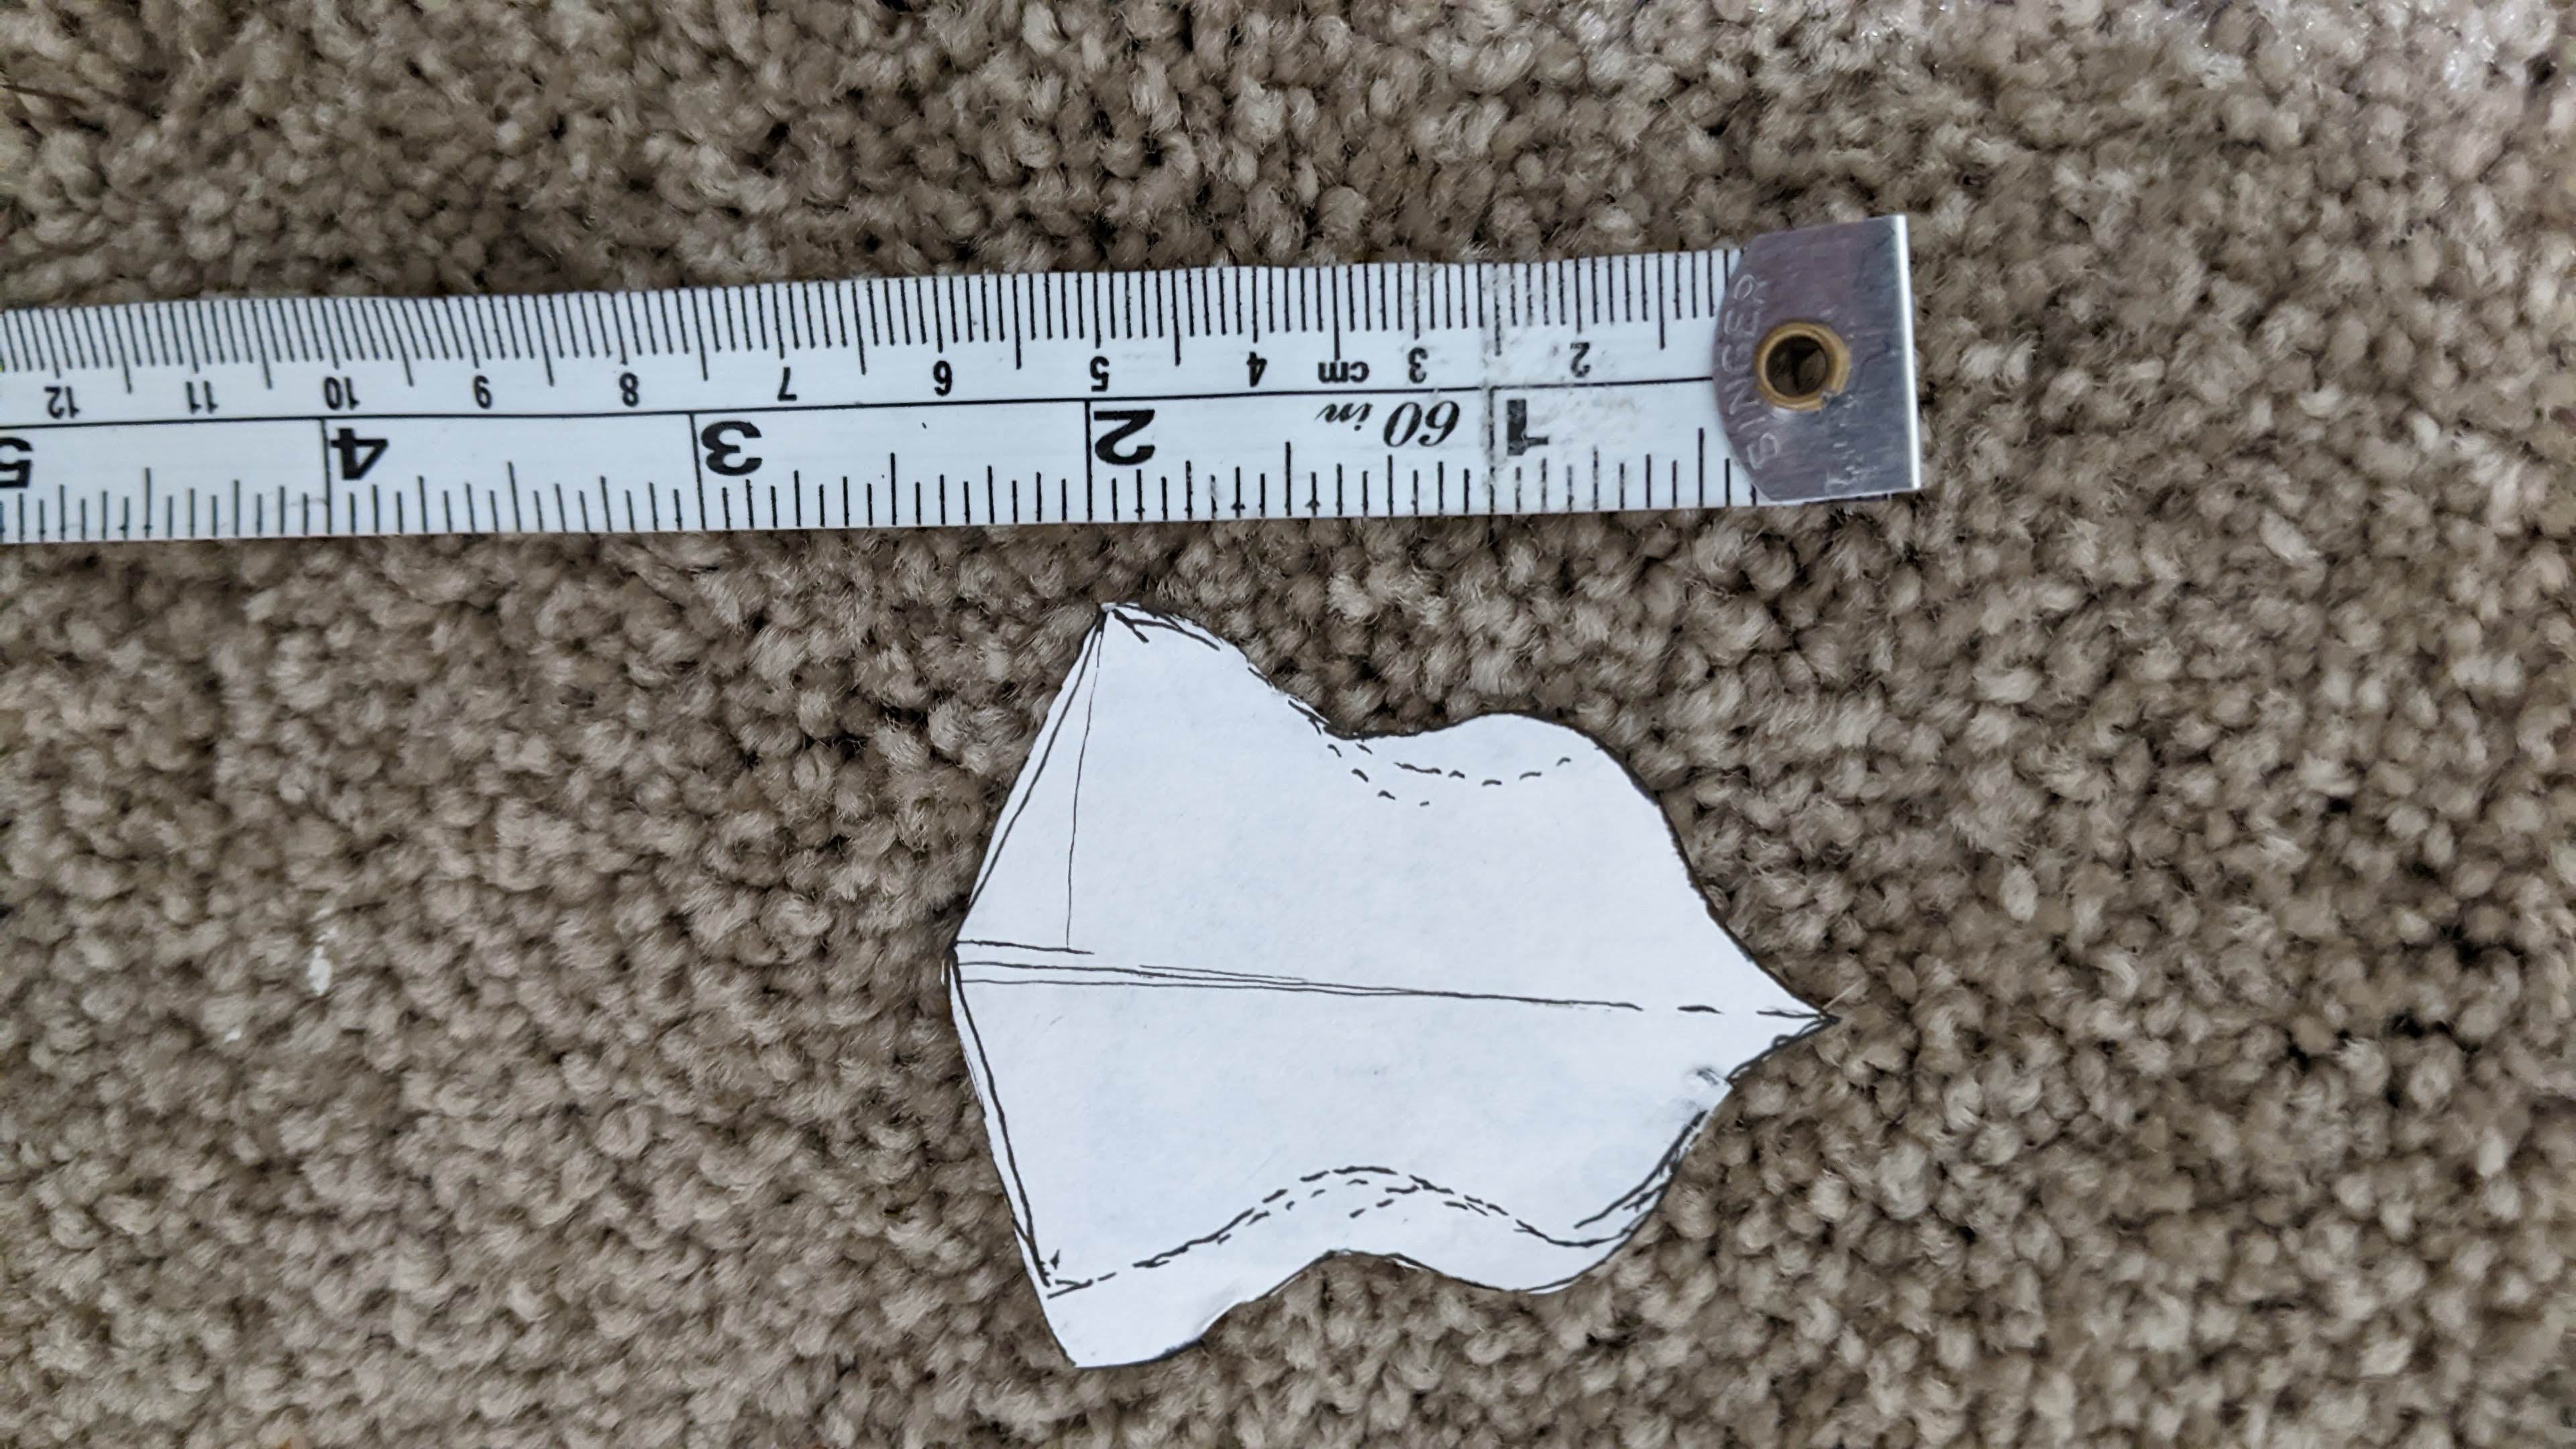
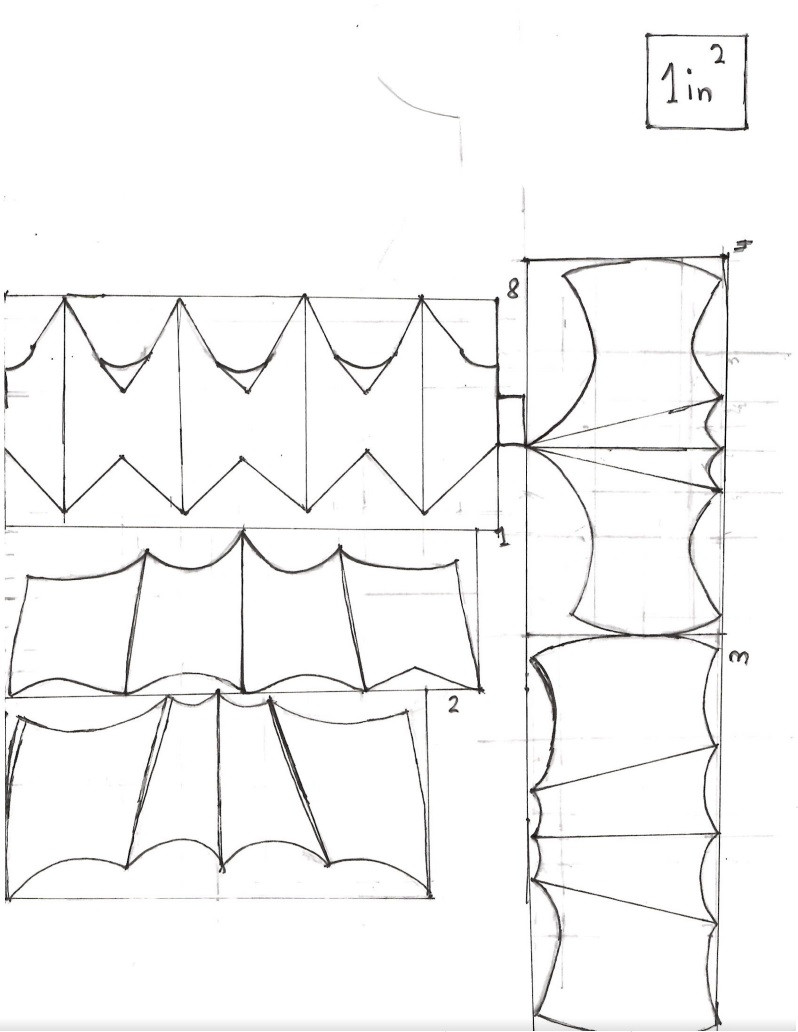
Templates
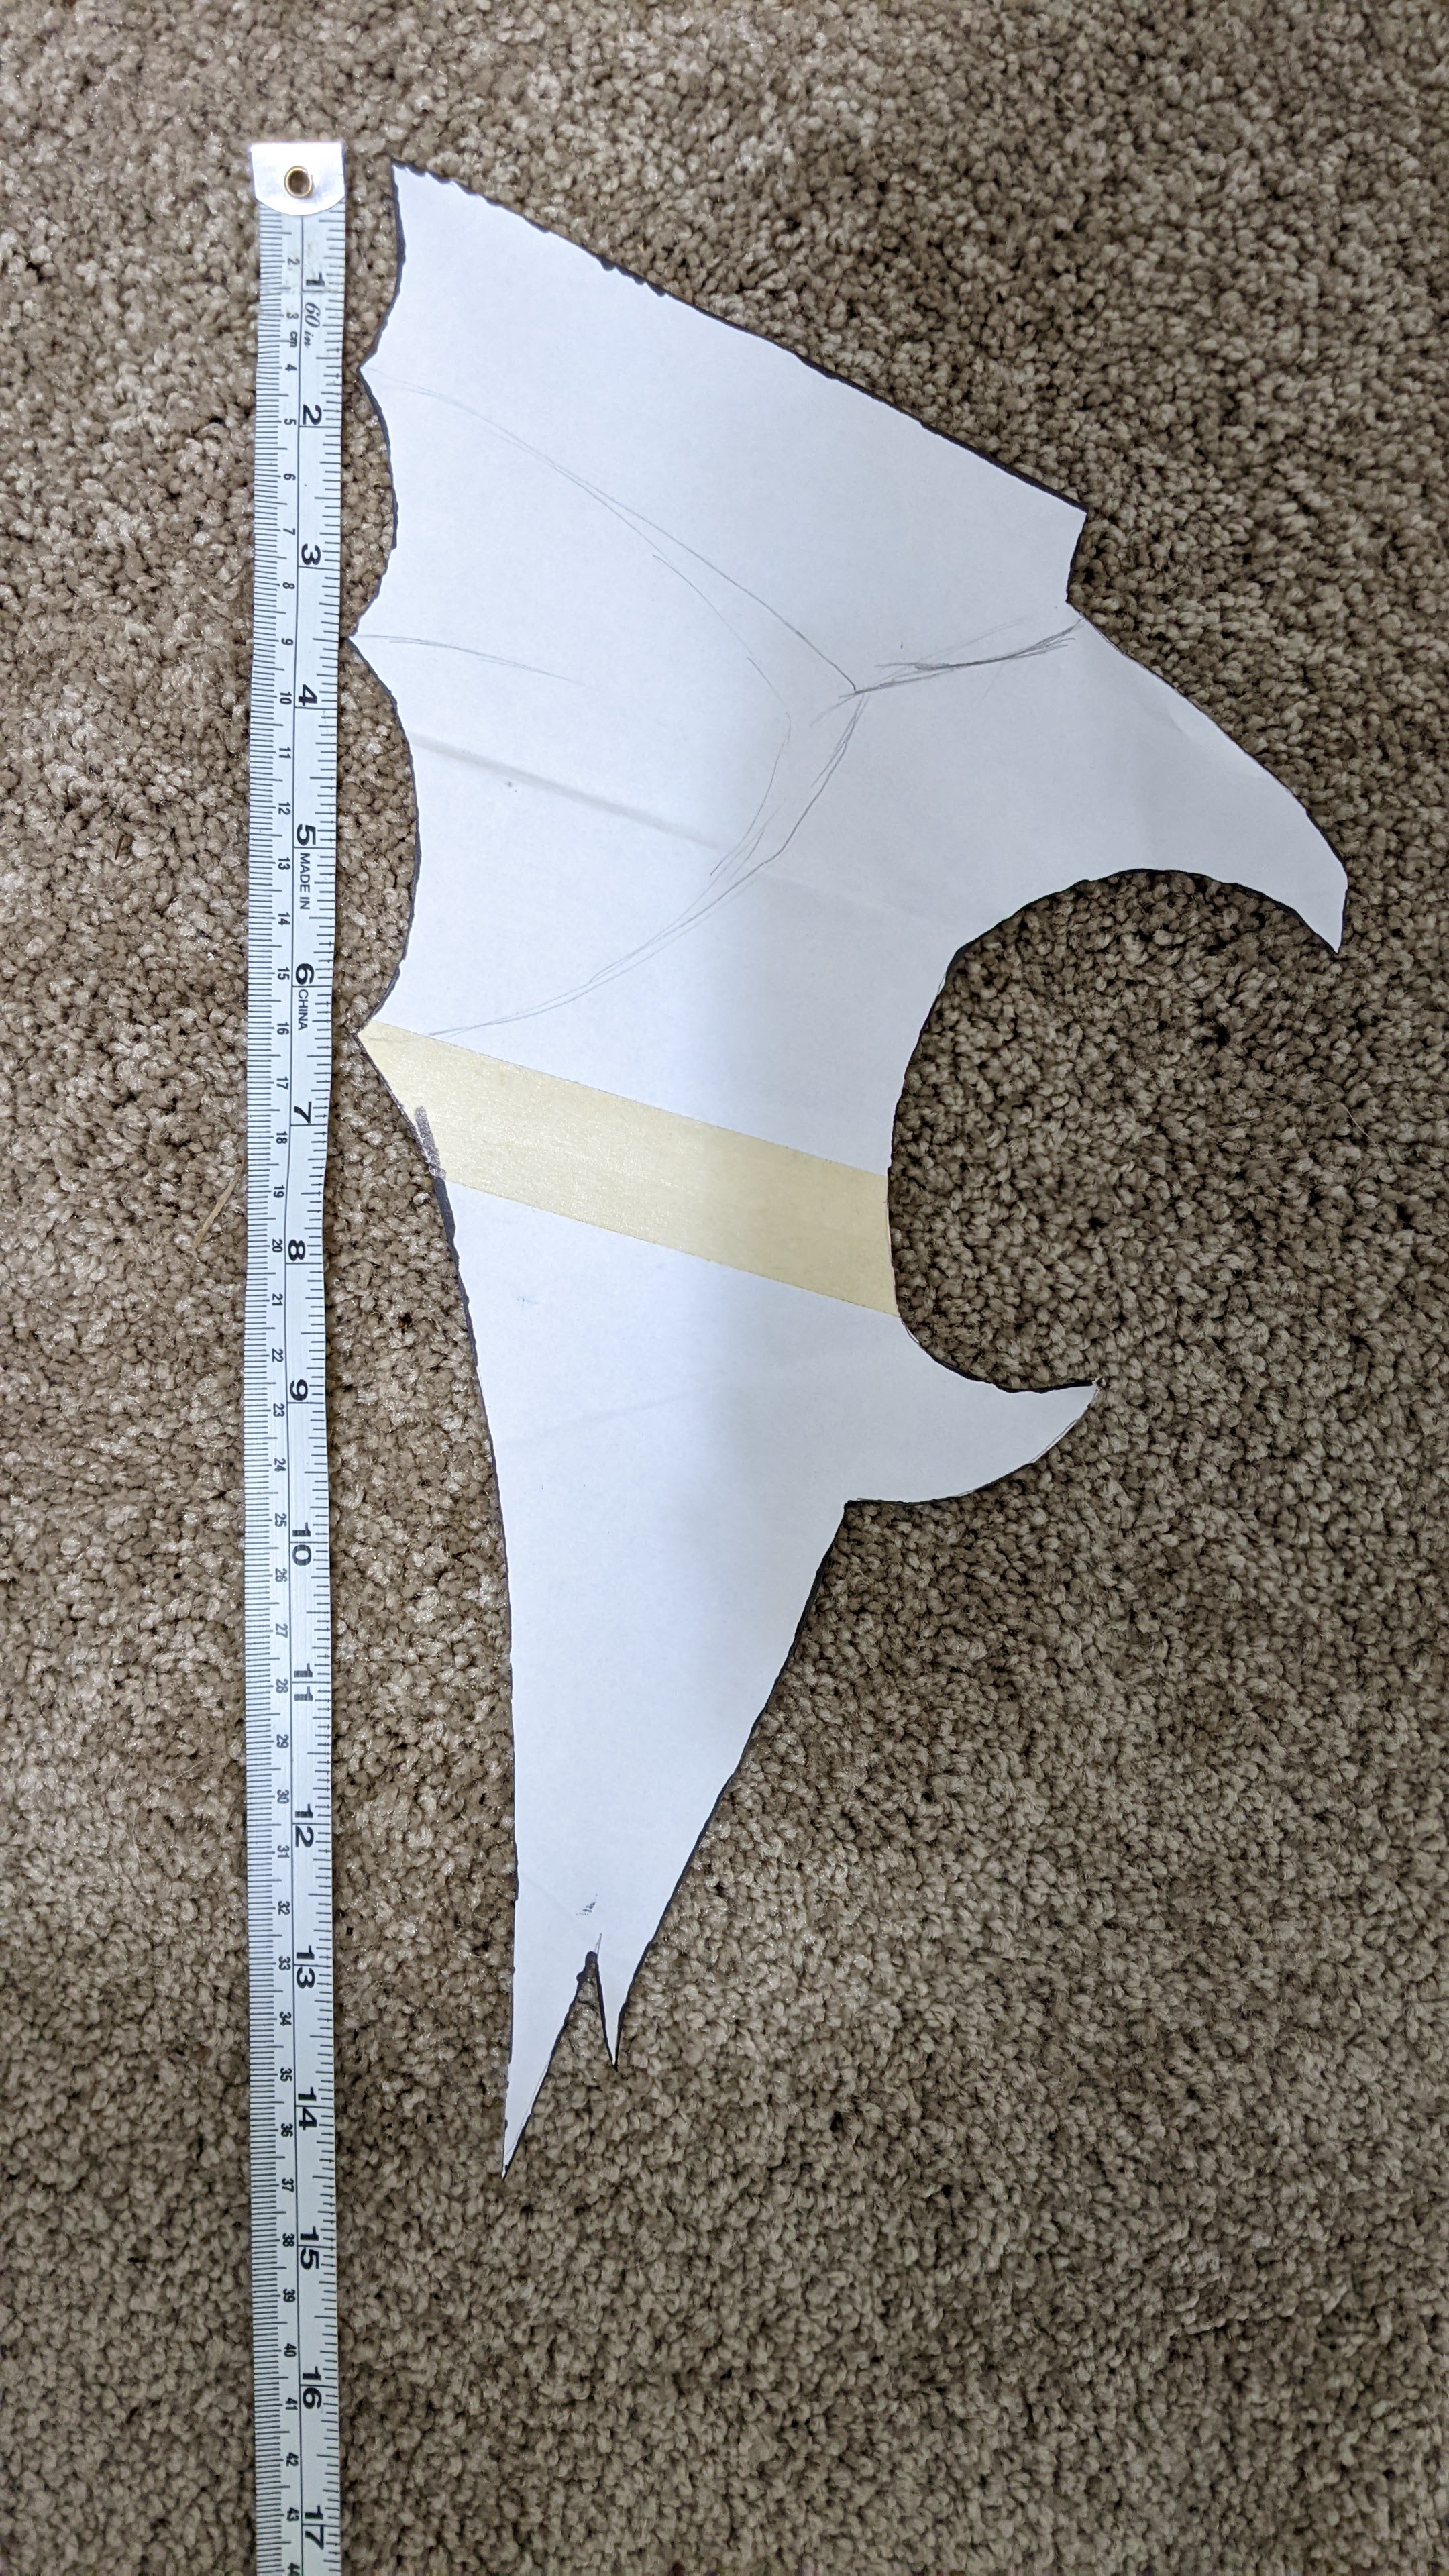
Below are the templates I used for various parts. Firstly, the cheek template:
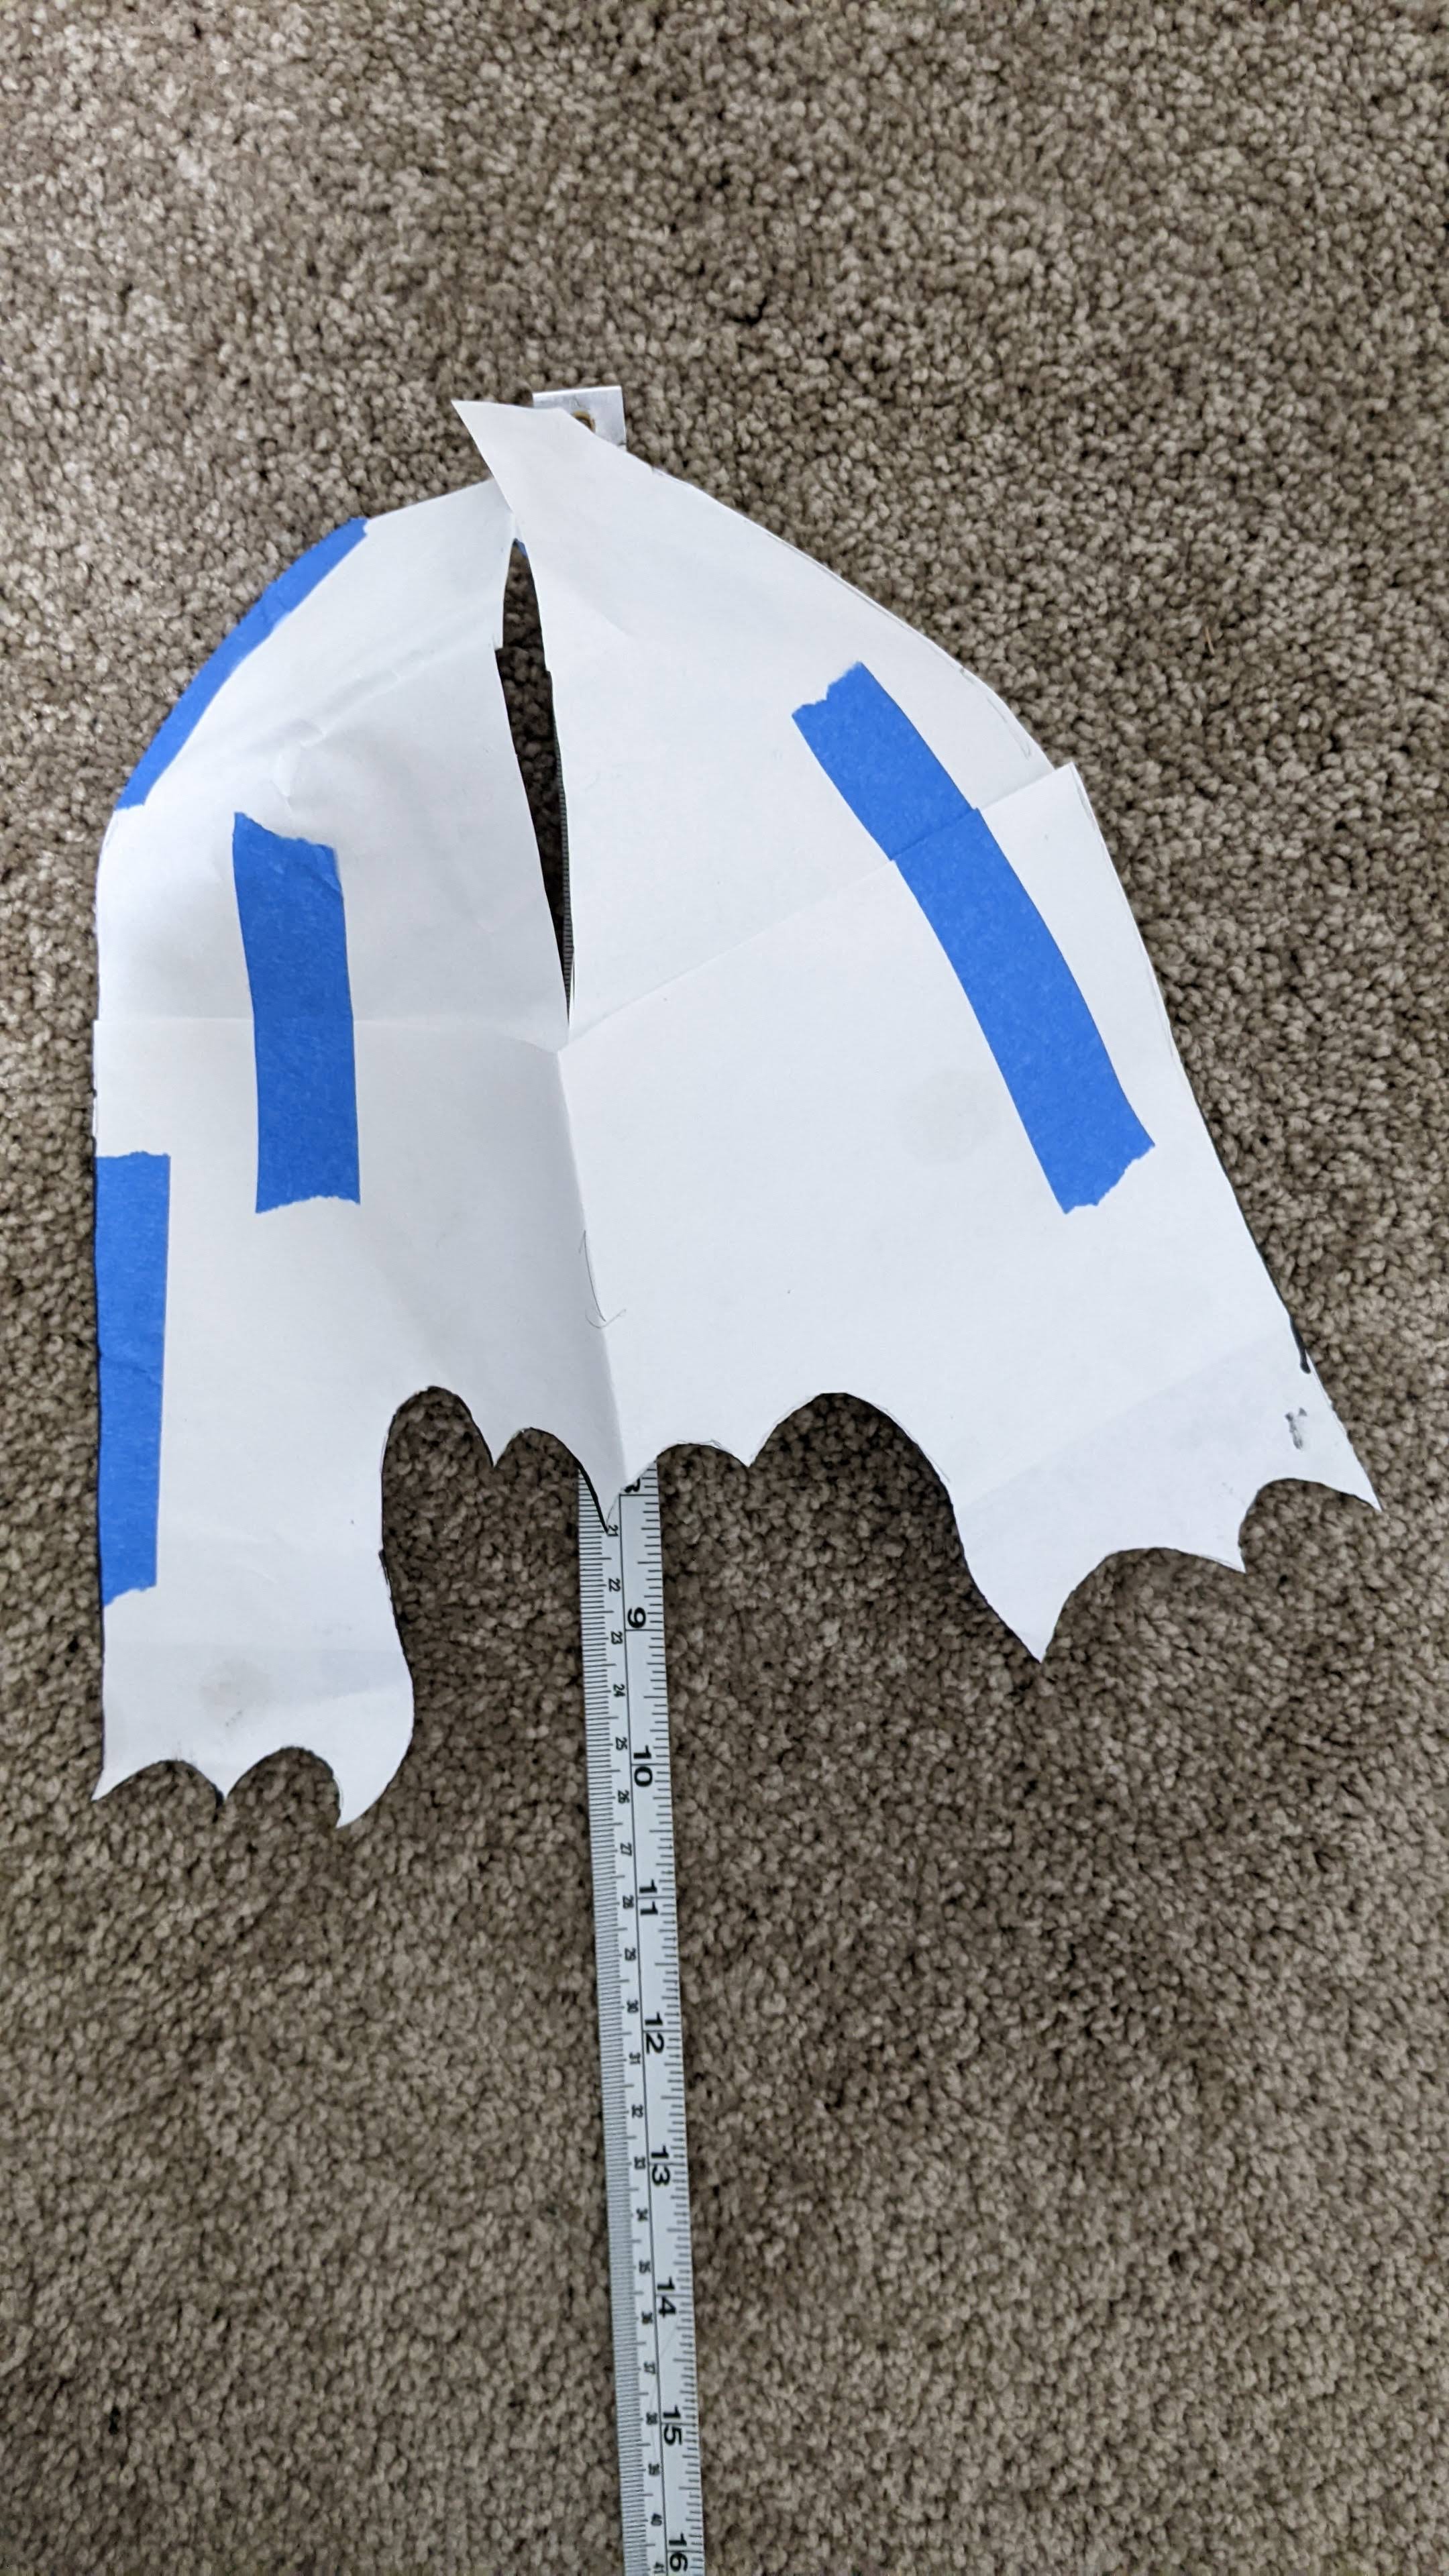
The upper shoulder piece, both front-on and side on:
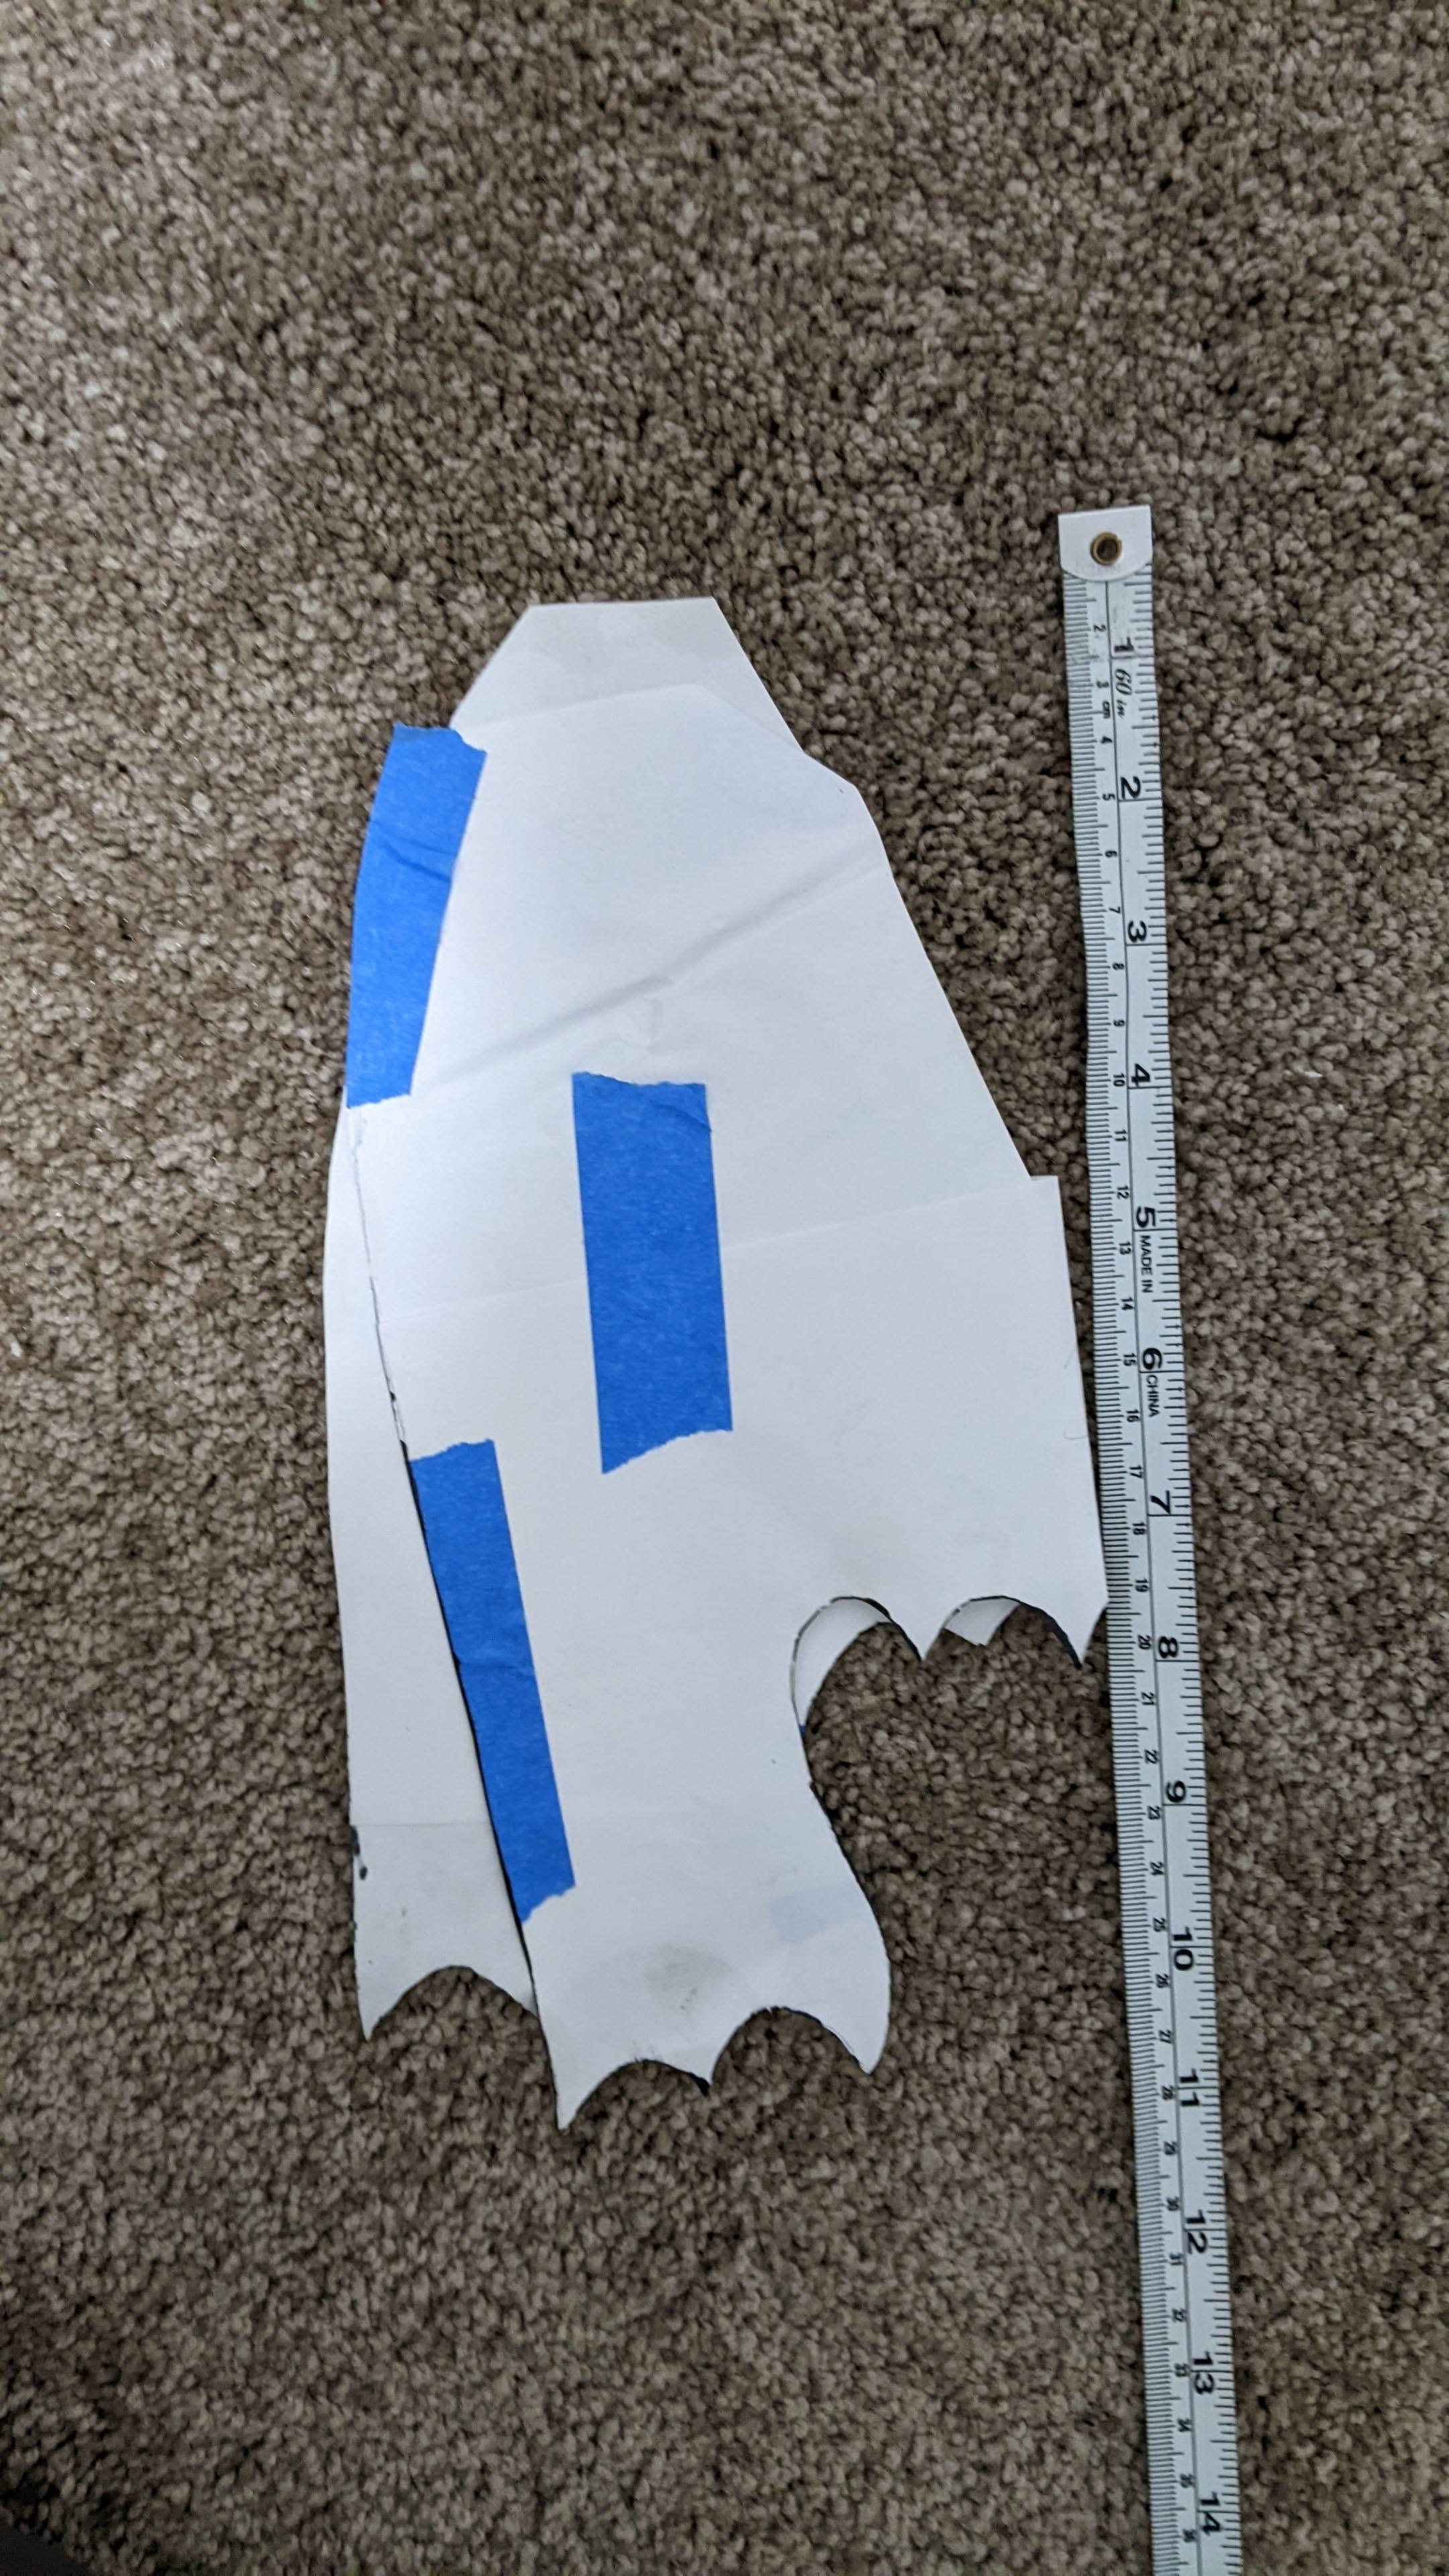
The remaining upper arm pieces:
Working down, the wrist and hand templates:
The two types of finger piece - the tip and the pieces along the finger:
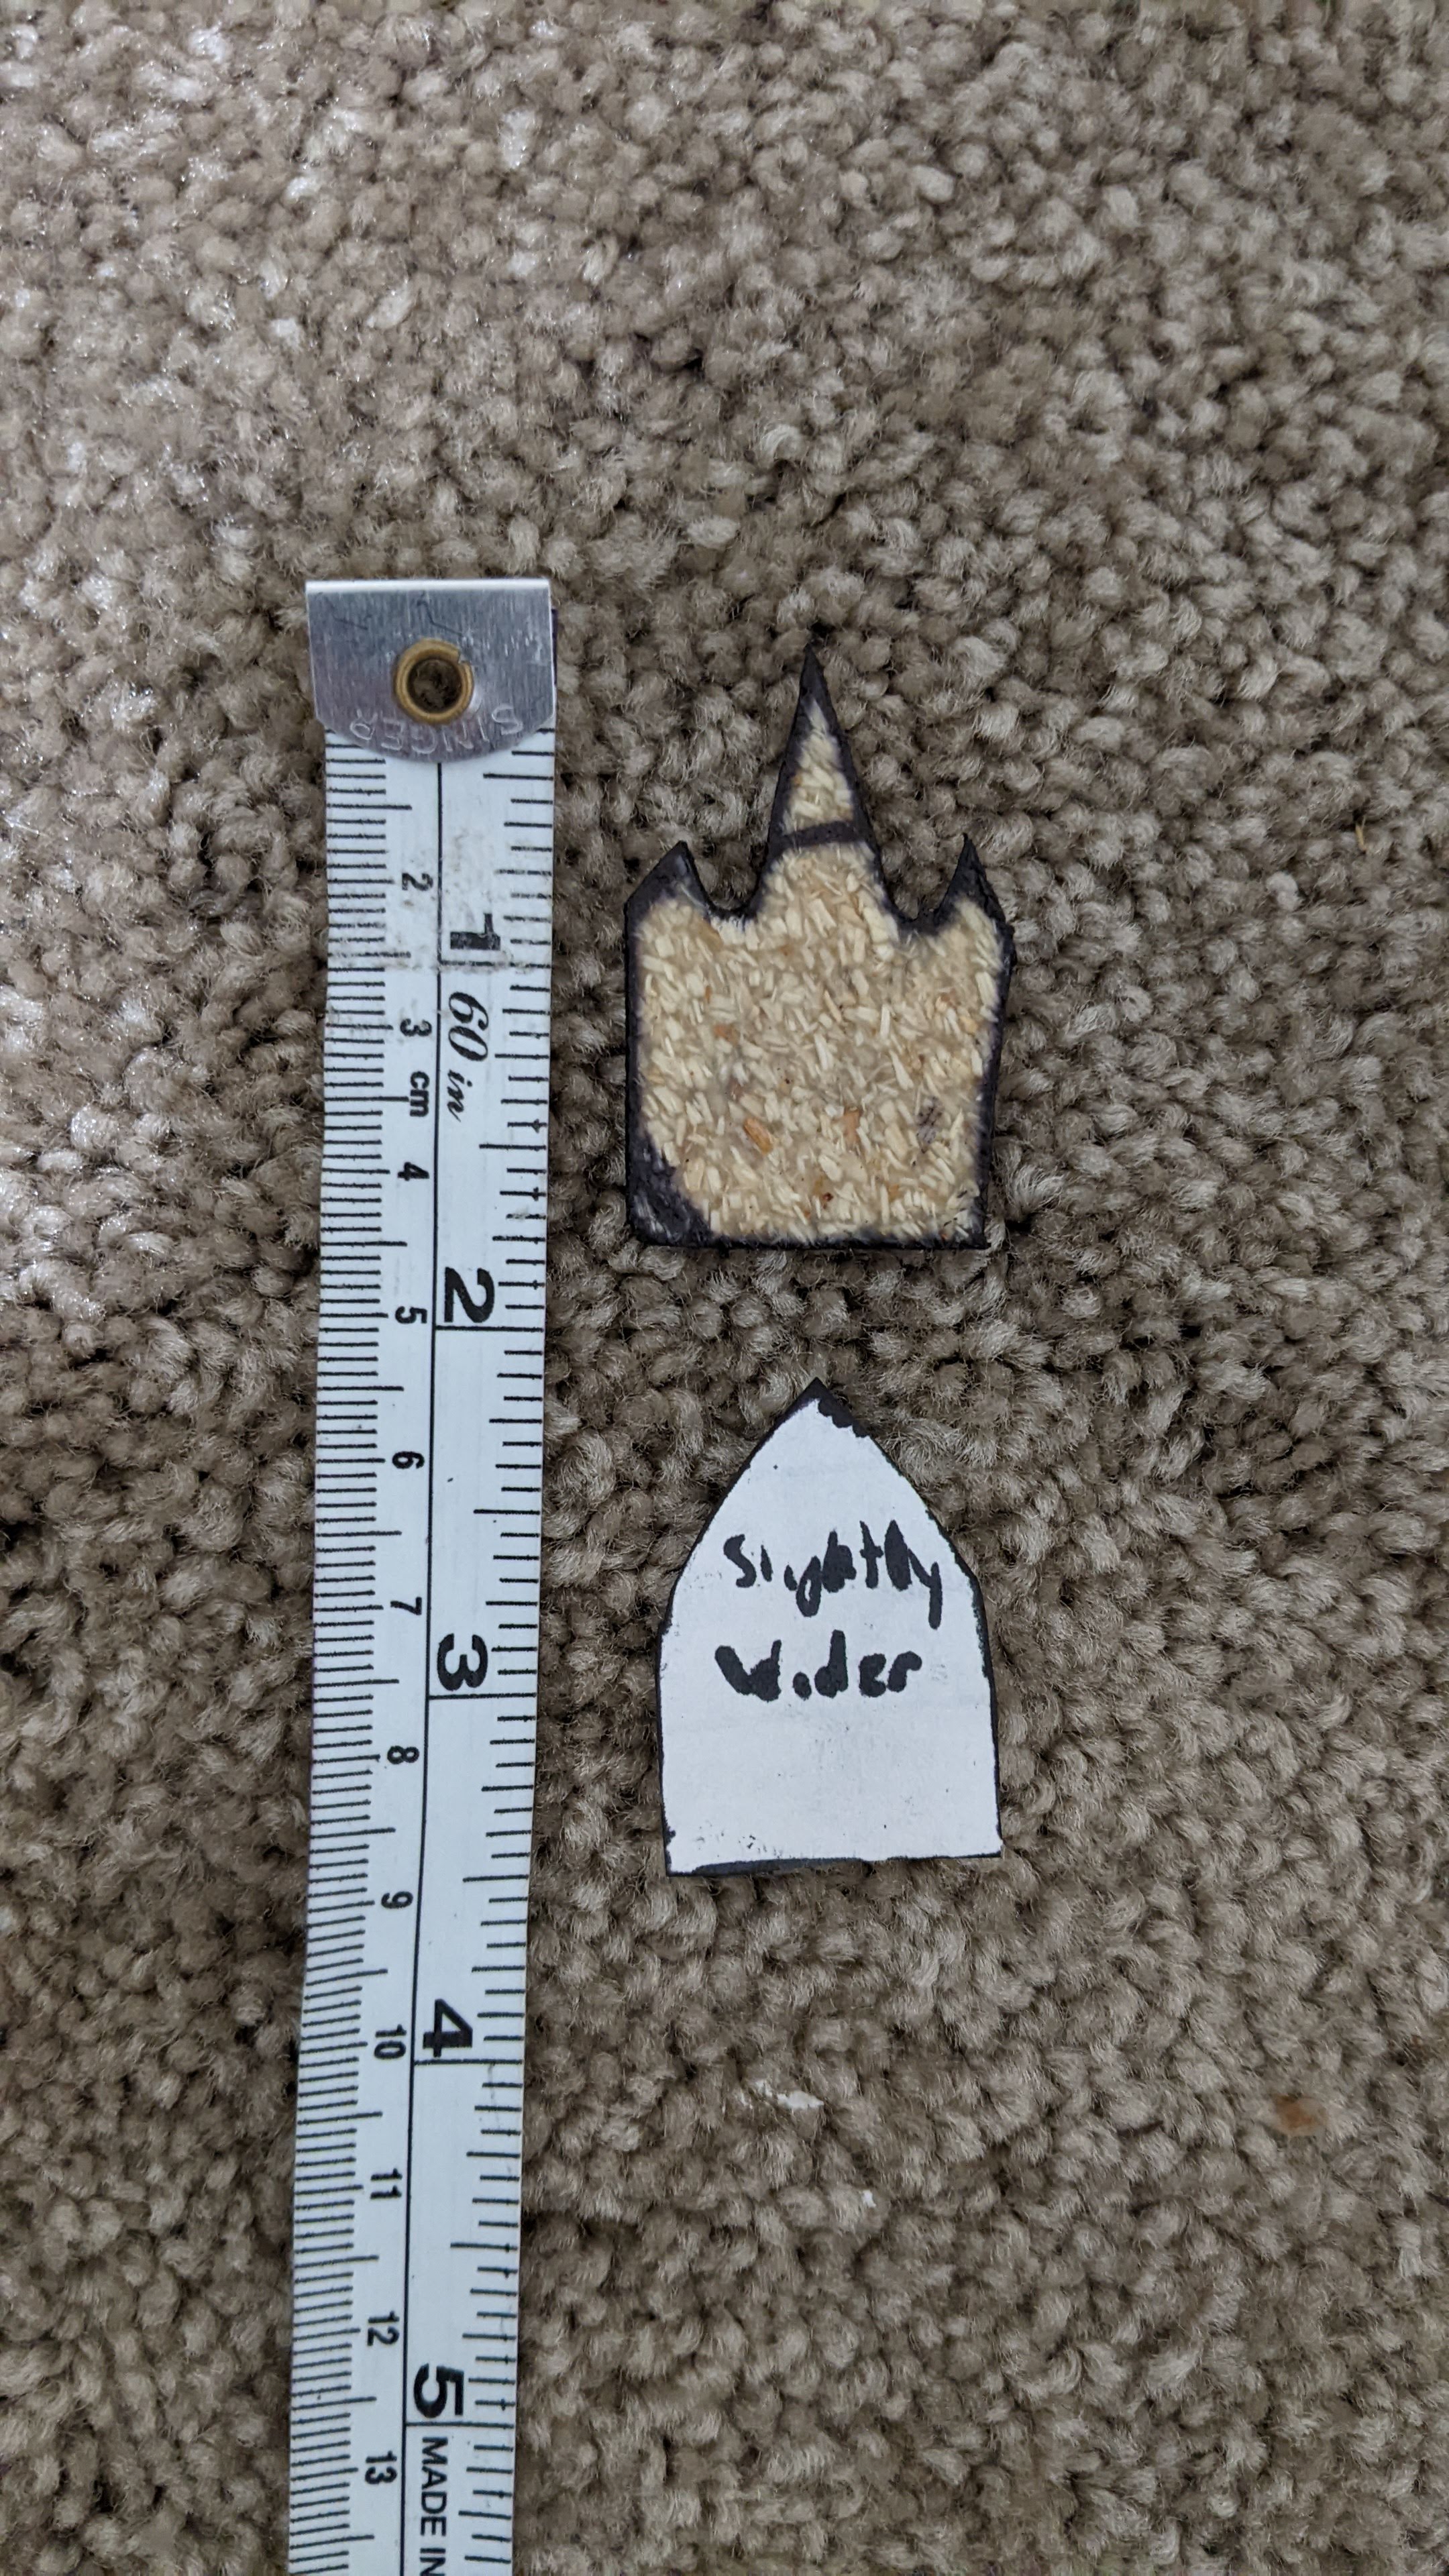
And the slightly different template I made for my thumb: