The One Ring
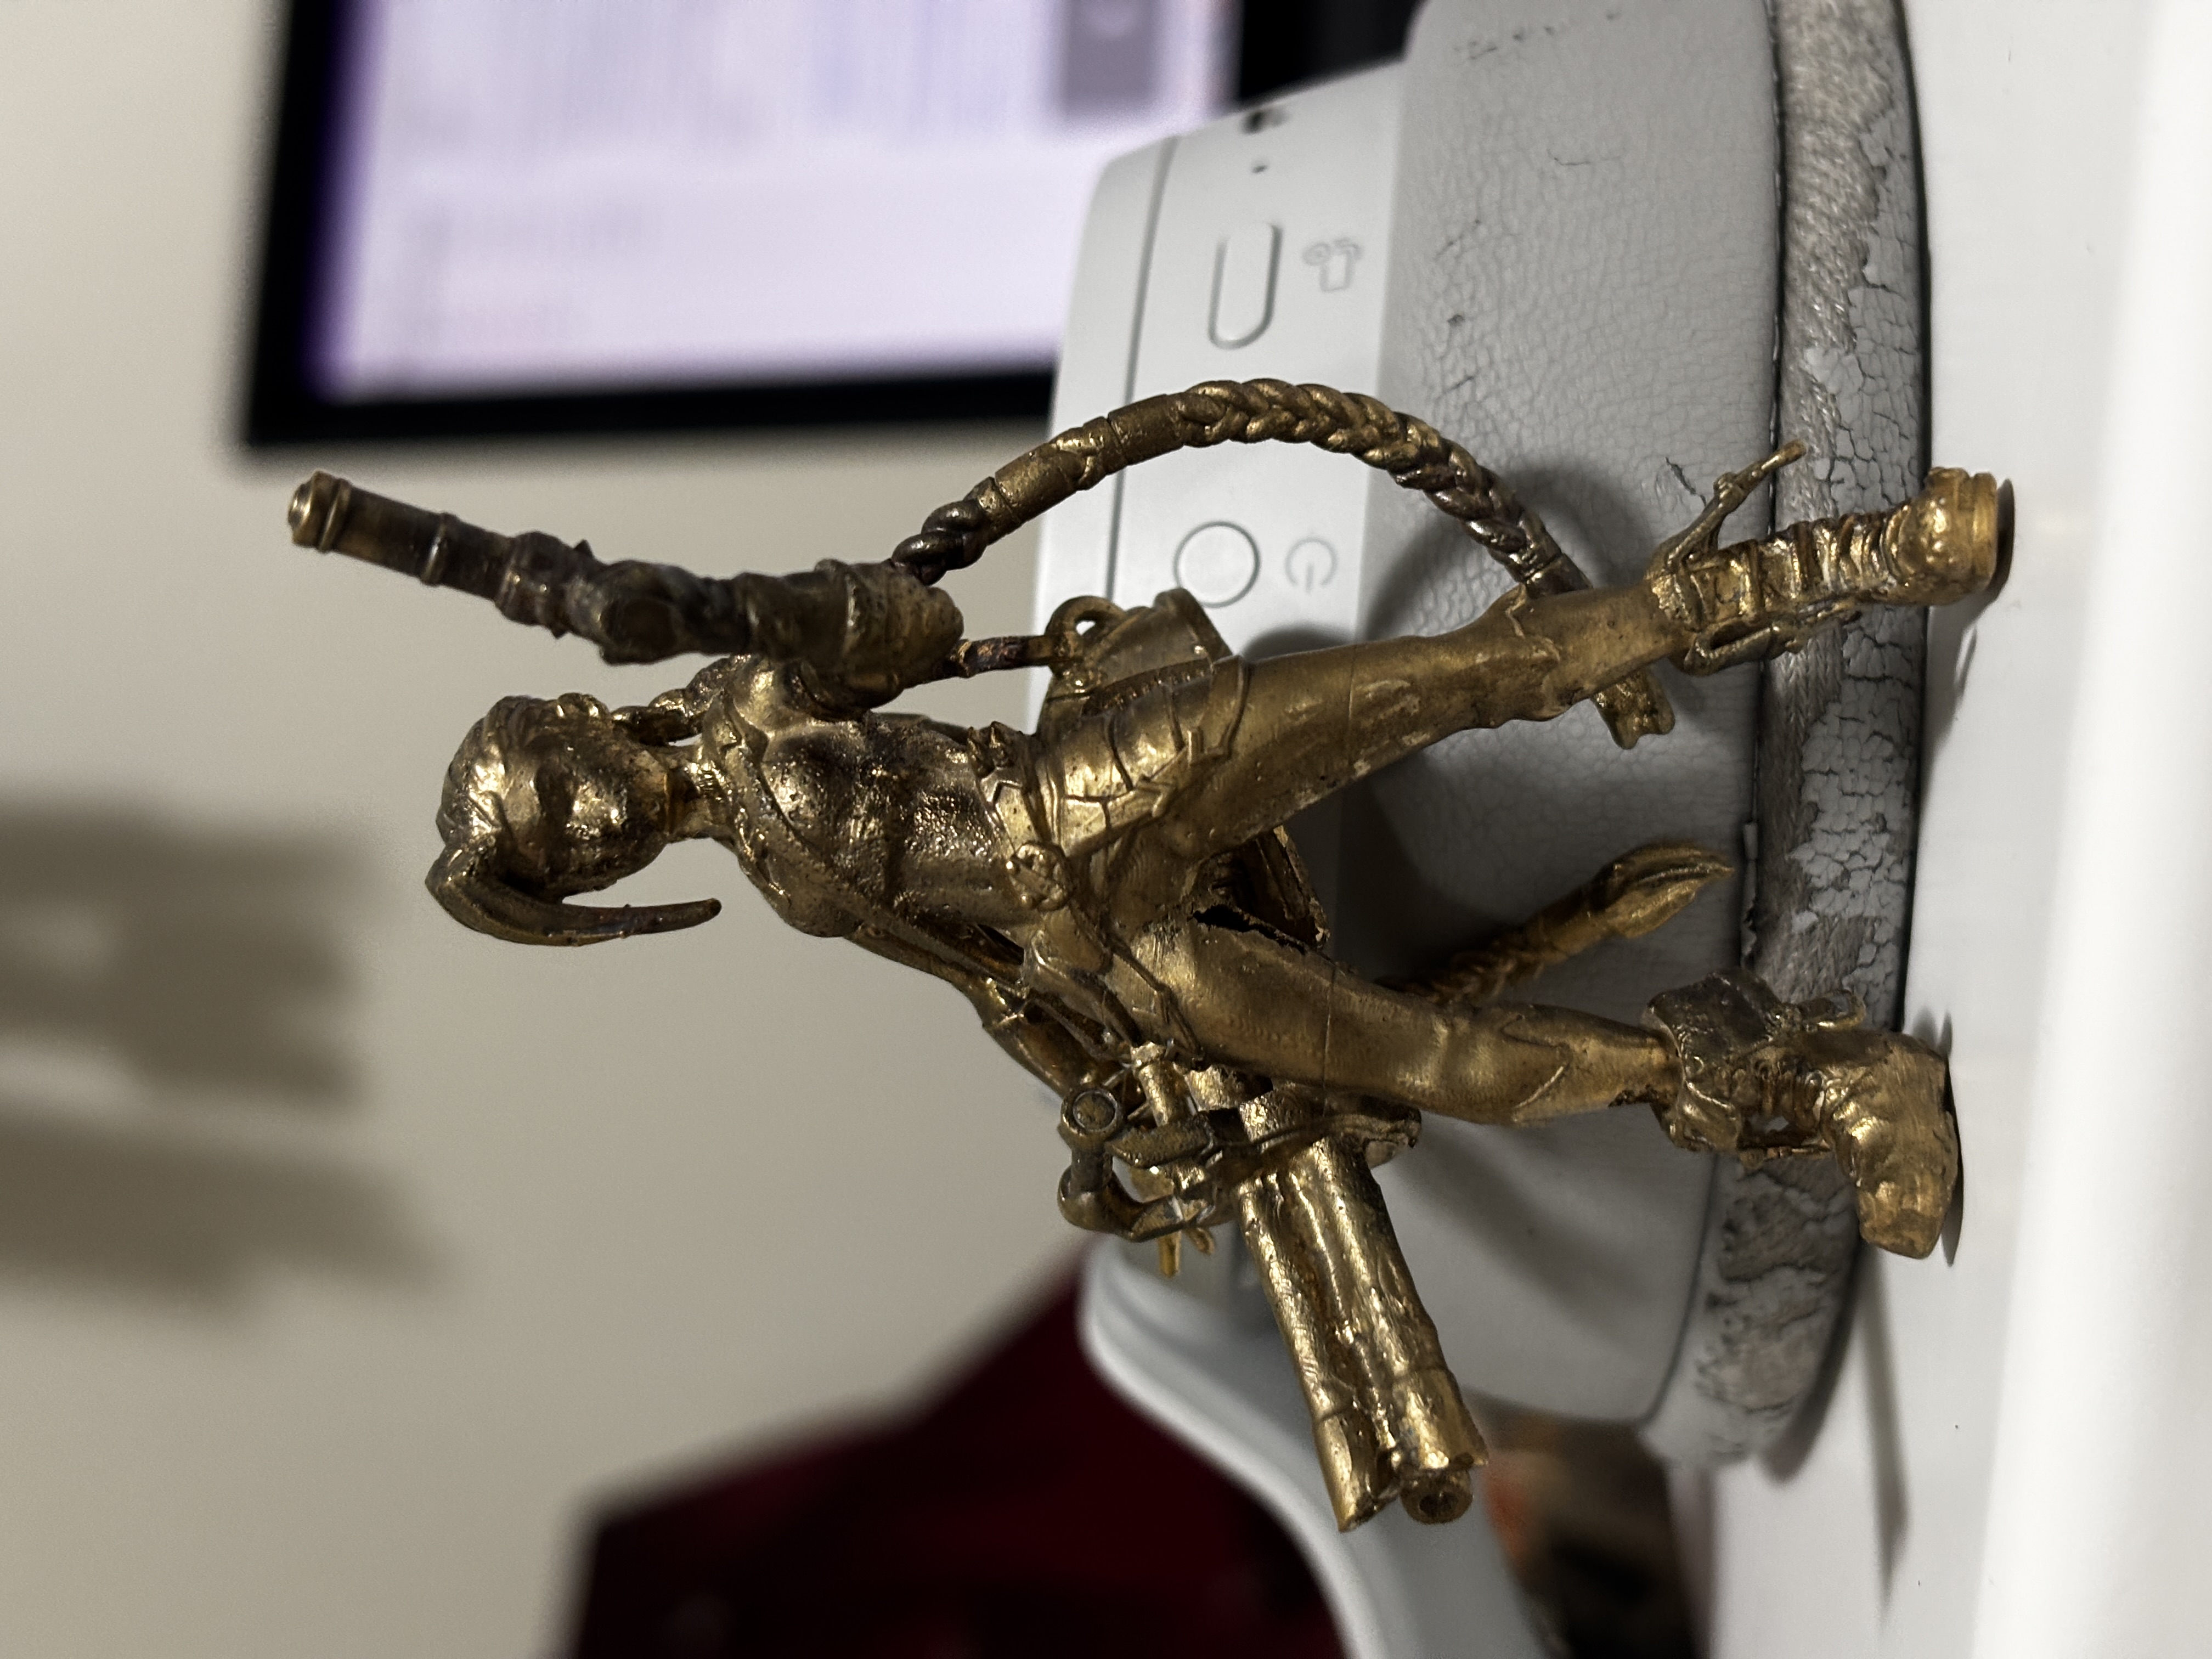
A friend wanted to test his lost-wax casting setup, and asked me for a model. We successfully cast this model below (Jinx, from Netflix’ Arcane or from League of Legends) out of brass and it turned out great!
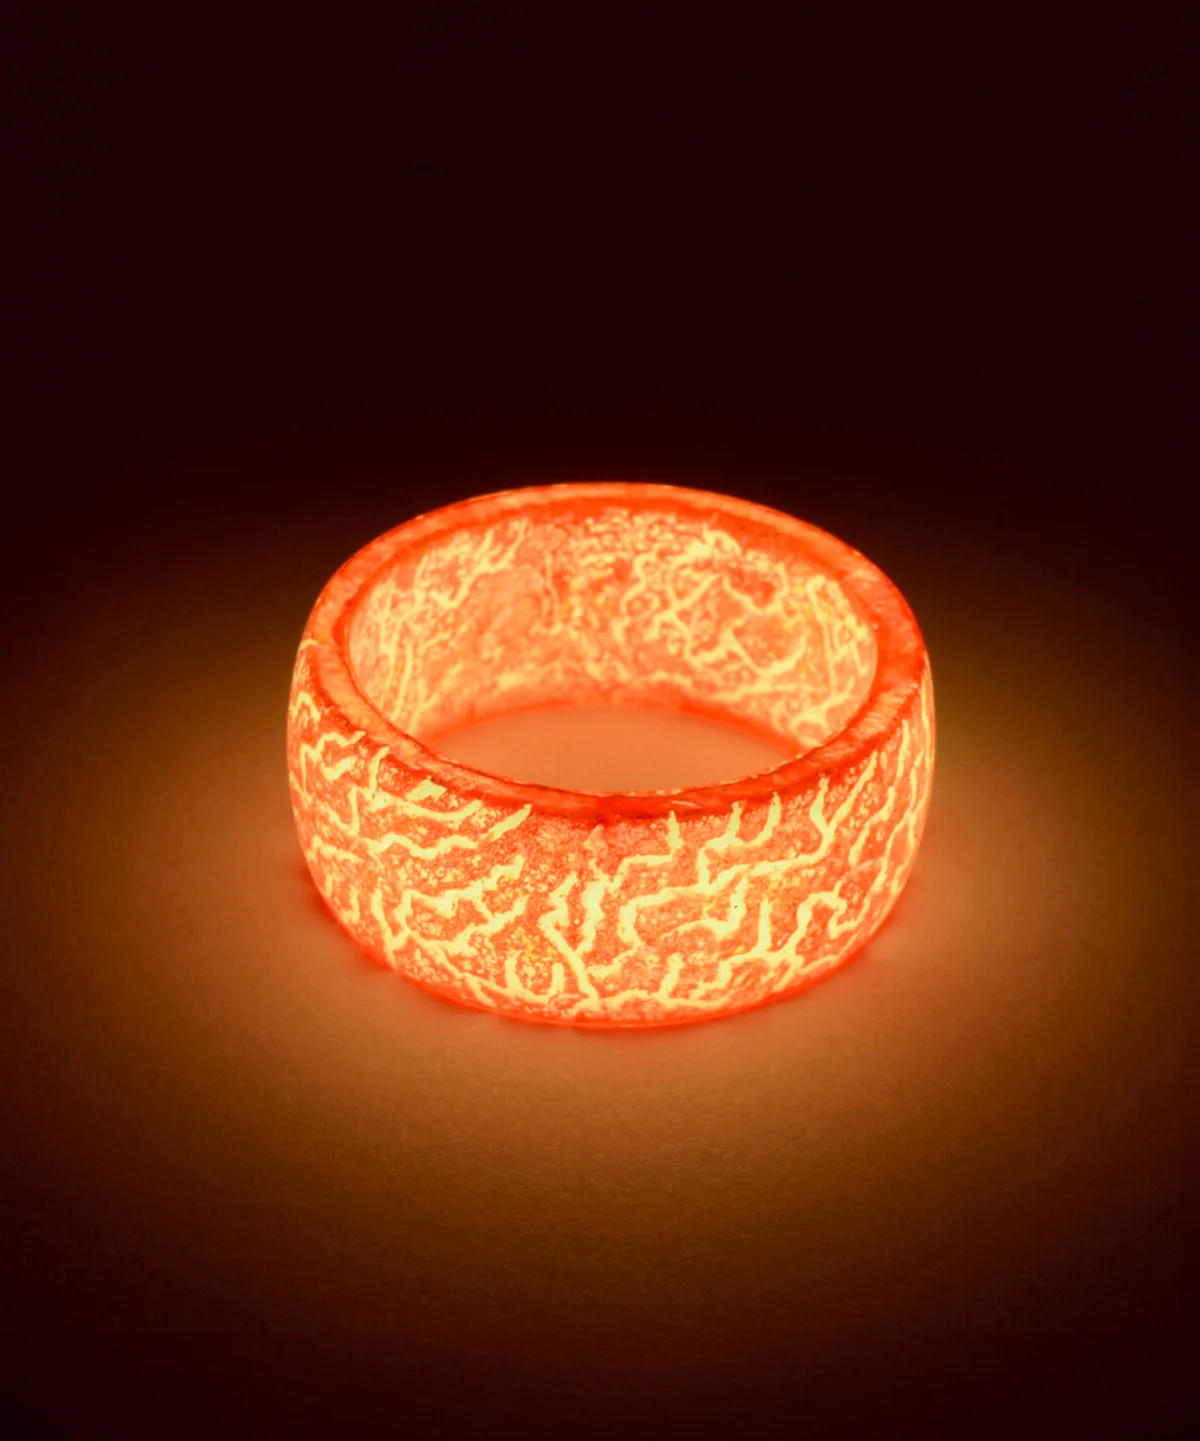
A year or two later I saw that someone online had made a ring with strontium aluminate (glow powder) embedded in into the metal. They’d specifically used red glow powder, giving their ring a very fiery effect.
Which gave me the obvious idea: can we do this with The One Ring?
From the book, we know the text can glow bright enough to read whilst the Ring is cool enough to comfortably hold. Since glow powder reacts to light, this is perfect.
A quick search on Thingiverse revealed several One Ring designs, and once SLA-printed there was an obvious candidate – smooth rounded edges, big text, and most importantly, deep text. To do a quick feasibility test, this was printed in standard resin and the text filled in with powder. Any excess was dusted off:
Excellent! Didn’t brush off as much powder as I wanted to, but this was also a quick draft. It proved the concept nicely, so I forged on.
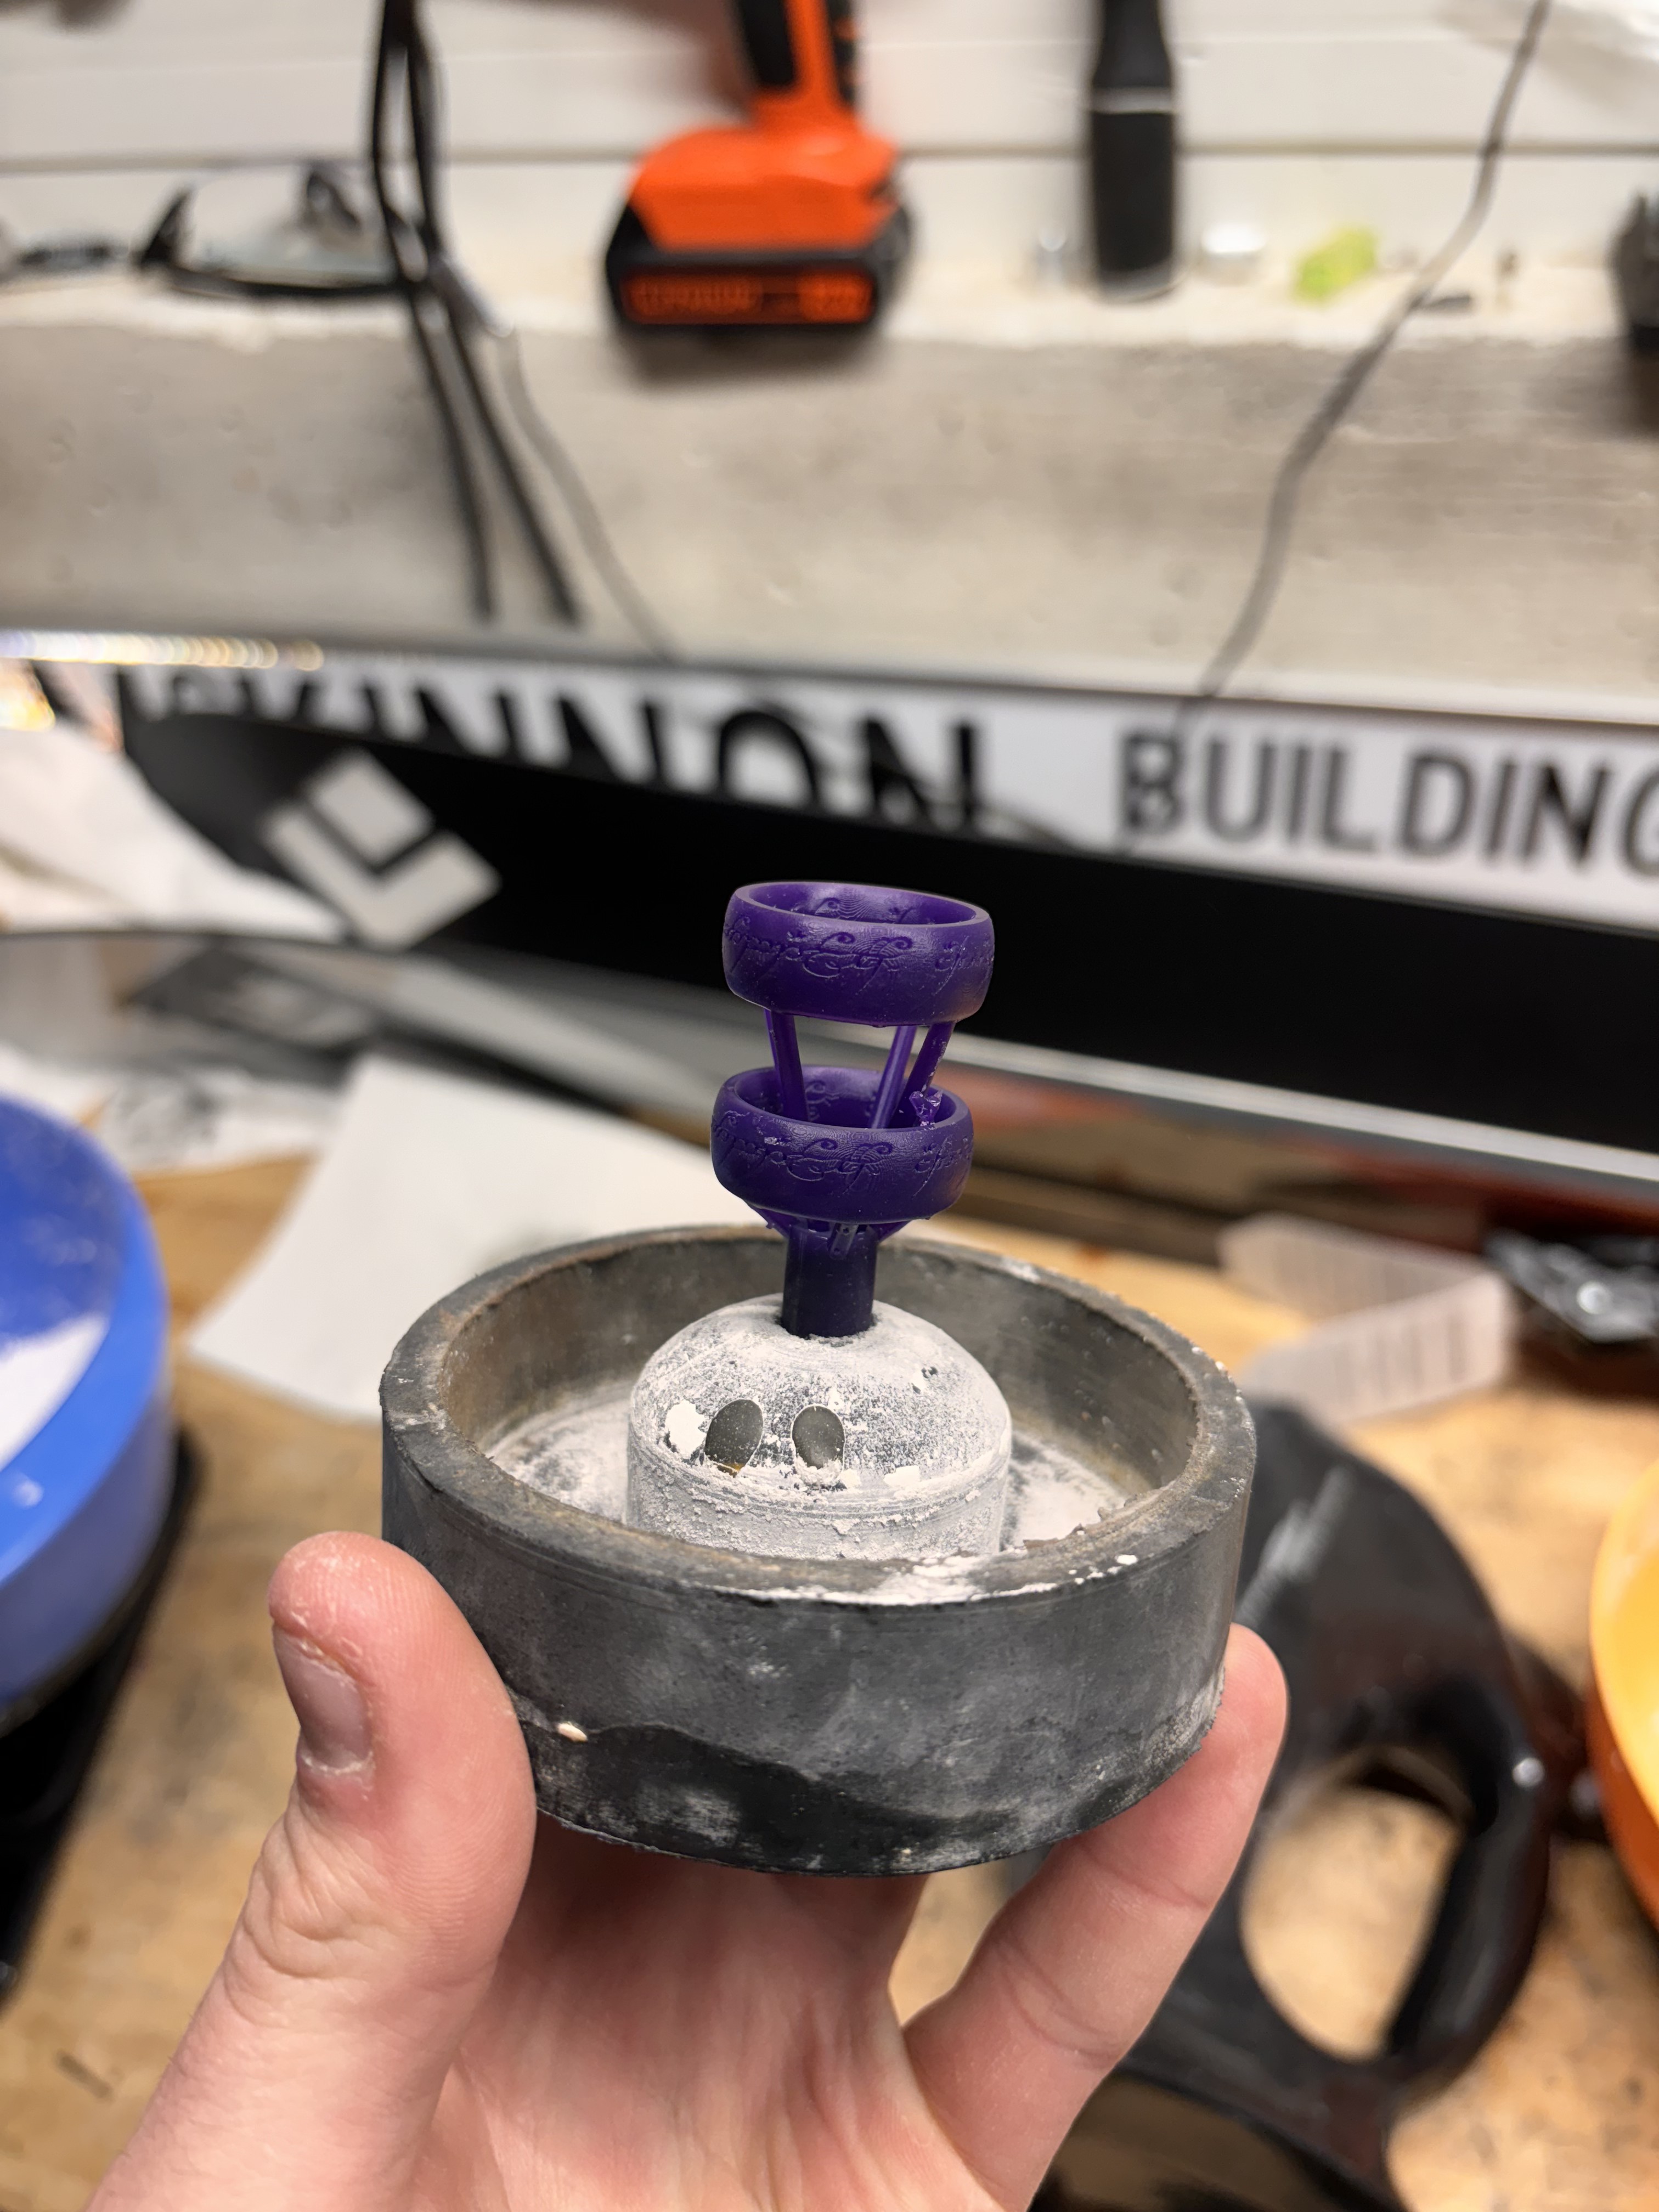
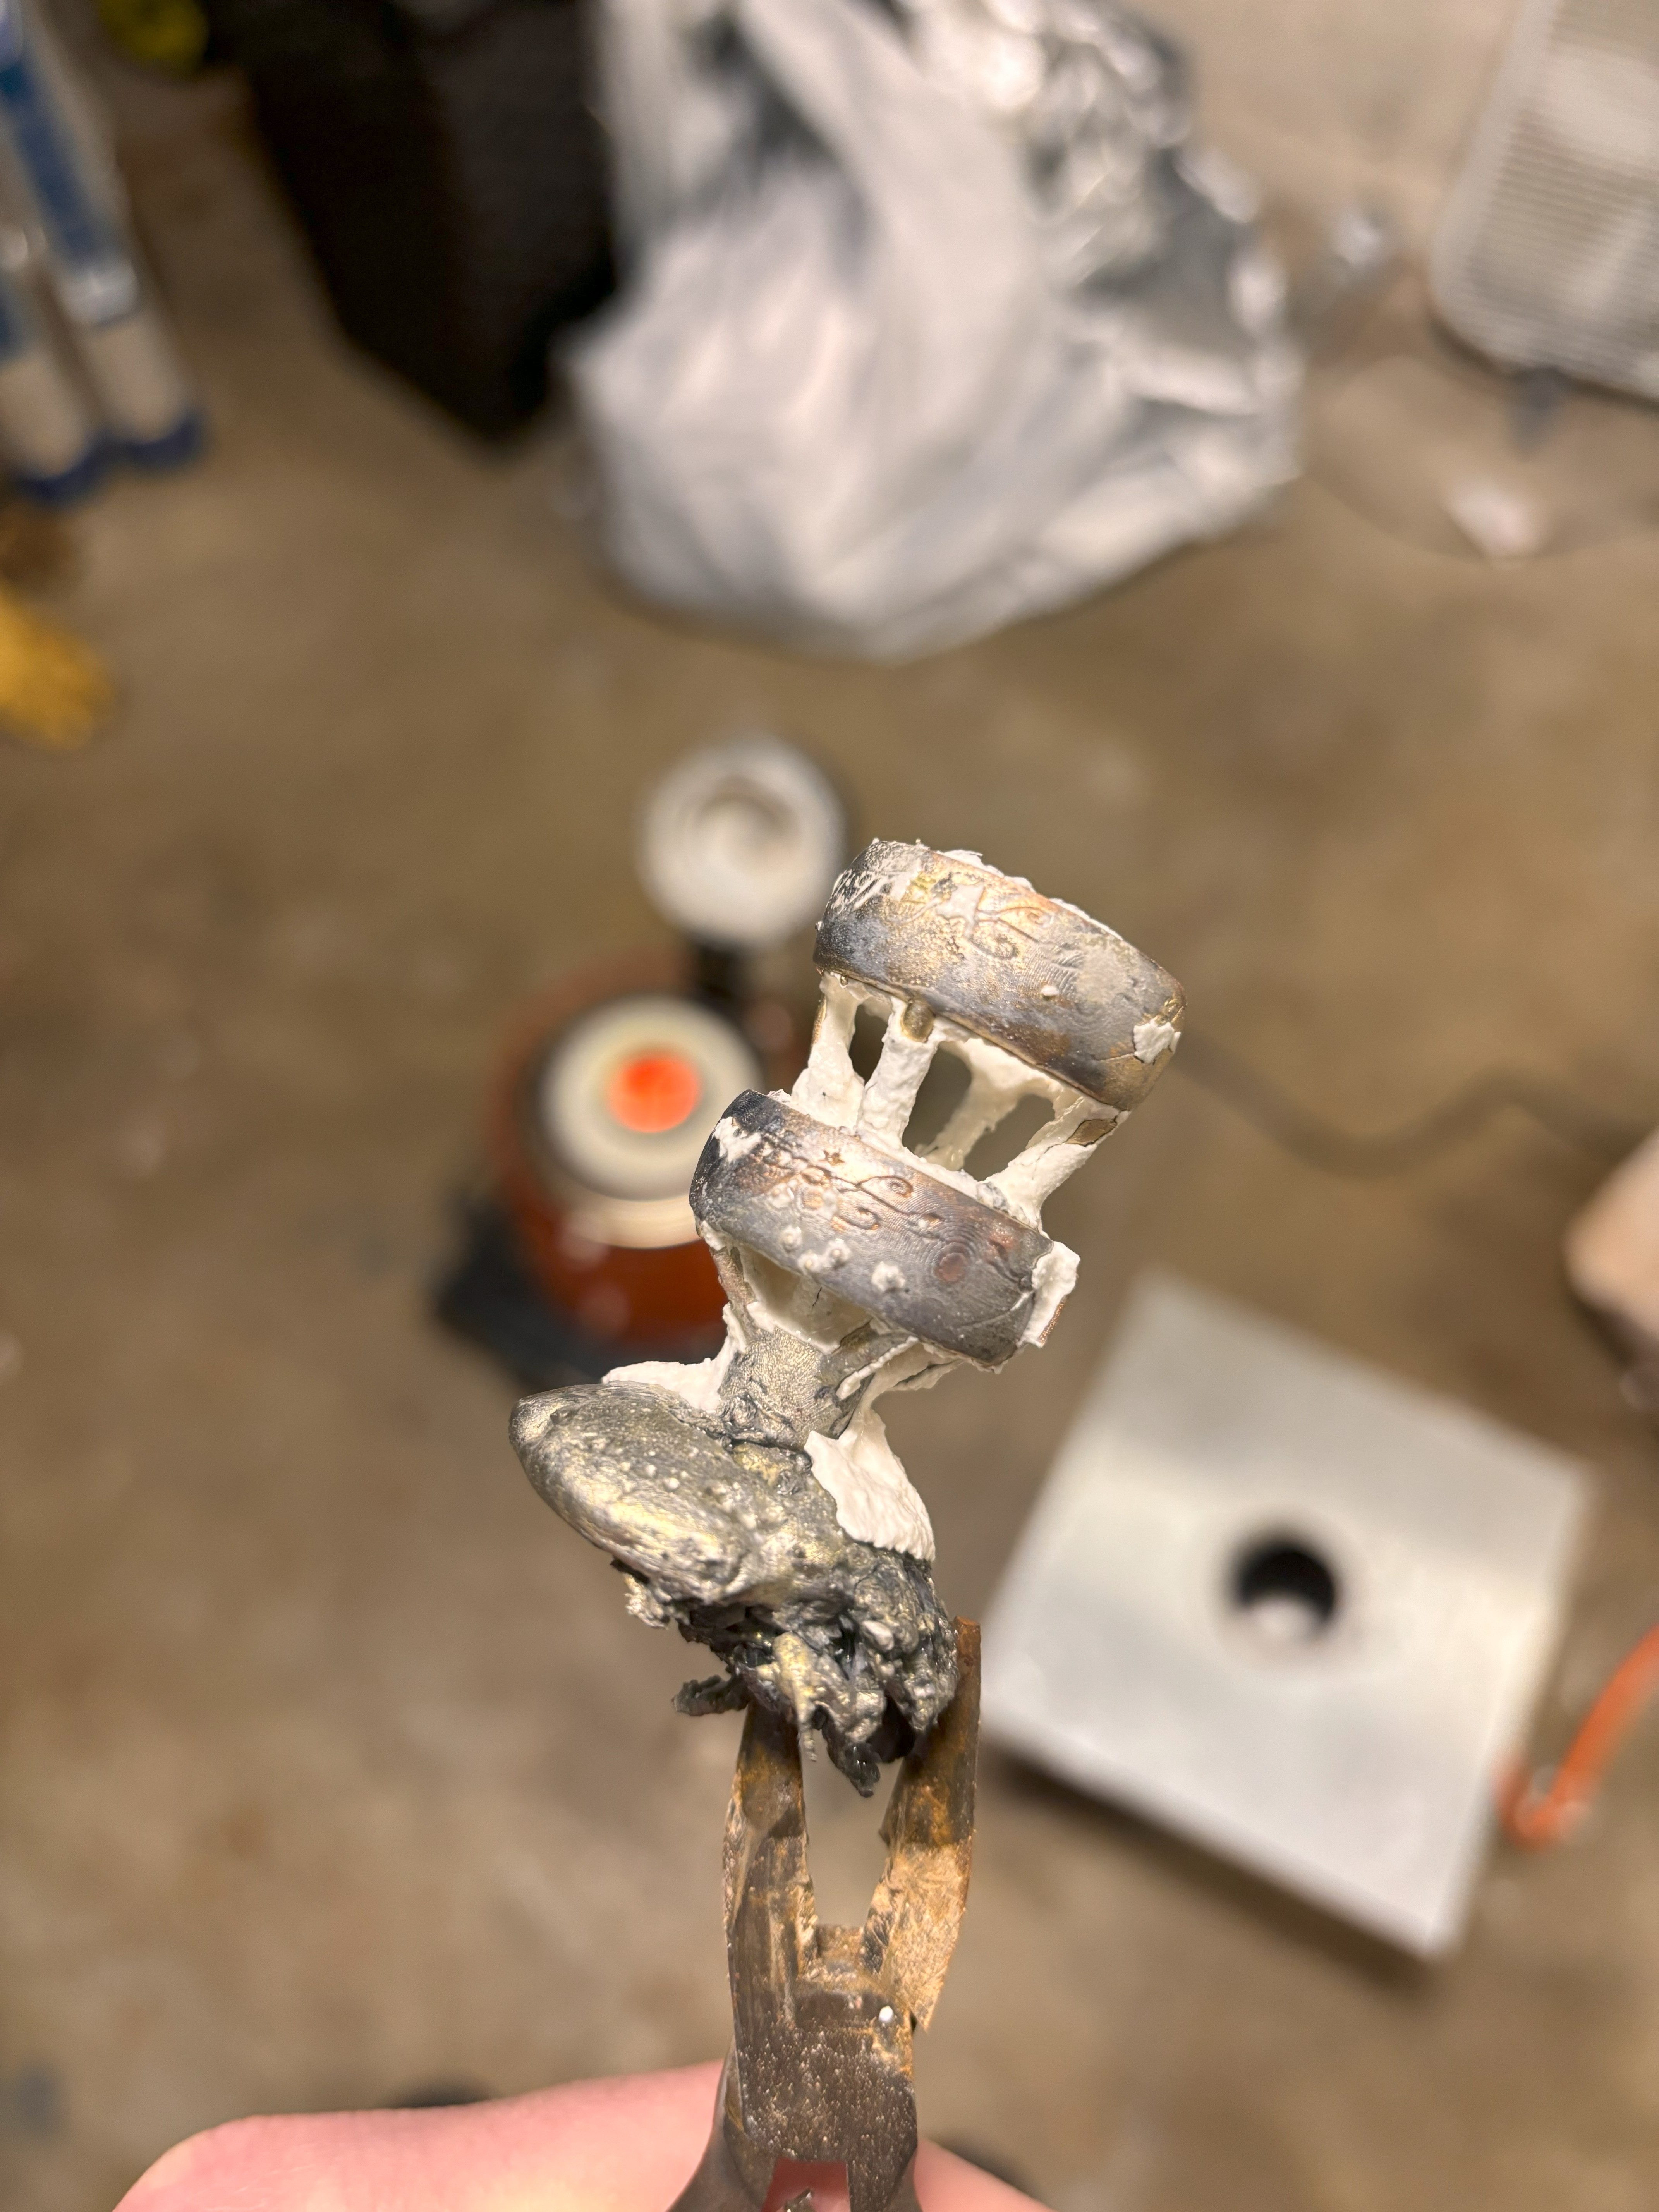
Next step is to print this in wax resin:
This will get embedded into plaster and melted out to make the negative. These were created in batches of two so that there was a spare, and the rods seen in the image are sprues, or tracks for brass and air to flow – if there were only one pathway, airbubbles would easily occur since molten brass is heavier than air (citation needed).
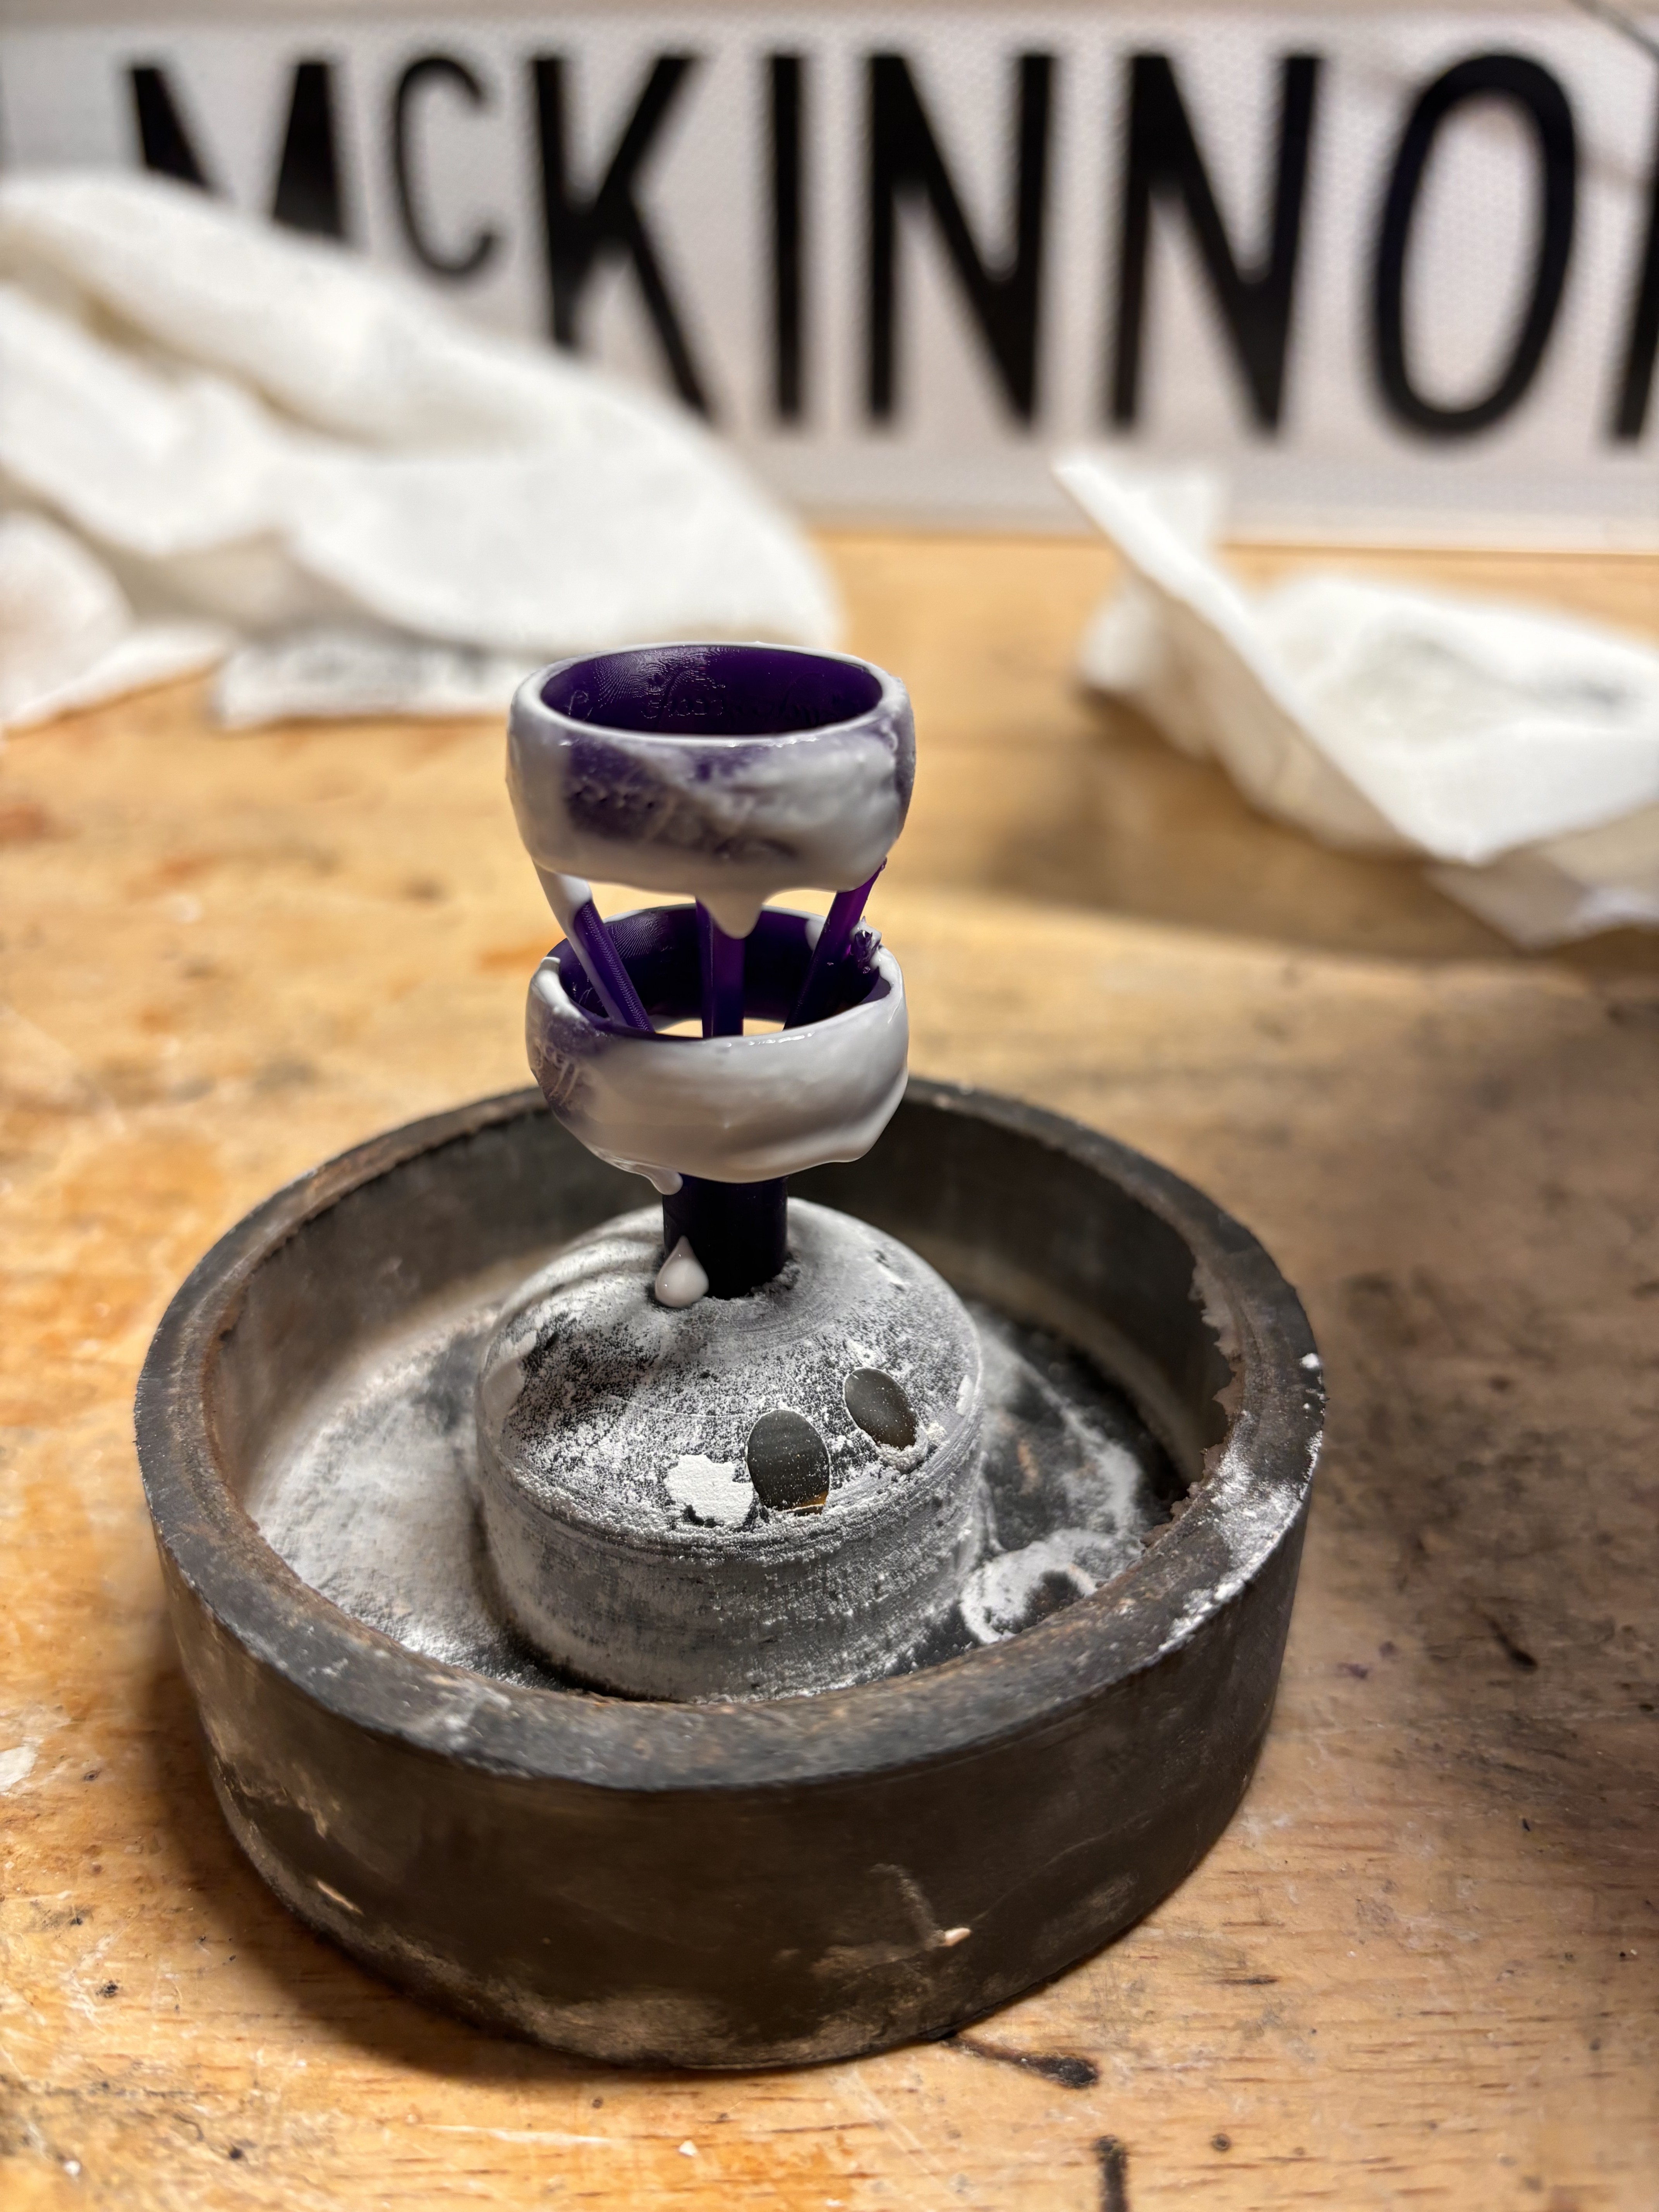
Encasing in plaster. I smooshed plaster into the text separately, to ensure palster got in the tiny holes:

The plaster needs to cook at increasing temperatures, with a ceiling of 1100 degrees F, for 14 hours. The kiln is programmable and it was set to the right times and temperatures so I just hit go … and then got back into bed as it was super early and I wanted to do it that evening. I don’t completely understand this part; something about heat-treating the plaster, I’m sure, and making sure it matches the molten brass temperature sufficiently so as not to crack upon contact.
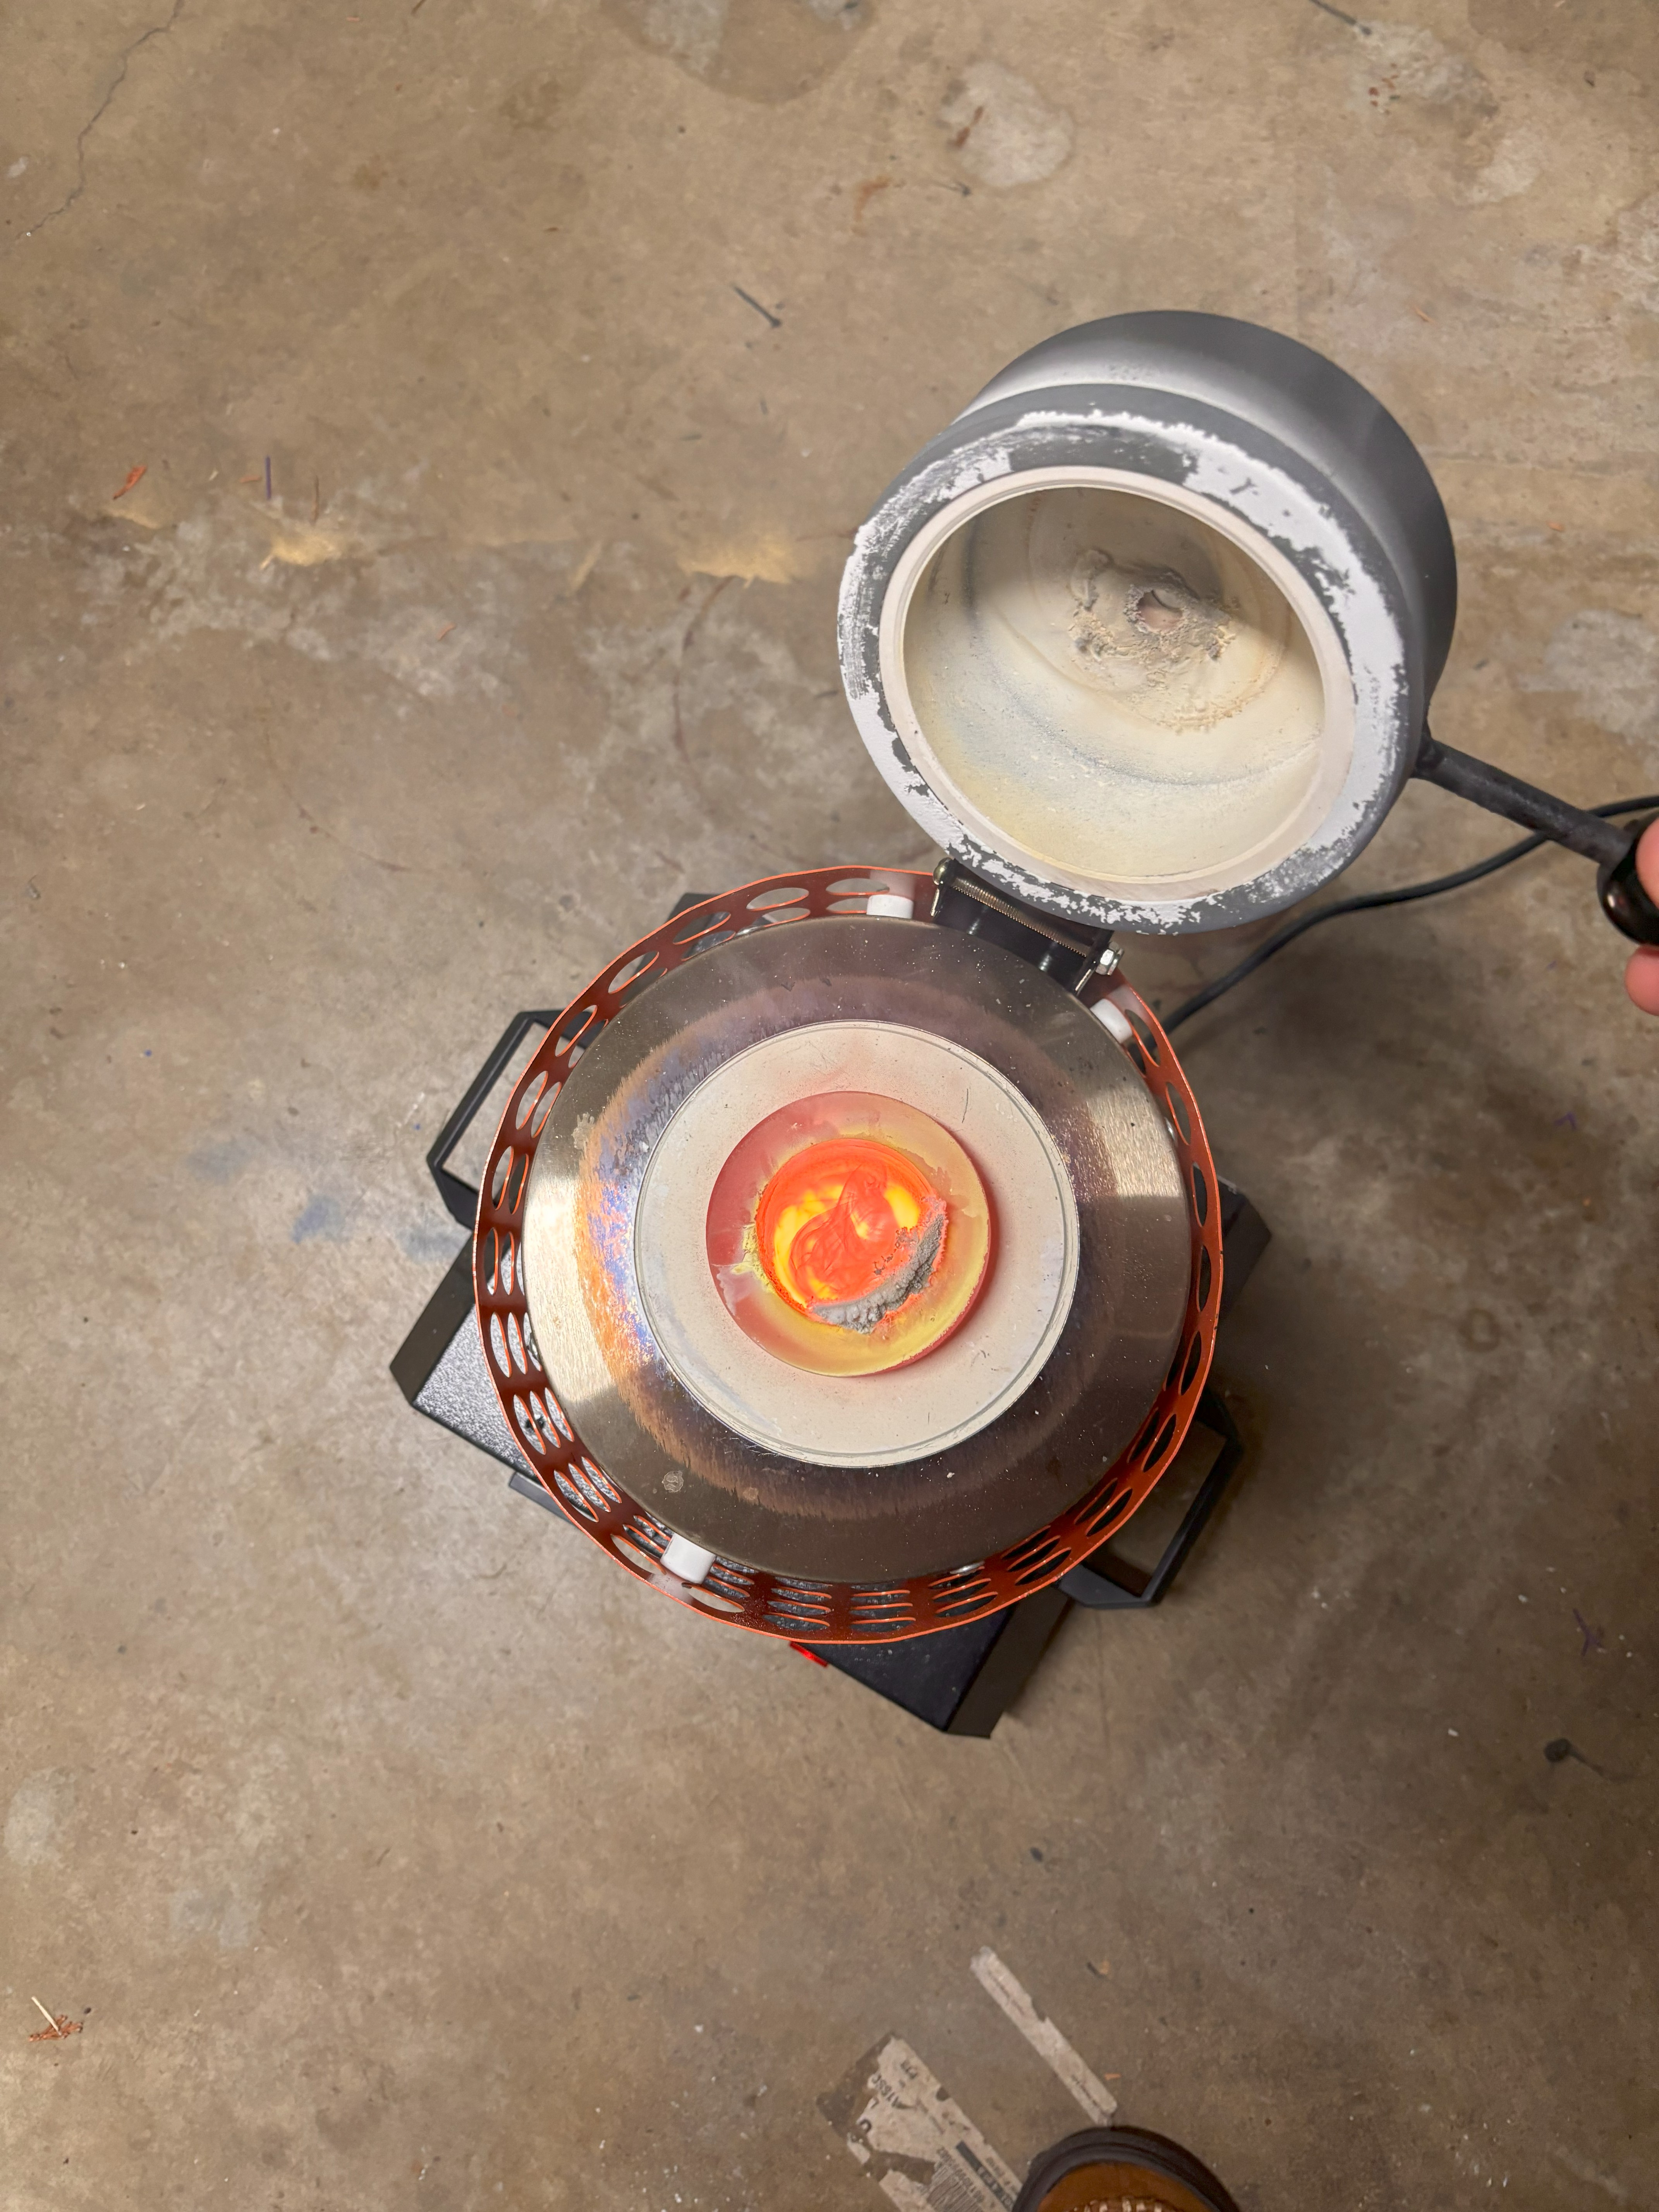
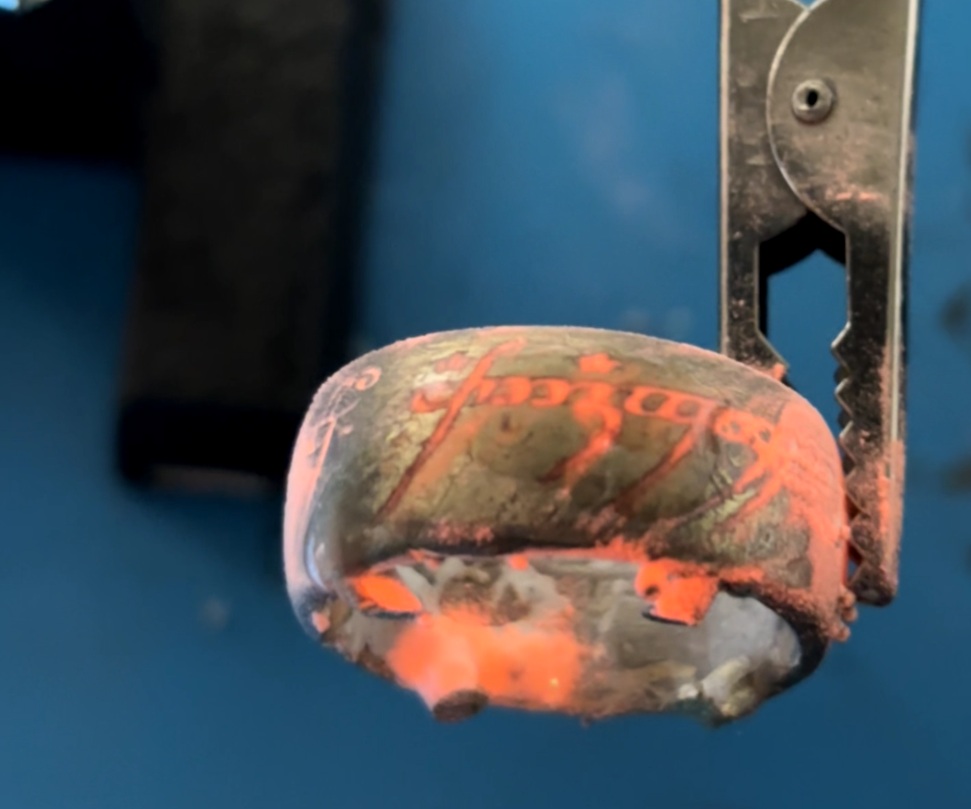
The oven I had takes about 90 minutes to heat the brass up to a good runny consistency, at 987 Celsius, so I timed them to finish simultaenously. This one is a lot simpler - one temperature, put the metal in, turn it on … simmer lightly, serves four. There is a window of opportunity when the plaster is held at the final temperature before cooling and the metal is liquid - it does not have to be immediate – but given that this has been going all day, I like to finish before it gets too late.
The next steps are the quick and finicky ones.
-
First, take the plaster negative out of the oven and put it into the vacuum chamber
-
Press to create a seal, then turn on the vacuum pump. Ensure the chamber is at lower pressure. You can’t take too long on this or the plaster will cool down
-
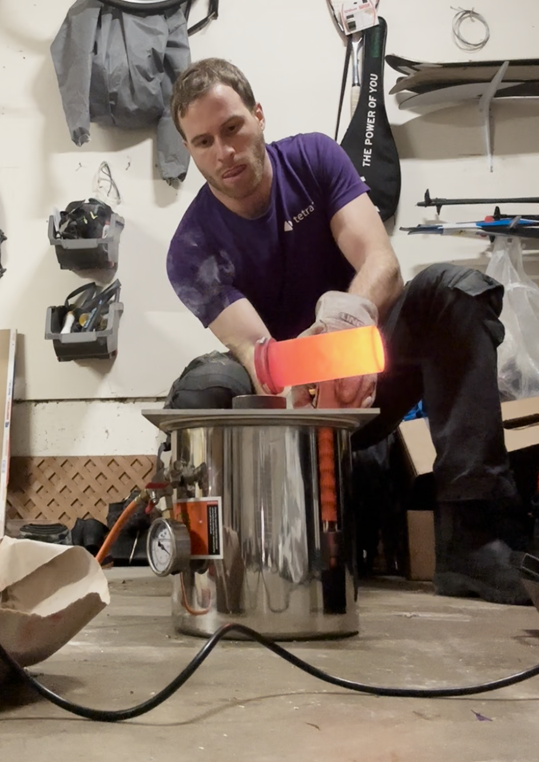
Finally, take the crucible out of the metal oven and pour – gently! - into the plaster. Too fast and you’ll make a splash (but the bad kind). Too slow and it will dribble in, solidifying on the way and not filling every crevice.
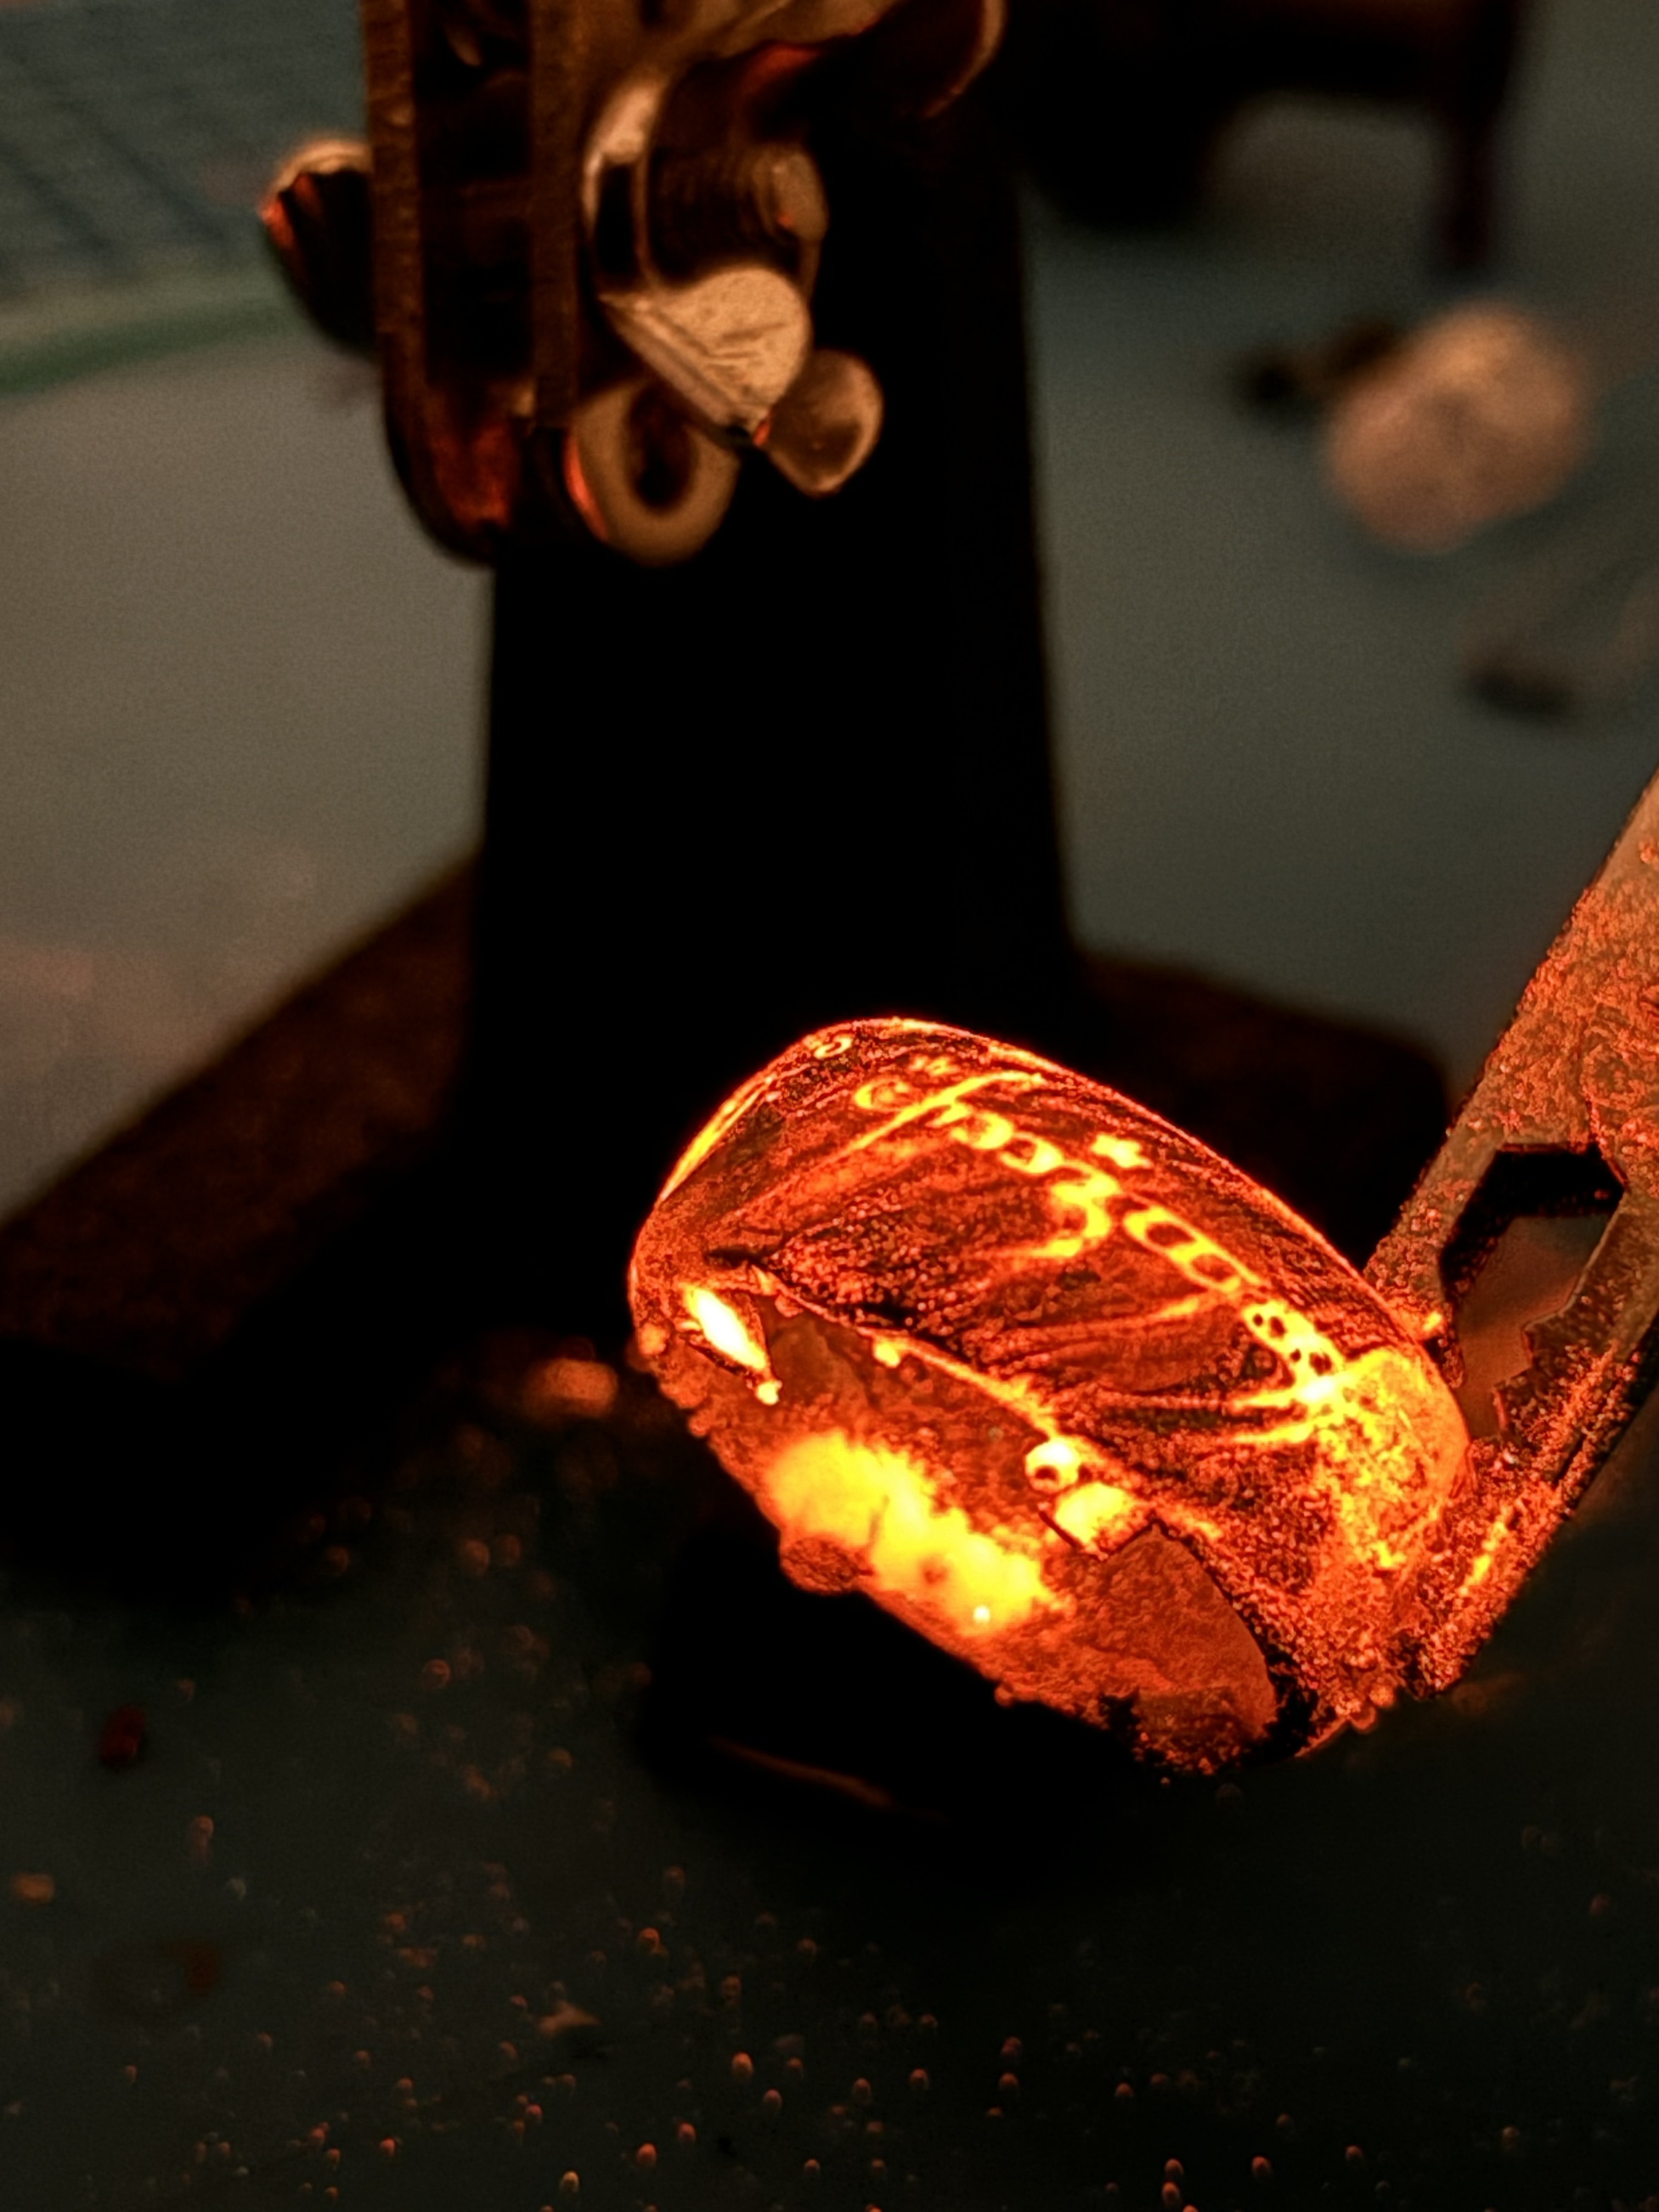
- Hard part is over; wait

Once cooled to a gentle glow, immersion in water helps remove most of the plaster, with gentle chipping or an air compressor clearing the rest. The sprues and other connecting elements can be sawed off with a hacksaw or jewelry saw. Tada! One (or two) Ring(s)!
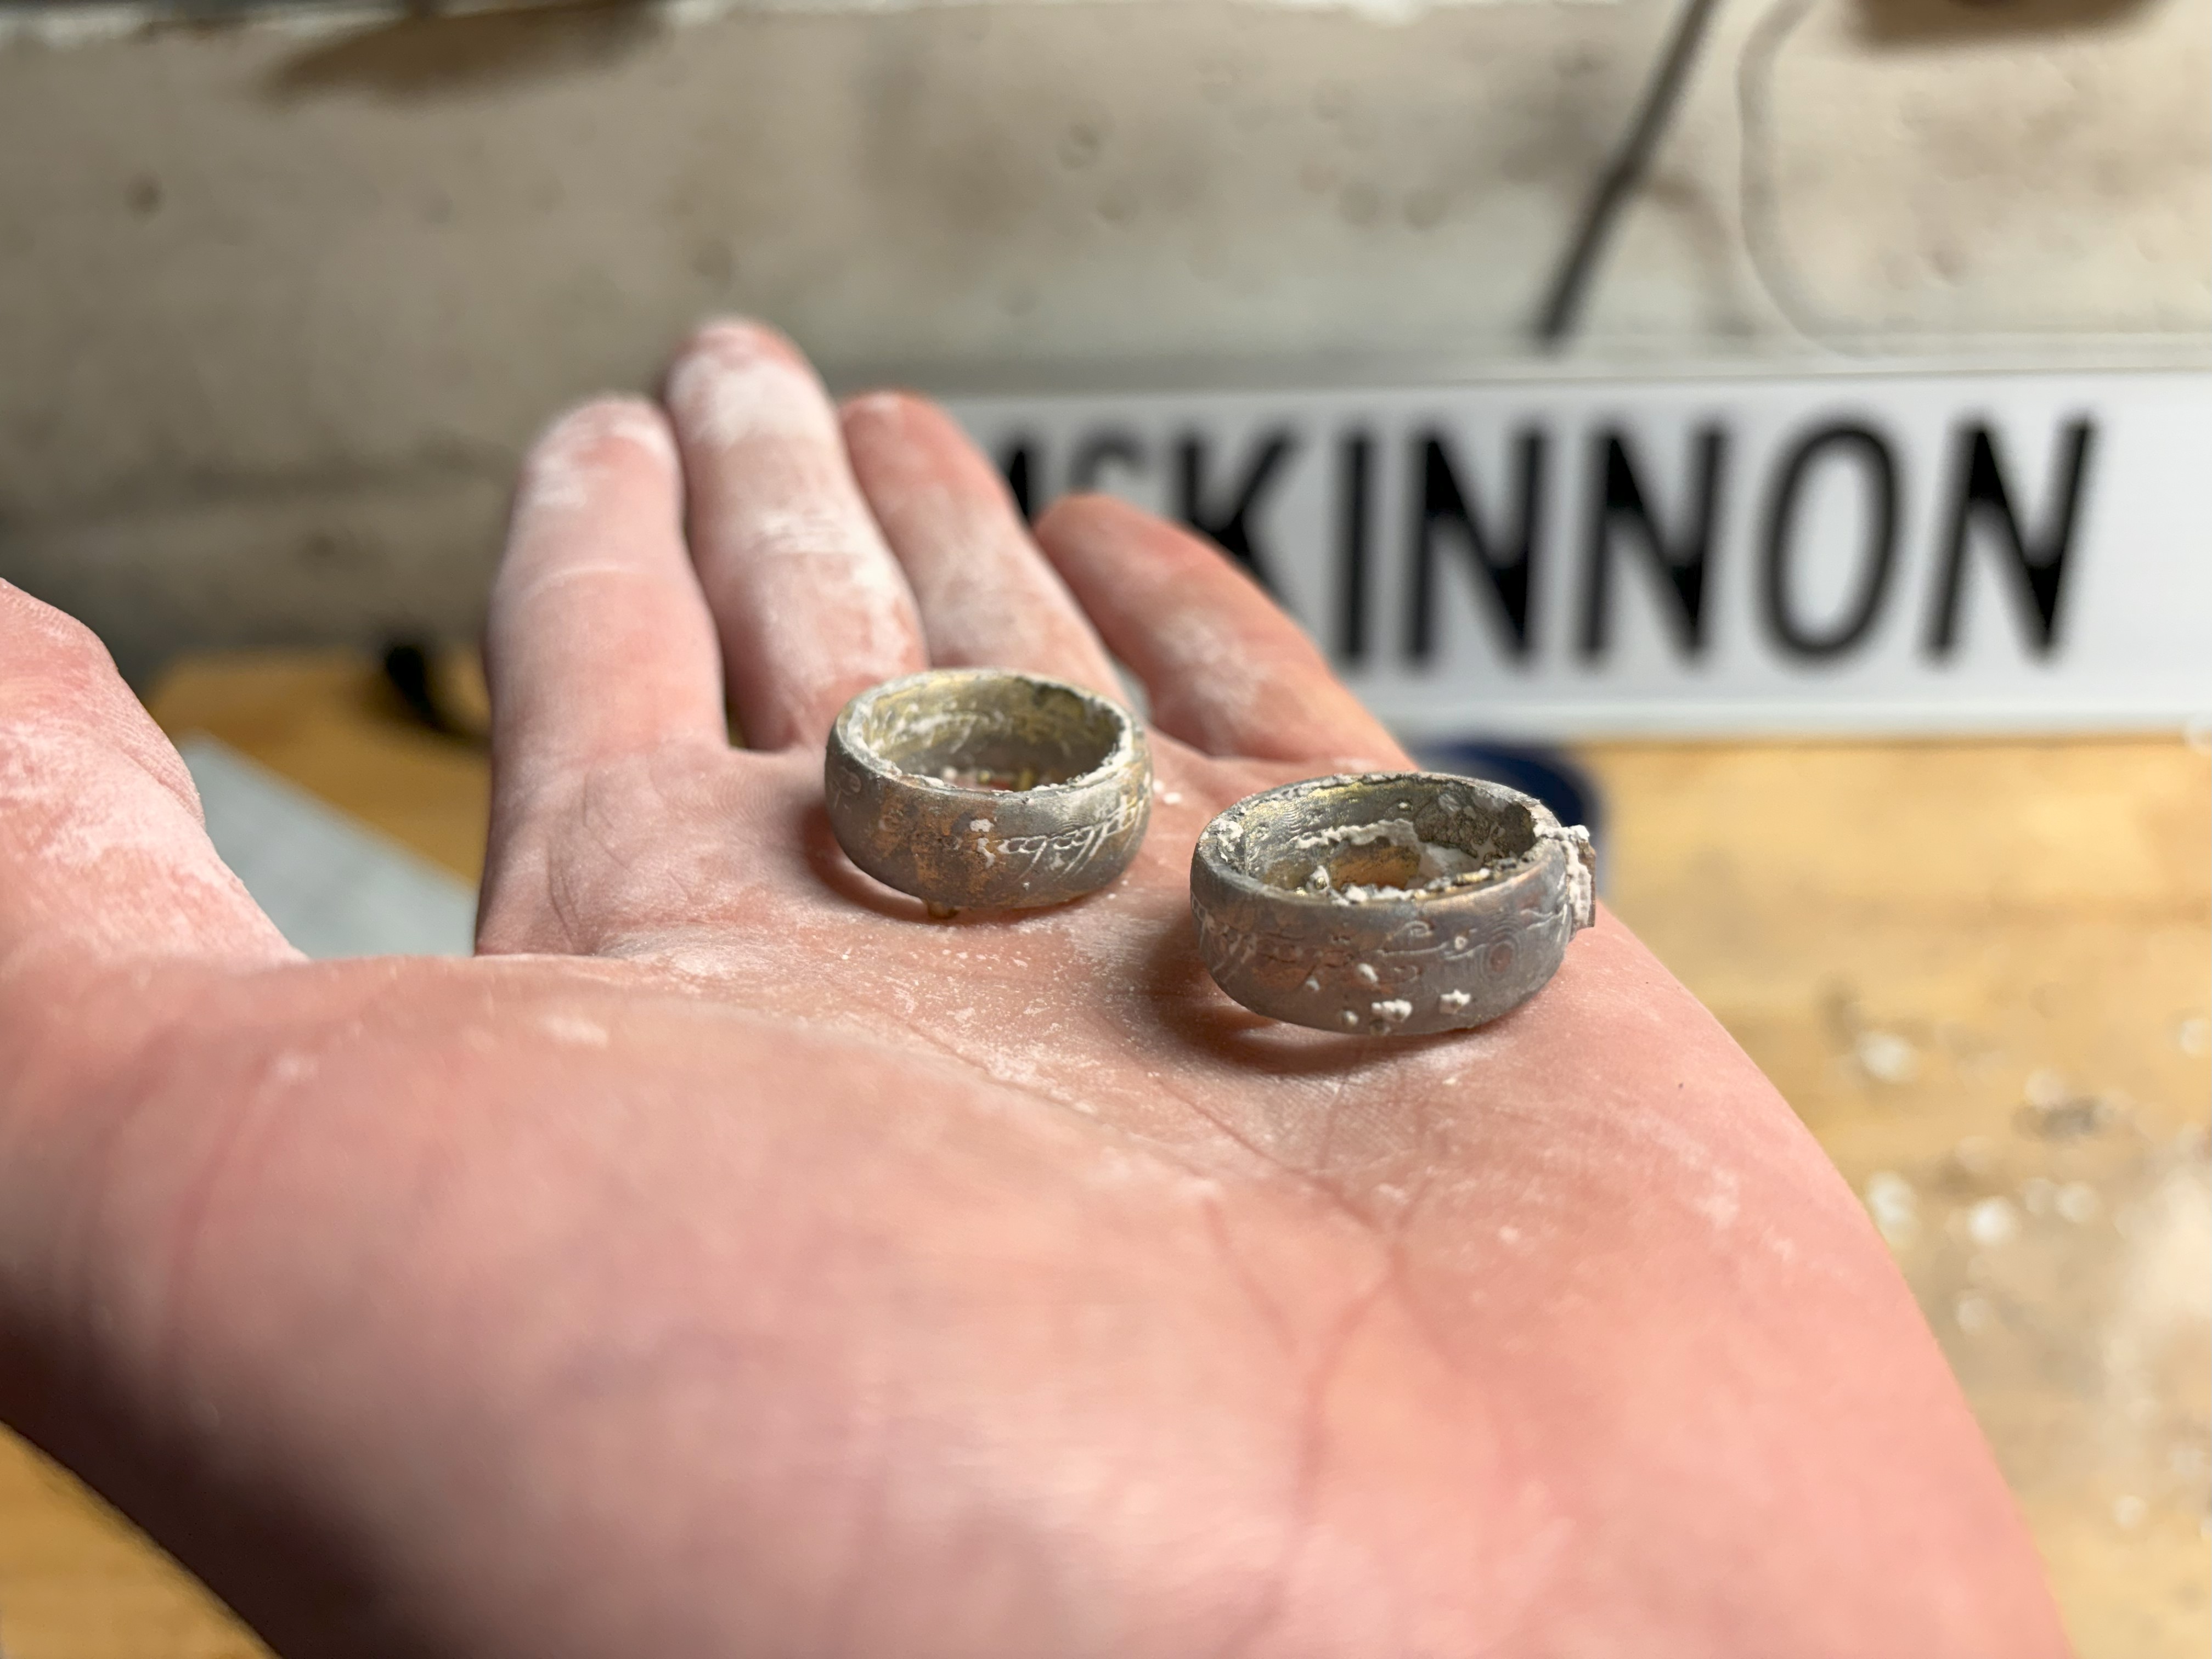
Once they were cleaned up, I took a closer look. The text unfortunately was not as deep as the test resin prints – I’m told that with casting it is difficult to get fine perpendicular edges on divots like this text. But it still had depth – we can work with that.
After a quick polish, I set about adding powder. This needs to be added into each groove of text, but wiped off all the other surfaces, and then sealed in. Superglue was a good option; others online have used it to good effect, and I could seal in short stretches of text at a time. After some practice on the spare:
This is looking pretty good! It’s glowing all over because I wasn’t too carefuly with cleaning off excess powder. Good lesson to learn the easy way. Now let’s try the real thing. The process was:
-
Tip more powder than necessary onto the current section
-
Scrape over with tweezers, taking most of the excess away
-
Gently wipe around and over the text. This will remove the dregs from around, but also removes some from the grooves.
-
Drip superglue on and spread with a tissue, then remove excess with a tissue. This had to be extremely precise since it was possible to spread the powder beneath the glue
-
Let dry, then move on to the next part of the ring and repeat from step 1
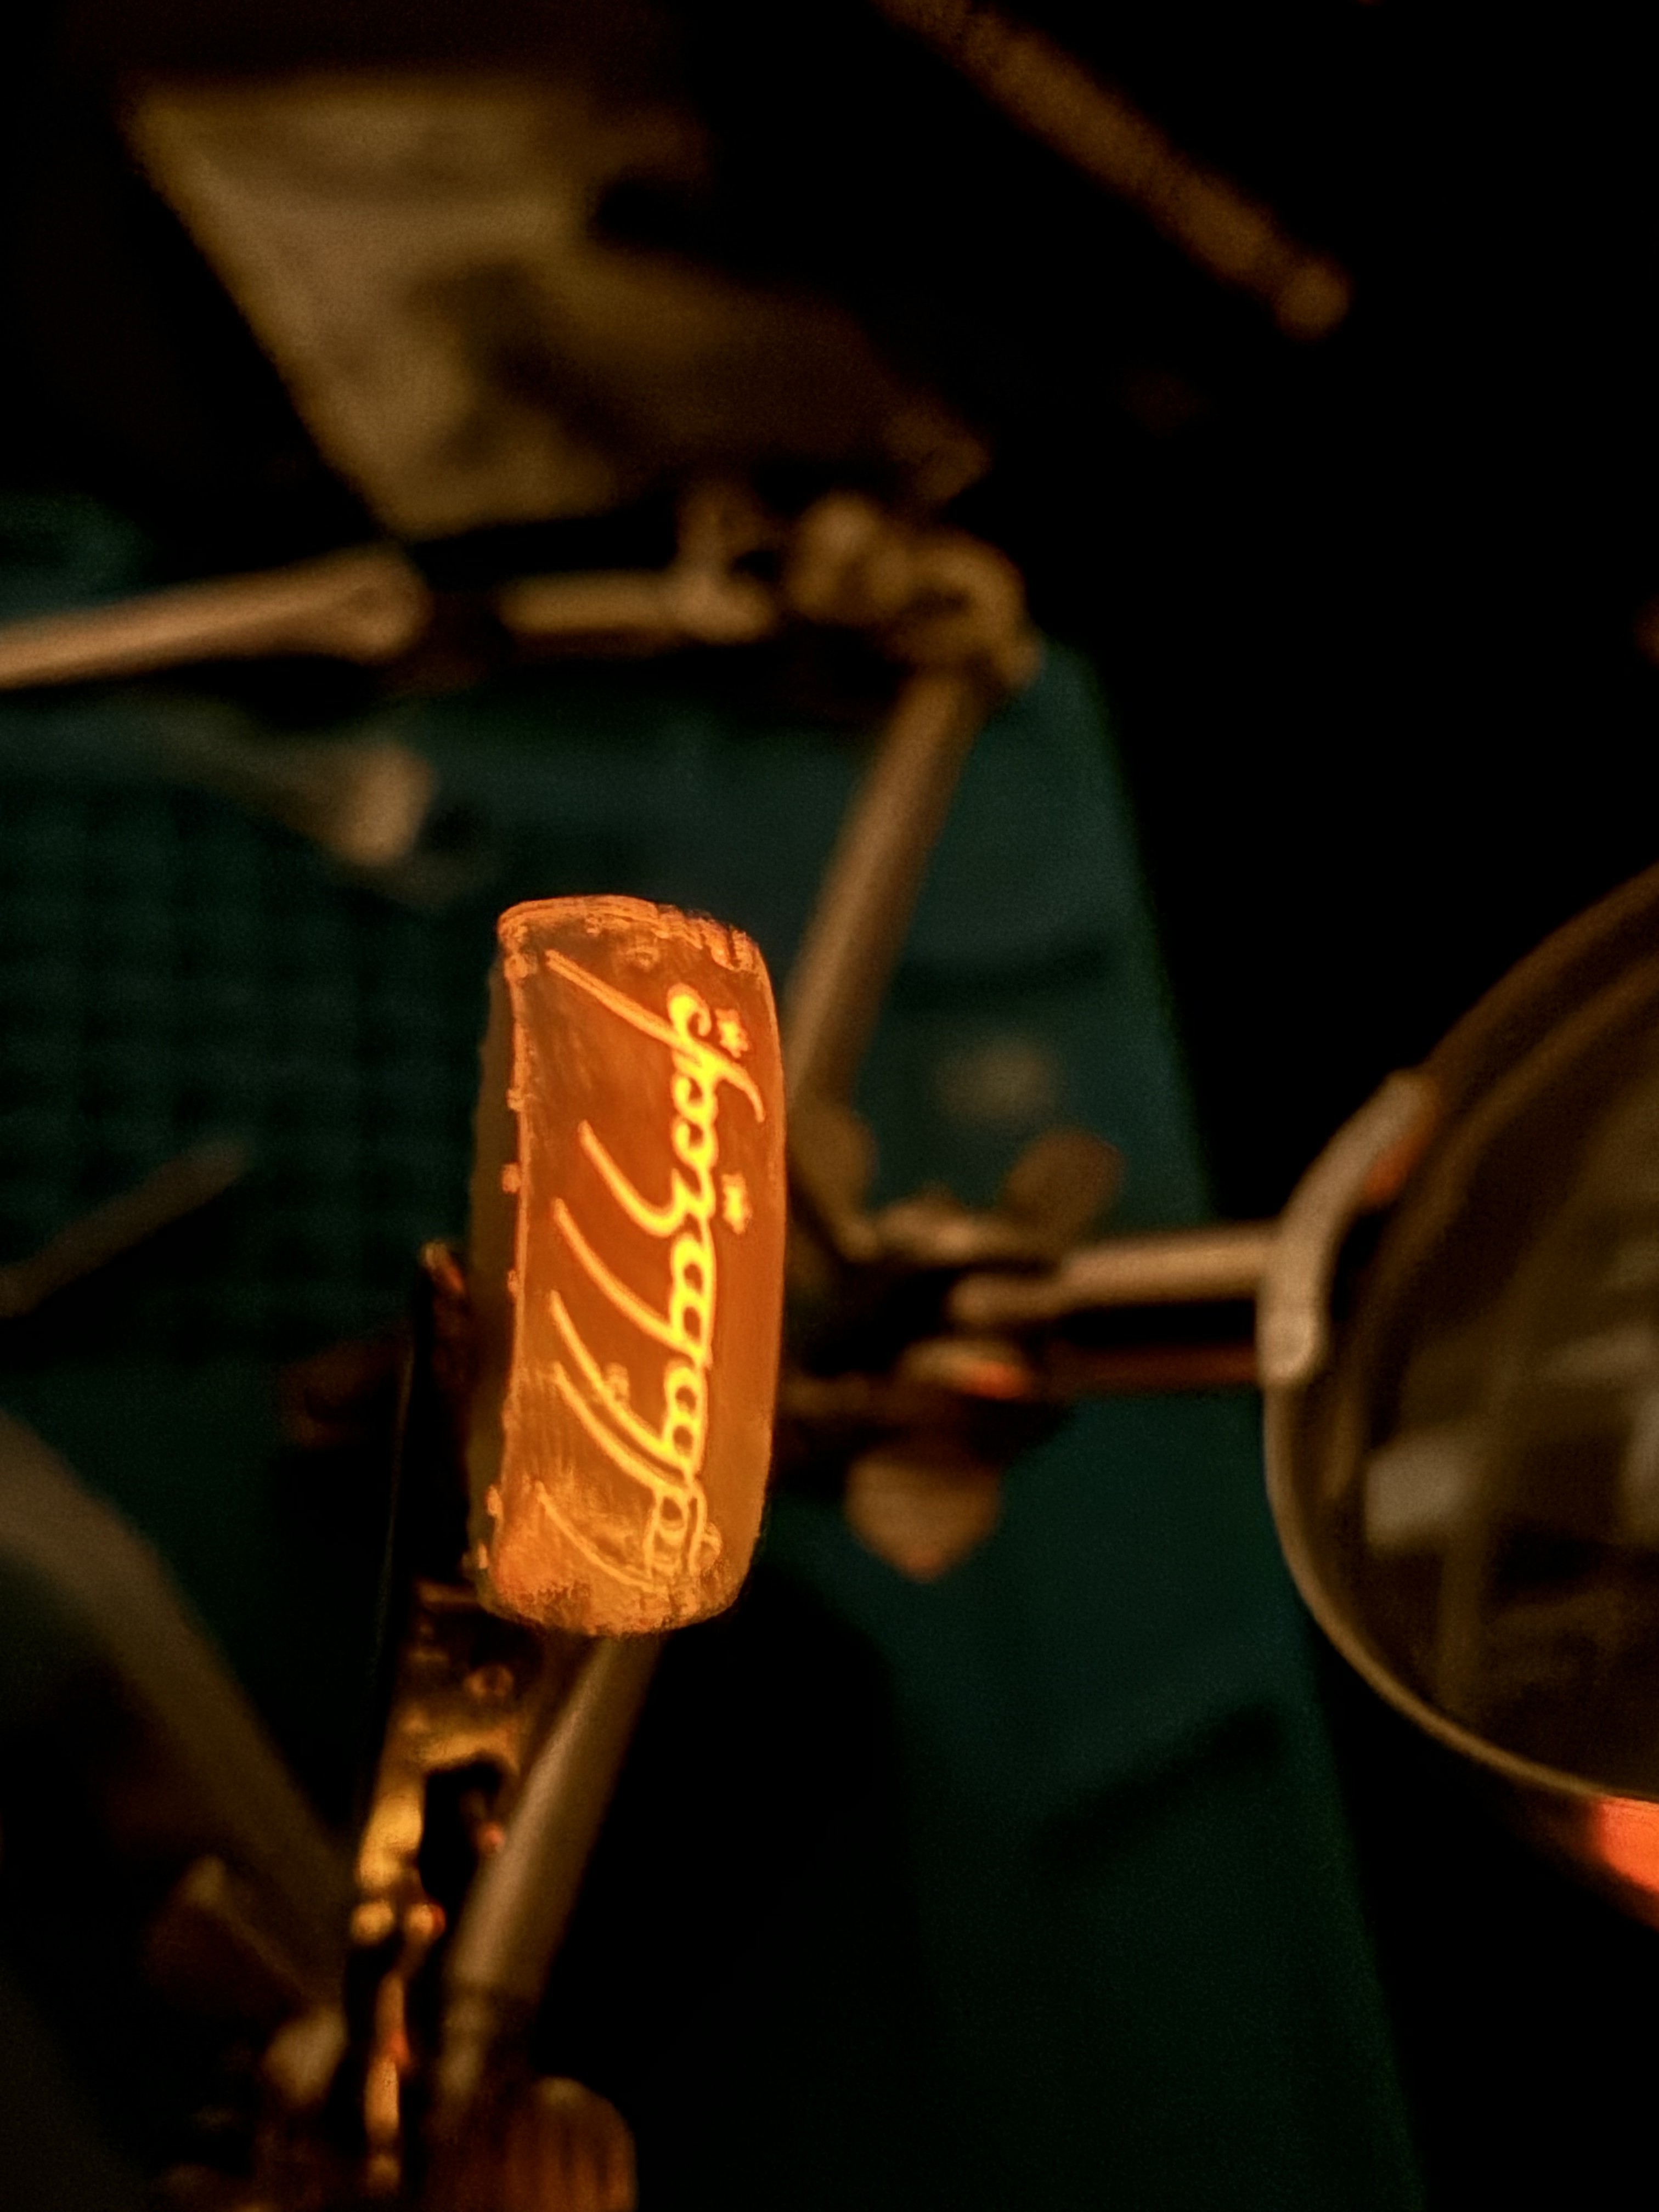
And the final product!
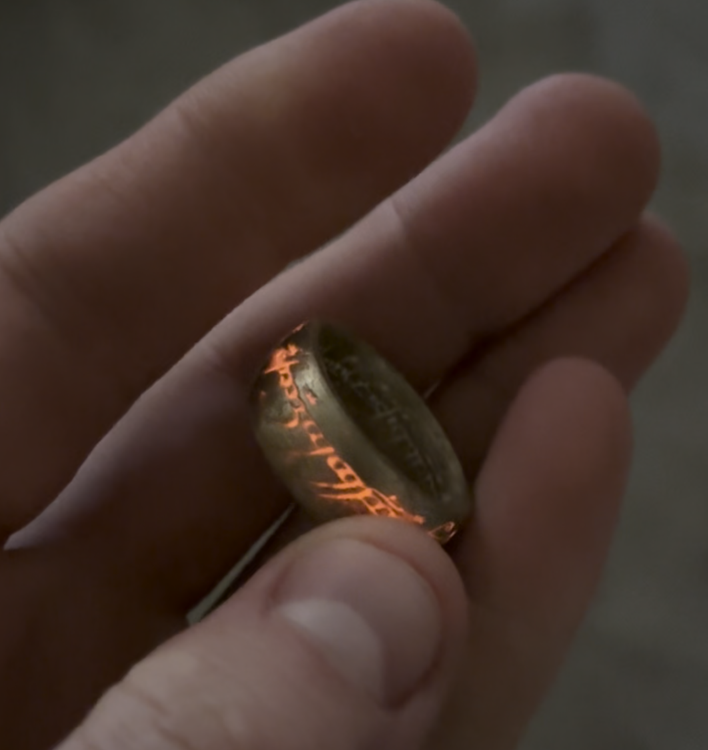
I’m sad that I did not polish this with a buffing wheel before sealing it; this may have held back corrosion quite well. Secondly, as the grooves were so shallow, the amount of powder is miniscule, resulting in the barest of glows unless using UV lights and pitch-darkness.
But it still works! The One Ring, glowing while at comfortable temperatures!
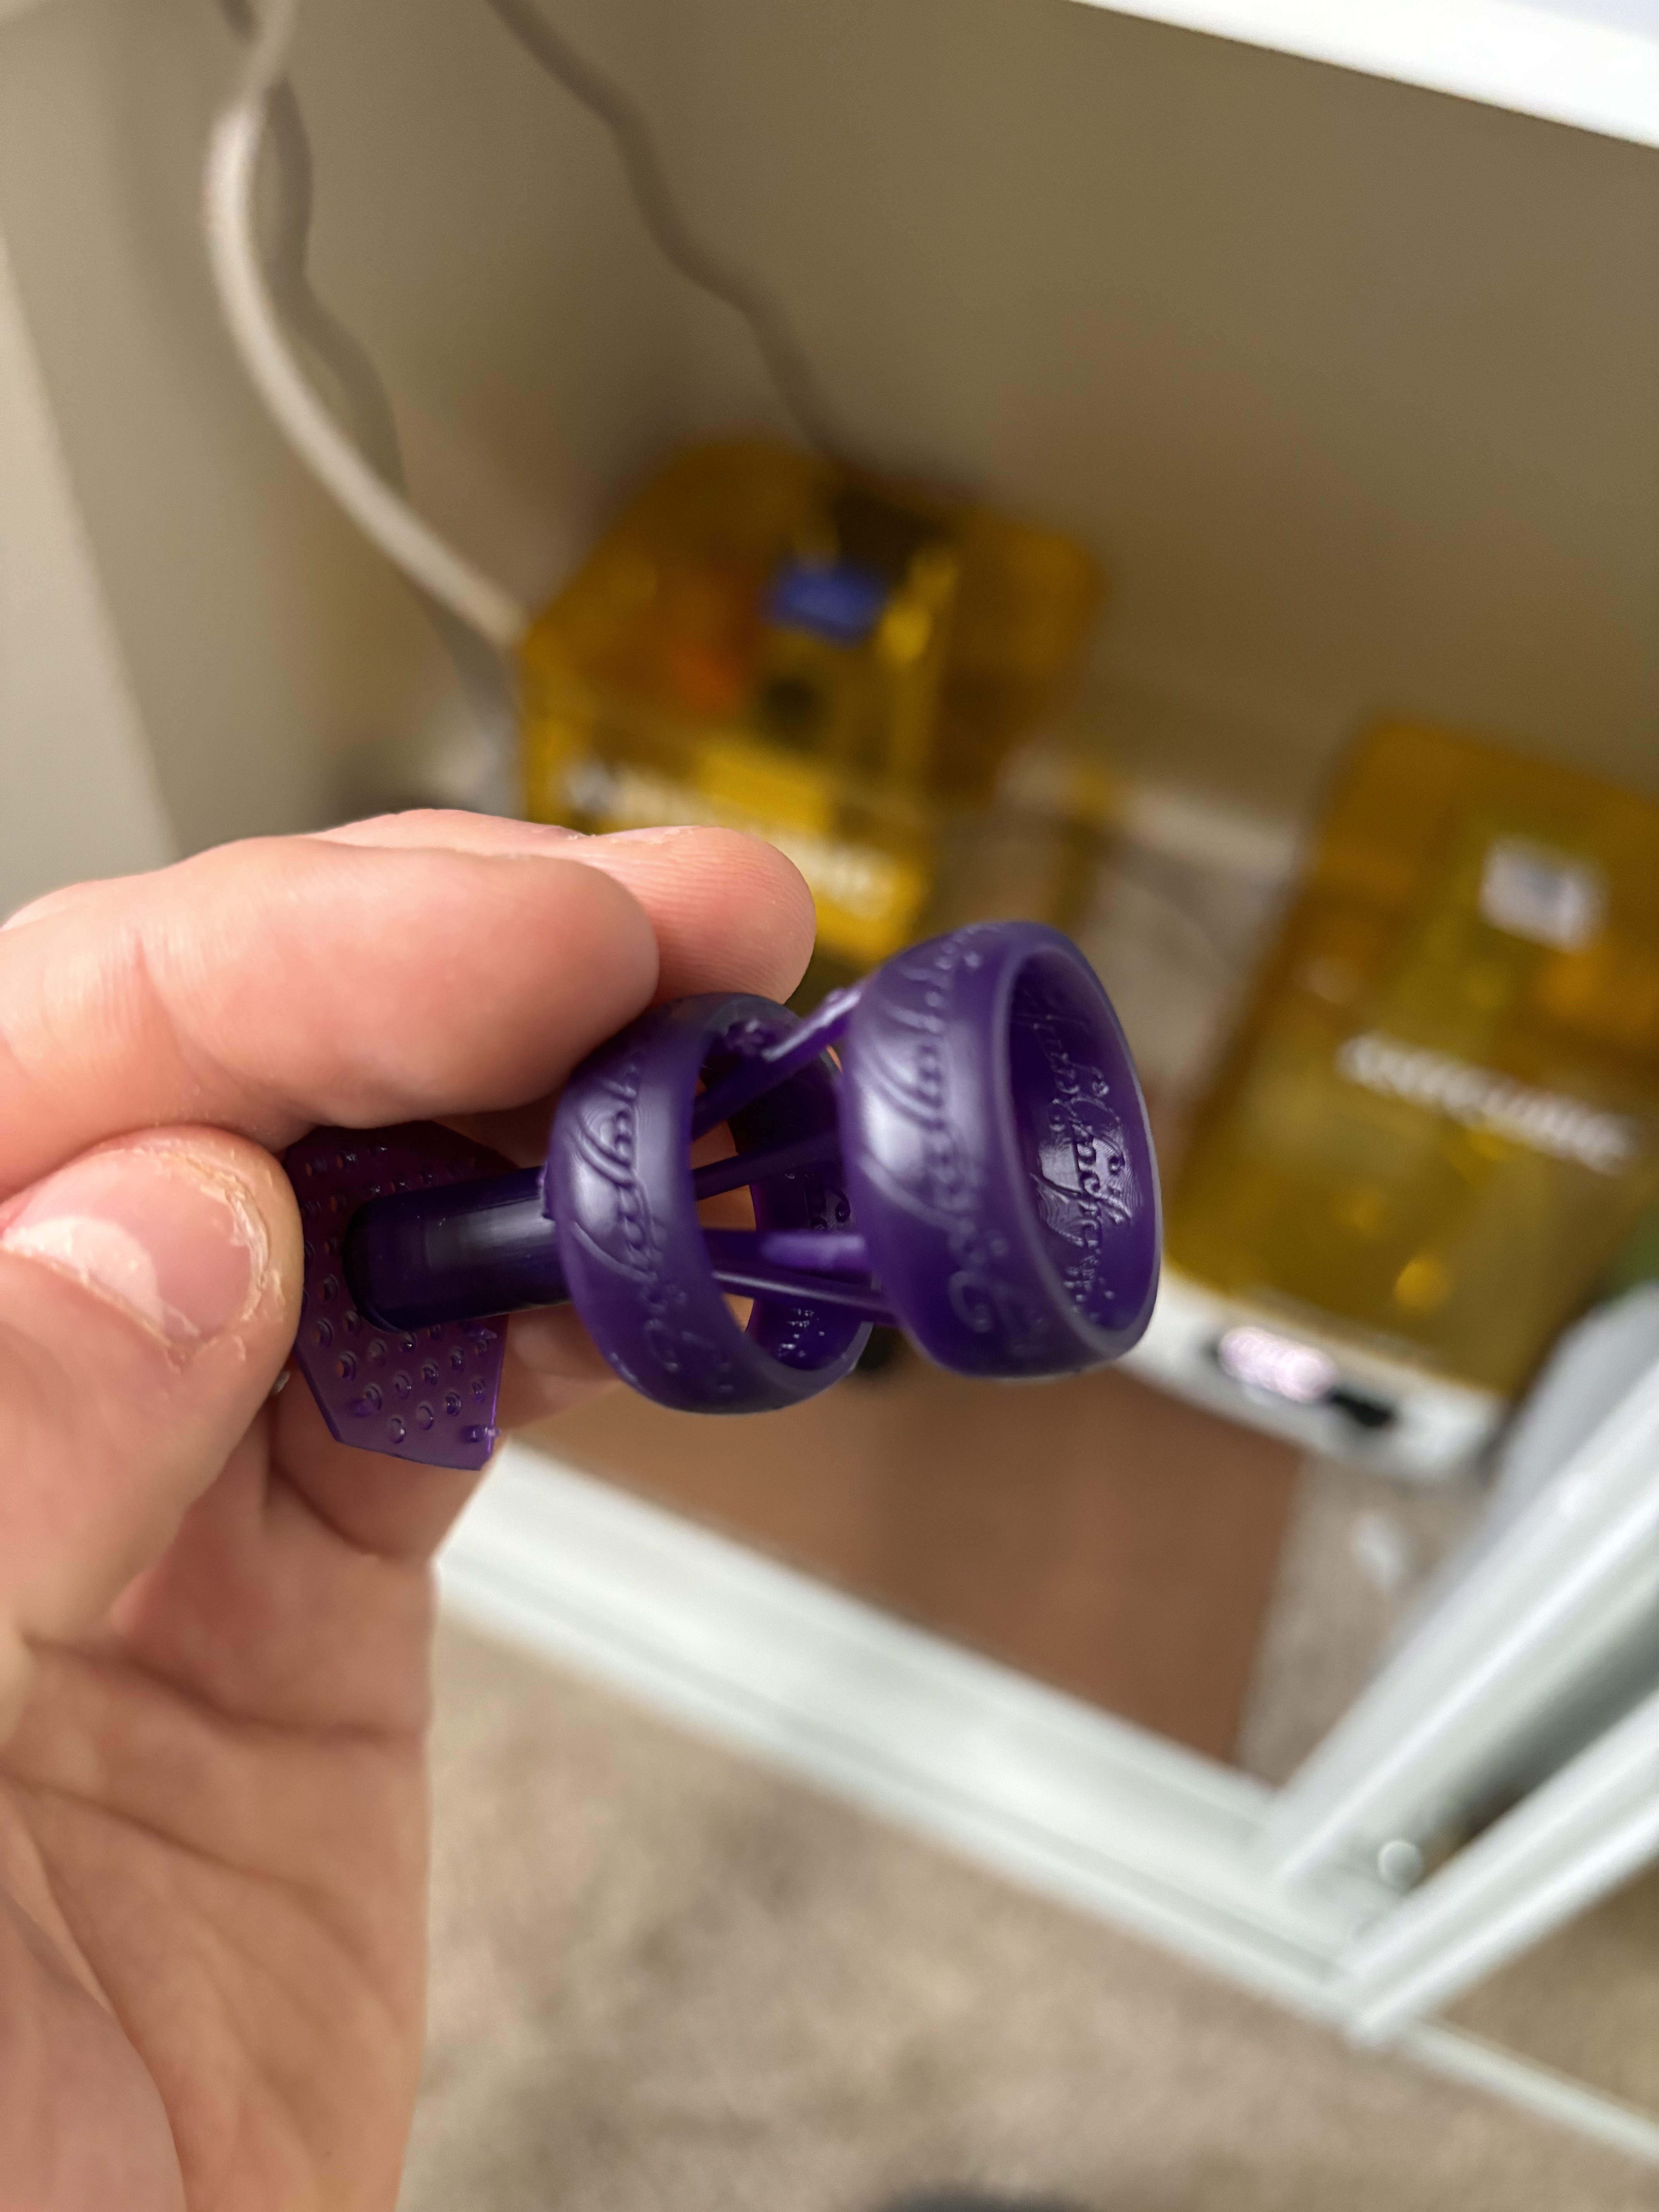
Turns out, you can buy a better version. Well, at least I saved some money.