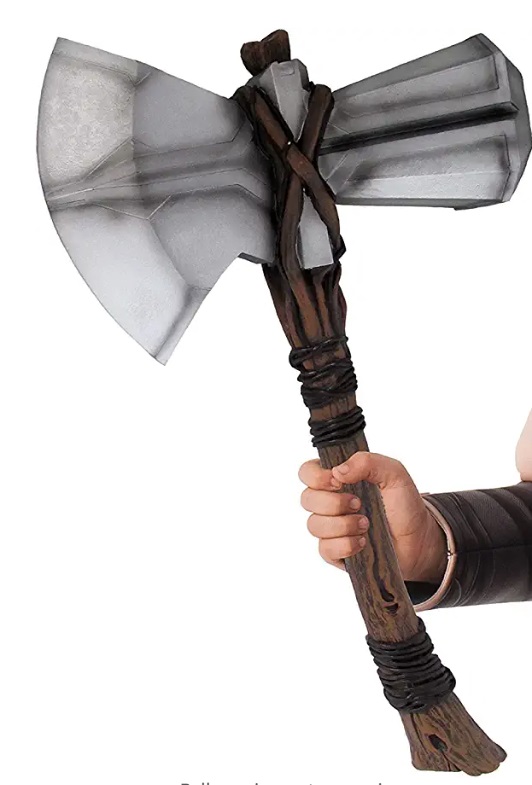
Stormbreaker
“A King’s weapon. Meant to be the greatest in Asgard. In theory it could even summon the Bifrost.”
“It have a name?”
“Stormbreaker”
The pandemic was still going strong in mid-2020, and after the Witch-King’s Flail I discovered I quite enjoyed making movie weapons: the bigger the better. The obvious next choice was Stormbreaker, Thor’s axe from Avengers: Infinity War.

Despite the ordering of contents below, I made a lot of these parts in parallel until it was all connected. The handle was made at the same time as I worked on the hammer and axe part, and I did a lot of the polishing and finer parts of the hammer and axe simultaneously.
Contents
Materials
Much like the Witch-King’s flail, I did not want this to be some lightweight foam thing that could bounce around willy nilly - I wanted it to feel proper, and also be as life-sized as possible. So the obvious material choice was some sort of metal, with a wooden handle. What sort of metal? Aluminium would be relatively lightweight, but difficult to attach - it’s hard to weld, and adding rivets or screws everywhere would be difficult and also ruin the look. Steel would be harder to rivet or screw due to the drilling, but easy to weld - and probably give me the weight I want. Some experiments led me to choose 16 gauge steel, as Home Depot sells 12”x12” and 12”x24” sheets of weldable steel in 22 gauge and 16 gauge. I’m not a particularly skilled welder, so I went for a flux-core arc welder, to avoid having the extra gas tanks. Probably should have gone a MiG in retrospect, but oh well.
Sizing
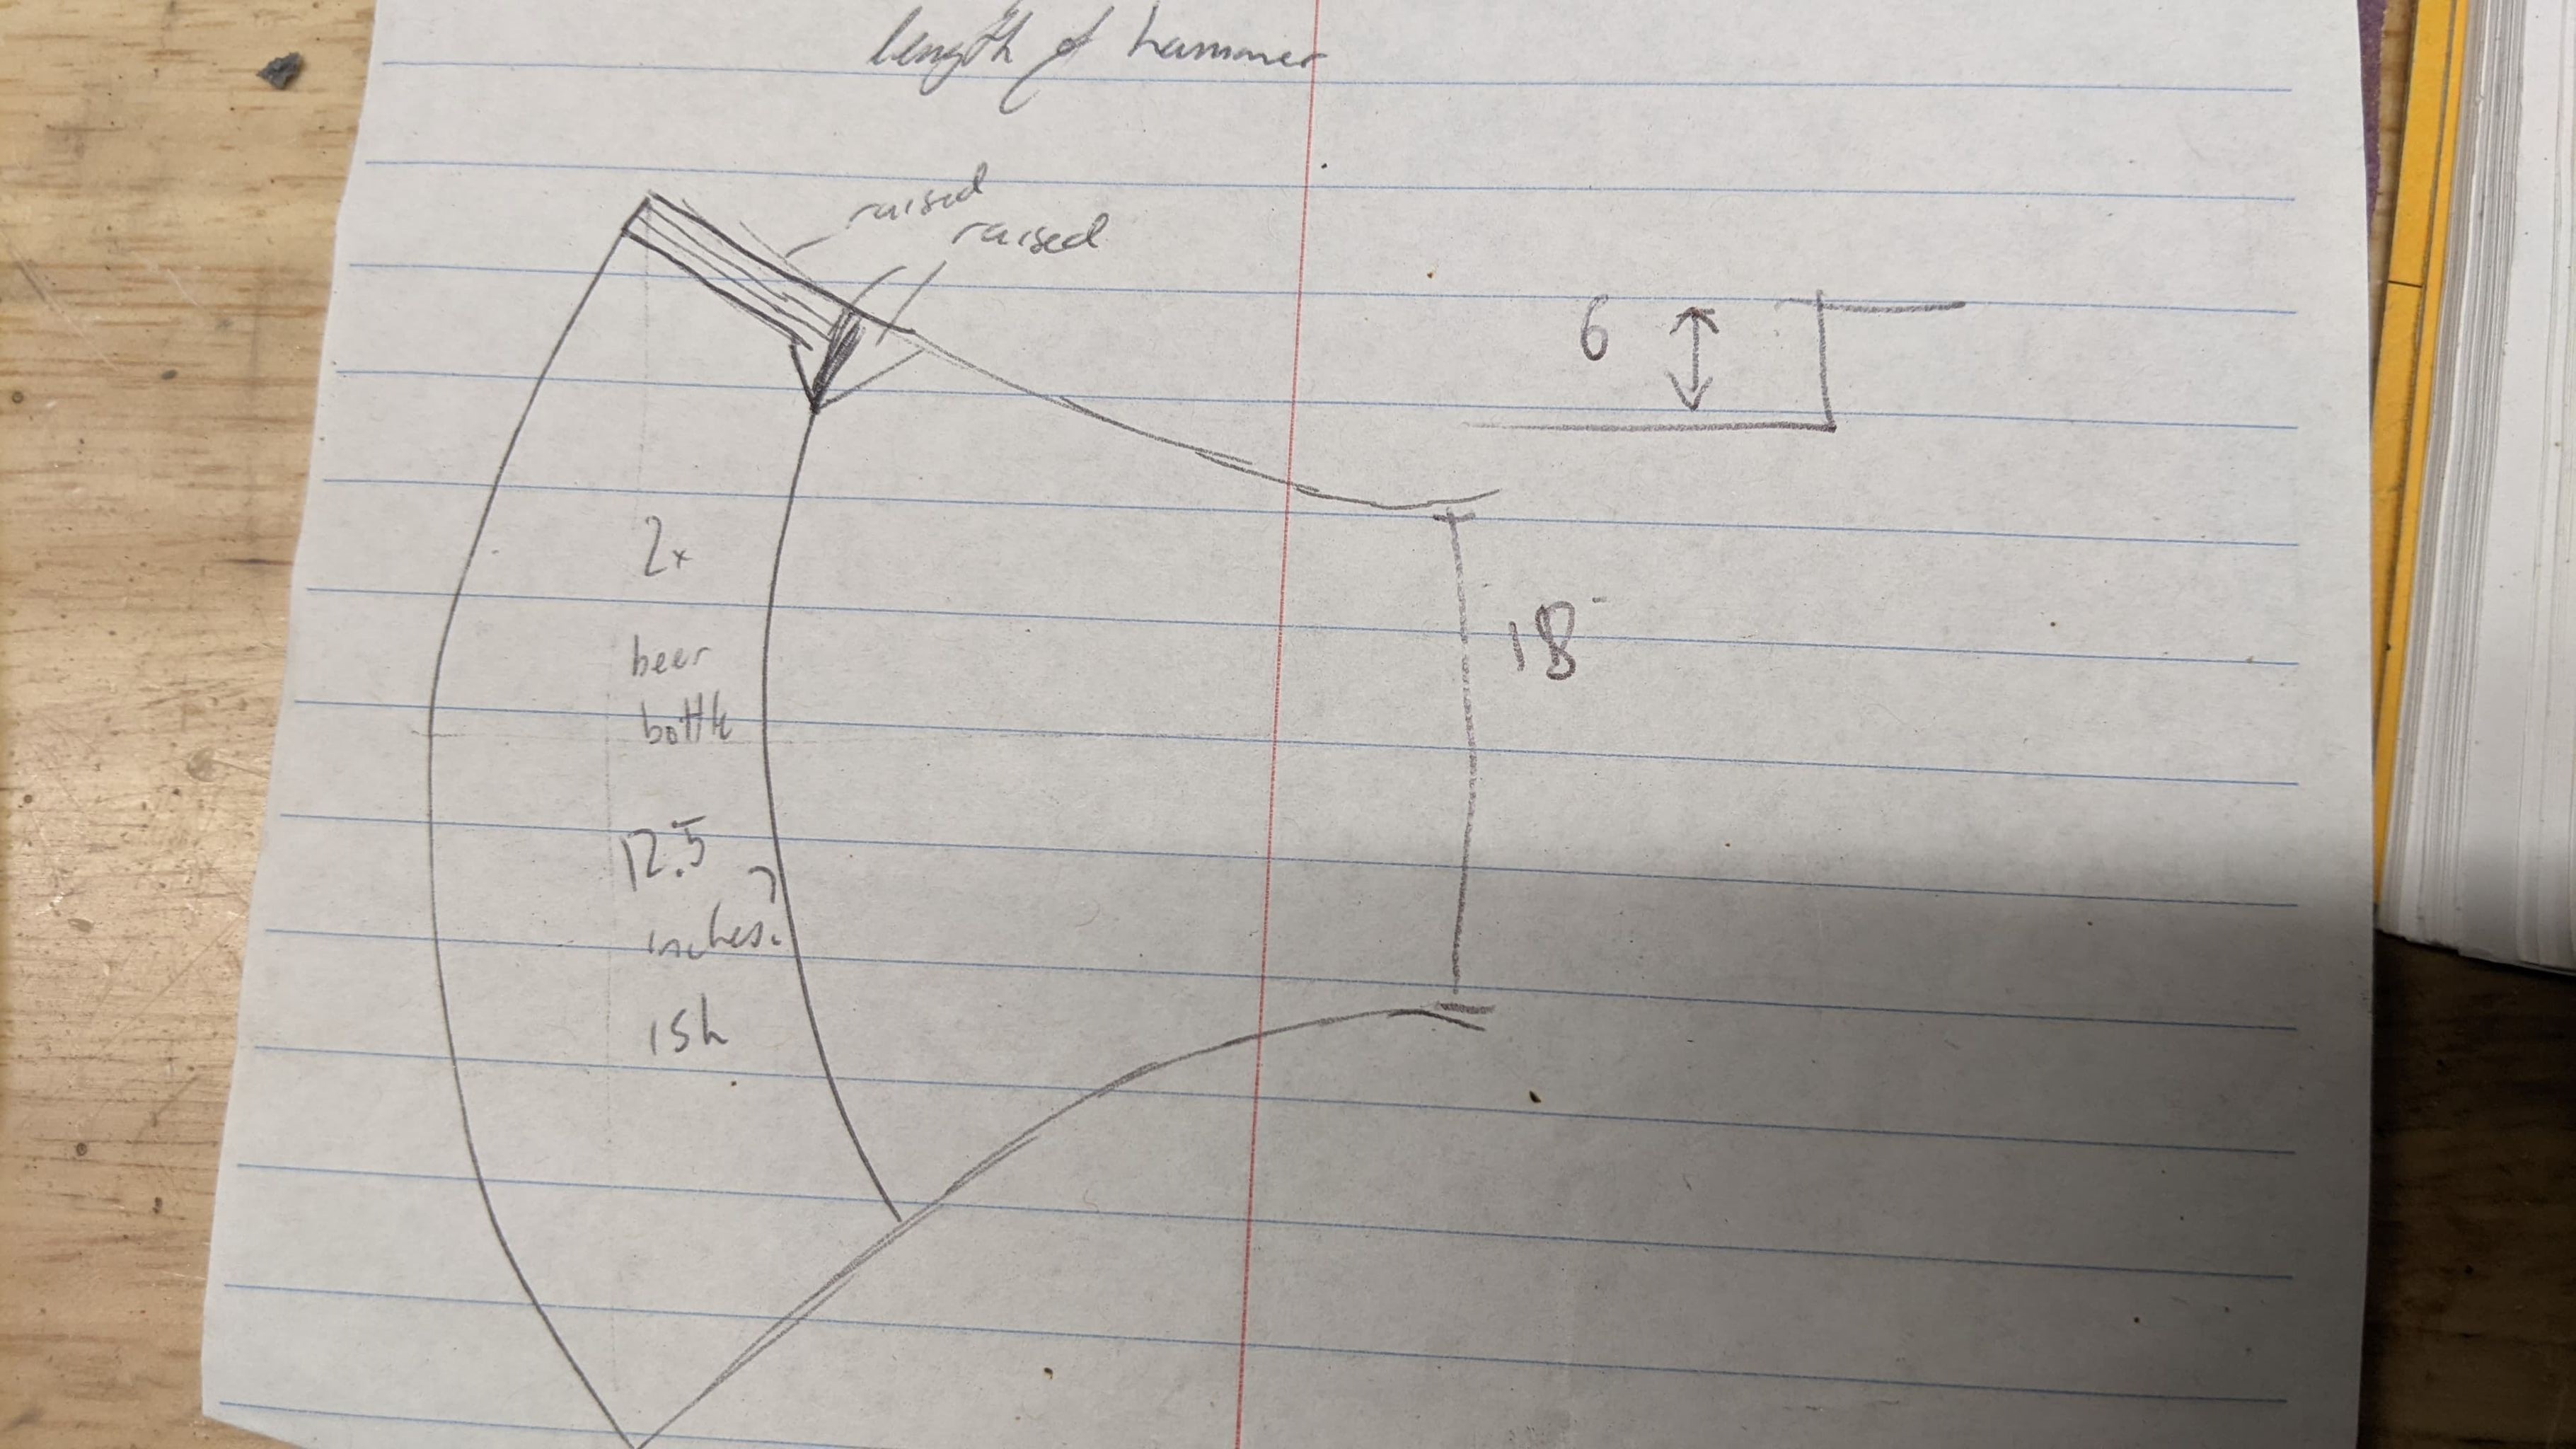
I made a foamboard mock-up to get an idea for size and also the structure I wanted - considering the shape and weight this thing probably needs internal supports and so on. There’s a few shots from the Avengers films I used for size. The obvious one is above in the introduction, with Hemsworth holding it, but that invovles perspective and makes it difficult to discern the size. There are other closer shots, like the forging scene, but the best two are firstly from a Graham Norton interview:
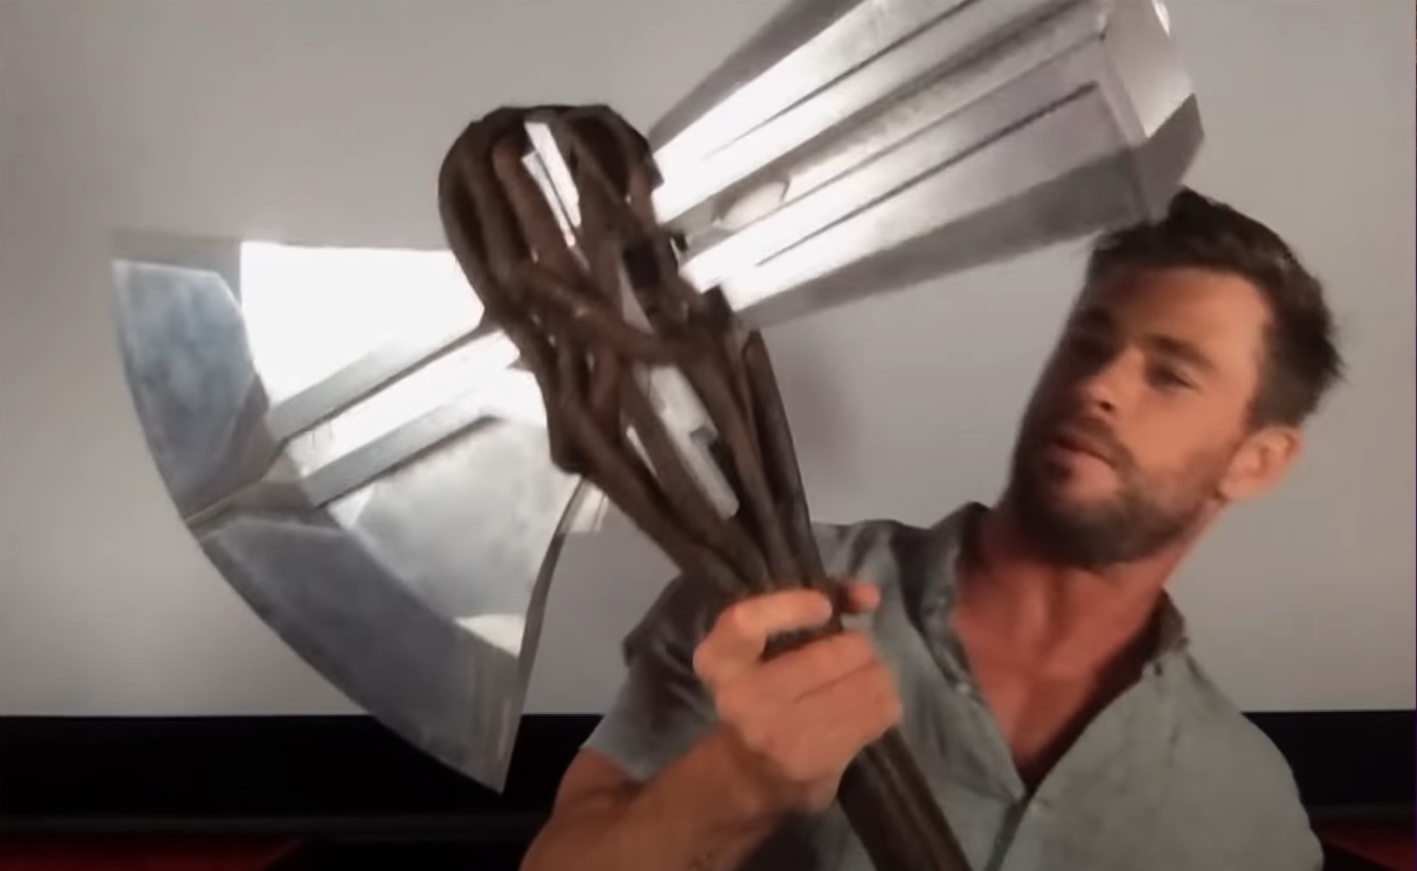
We get to see the axe right next to his head. Chris is a big bloke, and probably has a big head, but this still involves estimation. The other is from Avengers: Endgame, where Thor cracks a beer open on the blade (it’s not very clear, this is a very quick shot, and I had to go through frame by frame):
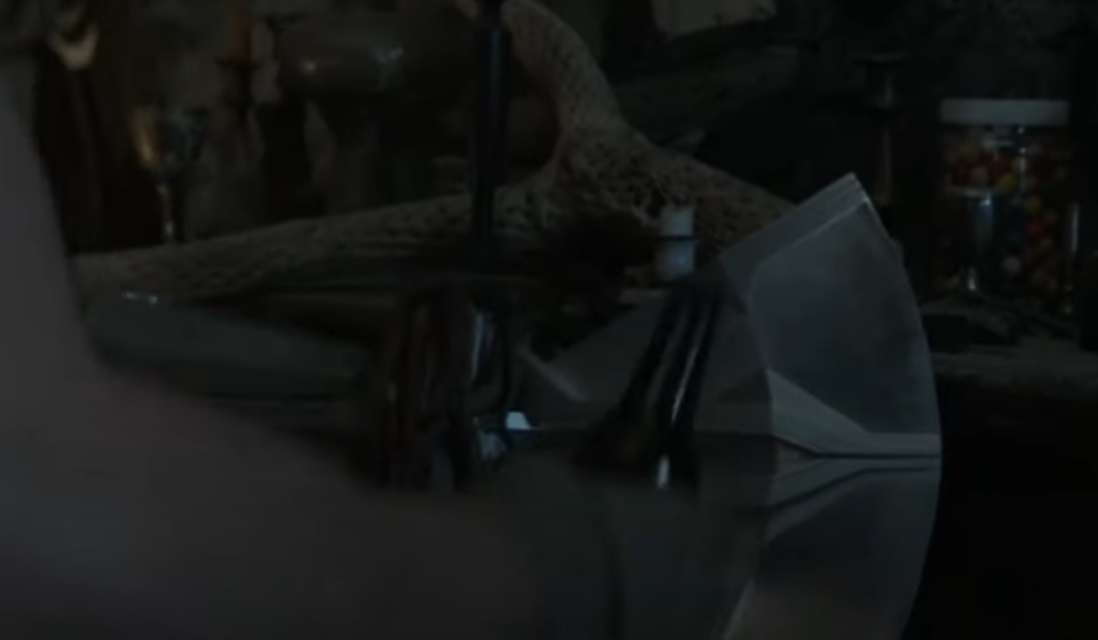
And this is very useful - I know exactly how big a beer bottle is, and this involves little perspective, so I can measure how many beer bottles tall the axe is. From this I can also tell the relative size of the hammer to axe, whose size I know in beer bottles … bam done. Here’s the final foamboard/cardboard mockup:
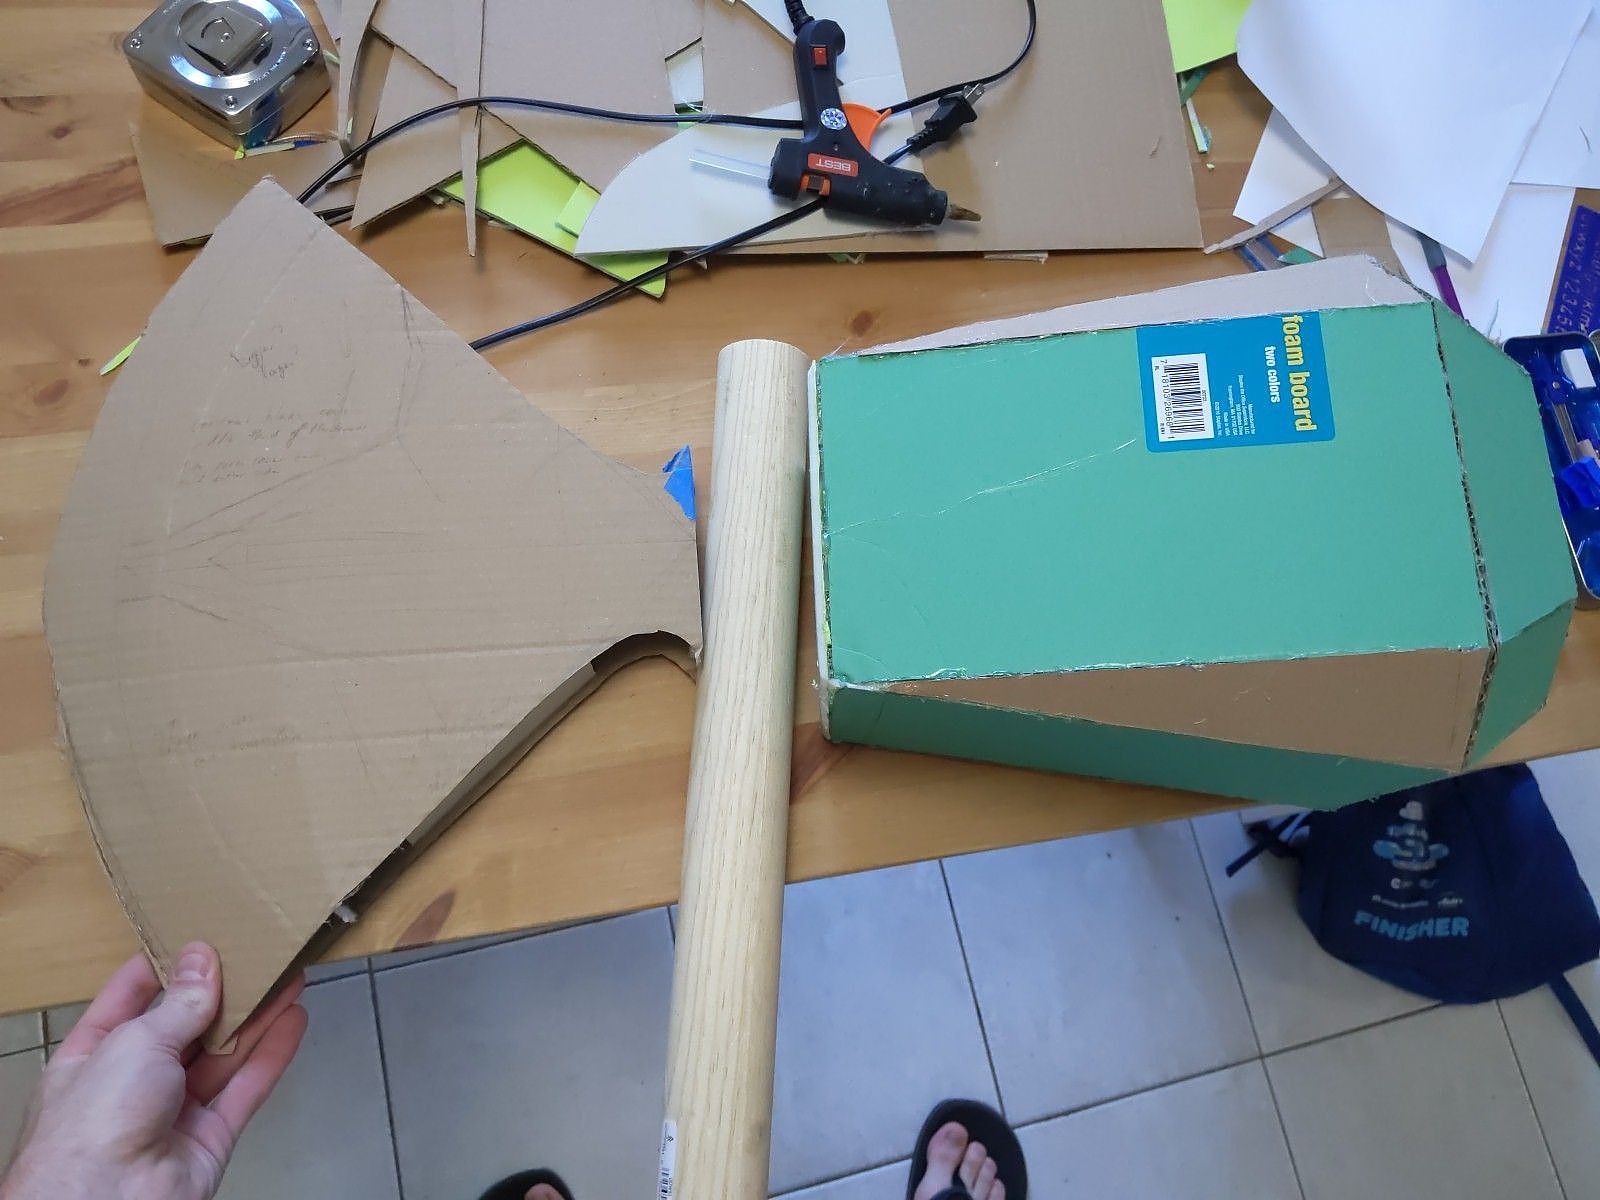
And from this I learnt what sort of supports I’d want, what size I was dealing with, etc. Let’s get started.
The hammer
The hammer seemed the easiest starting point since it’s all flat planes and angled joints, no curves. Looking back, I wish I had a plasma cutting table; it would have meant I could CAD-model all this up, export the design, and slice all the pieces. Alas, I did not, so I measured and manually cut each piece with powered metal shears. This worked alright, but was hardly machine-precision. Another construction option would be 3D printing - and I have a 3D printer large enough, though I didn’t at the time - although this would run against my desire to have an appropriate weight.
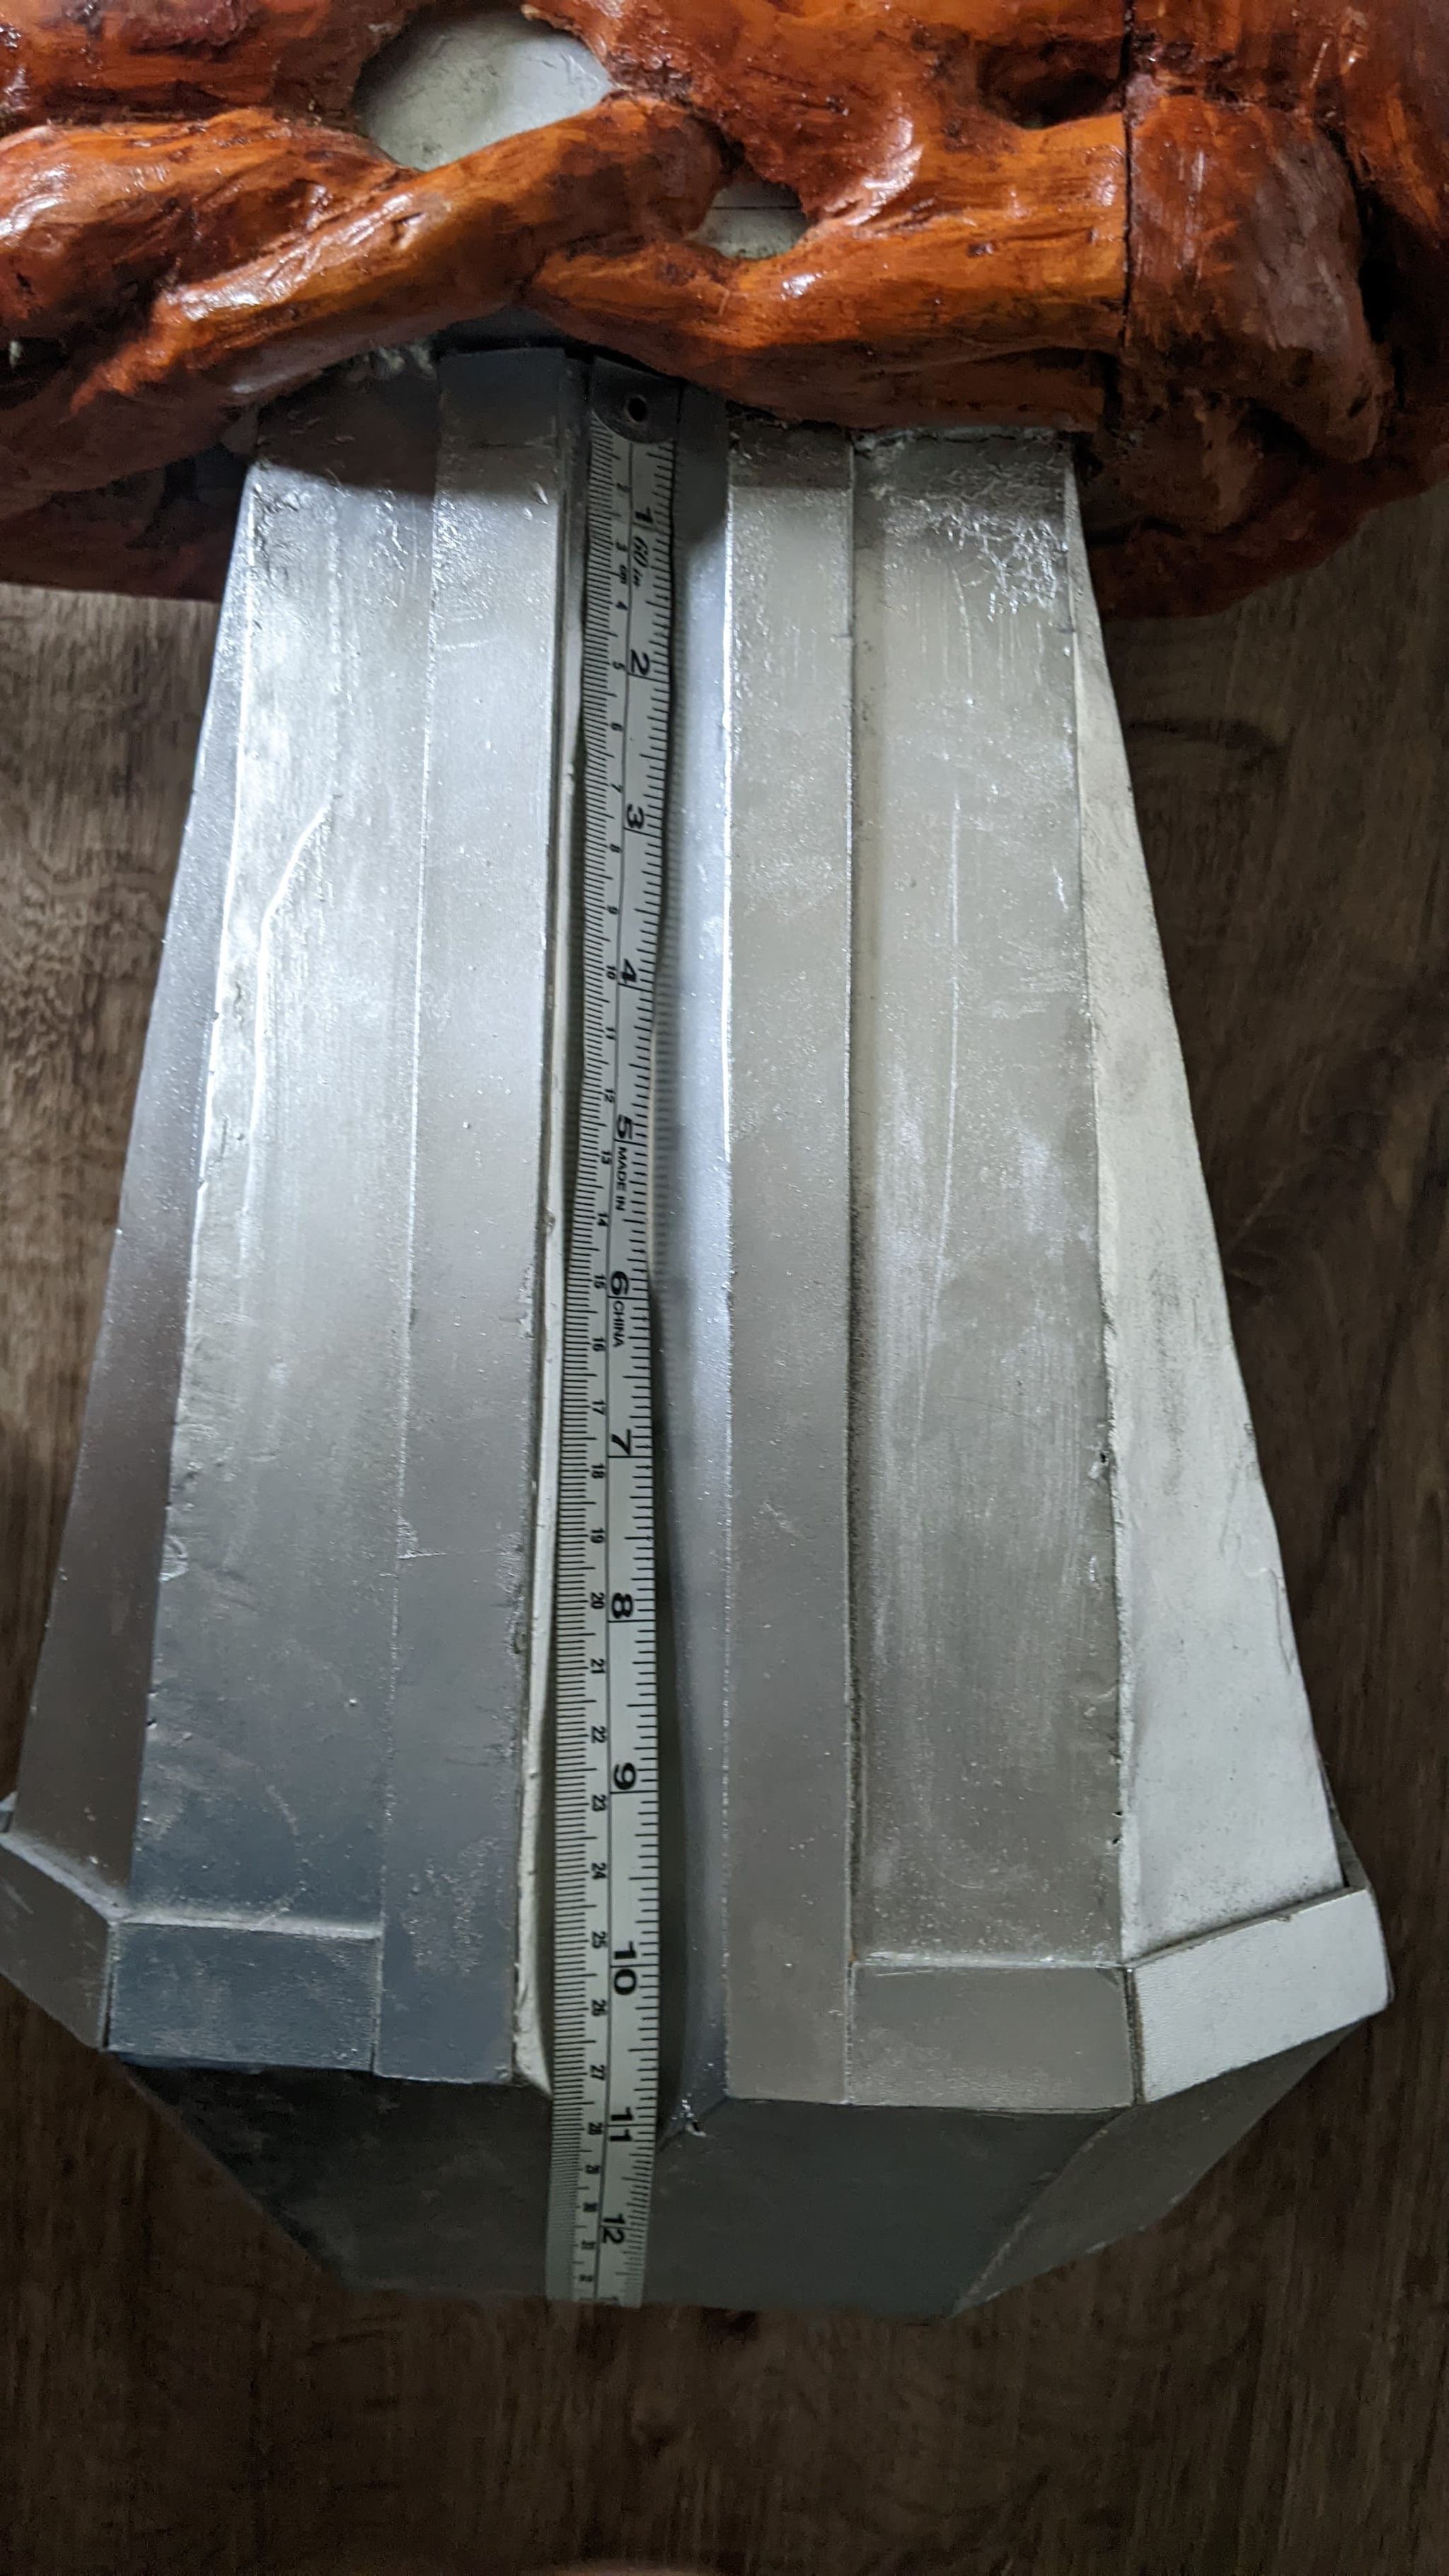
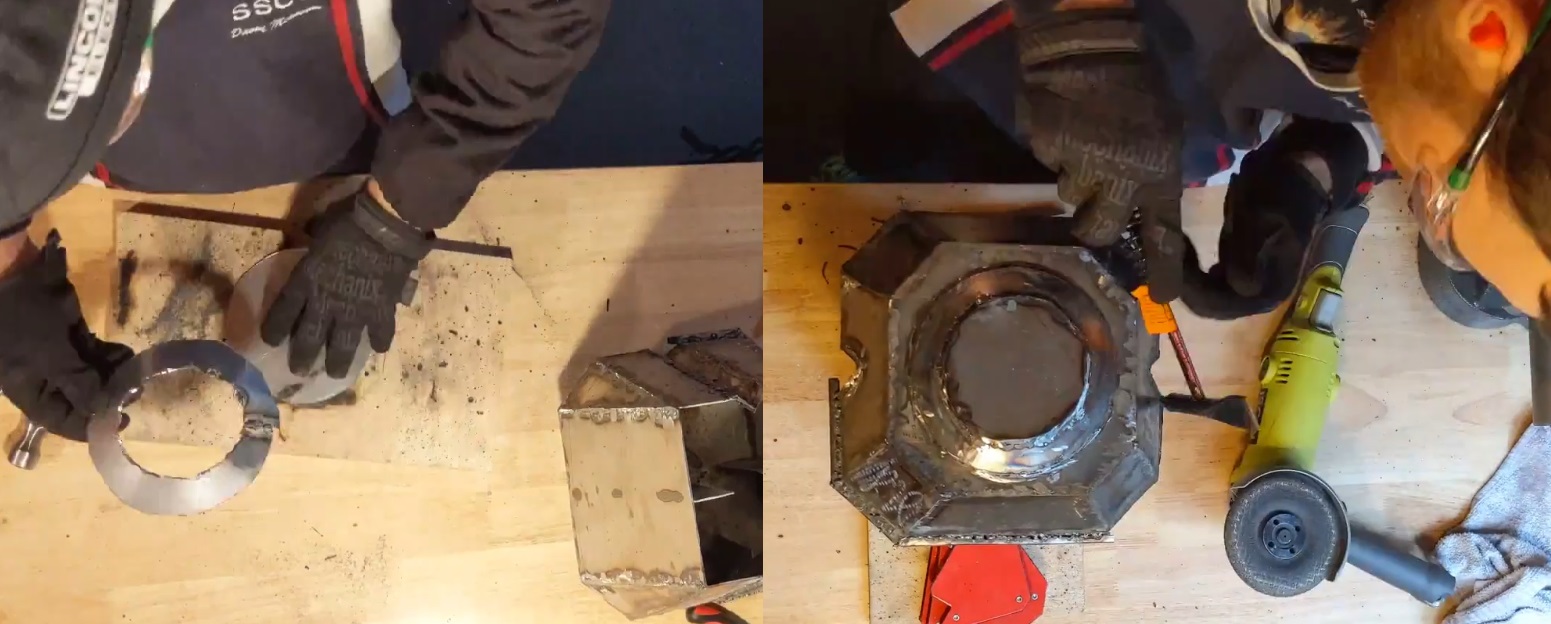
I started with a pair of octagons and welded them together with vertical support pieces, to make the far end of the hammer:
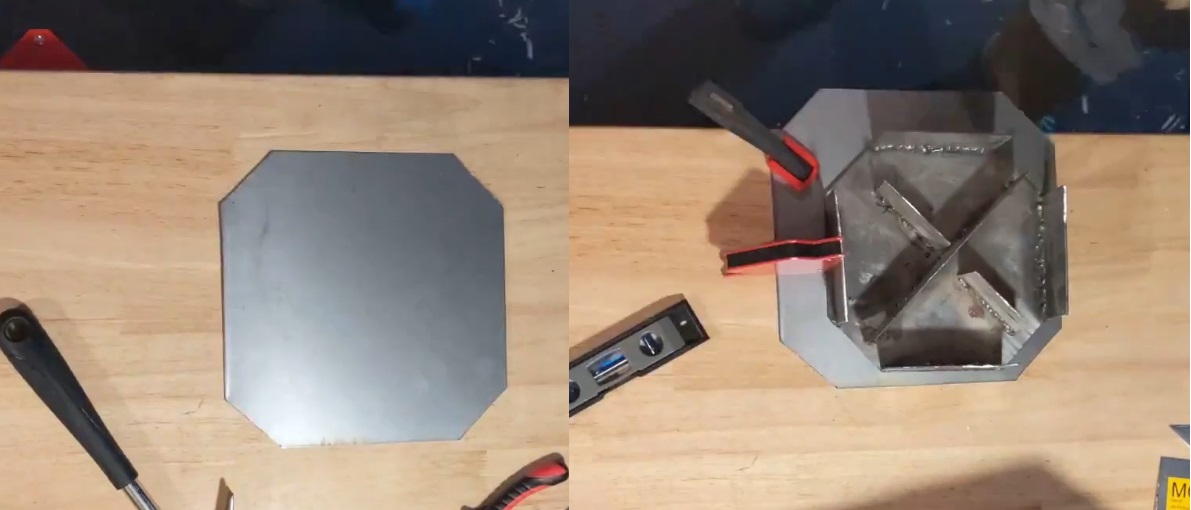
In retrospect these probably didn’t need to be as thick or strong, but I was worried this would be too light and didn’t want to skimp. I also didn’t want the slightest bump to dent it (got a bit overzealous there). From there I made the the angled sides, to finish off the end of the hammer. The Avengers films only give quick-motion shots but I could glean enough of the shape as it appeared symmetric and regular:

Let’s compare to mine:
At this stage, cutting with shears wasn’t too awful; I would err on the side of a piece being too big, and then grind it down to more precisely fit into its spot, but errors did propagate when I did this for several pieces in a row. That circular piece in the centre of the hammer end would be added later - I wanted this to be able to sit flat on my bench for now to make other construction easier. It was, all in all, a good start, and gave me confidence that this approach was working.
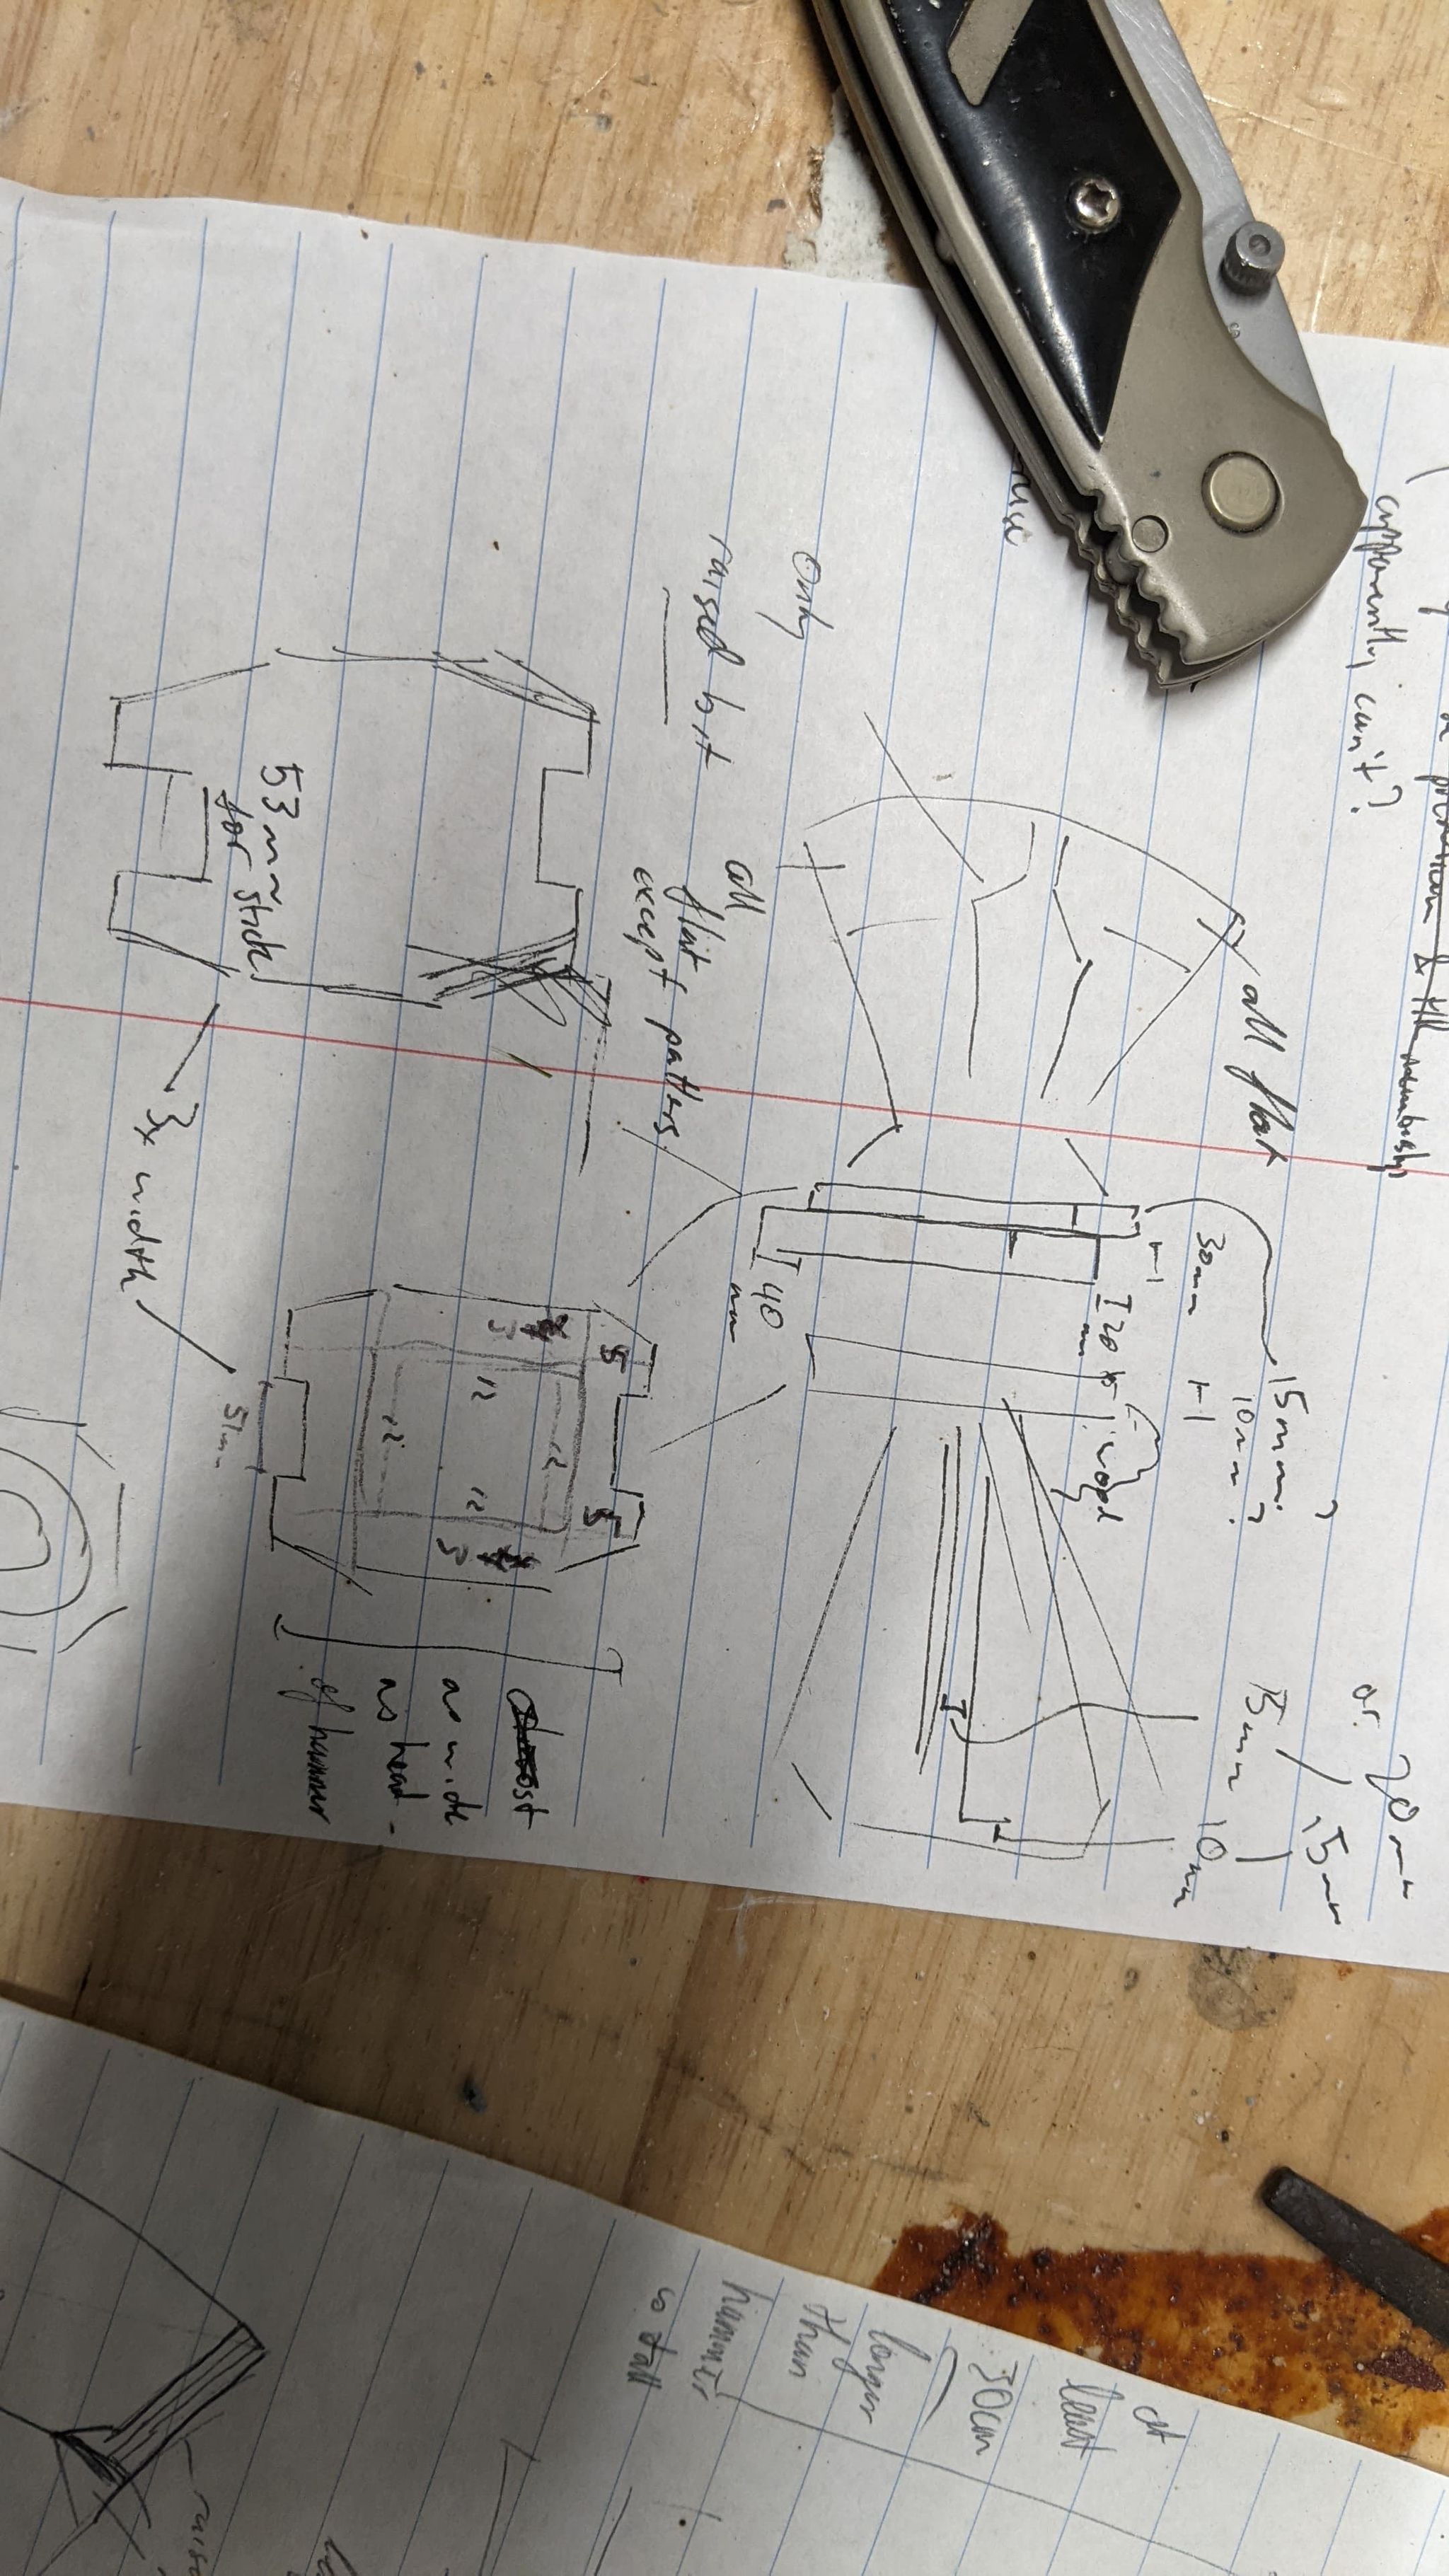
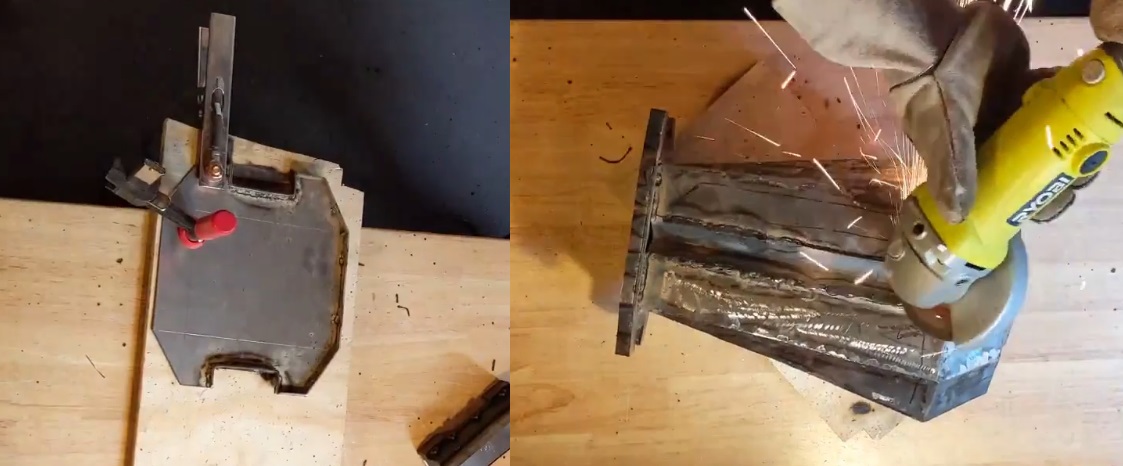
Next came the longer part of the hammer, and this got trickier cos it has those triangular divets running down the length on two of the sides. I preemptively cut side slits into my octagonal hammer end, as I figured this would be easier without sides. Then I added supports and long side pieces - big rectangles, really, as the hammer sides taper towards the radial axis of the hammer:
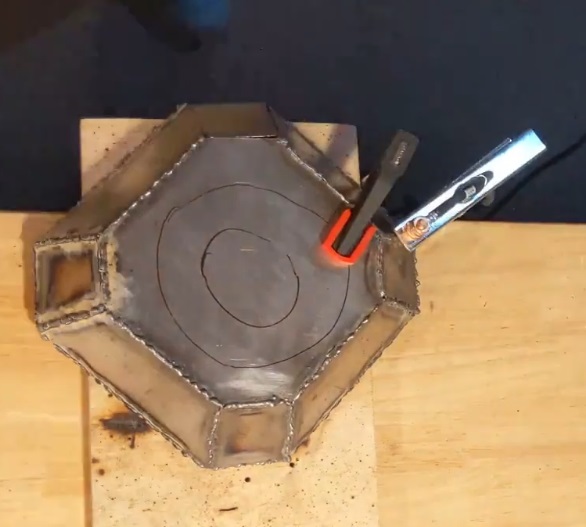
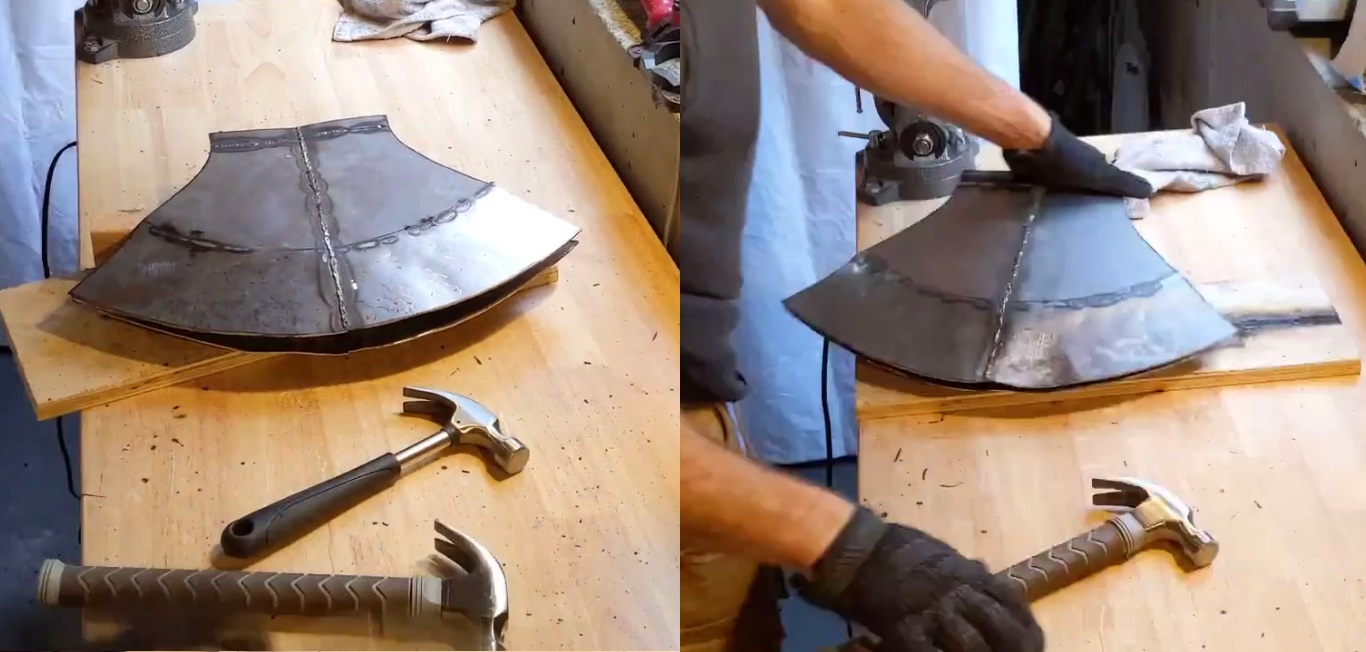
Finally, I welded in long thin triangles for the corners. My measuring and cutting inaccuracies started to show here, and I had to grind some pieces down or add more weld than I preferred to make up the difference. I originally tried to make the wedge insets from 22-gauge steel, but this proved too thin to reasonably weld - the welder acted as a plasma cutter and sliced through - so I changed to 16-gauge. I started to really notice the weight at this stage, but carried on, figuring it would feel different on the end of a stick (i I was right, but not in a good way). The final part of the basic hammer shape was the circle on the end, and now that I knew I didn’t need to sit it on the end of the hammer any more, I could add it. I’m pretty sure actual Stormbreaker has Viking runes inscribed there or something; I just went with a plain piece. I cut out a circle and a curved strip, and hammered the curved strip to make the circle raised off the end with a bevelled edge. This was very hard to get even and symmetric, but it’s one of those things where you only notice inaccuracies if you look closely, and looking at the whole you just notice that it’s there:

Side trim
Let’s look closely at the hammer:

That edging around the wide end is what I turned my attention to next. How could I achieve this? I could weld flat pieces of steel, but then you have an awkward weld line, as opposed to a direct edge. I tried a raised box section of 22-gauge, but a) this looked bad as it was too raised, and b) 22-gauge was too thin to weld.
I cut this off and left the idea on the shelf for a while, getting on with other parts of the build, and then eventually hit upon something else: wood. I had a large piece of thin … not chip board, but pulp board? Like the backing for a desk. It was 3mm thick or so, so not too raised, and easy to attach: I glued it. It was pretty easy to cut out the shapes I want, glue them on, and the idea was that they just wouldn’t get nudged too much so glue would be enough.
Maybe it’ll look good enough covered in paint?
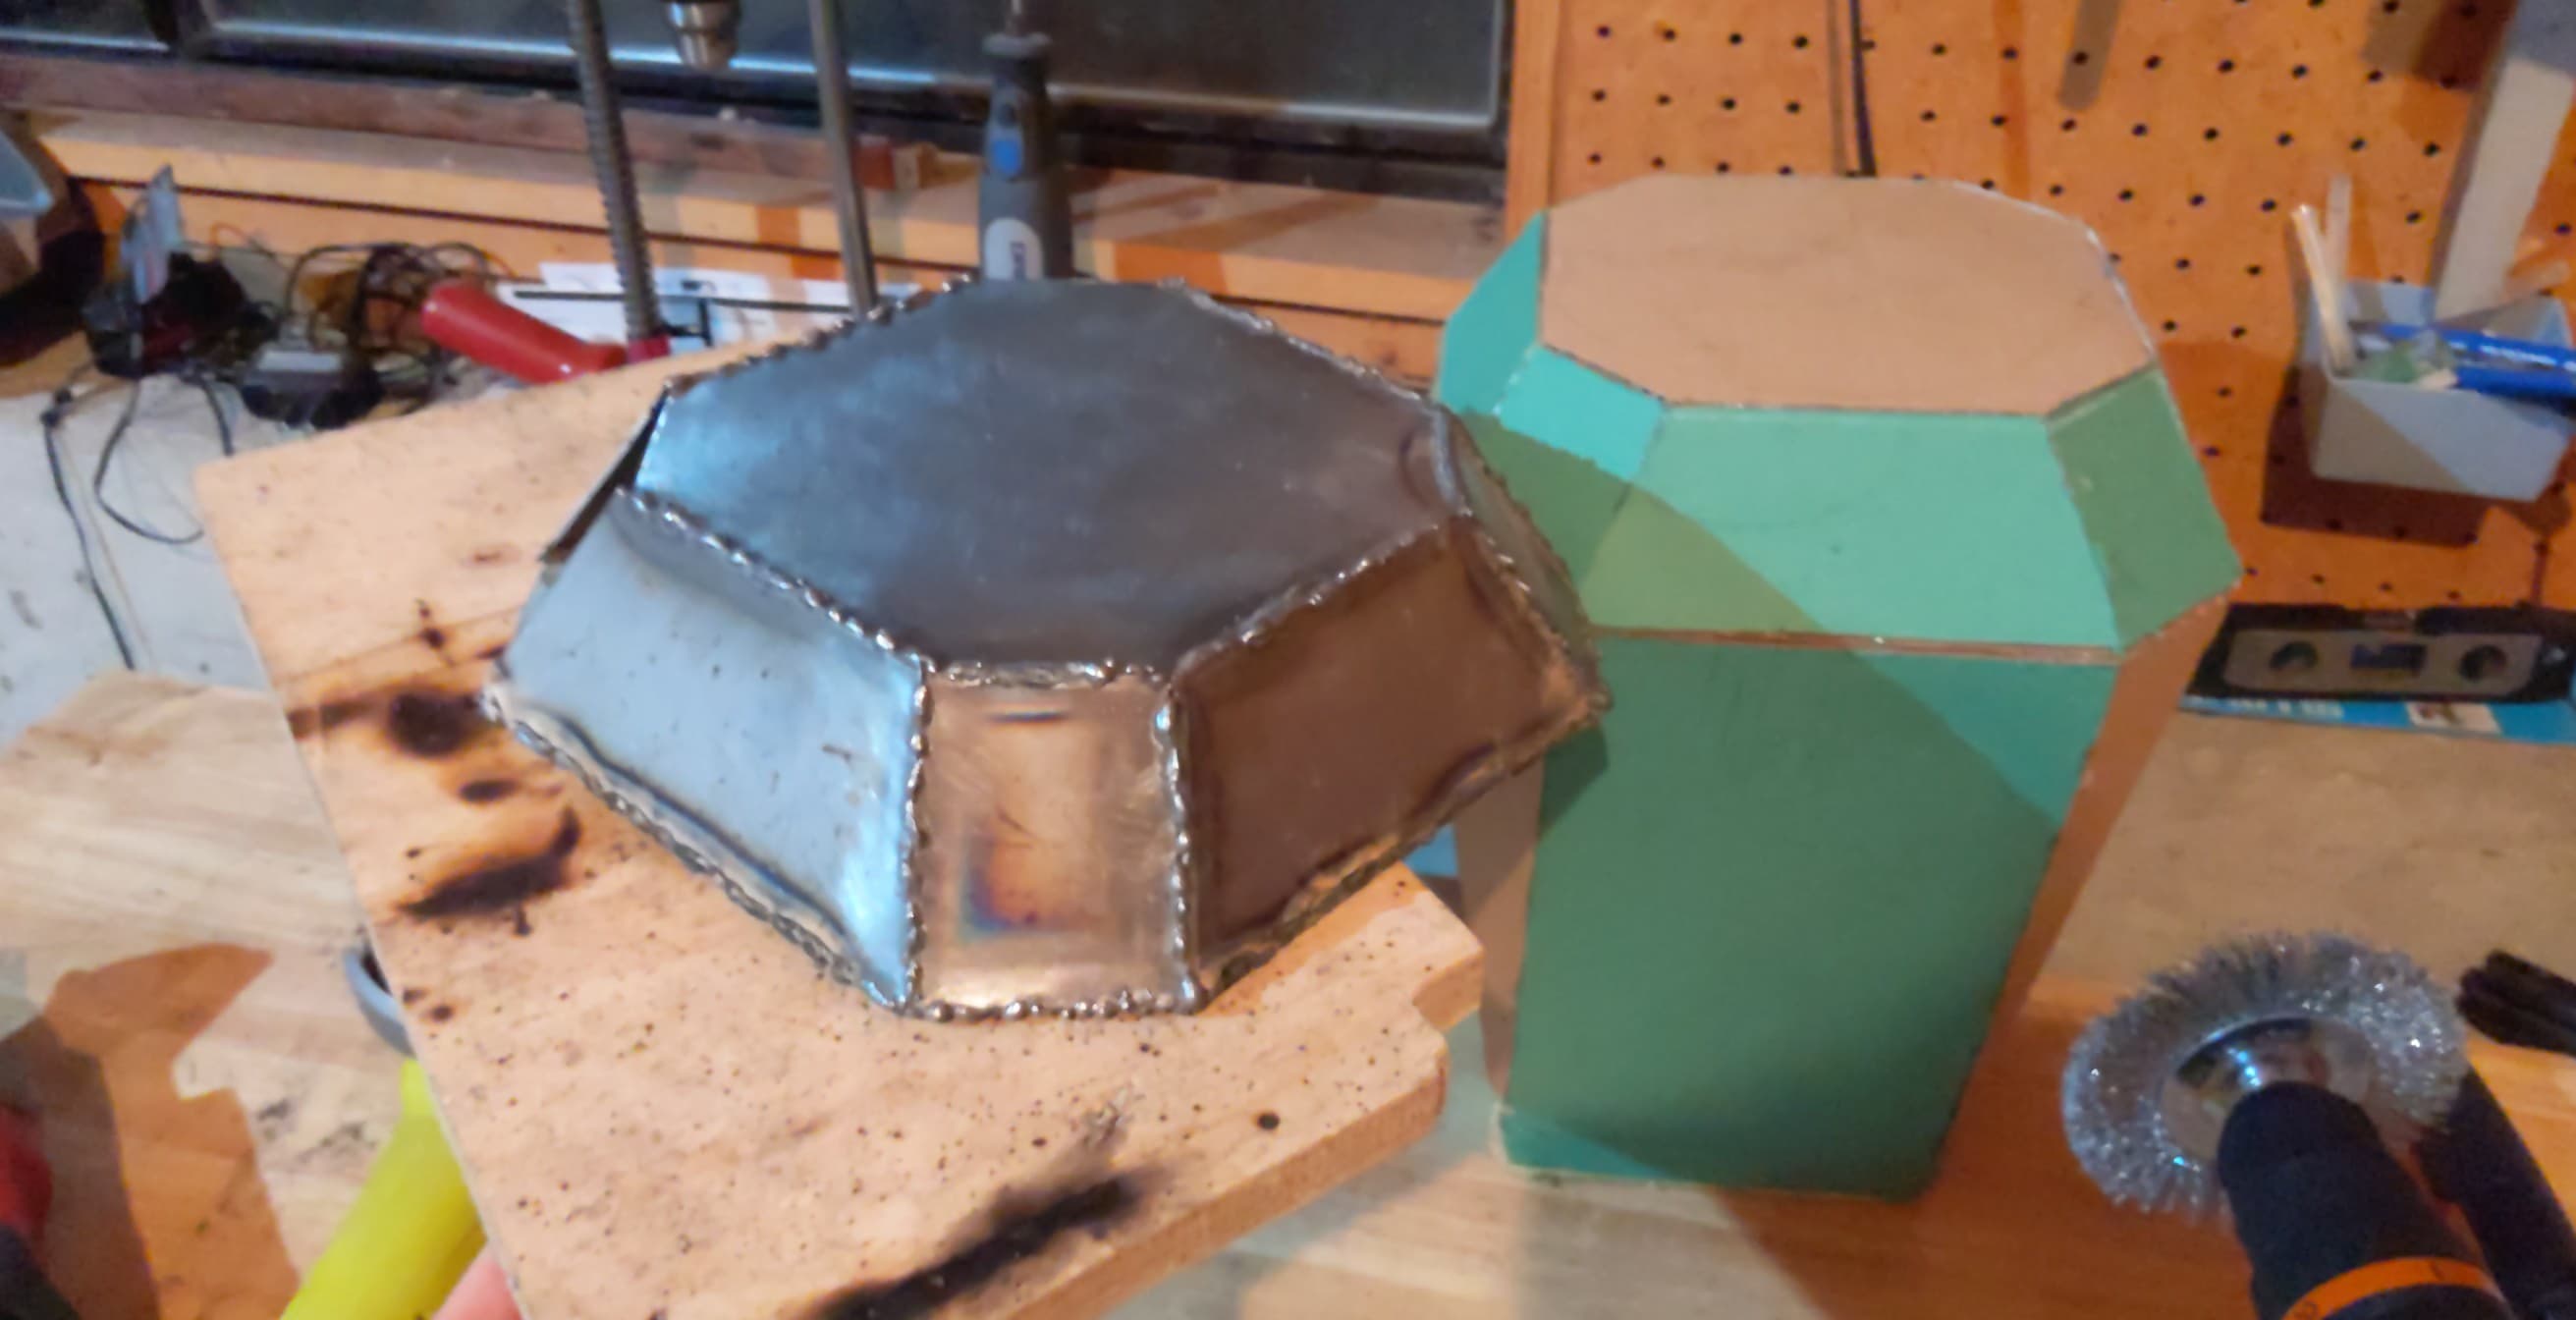
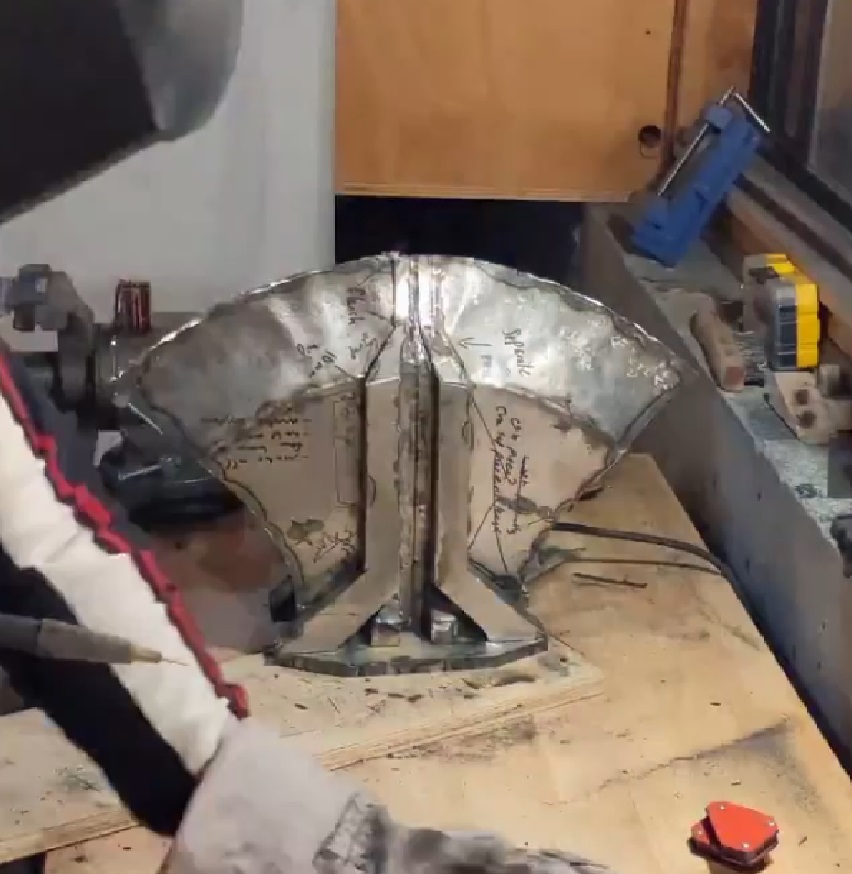
The base plates
The base plates for both hammer and axe, or rather the plates that would connect together around the central handle, were made exactly the same. I made the base plate for the hammer first, and copied this for the axe (no template, just measurements, but they were easy measurements and straight edges). This particular part of the whole head is not particularly clear, but we do get a glimpse or two:
I saw this as an irregular but symmetric octagon, with the edges inset at the top and bottom:
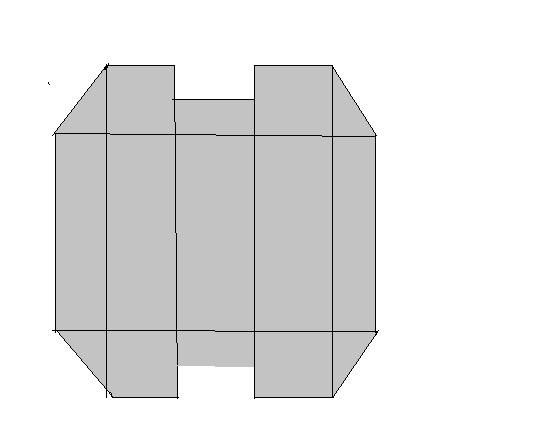
This was measured, cut out, and then I welded a raised edge to the inward-facing side, with a gap for the handle:
I could have just not done this, I suppose, and just welded a flat side panel the whole way round when I connected the two base plates later. I think the reason I had this was that each plate in the film has some small thickness, with a thicker part connecting the two that starts attached to the axe-half:

The axe
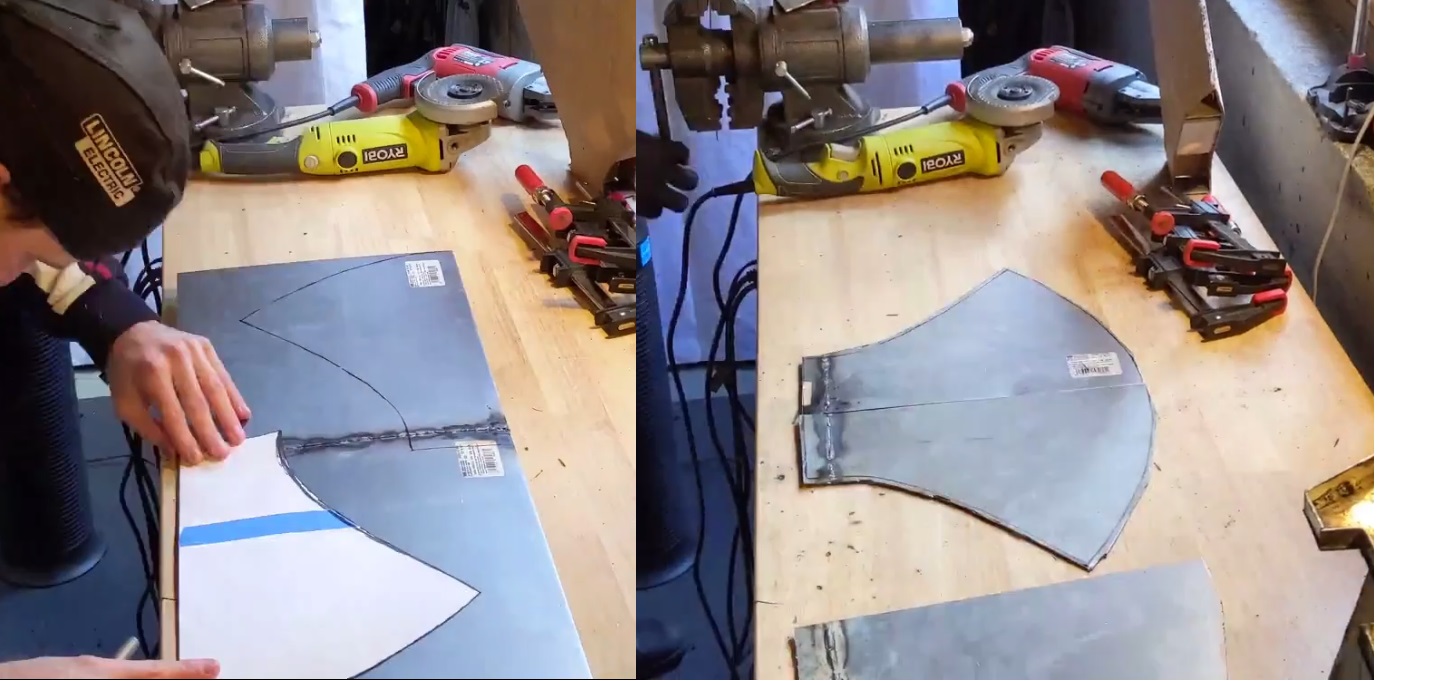
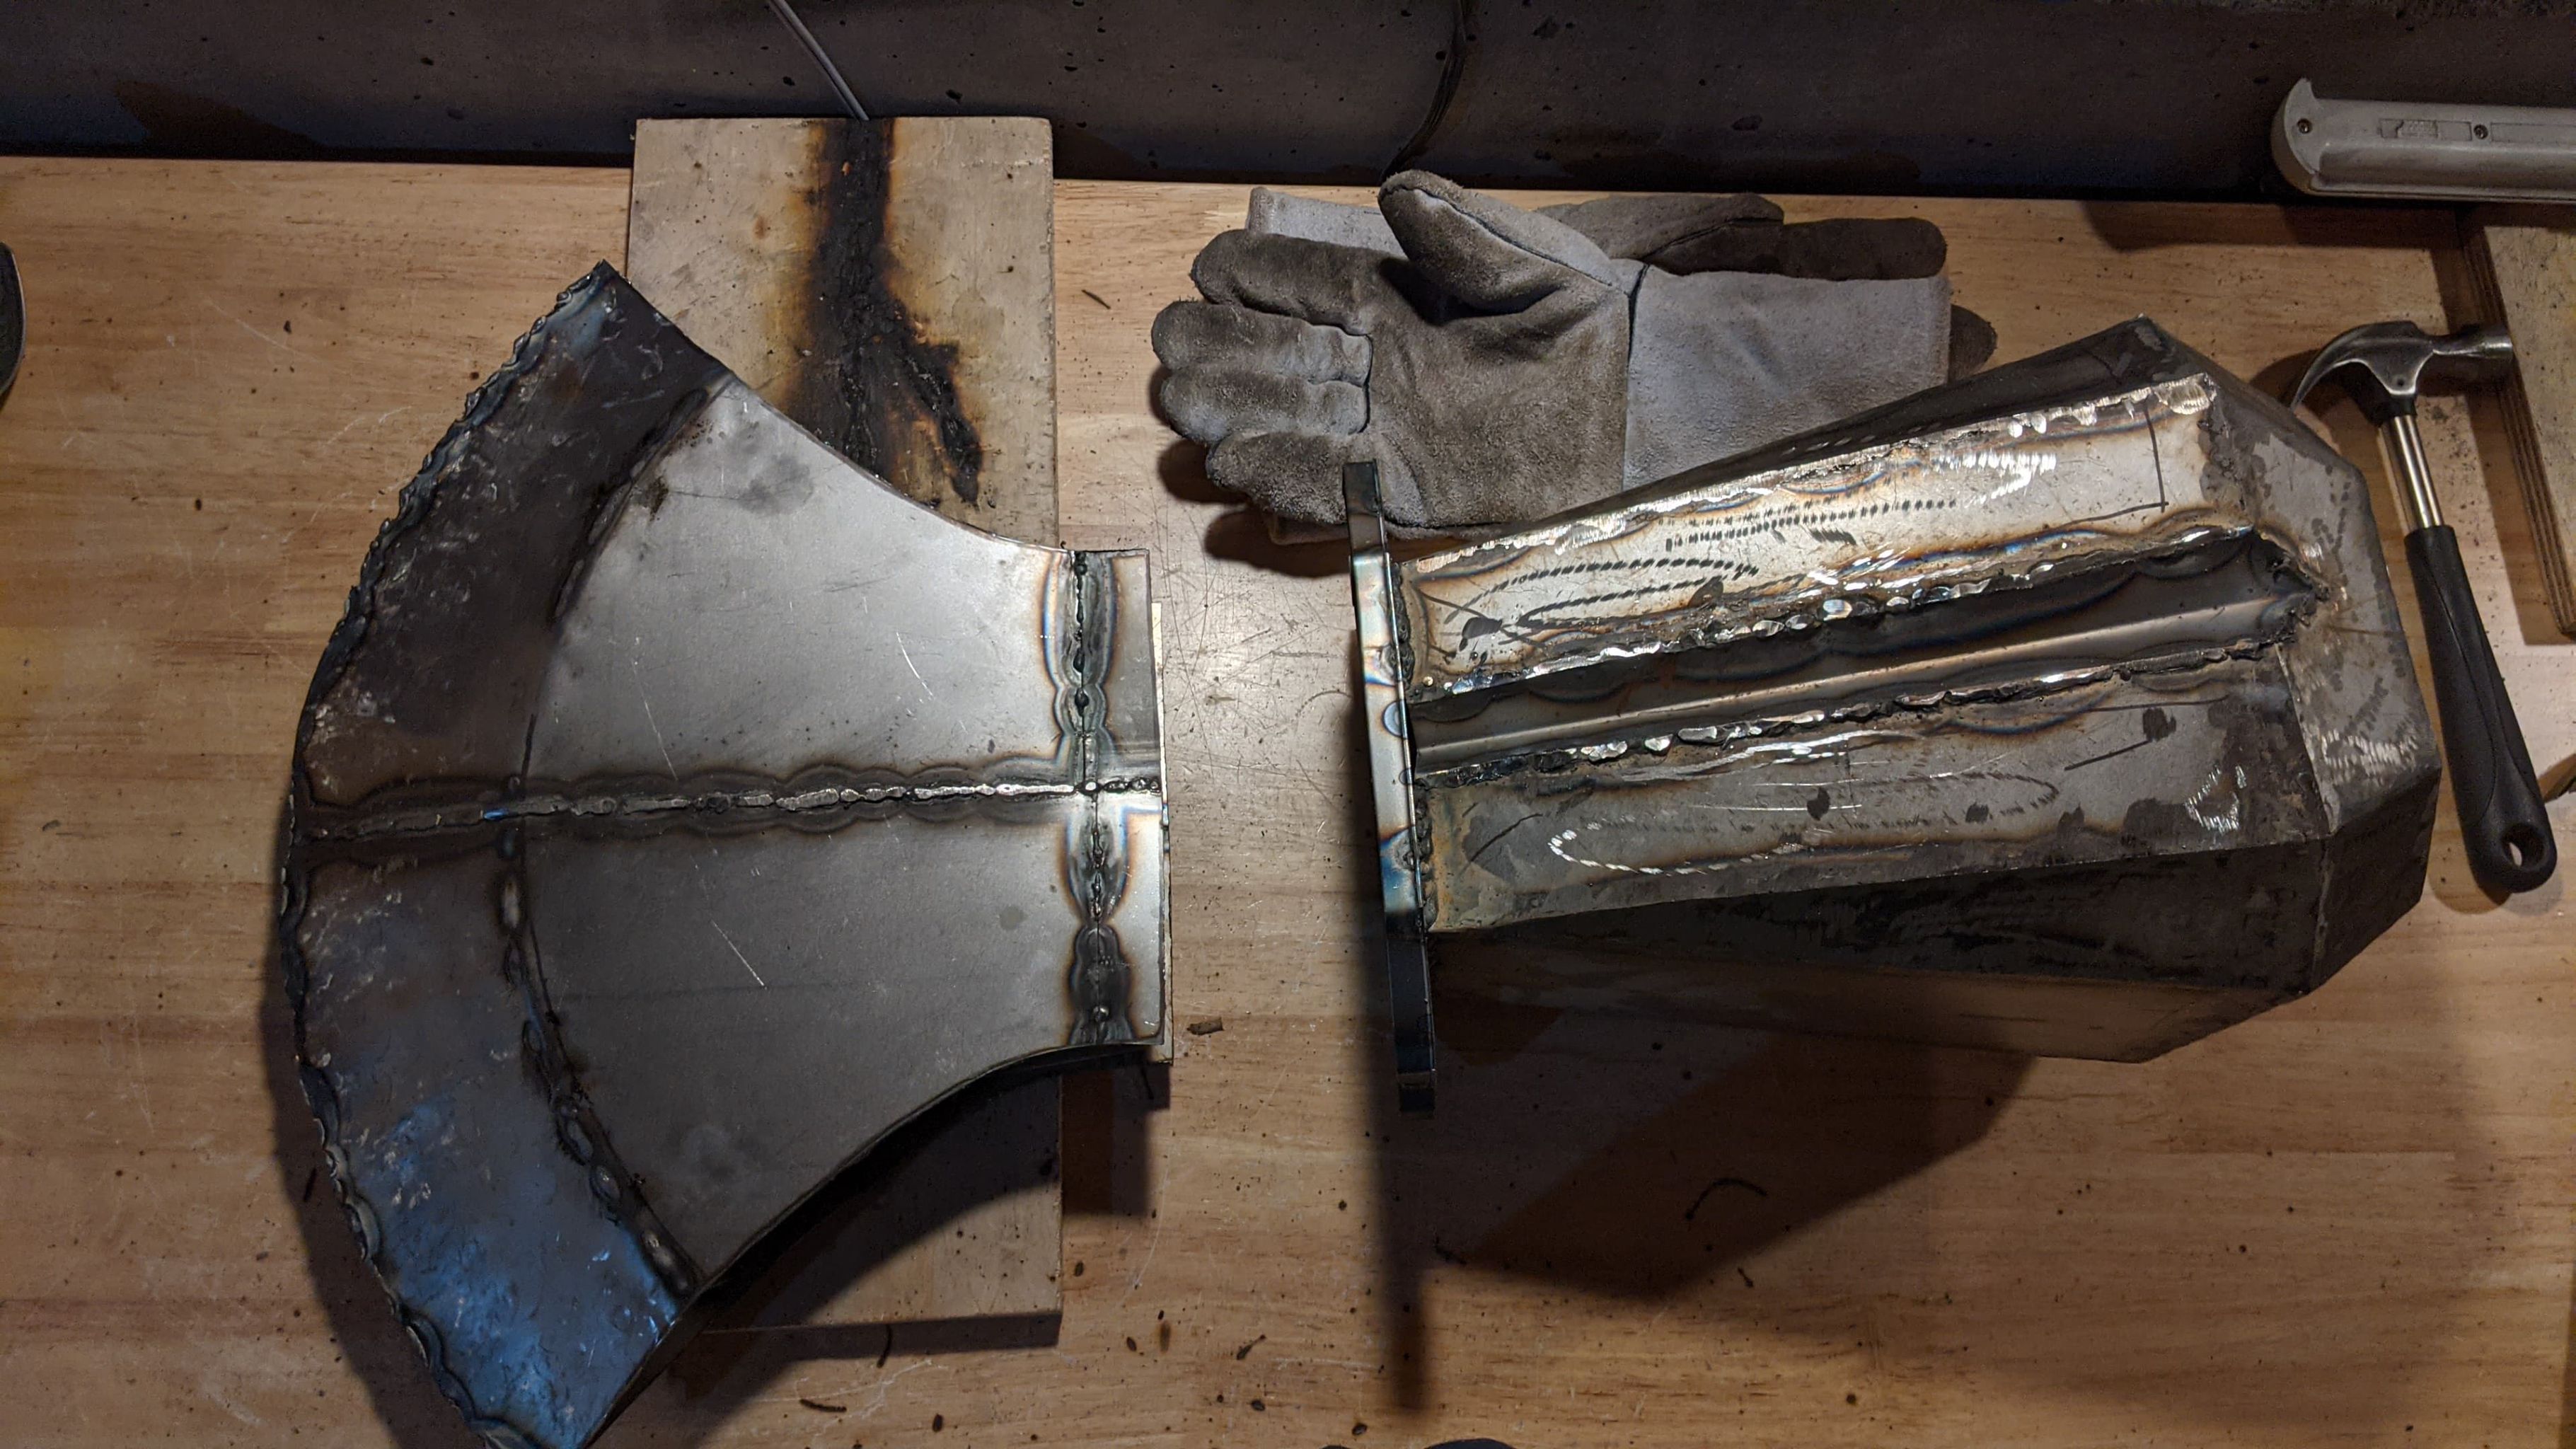
Unfortunately by the time I got to this Home Depot was sold out of 12”x24” steel sheets, had no larger size, and the company (Everbilt?) said they were no longer making these. Real shame, cos the way I chose to do the axe blade made this more difficult. Let’s look at the axe:
This was fairly long from base to blade, and tall from tip to tip. I had the idea of cutting it down the middle, so each side was two pieces, with a straight edge and a curve. But this was too big for one 12”x12” sheet of steel, and I had no bigger since the 24x12’s were out of stock and no longer being sold. What to do?
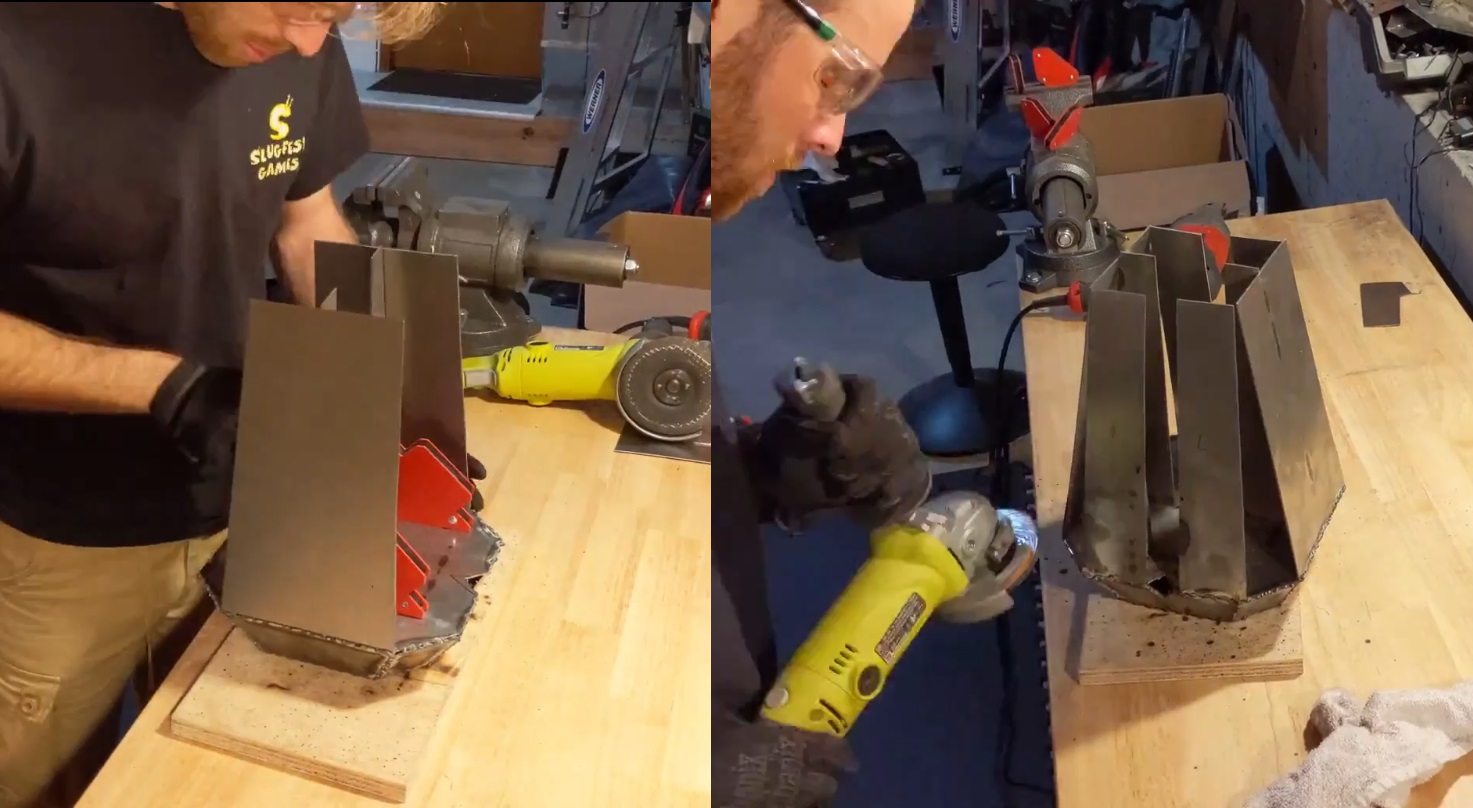
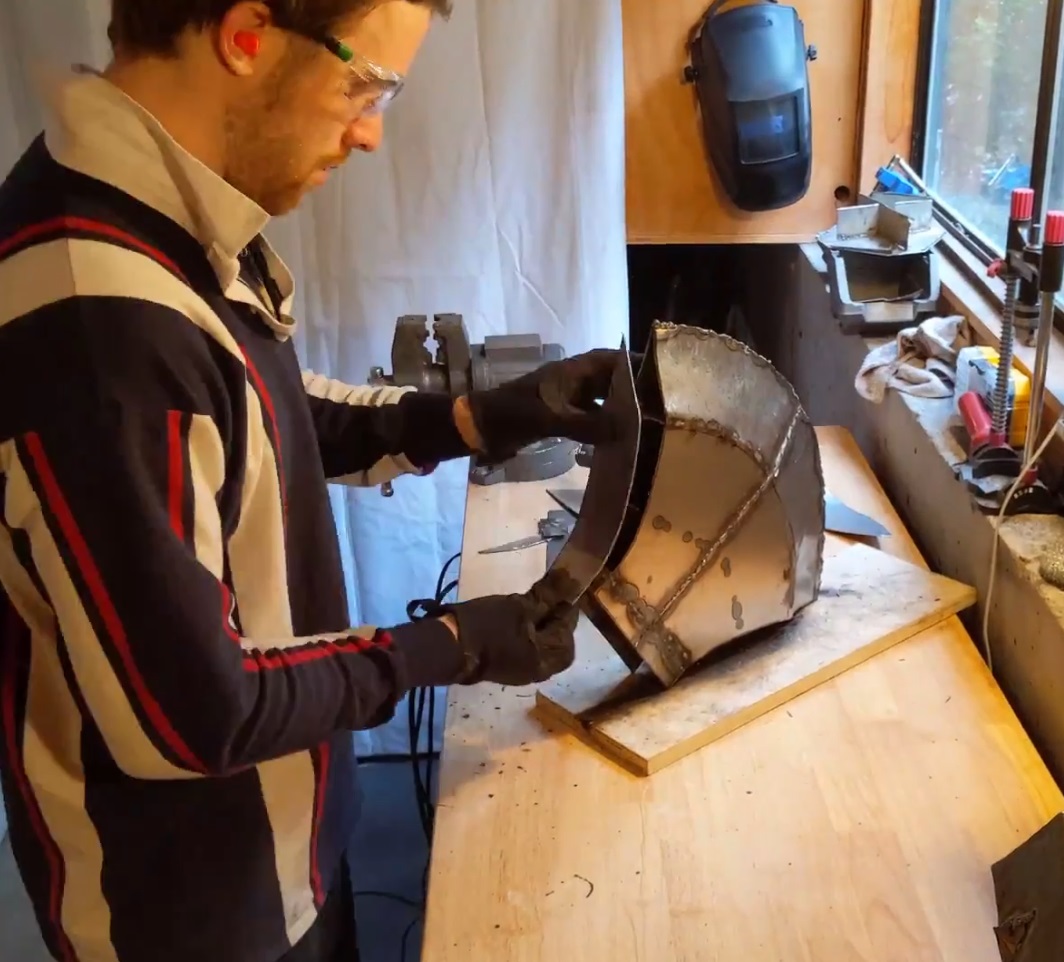
I welded two sheets together along one side. This made things a bit wonky, as it didn’t weld flat, but … what else was I to do? Having done that, I could actually fit both the top and the bottom half of an axe side onto one of these sheets, so I cut those out - with an angle grinder, due to the curve, not shears - and welded them together. You can see the result here, along with my paper template:
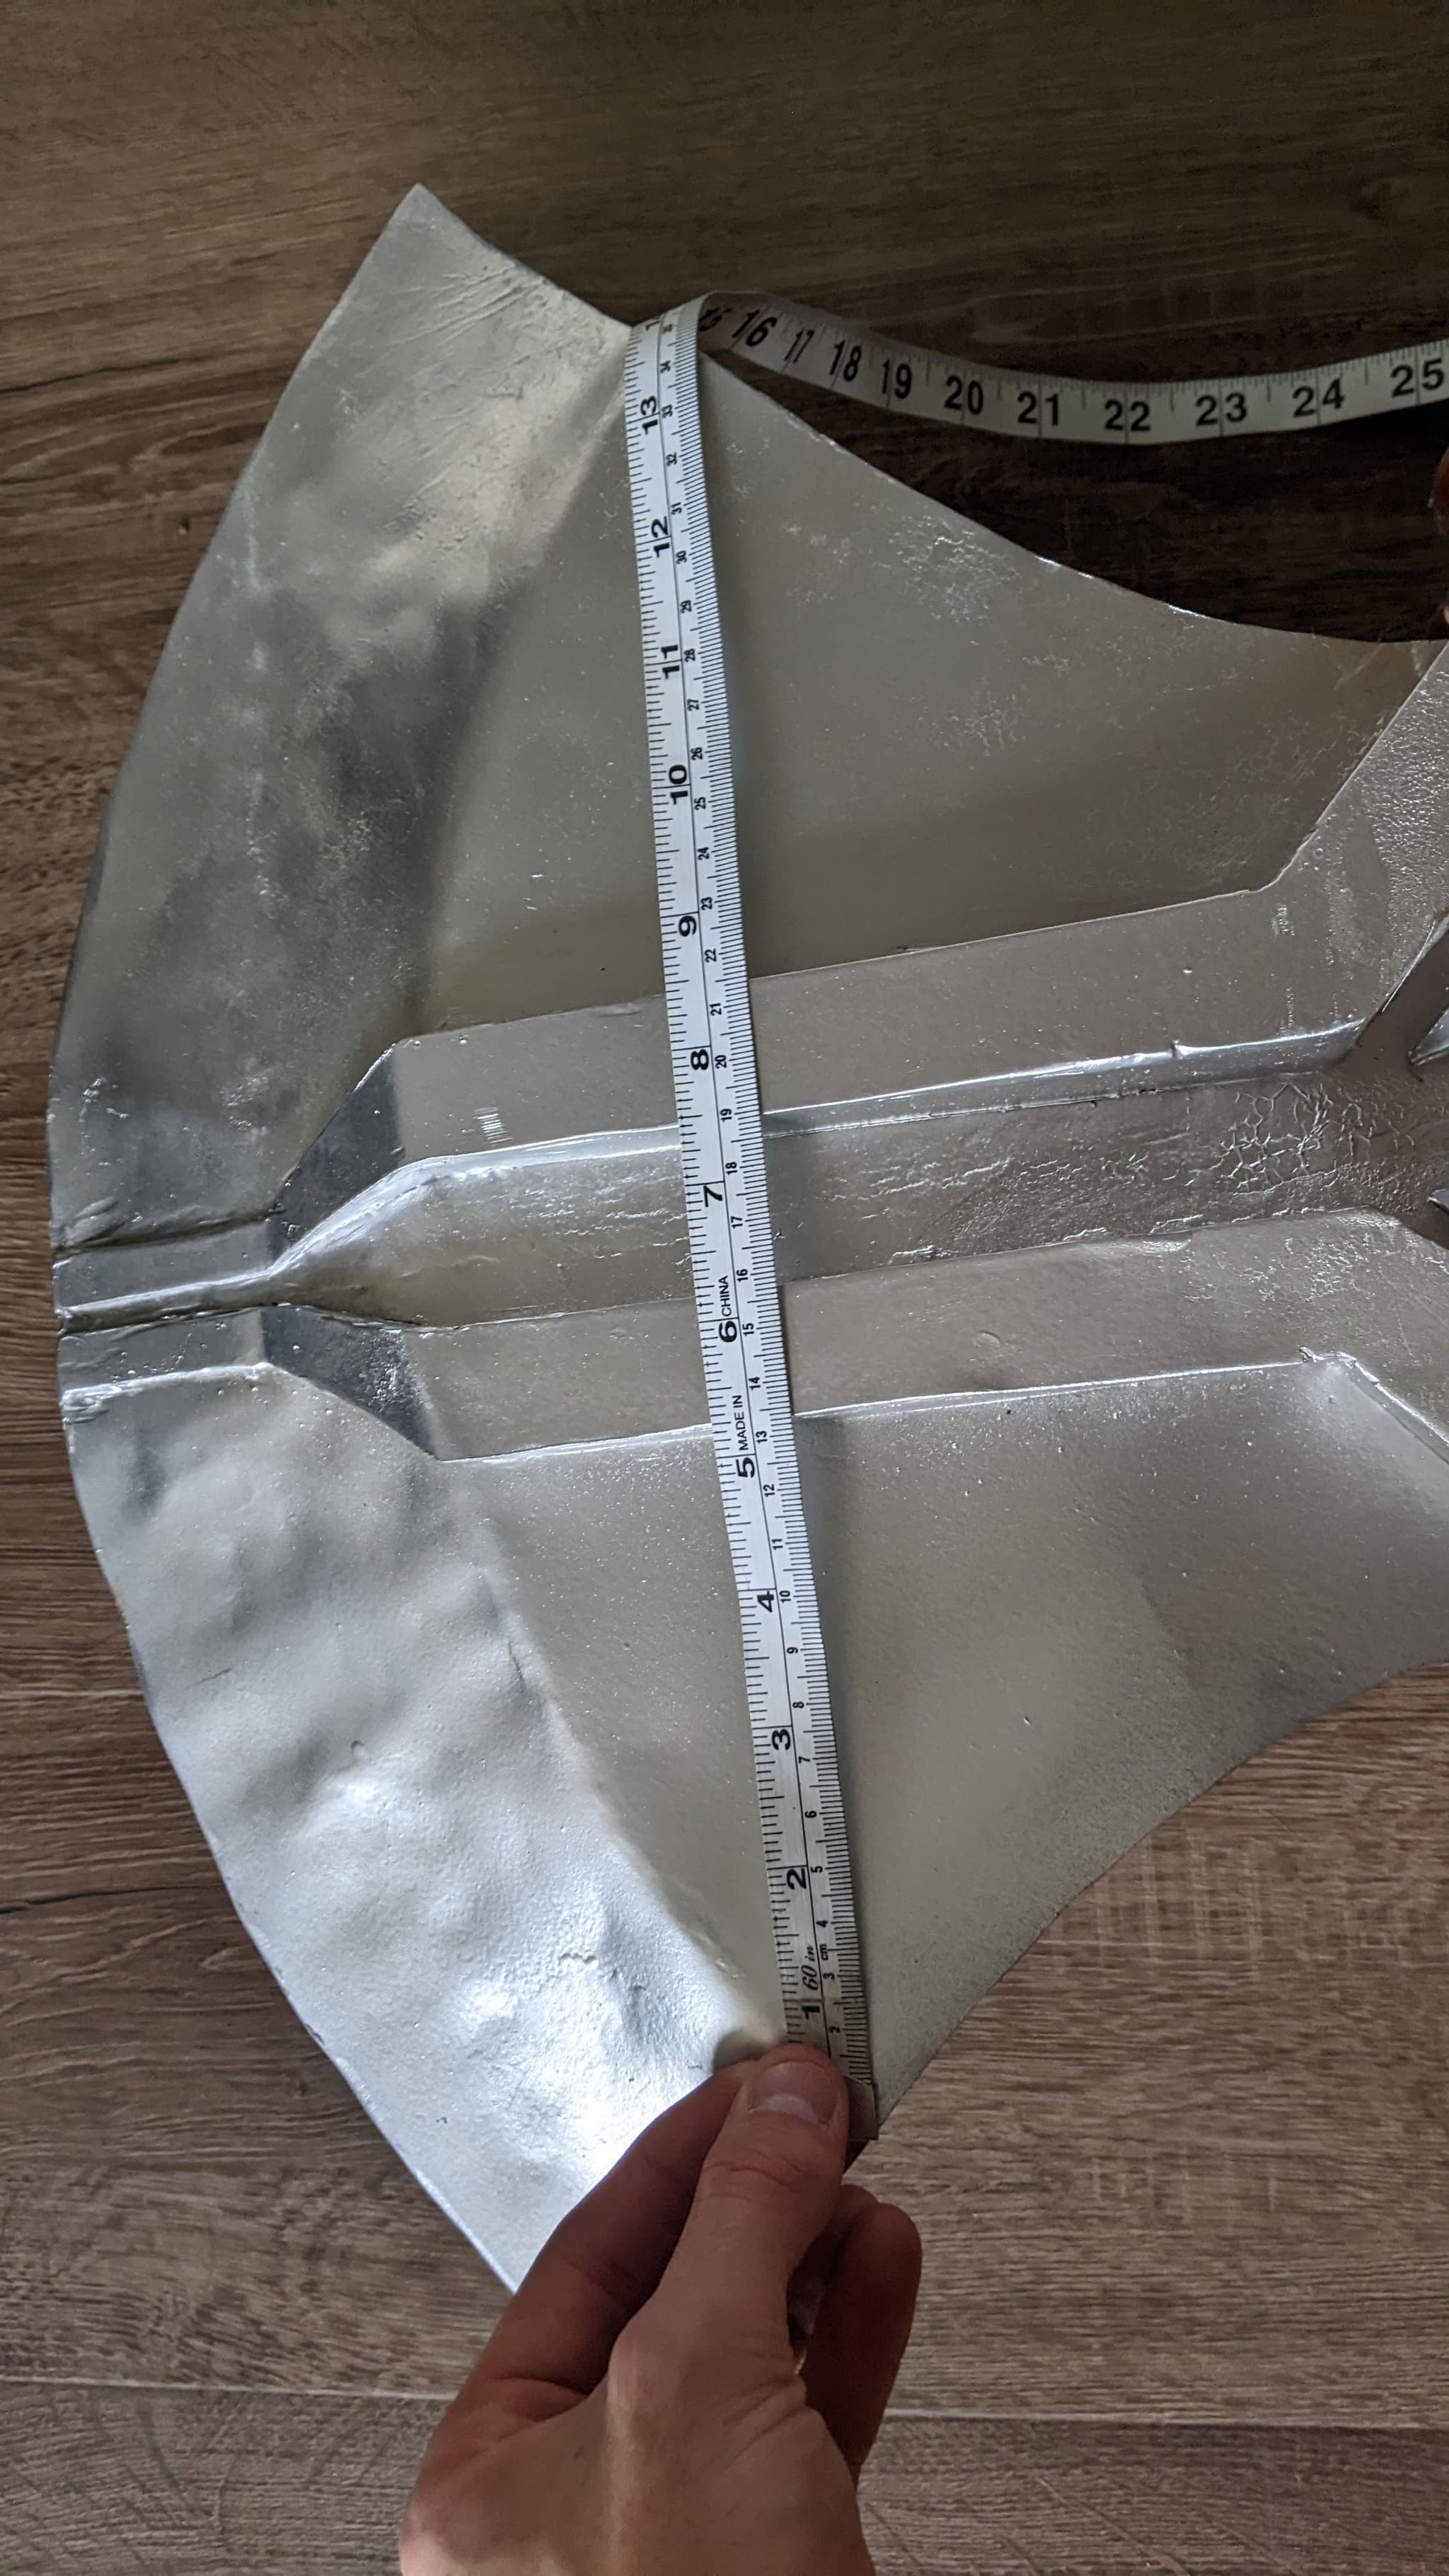
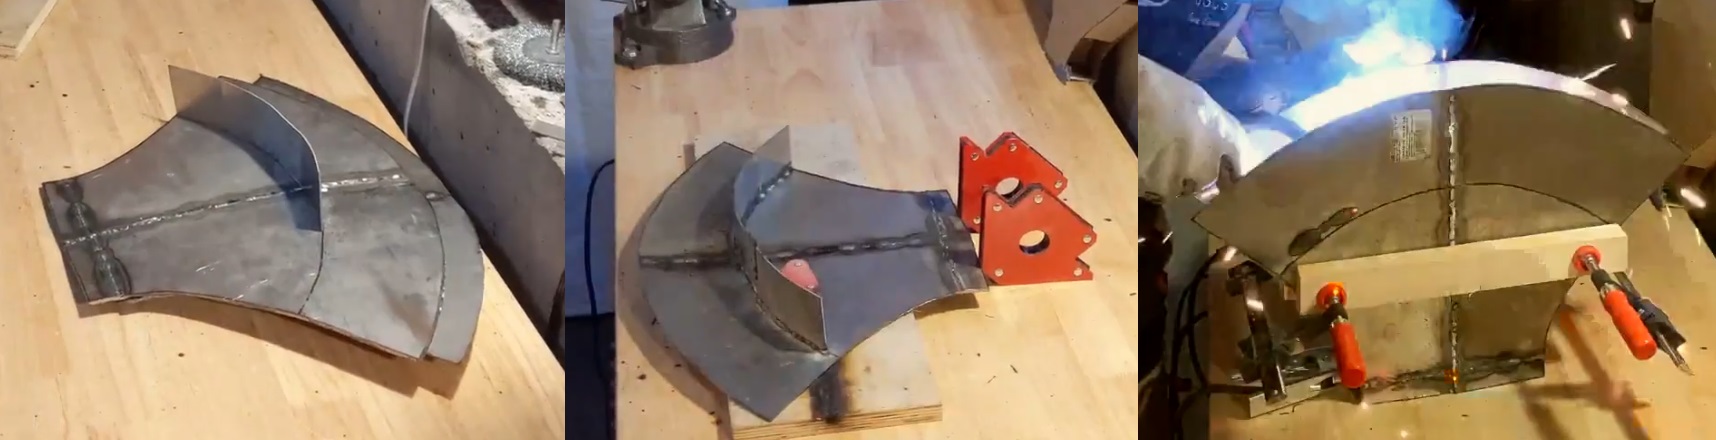
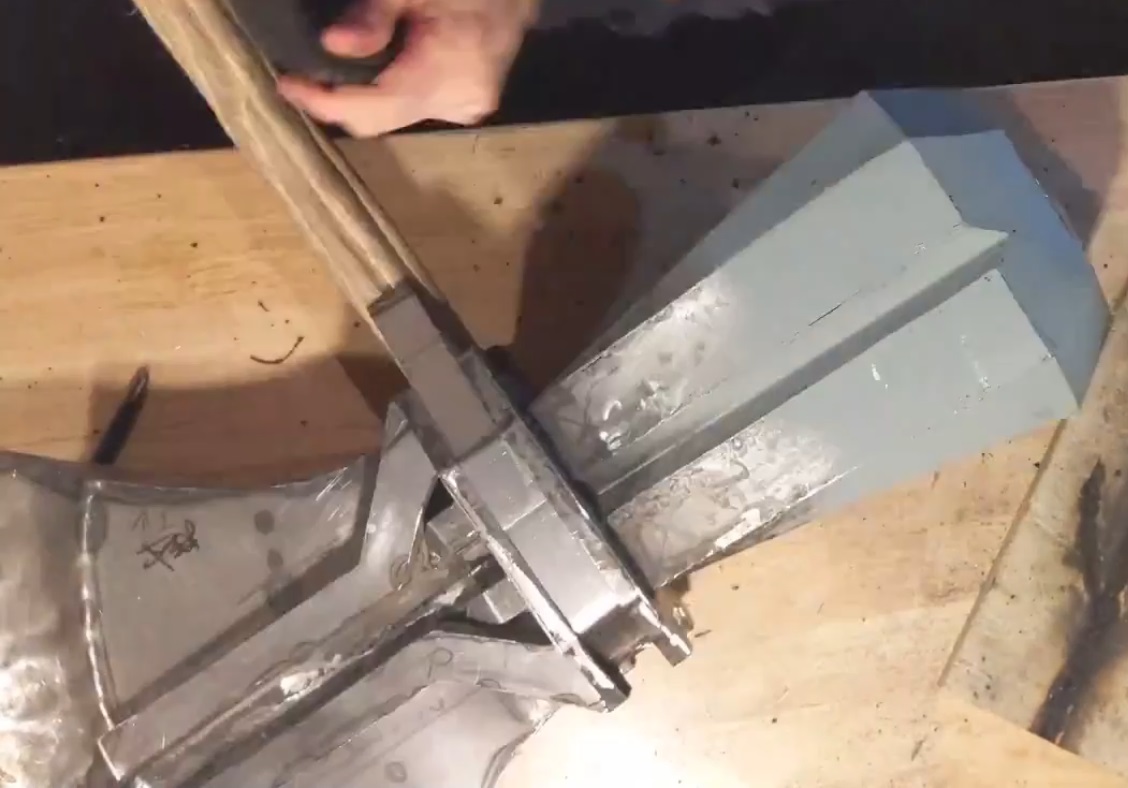
Now I have the two sides of the axe blade. I wanted internal supports so it held the shape, so I welded several rectangles on the inside, and a curve at the line where I wanted the blade taper to begin - this was about 15cm from the edge:
To get the wedge shape iconic to axes, I first thought of bending the steel with a mold or something since my metal bender vice grip would have been awkward with that curve:
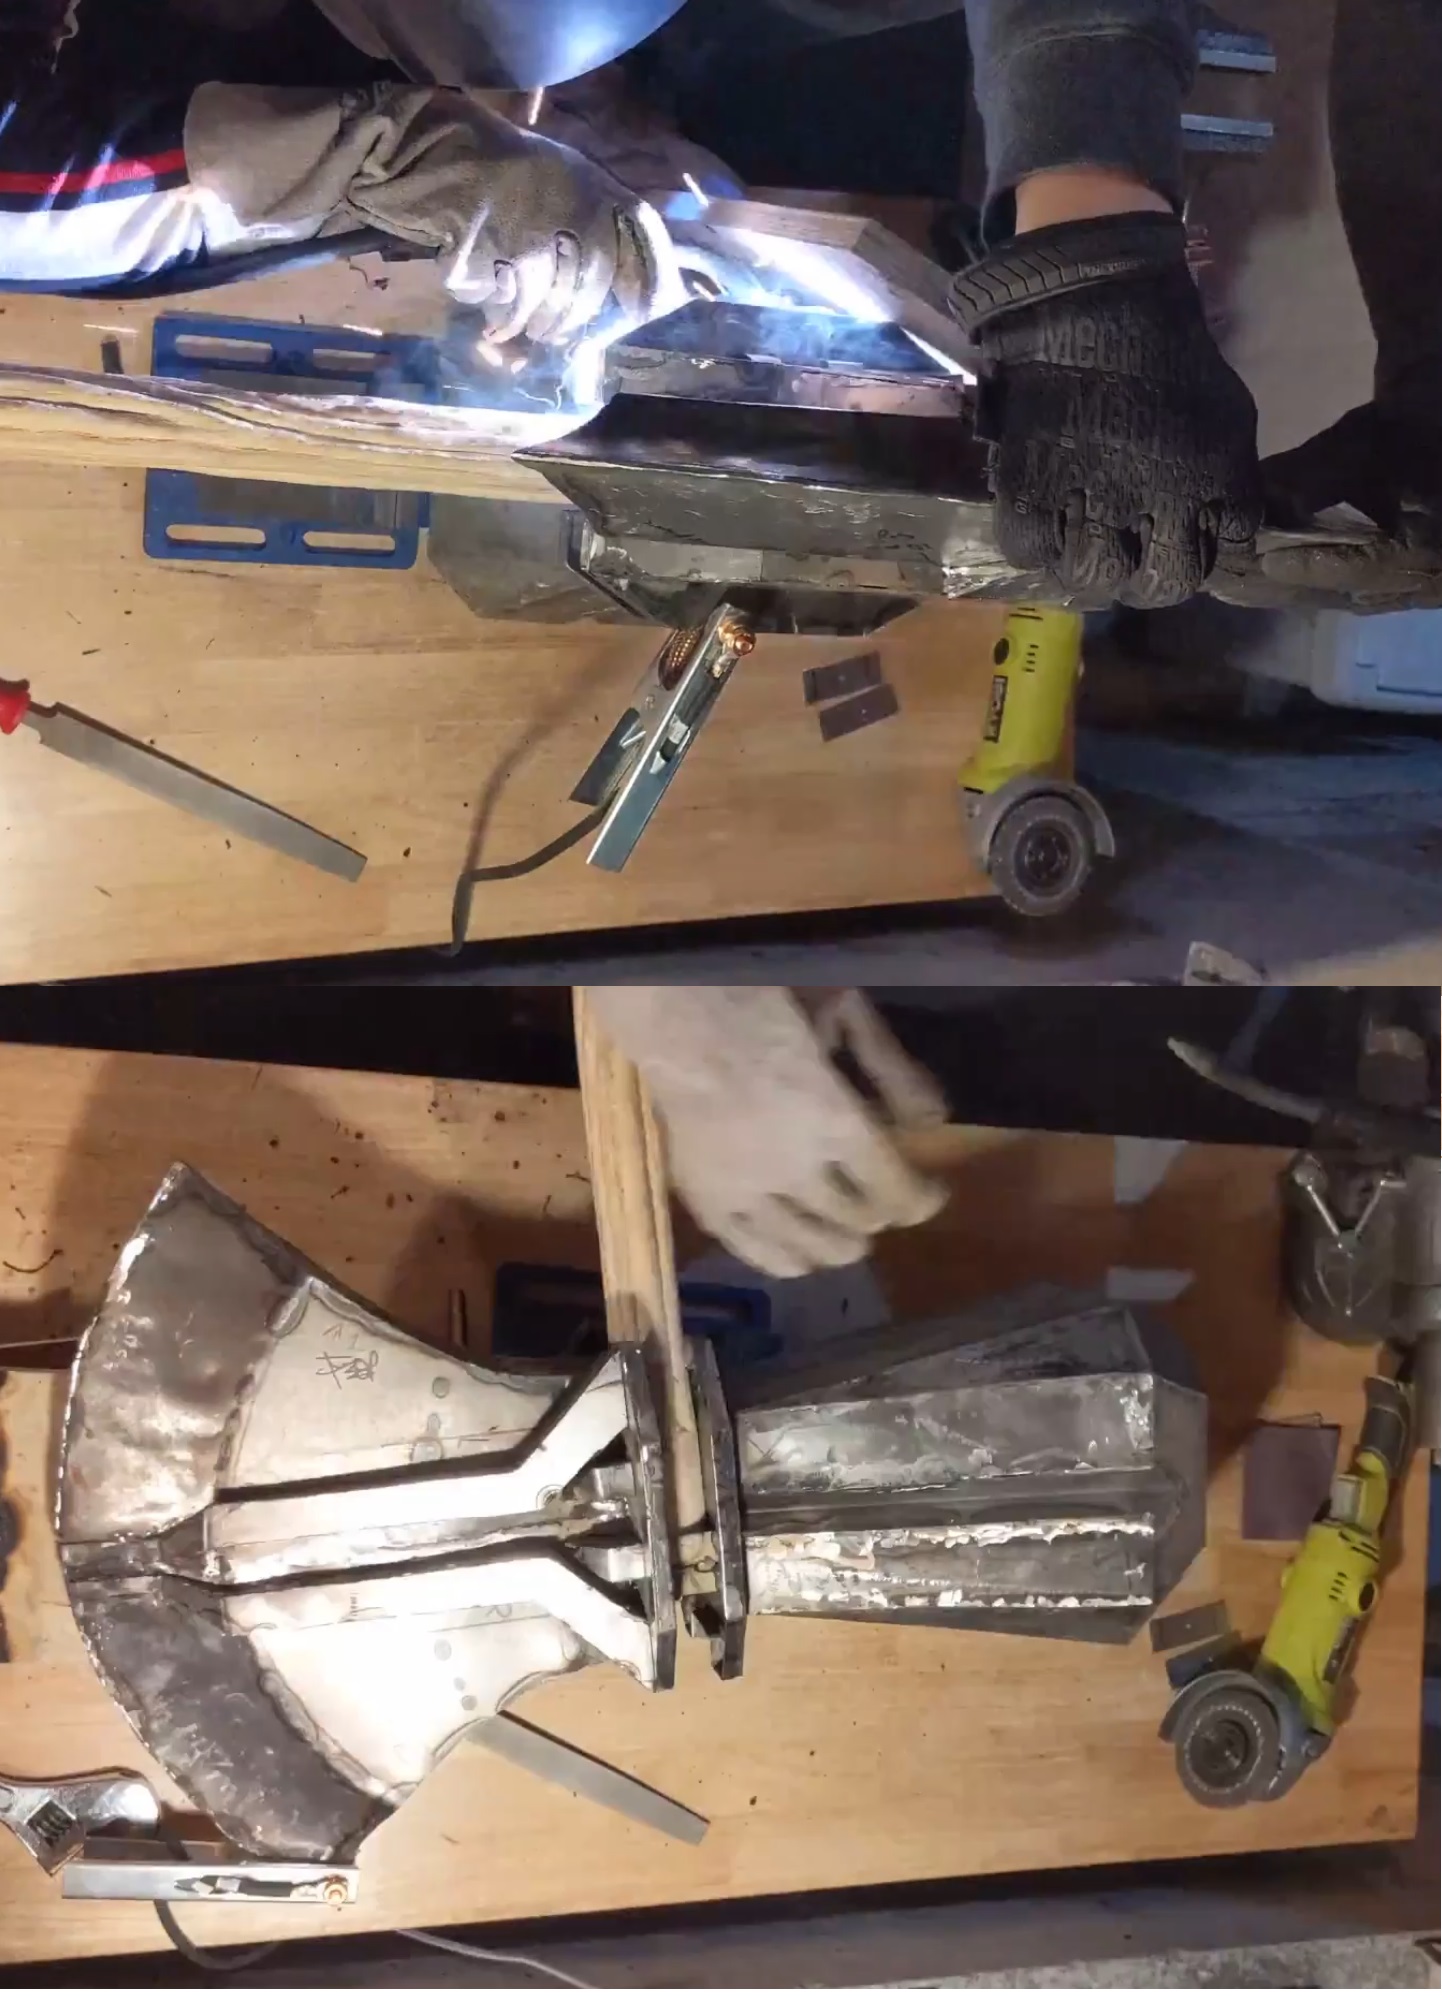
This, simply put, failed. That’s not how you bend steel. My next idea was simpler: smack it with a hammer. A lot.
This worked. It meant the steel was very dented, and it was more of a curve than a wedge, perhaps more quadratically-curved than the nice linear edge I’d prefer, but it worked and the blade edges were close enough together such that I could weld them. I used the slanted bits of wood from the mold to provide flat and heat-distanced surfaces for the clamps, and welded the two halves together. Getting there! Just need top and bottom panels
and then the extra detailing.
Extra detail
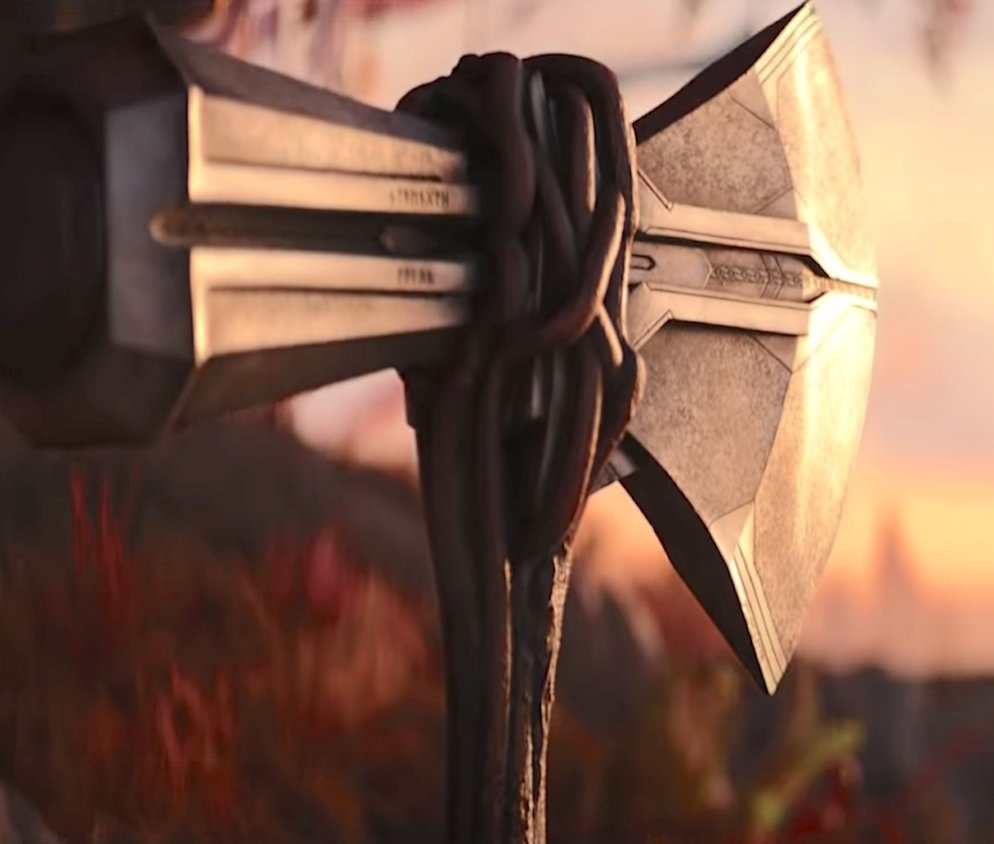
But it’s not just an axe blade, there’s extra detail on top. These patterns, in particular:

Difficult to get a clear picture of before Thor 4 was released, but I had a rough idea. A few sketches later and I basically decided upon what I wanted:
I deliberately didn’t do those top and bottom patterns at the blade of the axe. Why? I thought long and hard about how to do them - a little raised triangle? There were shots from other angles that show it raised. Weld a flat piece on, grind off the weld mostly? Or copy the wood idea from the hammer? None of it sounded right in my head, and given that I’d beaten the blade into its curve with a hammer, I wasn’t working with a nice surface. So I skipped this, but sometimes wish I hadn’t. Perhaps I should have just dremel-engraved the lines in. I suppose I can go back at do that at any point.
After some guessing and measuring, I figured out the dimensions of the pattern: raised about 20mm from the flat of the blade at the base, going all the way to flat against it at the blade edge. I cut out these guide rails after some careful measurement, lay them down, and then welded the tops on.
You can see in these shots the notes and measurements I was drawing all over the axe head; thankfully the paint covered all this later.
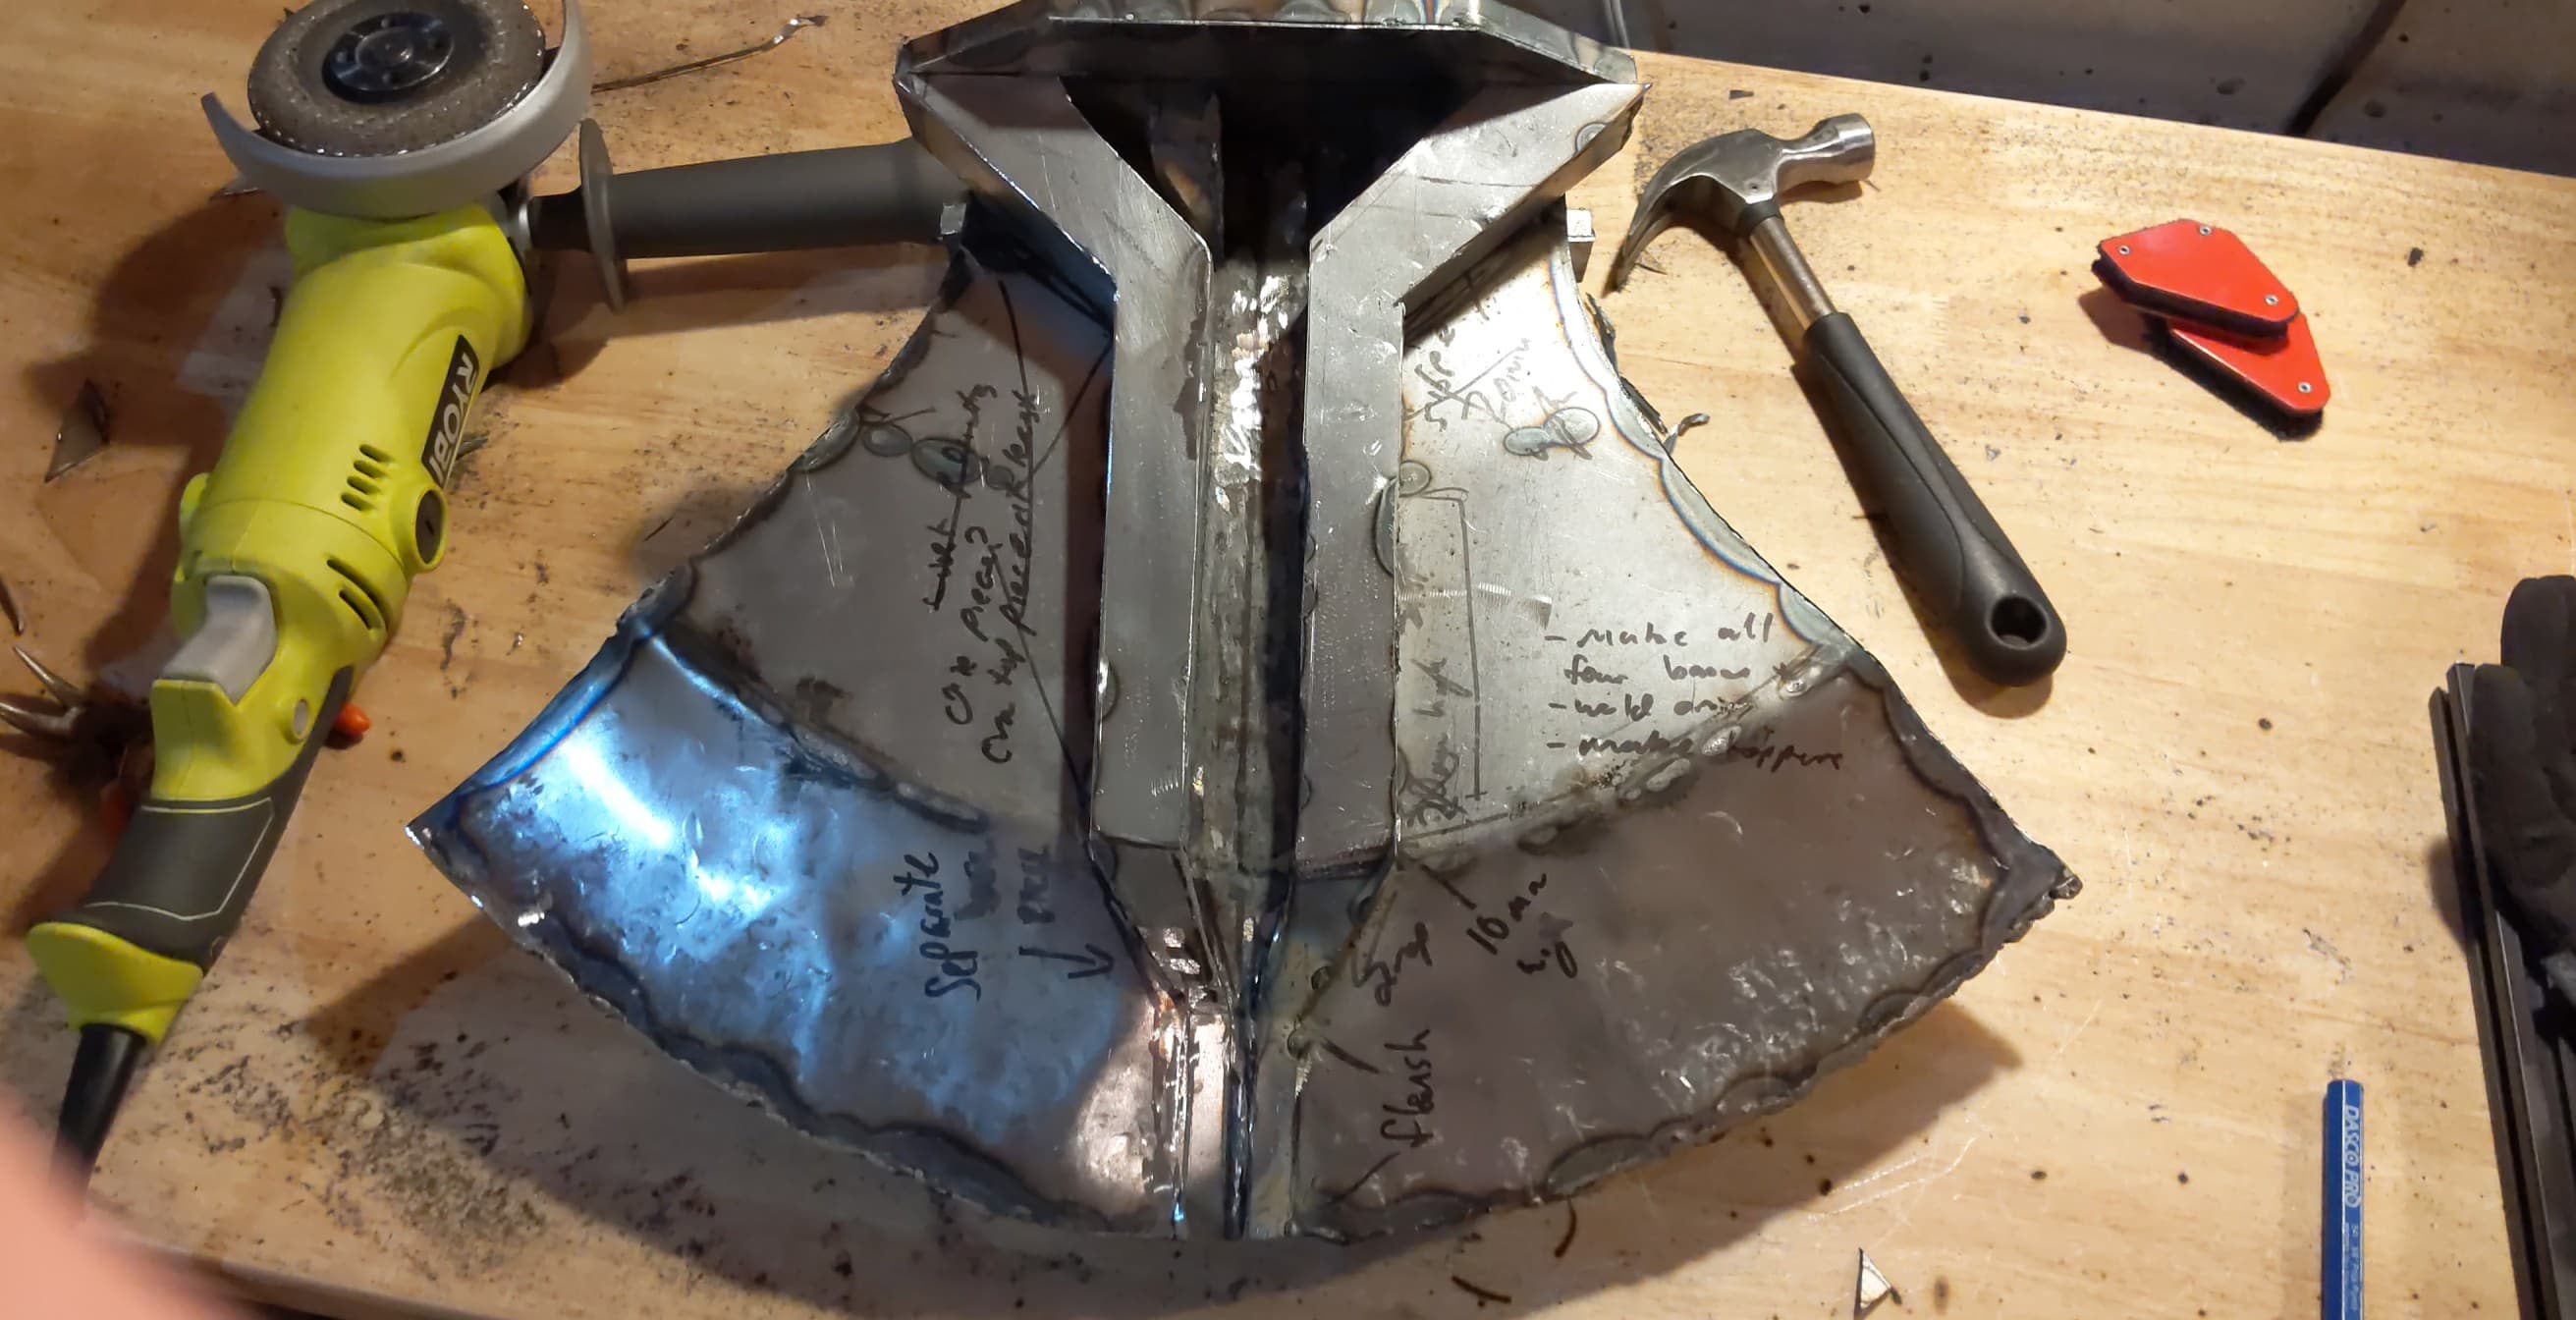
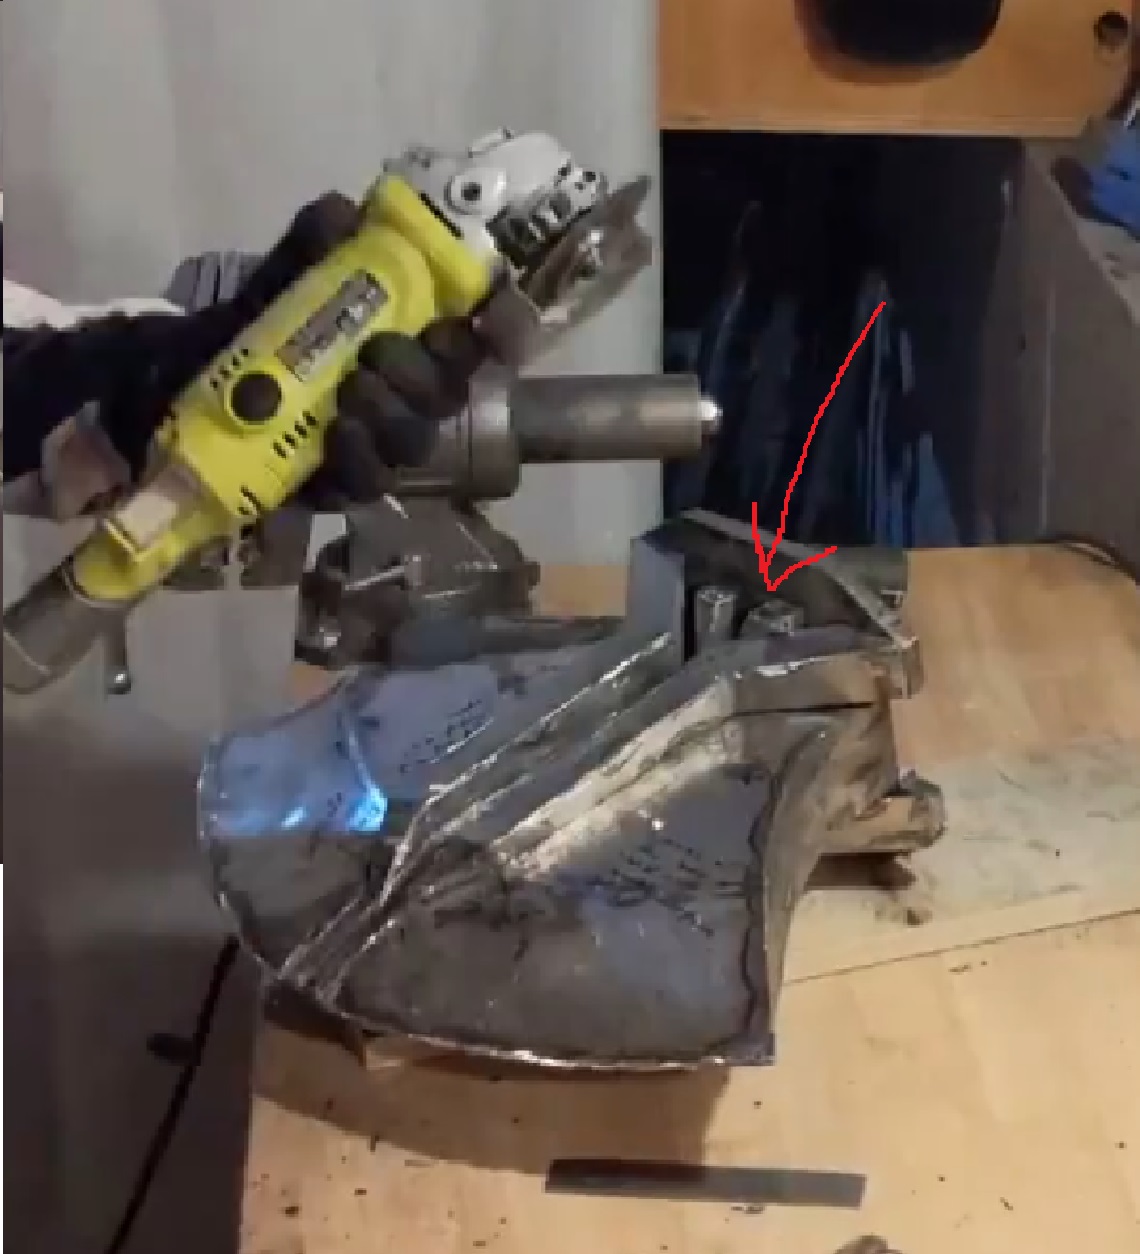
Unfortunately, I must have … I’m not sure really, stetched? Angled? Mismeasured something somewhere? I did something wrong, and the raised lines didn’t align at the blade edge - off by about 10mm. Not a huge error, only noticeable when looking head on, but still, an egregious error that was easy to avoid. It’s difficult to see in this picture but I’ve tried to point it out with arrows:

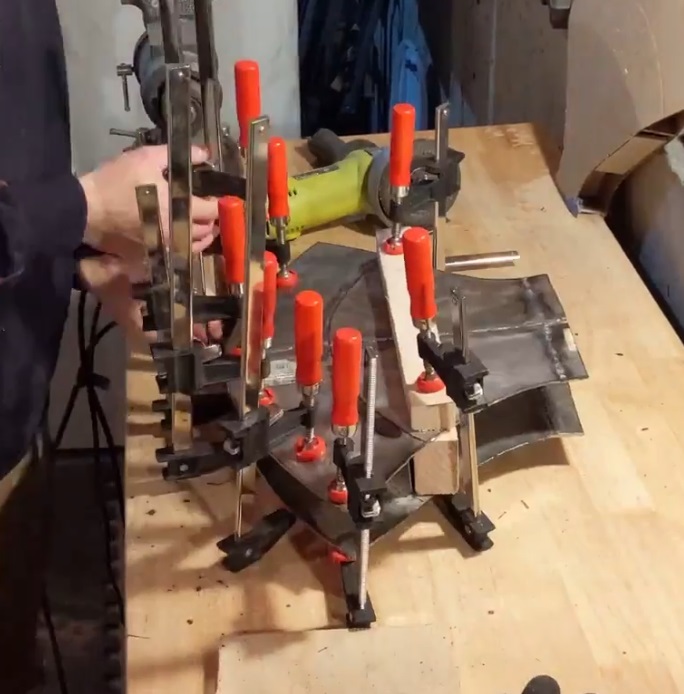
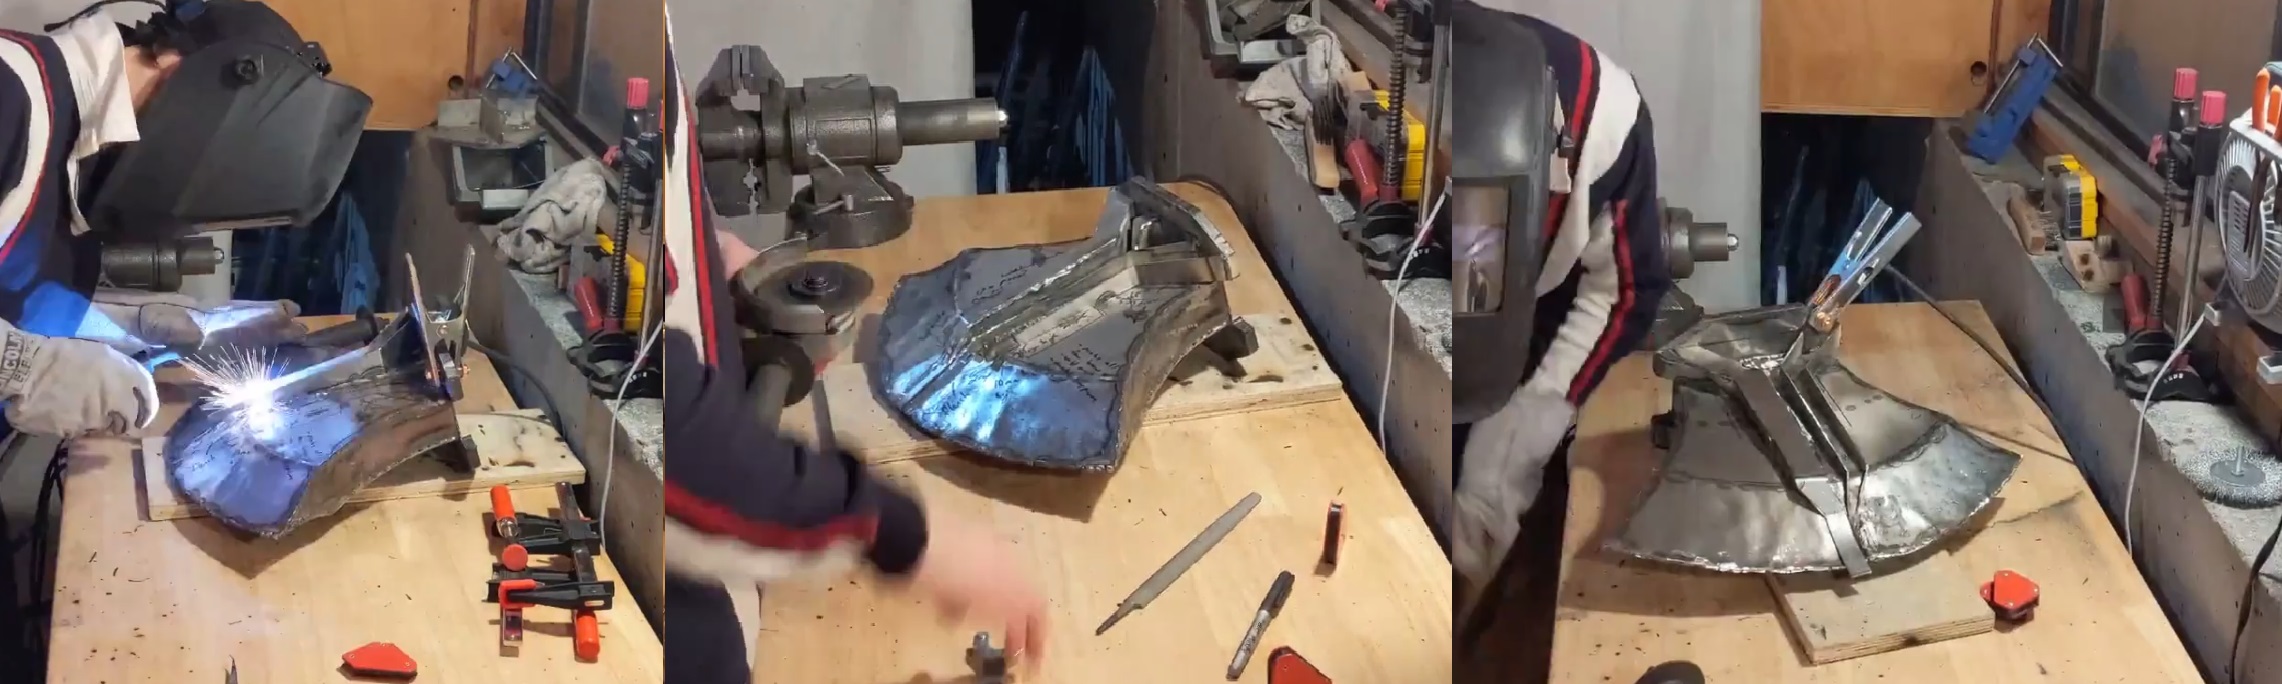
This aside, once everything was semi-spot-welded on, I just had some intense grinding to do. Some of these spots were quite difficult to grind, like these trapezoidal pieces:
and they ended up not looking great, but this can be excused by the fact that the branches should be wrapping tight and close here, and therefore drawing attention from minutiae.
The errors
Just a comment on all the errors that accumulated during the axe construction as opposed to the hammer. The hammer was quite precise - if I could have cut every piece on a machine, I’m sure it would have fit together really well. In contrast, the axe was not. Firstly, I did not have perfectly flat pieces due to welding two panels together to cut the blade from, and then they were curved shapes and I didn’t align them well. This meant that any further pieces were welded awkwardly and I just angle-grinded edges down to fit, etc, like the blade edge. There were also gaps where I could grind everything down that much, so I filled the gaps in with other steel, or just left them in some cases. Certainly for some of the extra detail it was hard to get a grinder into some of the smaller areas. I think overall I did a good job of hiding these errors, and the bigger picture tends to draw the eye rather than the final detail, but still - I wish I had done this more carefully.
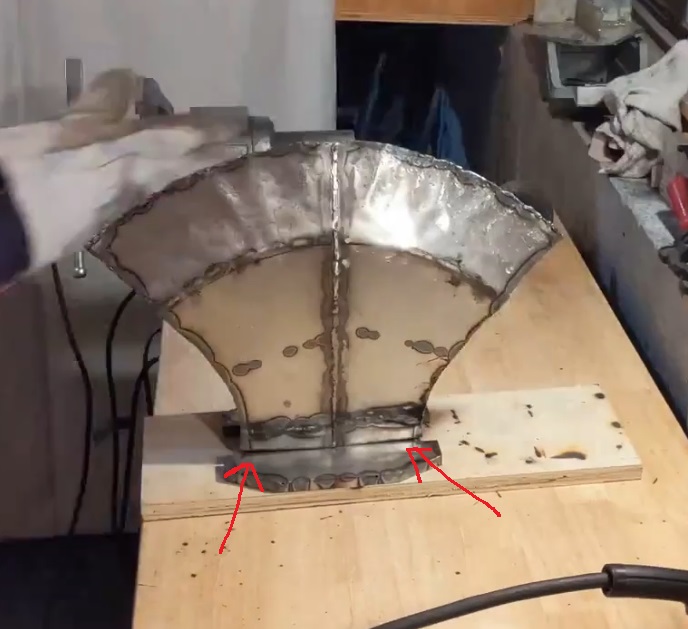
The base plate
See the same from the hammer. I did the same here. It was more difficult to weld down, as there were more errors along the axe base edge than most others - for example, one side of the axe had a tapered edge, due to … just accumulated errors. I ground it all down as flat as I could and welded it as centrally as possible.
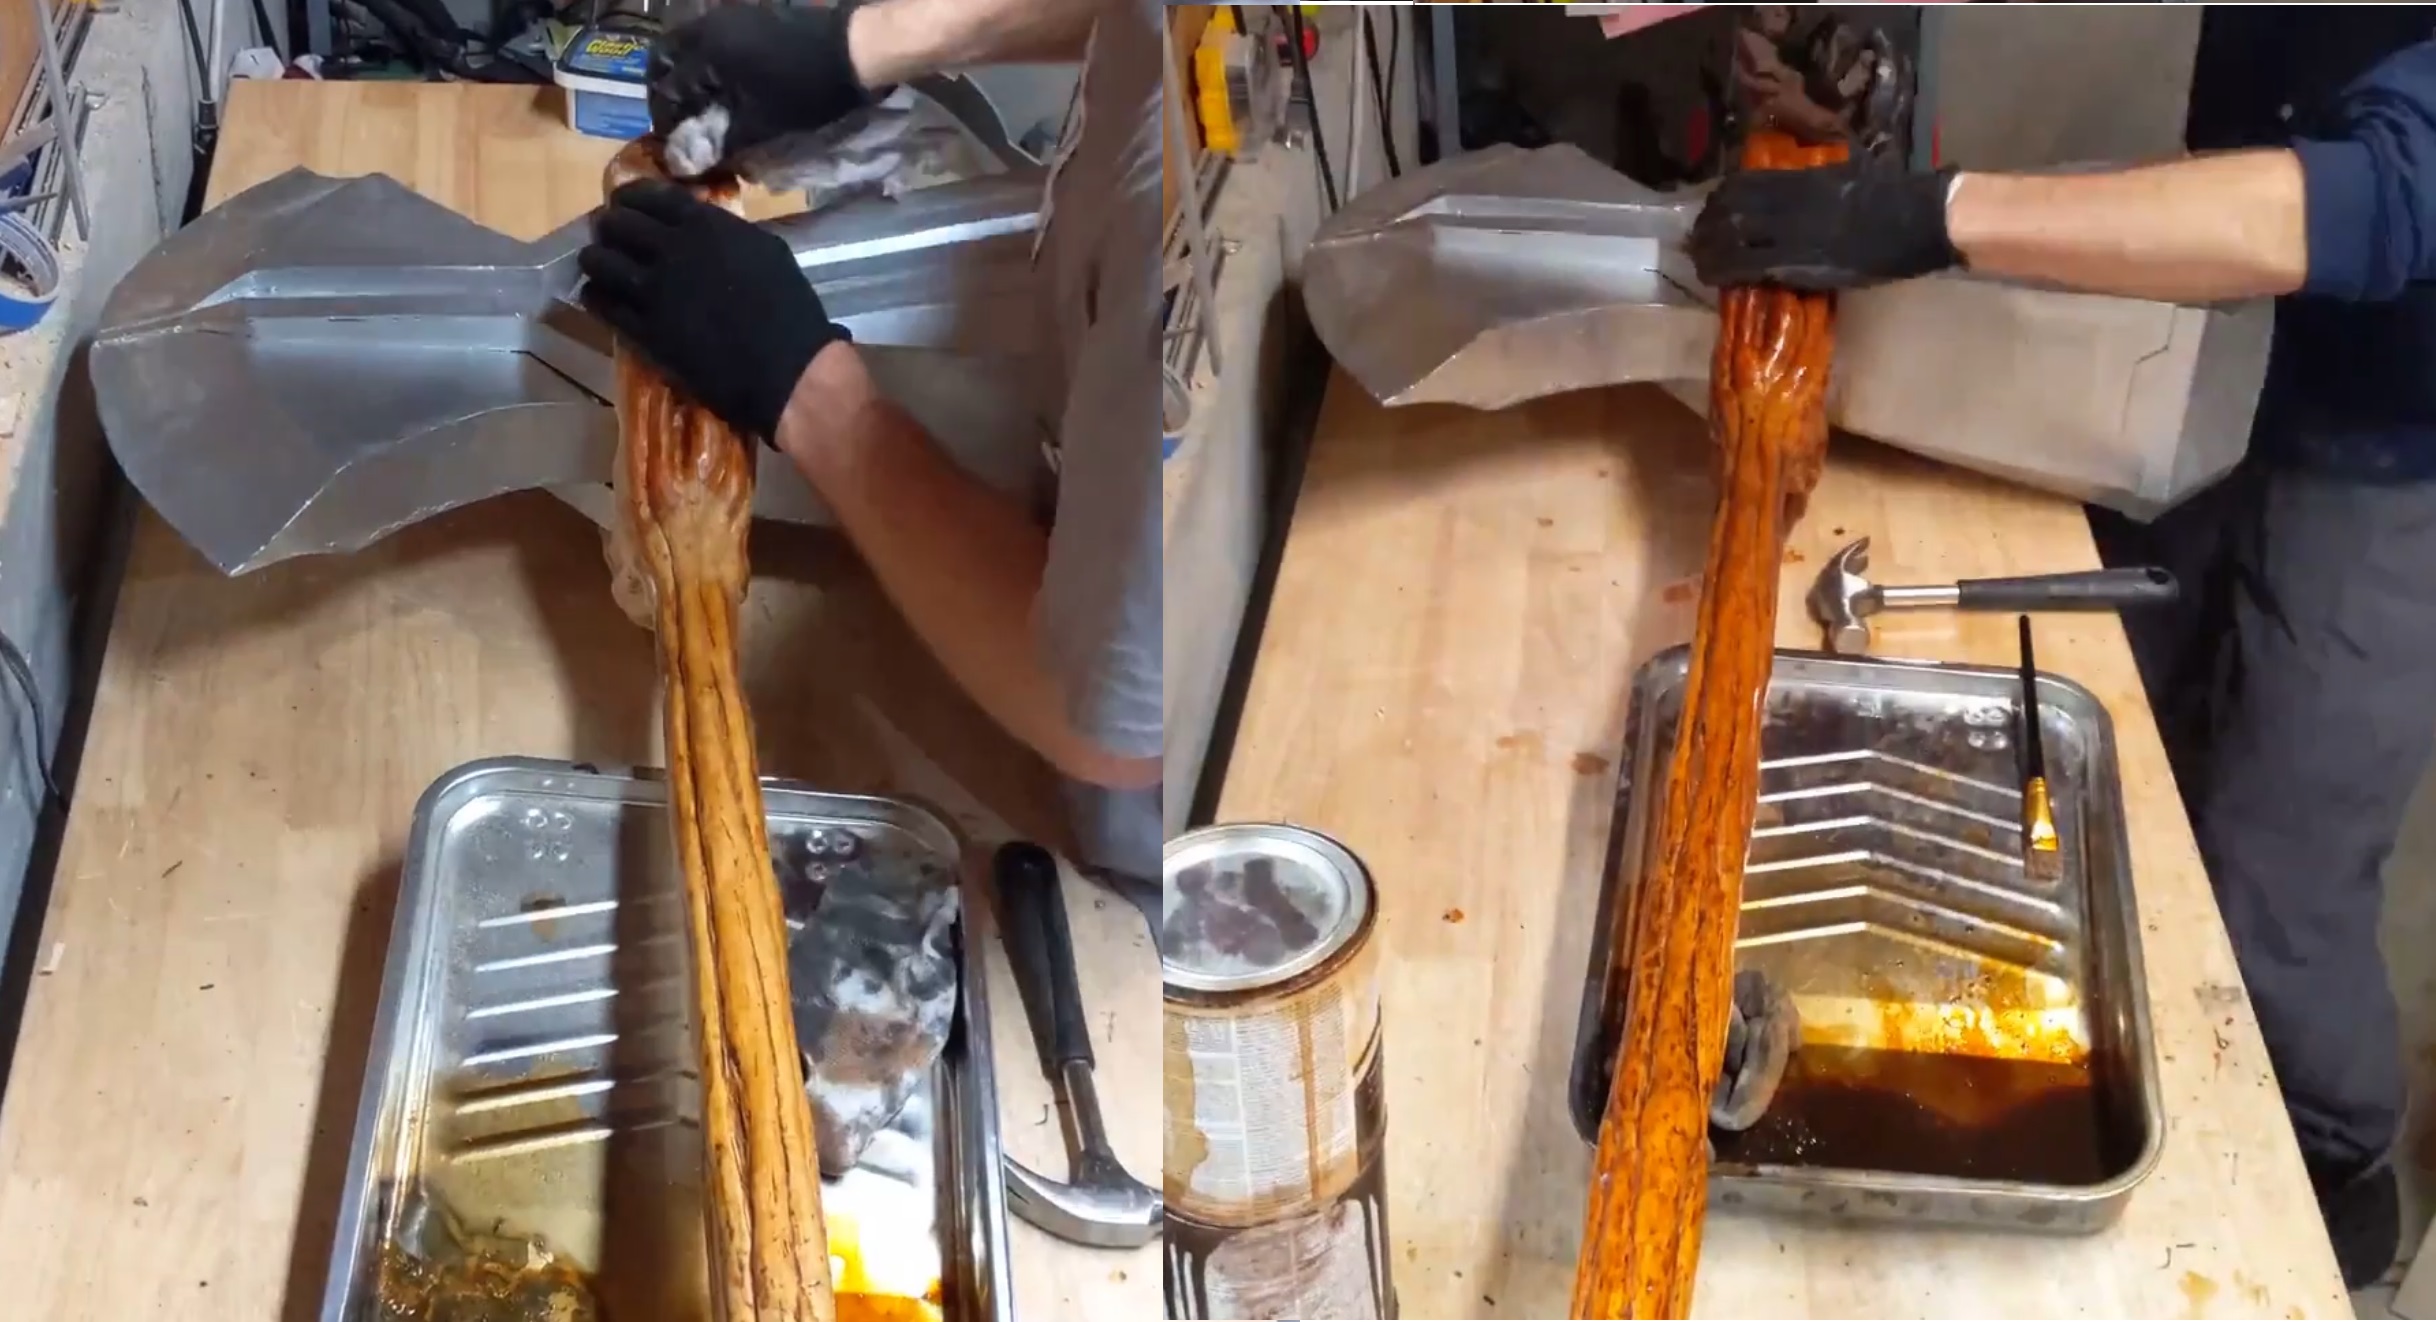
The handle
The handle was conceptually simple - I got another 53mm x 1.2m dowel from Home Depot, the same as I’d used for the Witch-King’s flail handle, and this … was just about the right size I wanted straight away. It also had to be made of wood. Look at the handle from the film:
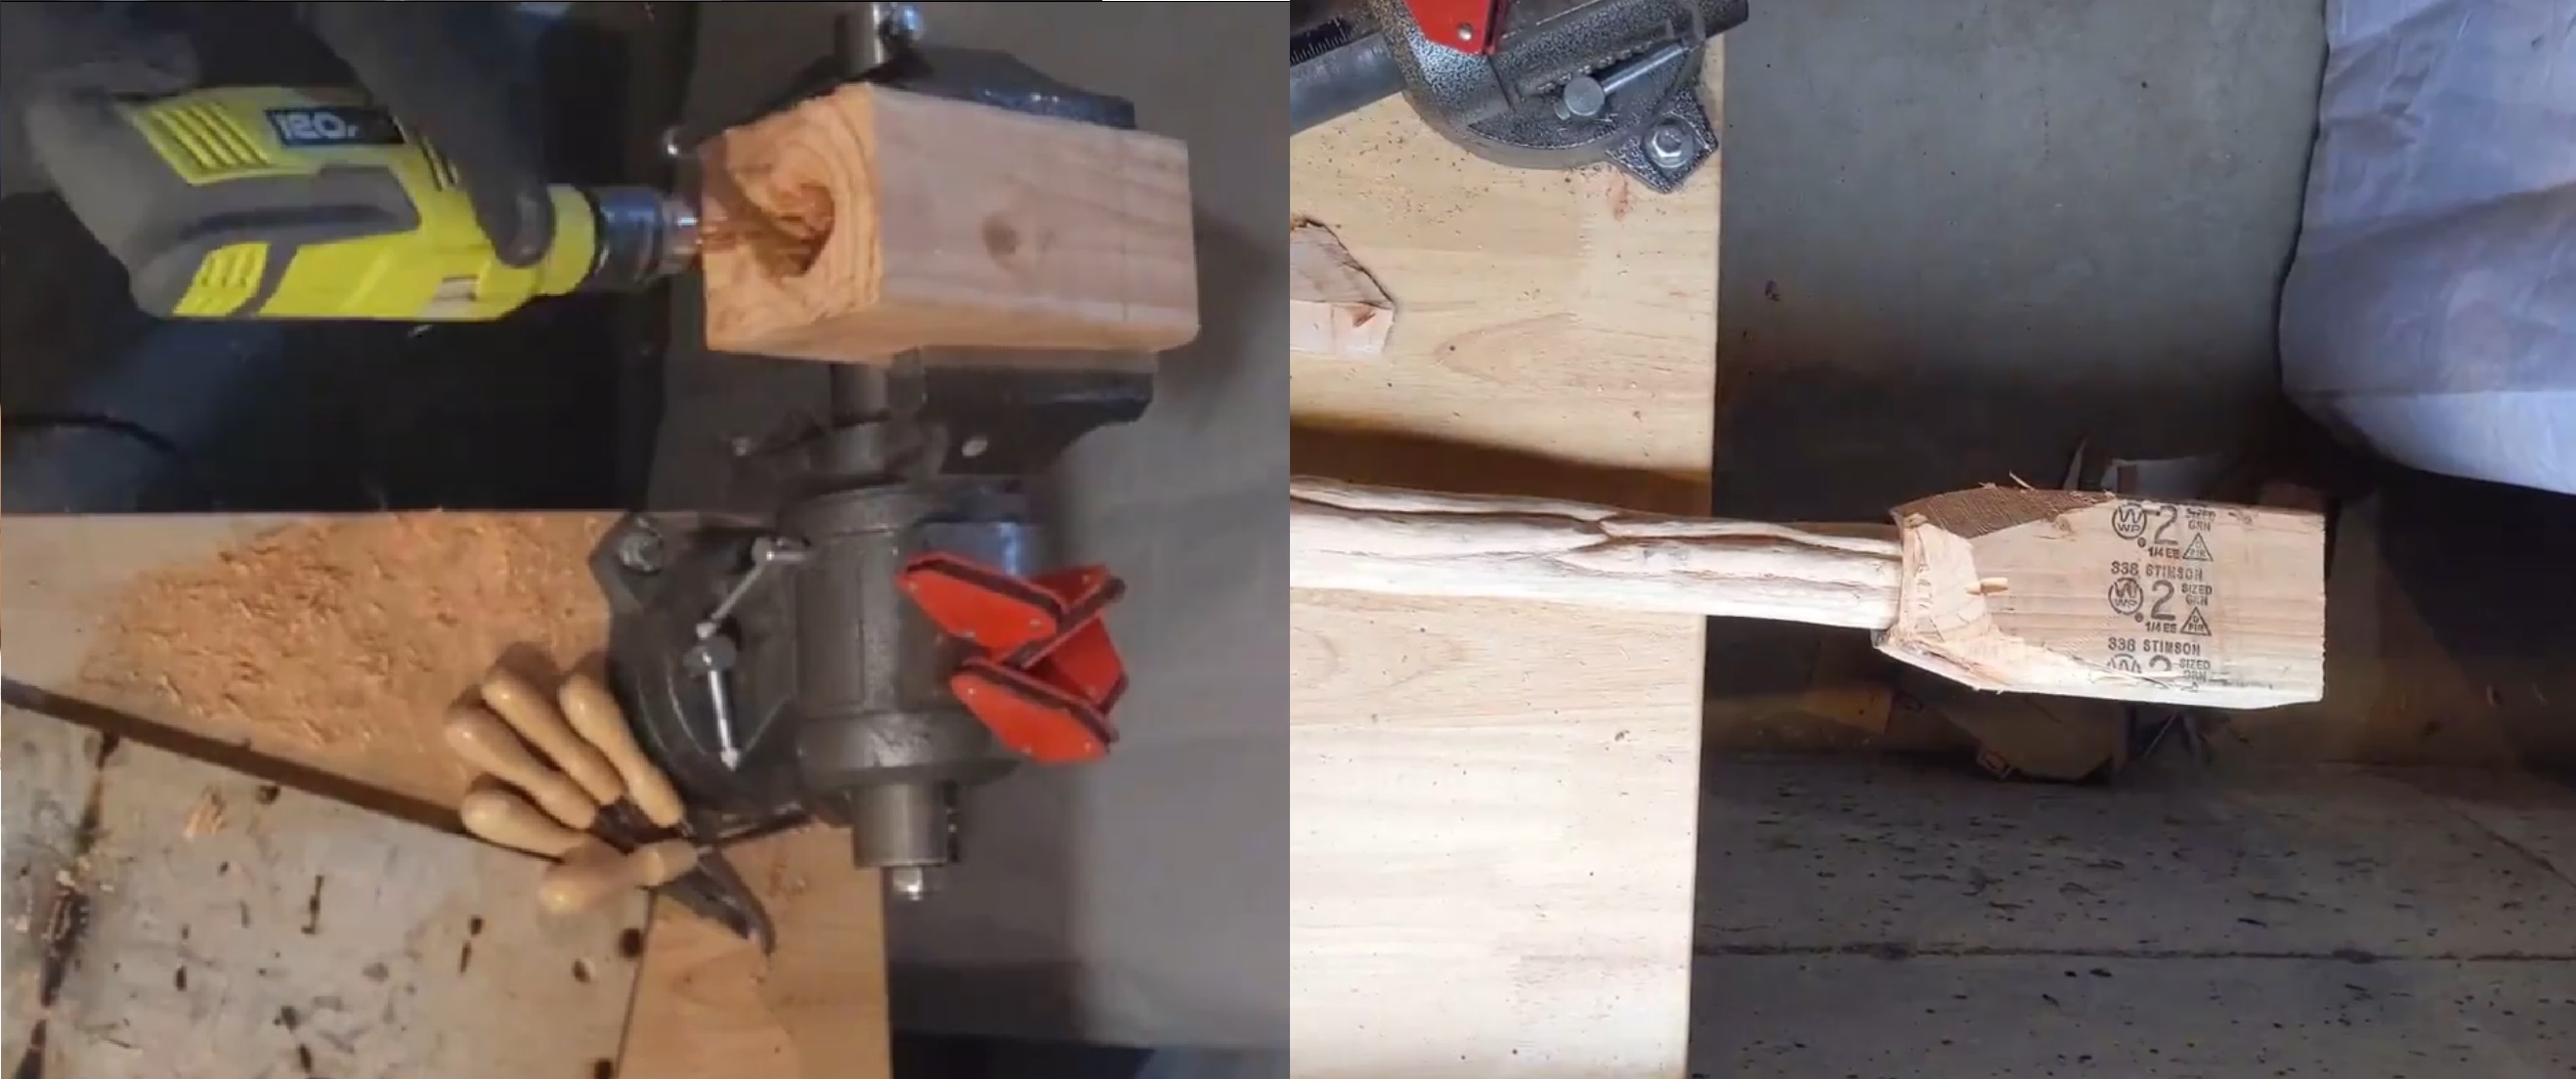
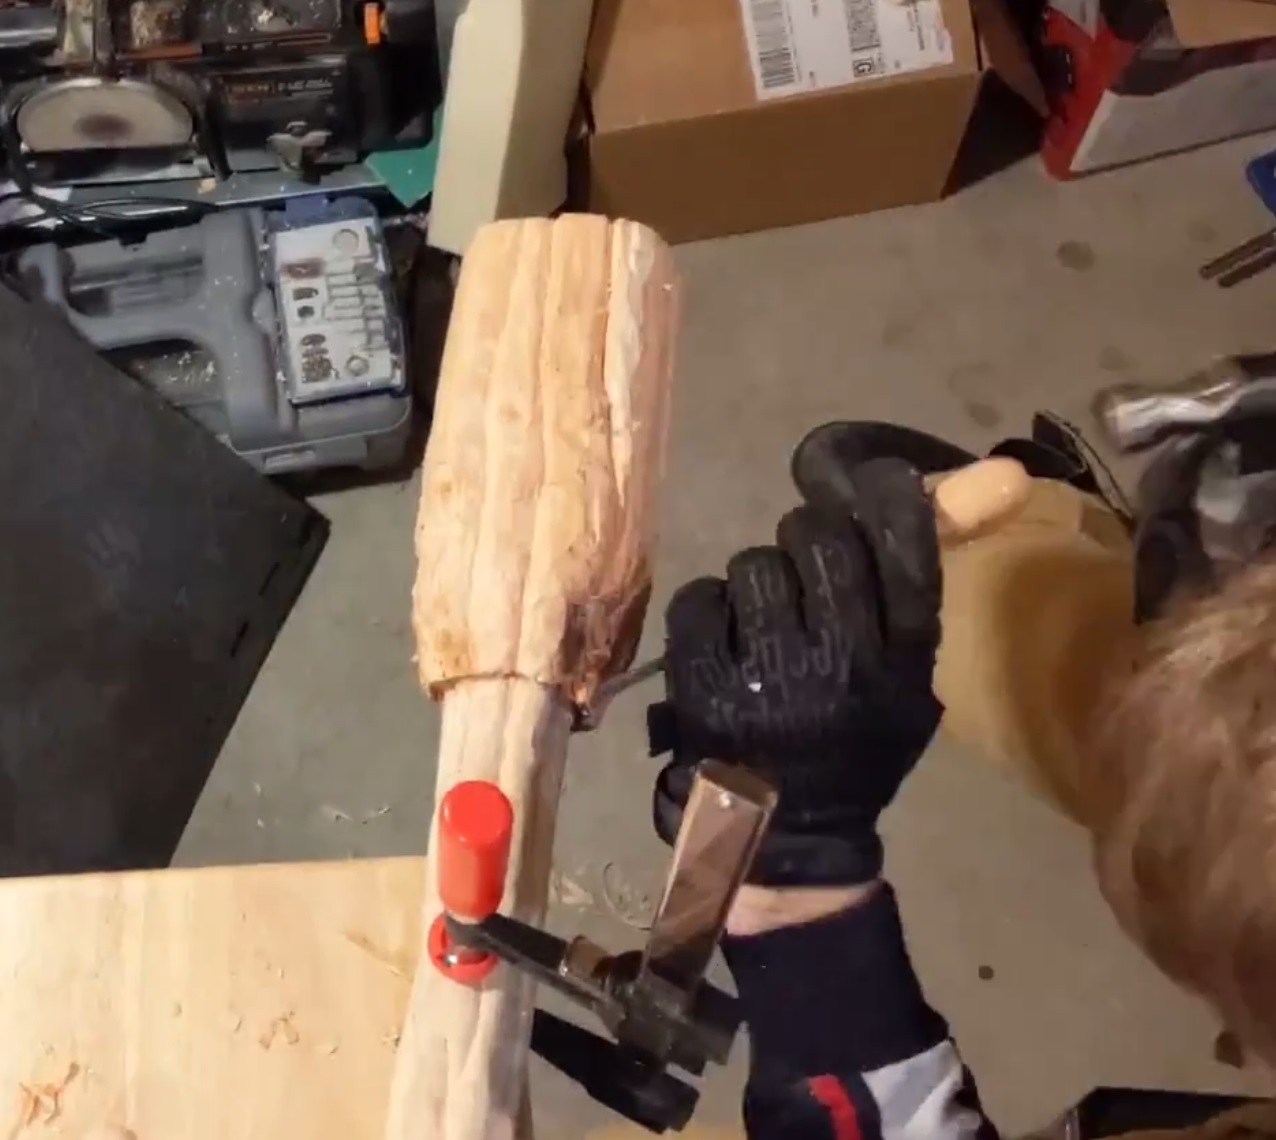
It’s made from a bunch of vines and branches twisted together and thickening. Instead of actually weaving all this, or, heaven forbid, growing it naturally, I decided to start from a single wooden pole and carve these designs into it to give it that look. I bought a few wood carving tools and got started:
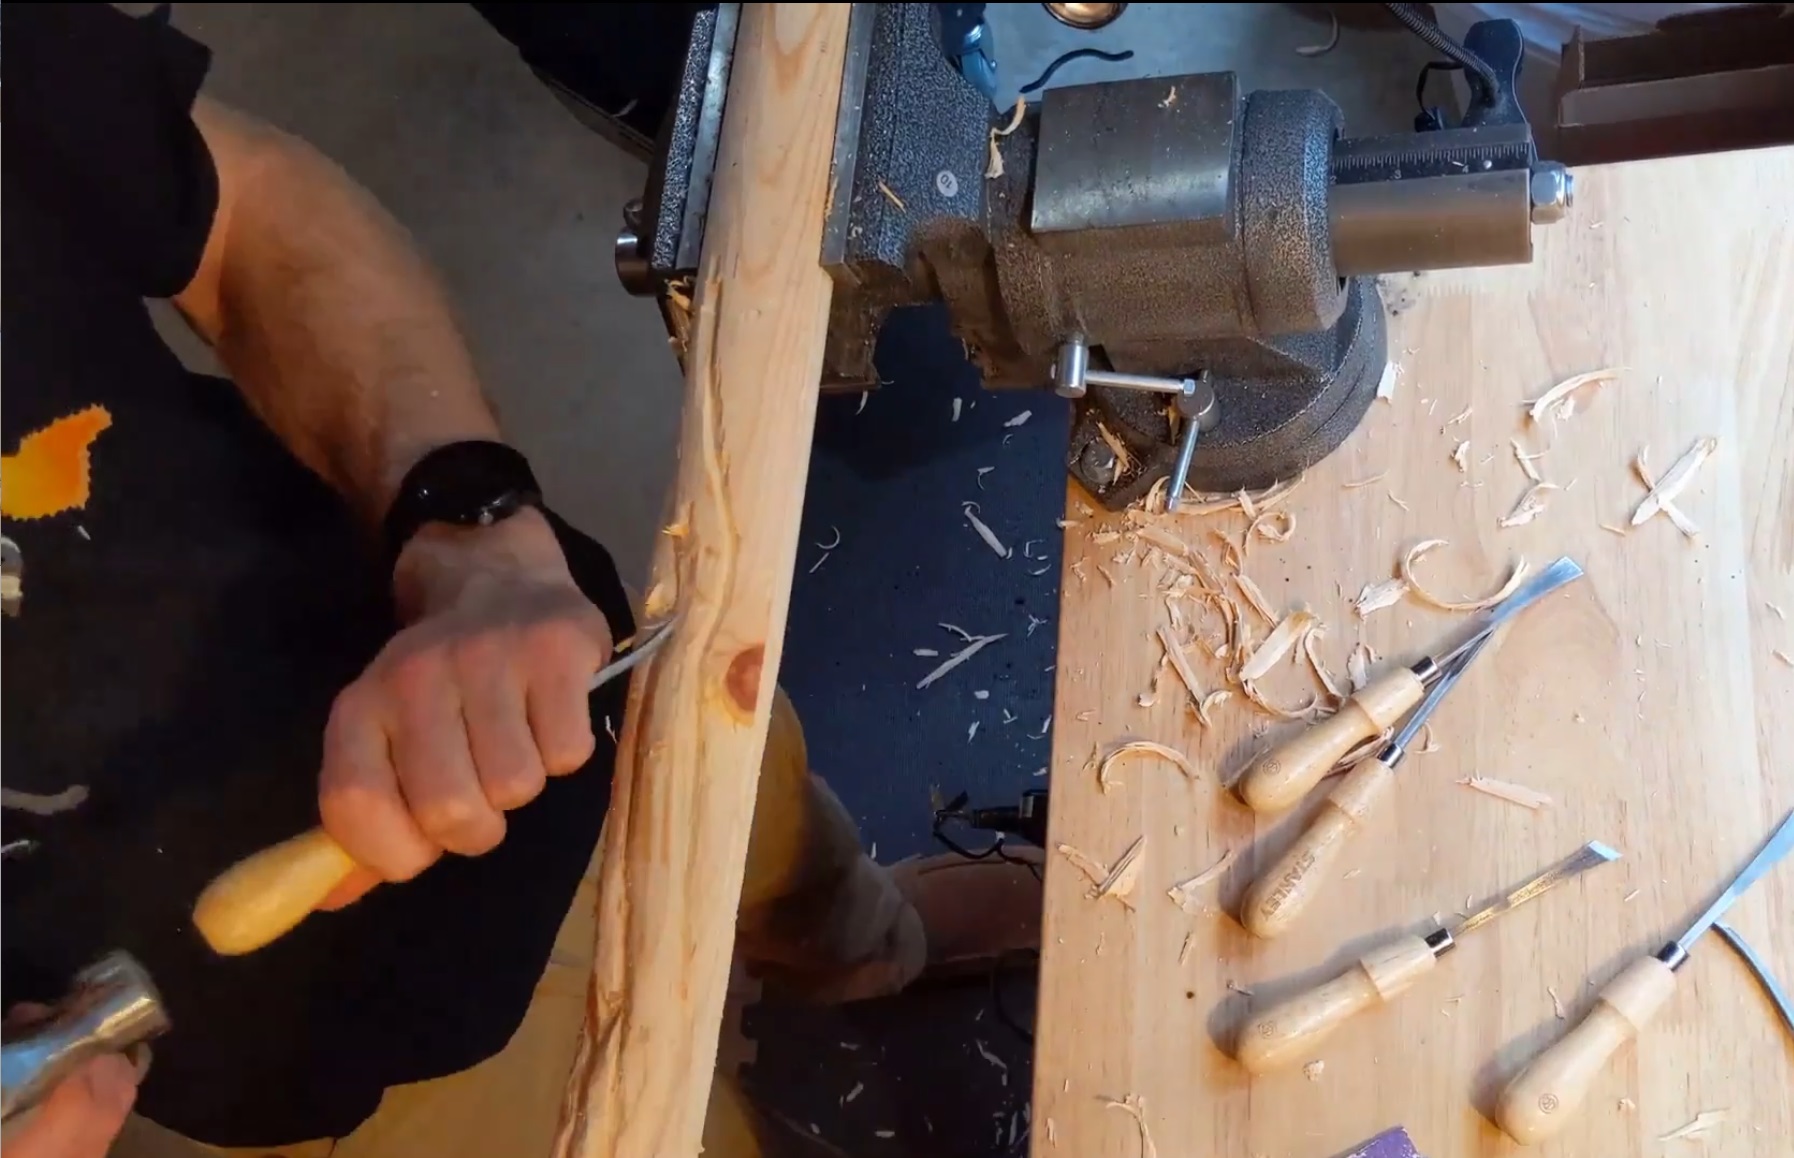
Unfortunately I didn’t realise a dremel could do all this a lot quicker, but retrospectively I still like that I did it this way: it’s slower and allowed me to plan it more as I went without making a sudden drastic mistake, which is easier with a machine tool. I let the pattern emerge more naturally, as opposed to planning the whole thing ahead; I’d decide on the next few inches at a time, just letting the “branches” twist and flow throughout the design.
Once this was complete, I did another pass of sanding down splinters and deepening the rifts between branches to solidify the look - some of this I did with a dremel, as well as some of the smoothing, but with a light touch.
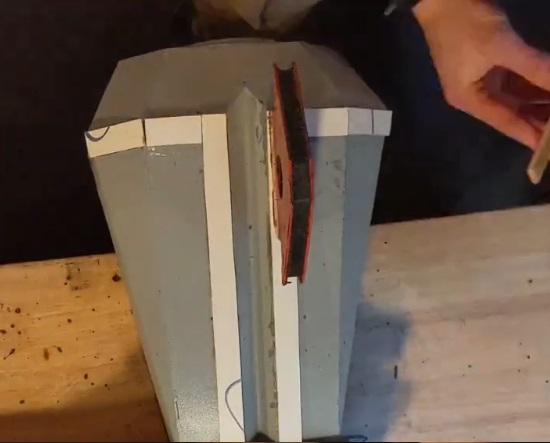
Attaching it all together
First I had to attach the two top pieces together, and then attach the handle … or so I’d imagined:
It actually ended up being easier to attach everything at once.
Attaching the handle to the head
The handle had to not move at all from the head. I originally had an idea of it being detachable, so it would be easy to transport, but … that just proved to be too annoying. So I wanted to rigidly attach the handle between the hammer and axe as rigidly as possible. I squeezed it all together with clamps and welded some supports between the two sides.
For extra security screws were added through those into the handle, with a support across the top and a massive 10mm bolt to really hold it in. This held, but had an awful centre of mass. I could really only carry it directly upright:
Finally, some panels to cover the sides:
You might ask, “Why have these side panels if they’ll just be covered with wood?” Good question - they weren’t going to be completely covered. The branches around the head ideally were going to have gaps and spots where you could see through, so I wanted metal below that. Now all I needed was to add the “branches” flowing from the dowel up and around the head. Timber doesn’t flow easily, funnily enough, but can be carved. I bought a 6’x6’x48’ beam and cut a few blocks off, then fit some shaped blocks around the outside of the head:
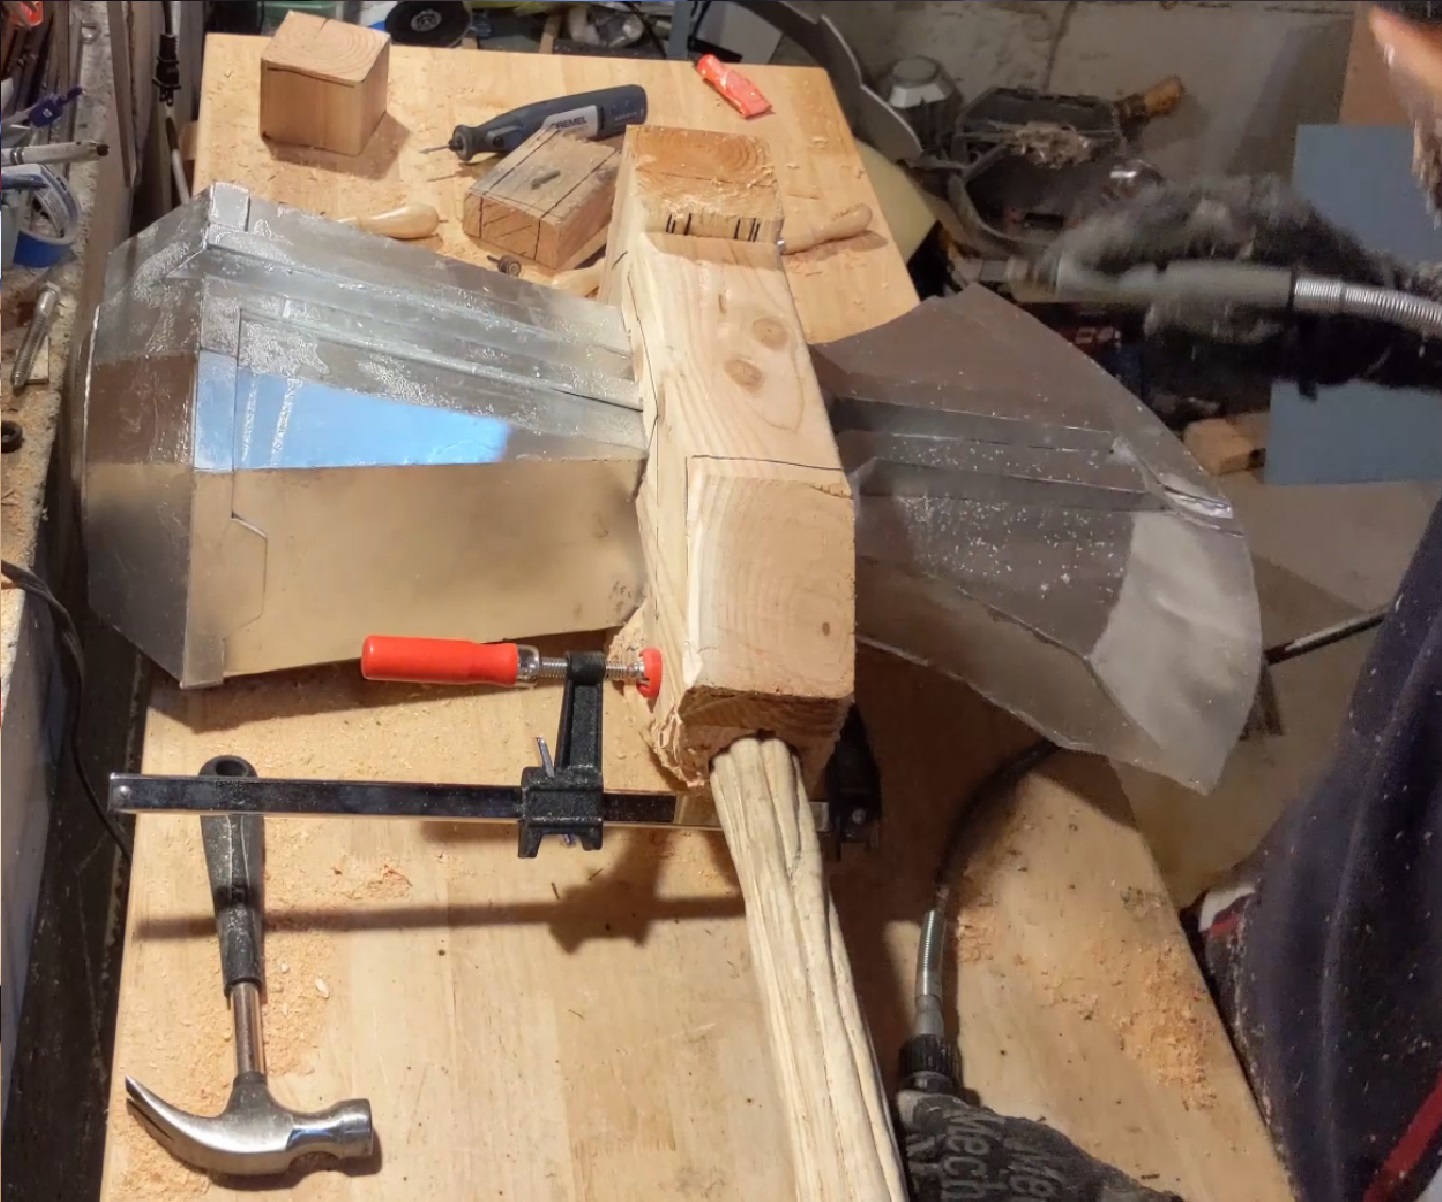
These were clamped and glued around the head so they weren’t going anywhere, and then the real work began: carving the patterns out of this block. Again, they emerged semi-organically, working from the patterns I’d made each side in the handle. There were a few air gaps that I don’t like, but it largely went well. Several router bits for the dremel later:
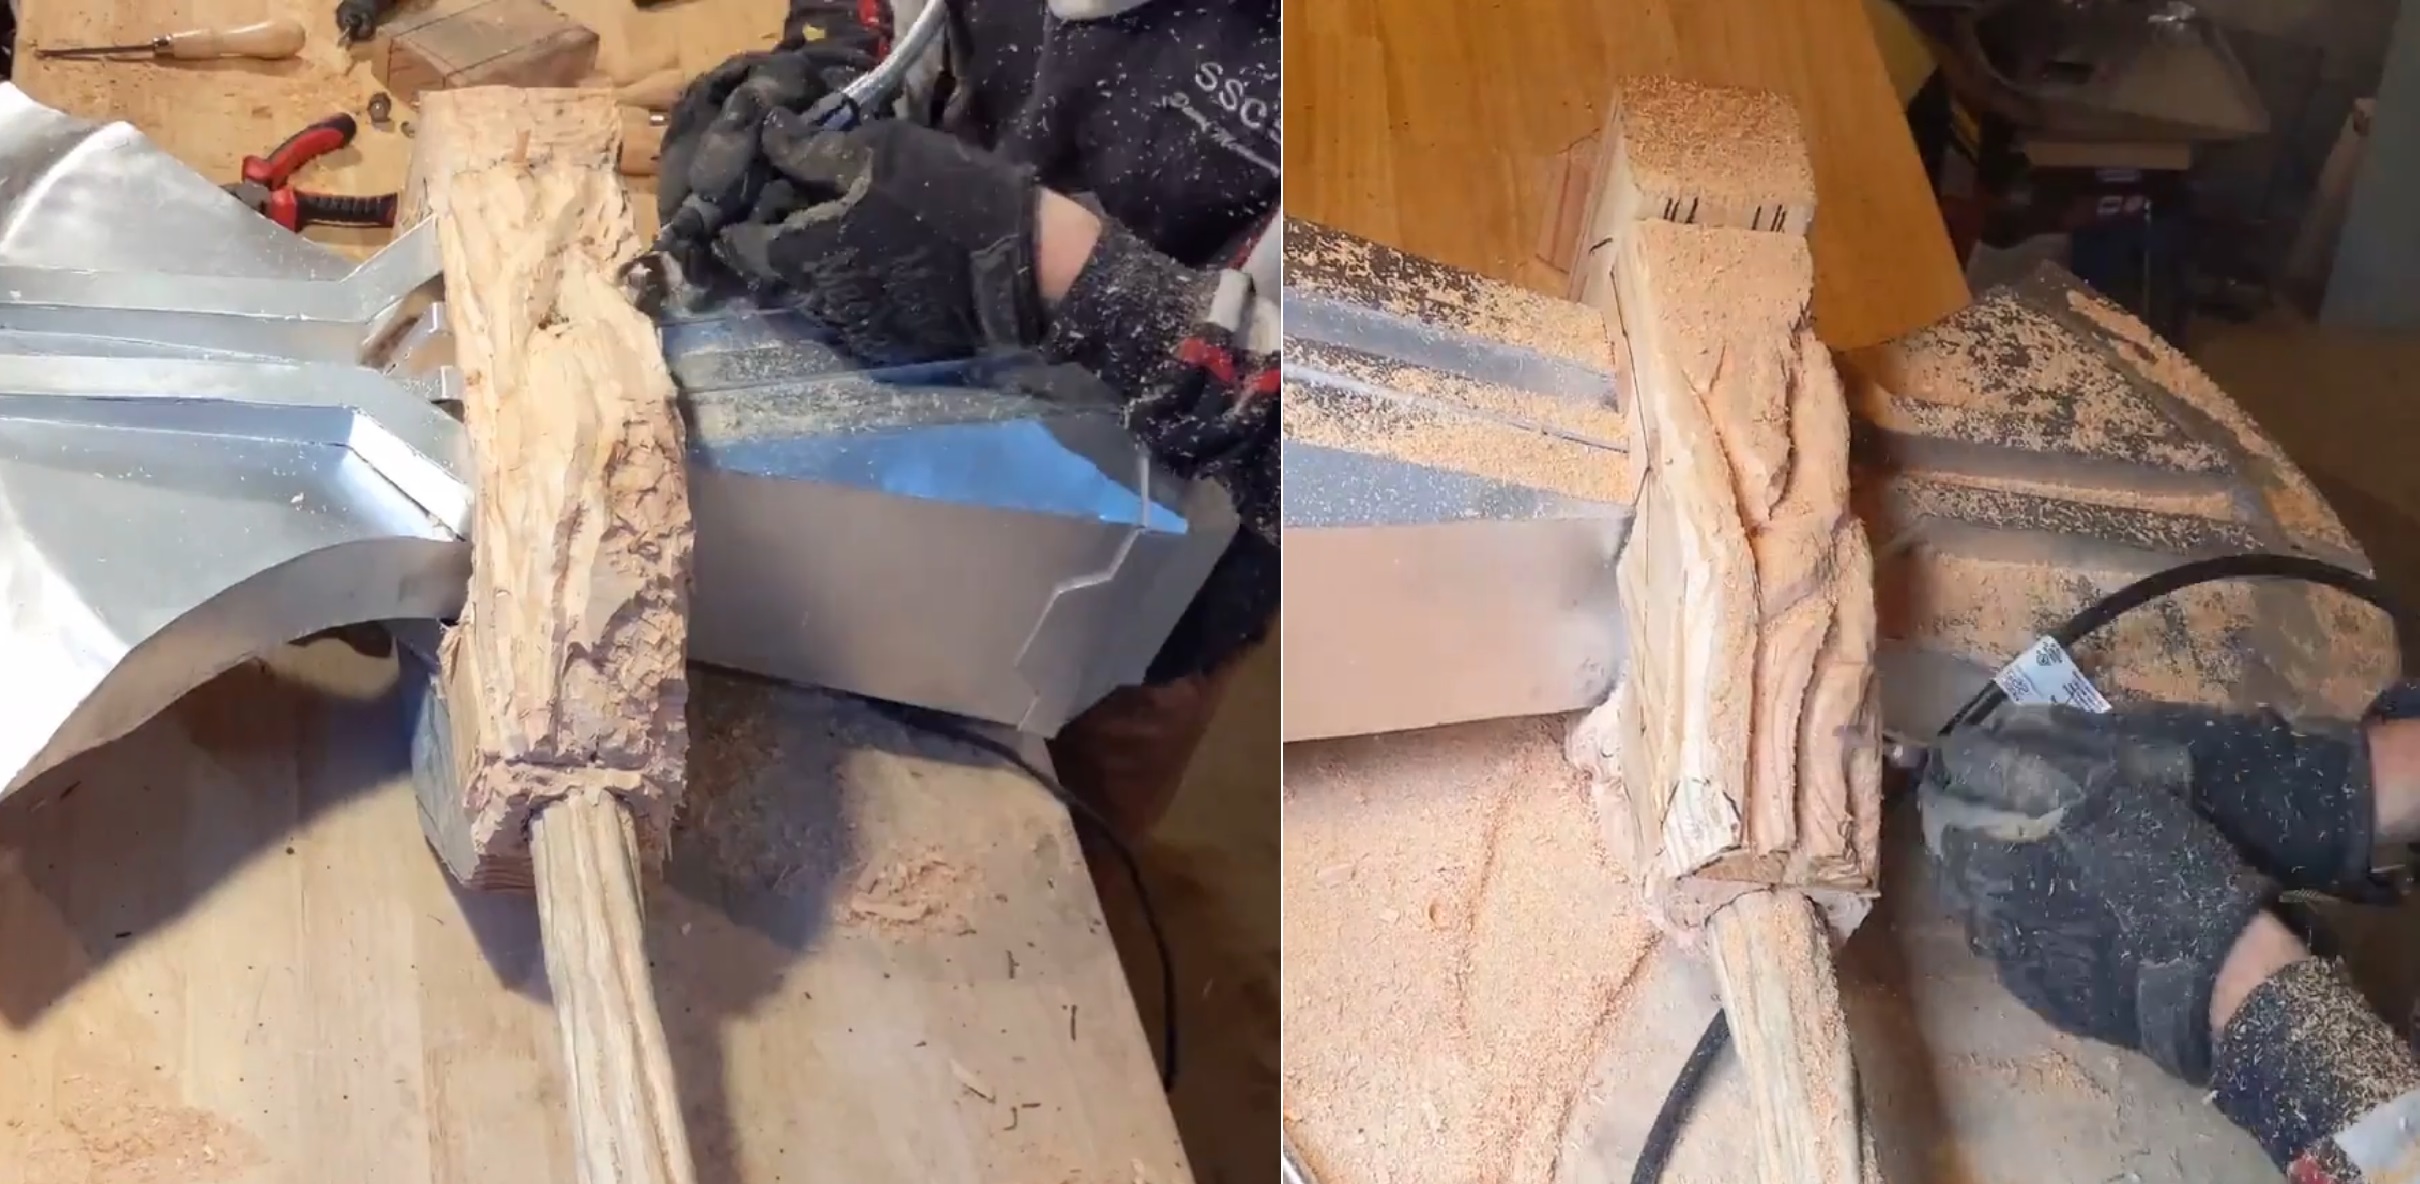
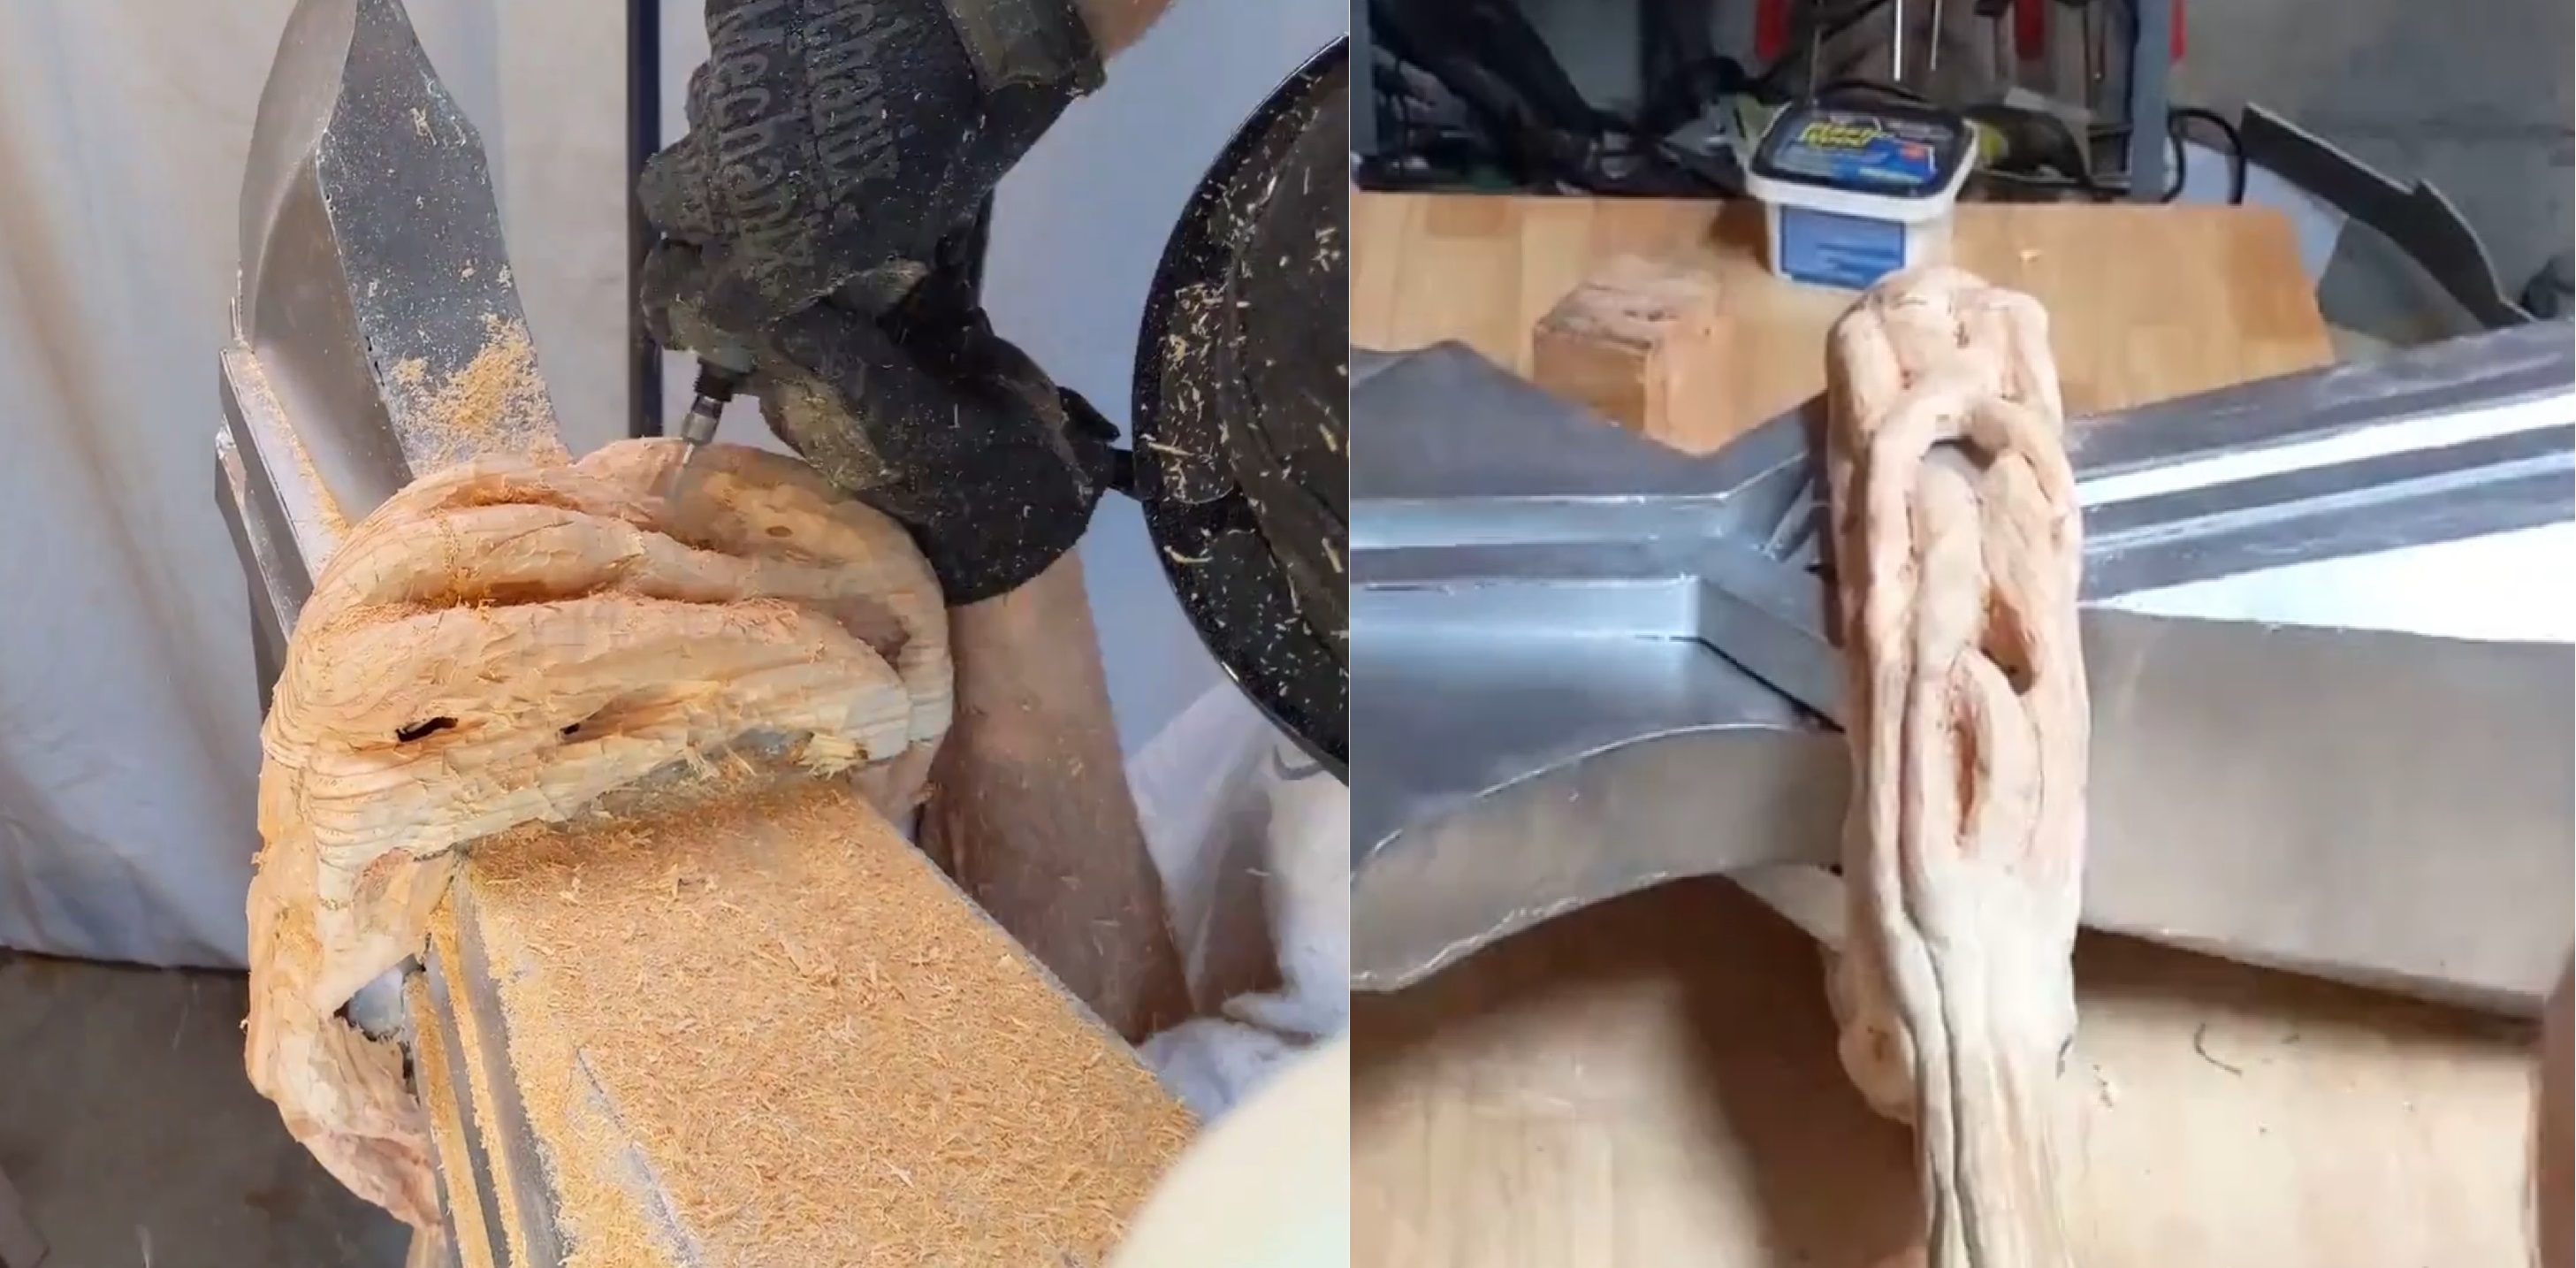
And I had what felt close to accurate! Any gaps were patched with wood putty, which stood out at first but once stained faded into the same colour.
The counterweight
Everything being attached threw a particular problem into sharp relief: the head was roughly 13kgs, and the handle was … 500g at best. Less, maybe. So the centre of mass was basically inside the handle, and this had incredible lever arm force wherever you held the handle. I needed a counterweight to be able to hold it in any way that wasn’t directly upright. But what’s super heavy? I need to counteract 13kgs, and shift the balance point to a comfortable holding spot on the handle, perhaps twenty centimetres lower than the head. Furthermore, there wasn’t a lot of room to fit a counterweight reasonably, so any counterweight needed to be very dense.
Lead came to mind, as a compromise between density and cost (platinum may be better for density but is expensive). I bought a large fishing sinker, 7lbs of lead (they were sold in lbs, not kgs, alas). How to attach this? Well, the melting point of lead is 327 degrees Celsius, and while wood ignites at about 300 degrees Celsius, it needs a good environment to sustain a burn … and I’d also felt that the end of the handle needed to look thicker anyway. So I cut another block off the thick beam I had, and drilled and carved out the centre to make a) a pit for the sinker to fit in, and b) a hole just wide enough to jam the handle in and attach this tightly:
The lead melted easily and was poured into this block, and then I shoved the handle in, screwed and glued it in. The wood block burnt a bit on the inside but didn’t catch further, presumably because a) there wasn’t much oxygen when I kept pouring lead in, and b) it was outside and cold; the lead cooled quite quickly. Finally, branch patterns were added to this block:
This lowered the centre of mass to almost a comfortable point. Retrospectively, I should have gone easier on the supports in the head. I probably could not have used a much lighter steel, since the welder just sliced straight through the 22 gauge, and 20 gauge and 18 gauge just weren’t sold at Home Depot, but I could have used less steel - the supports did not need to be as strong as they were. I didn’t want to go much heavier on the counterweight since I still needed to be able to lift this entire thing at all.
Painting
The head
This involved a bunch of tests between matte and shiny metal grey:
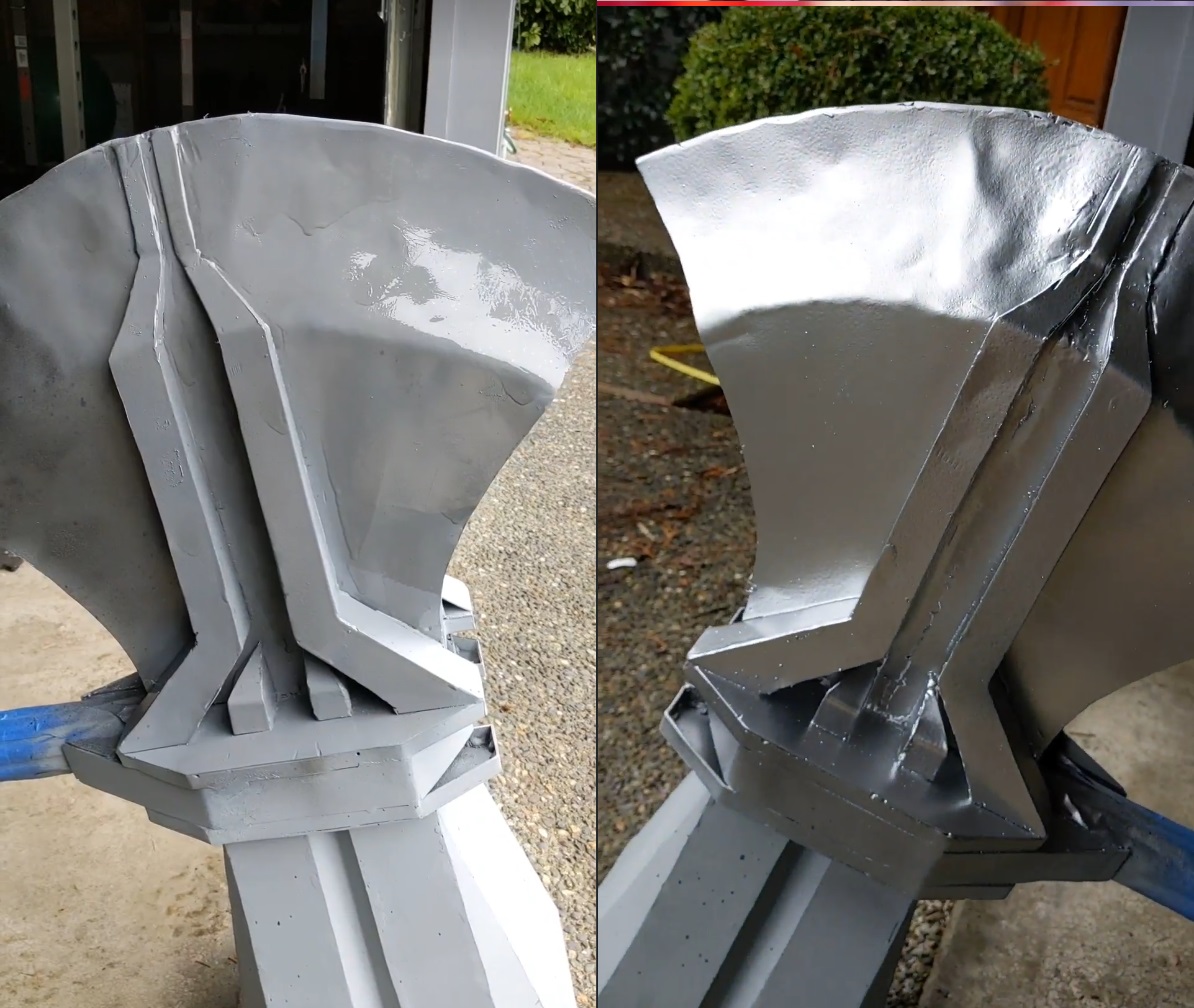
before I settled on the shiny metallic silver - it felt more true to the movie version, which looked to me very shiny and reflective and “ideal” rather than old, used, worn metal - I suppose this makes sense, given that in Infinity War at least it was used about five minutes after forging, so it’s about as new as it gets. I had done a cold galvanising layer first, just to make sure it would last.
The handle
The handle was stained, rather than painted; the wood I used was a rather light colour, and I wanted a much deeper brown to match Groot’s arm:

So I just did layer after layer of a particular stain:
I think I should have gone with a darker brown, but this still looks good and nice and tree-woody.
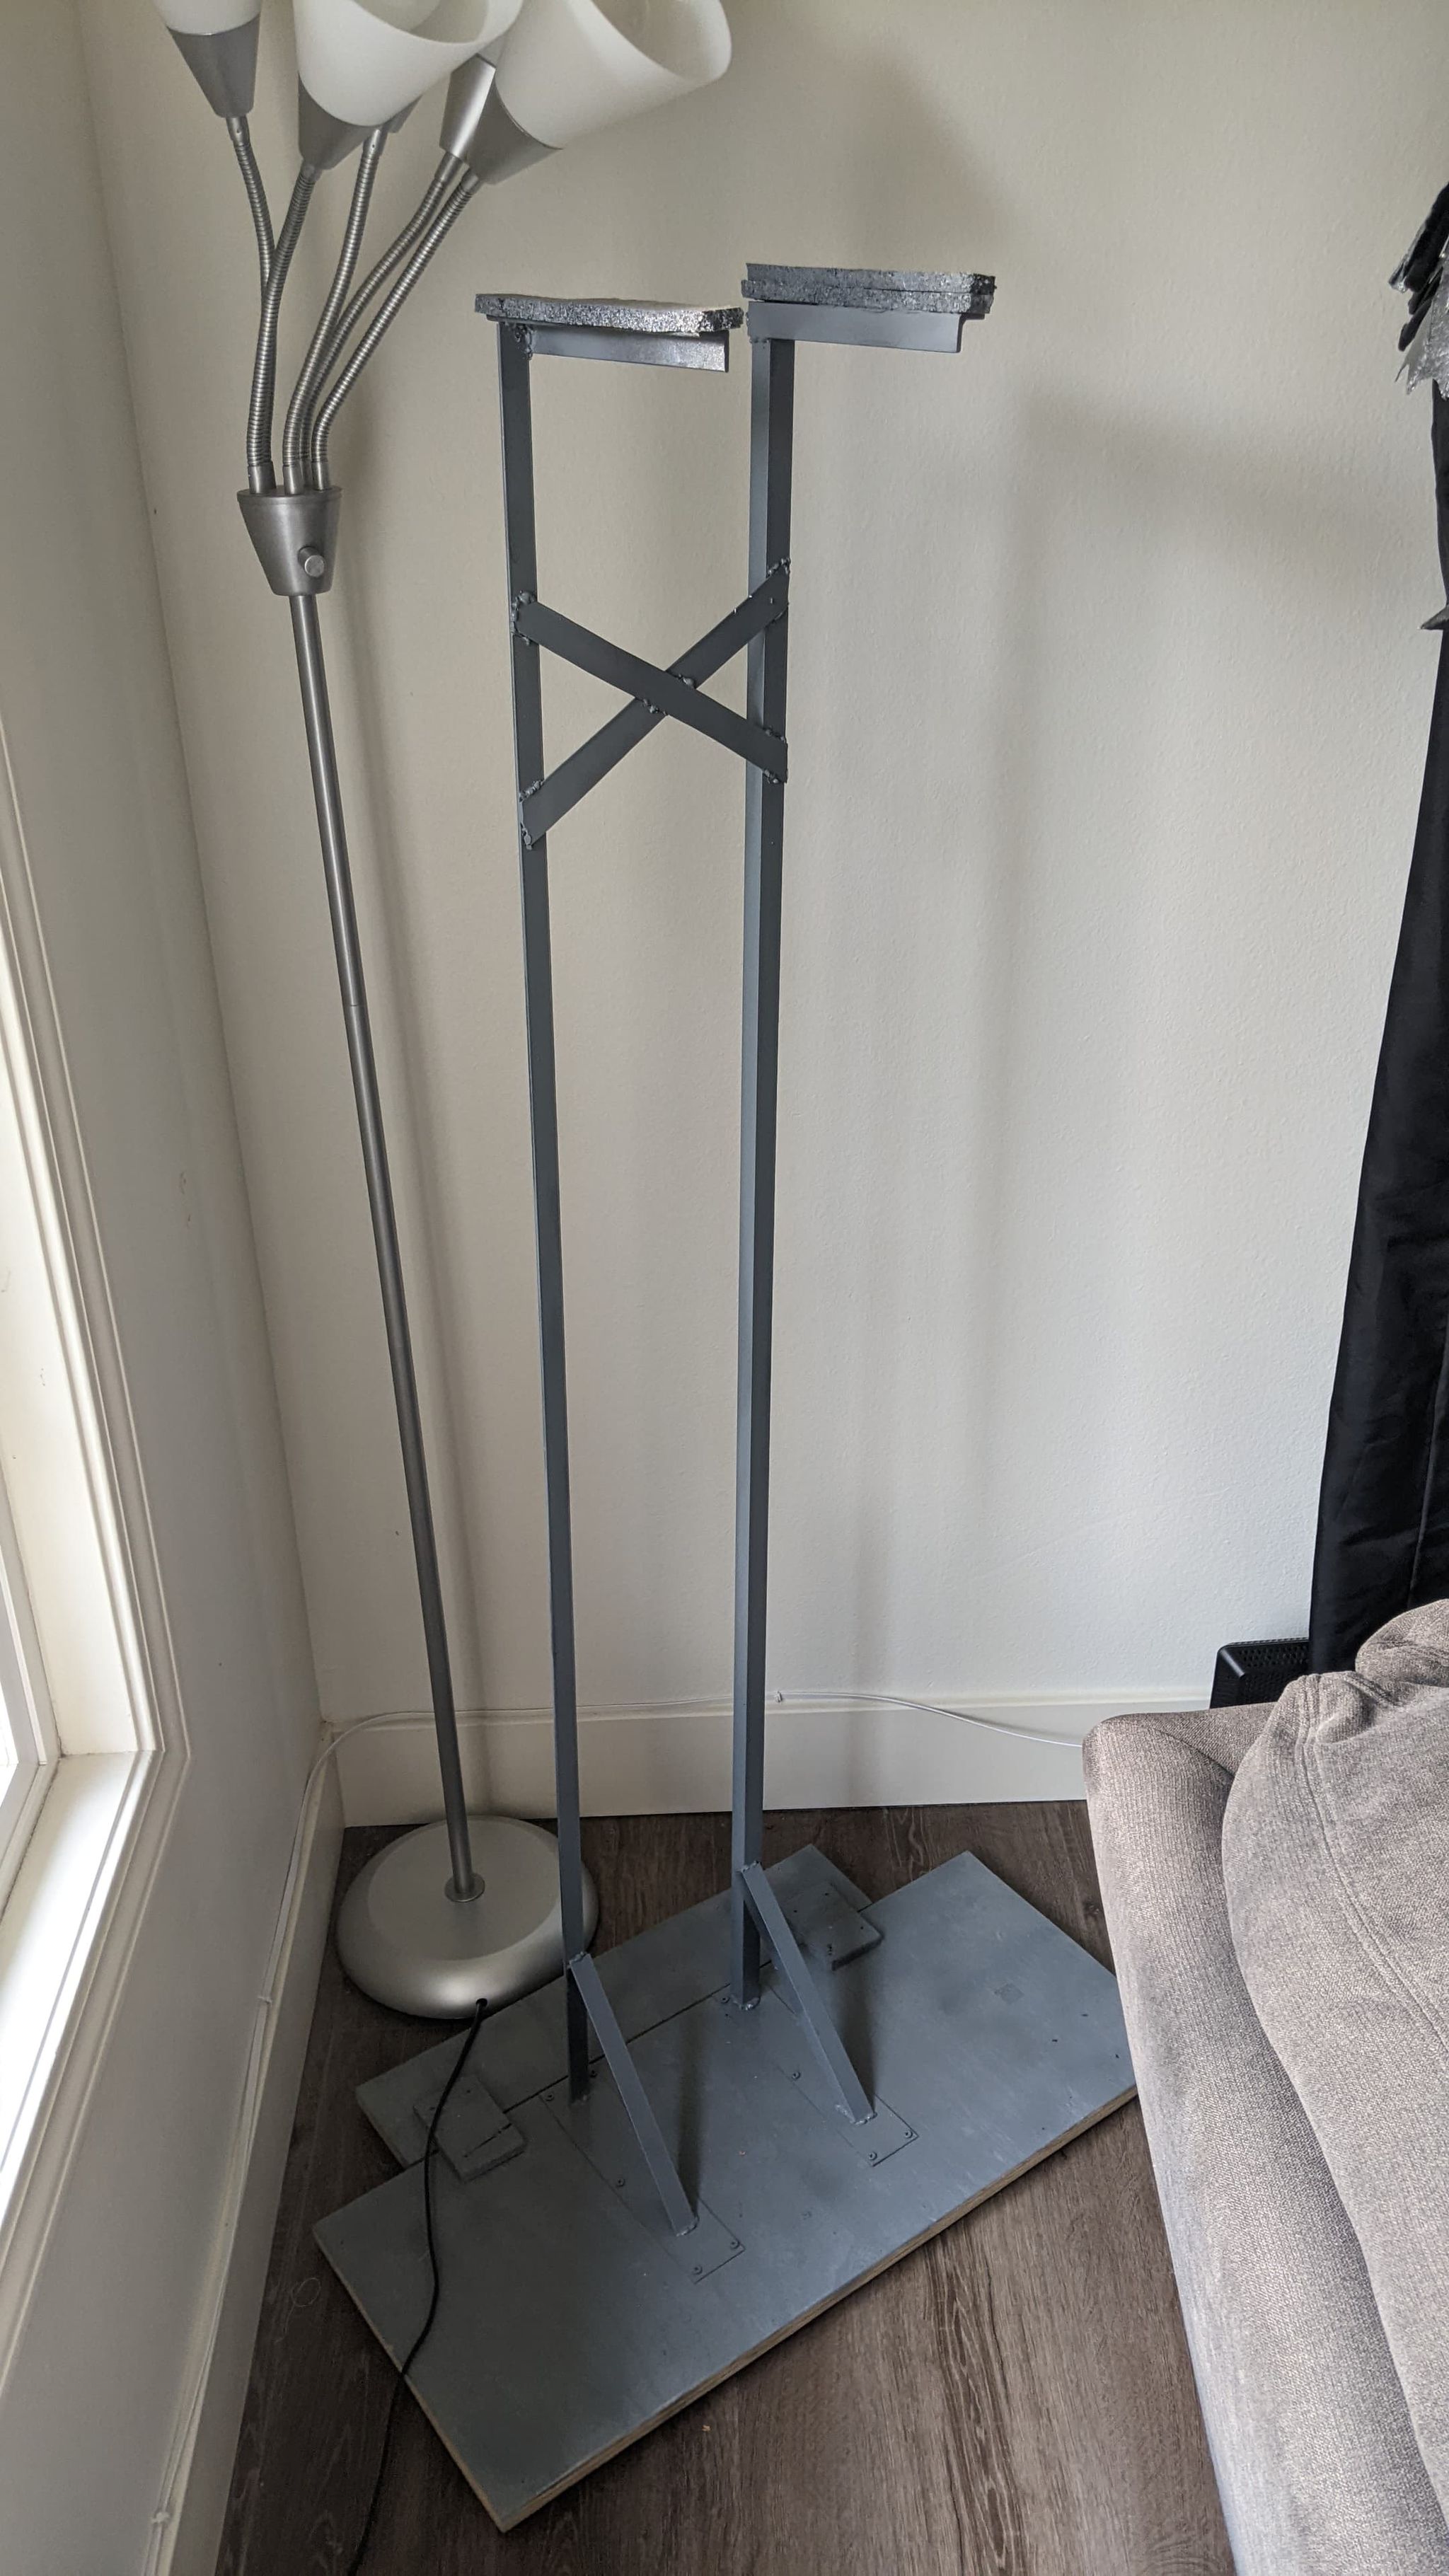
A stand
As with my previous stands, this was a quick and dirty low effort stand, as it’s not the centre of attention. The only consideration was that the axe had to hang from this, and the stand had to support the weight. I settled for a couple of braced steel beams, with supports between them:
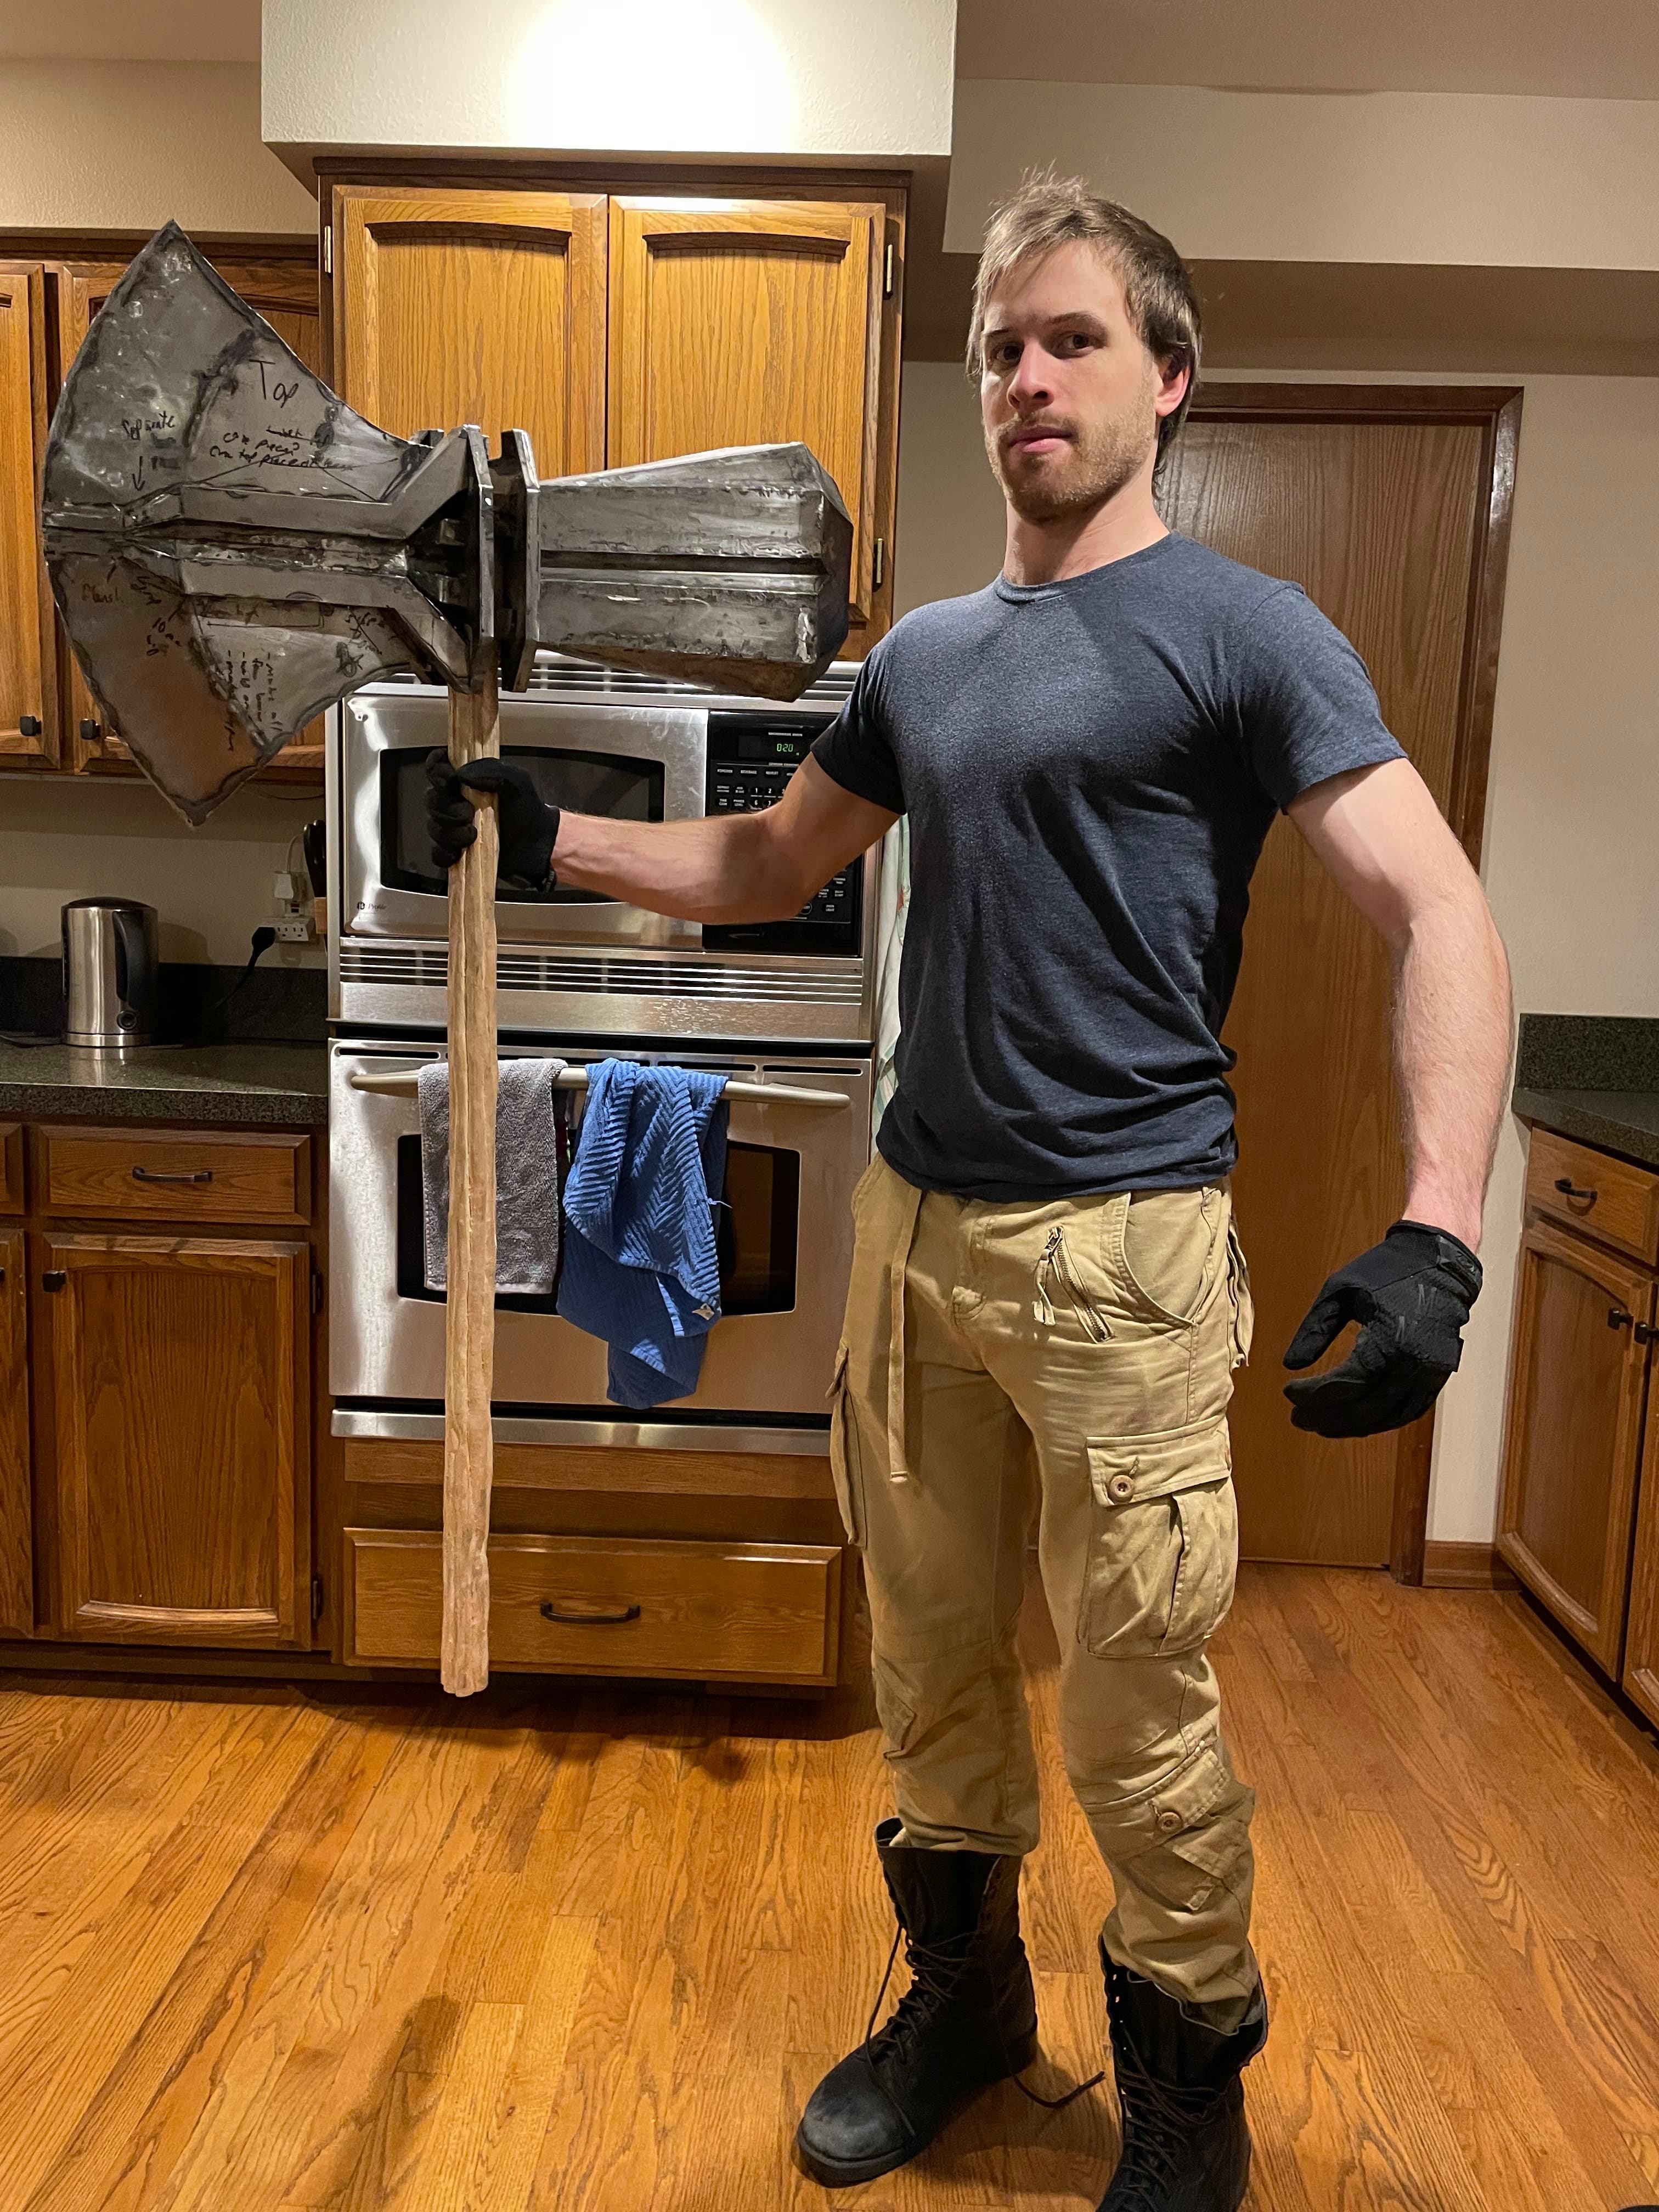
Final product
And here’s how it turned out!
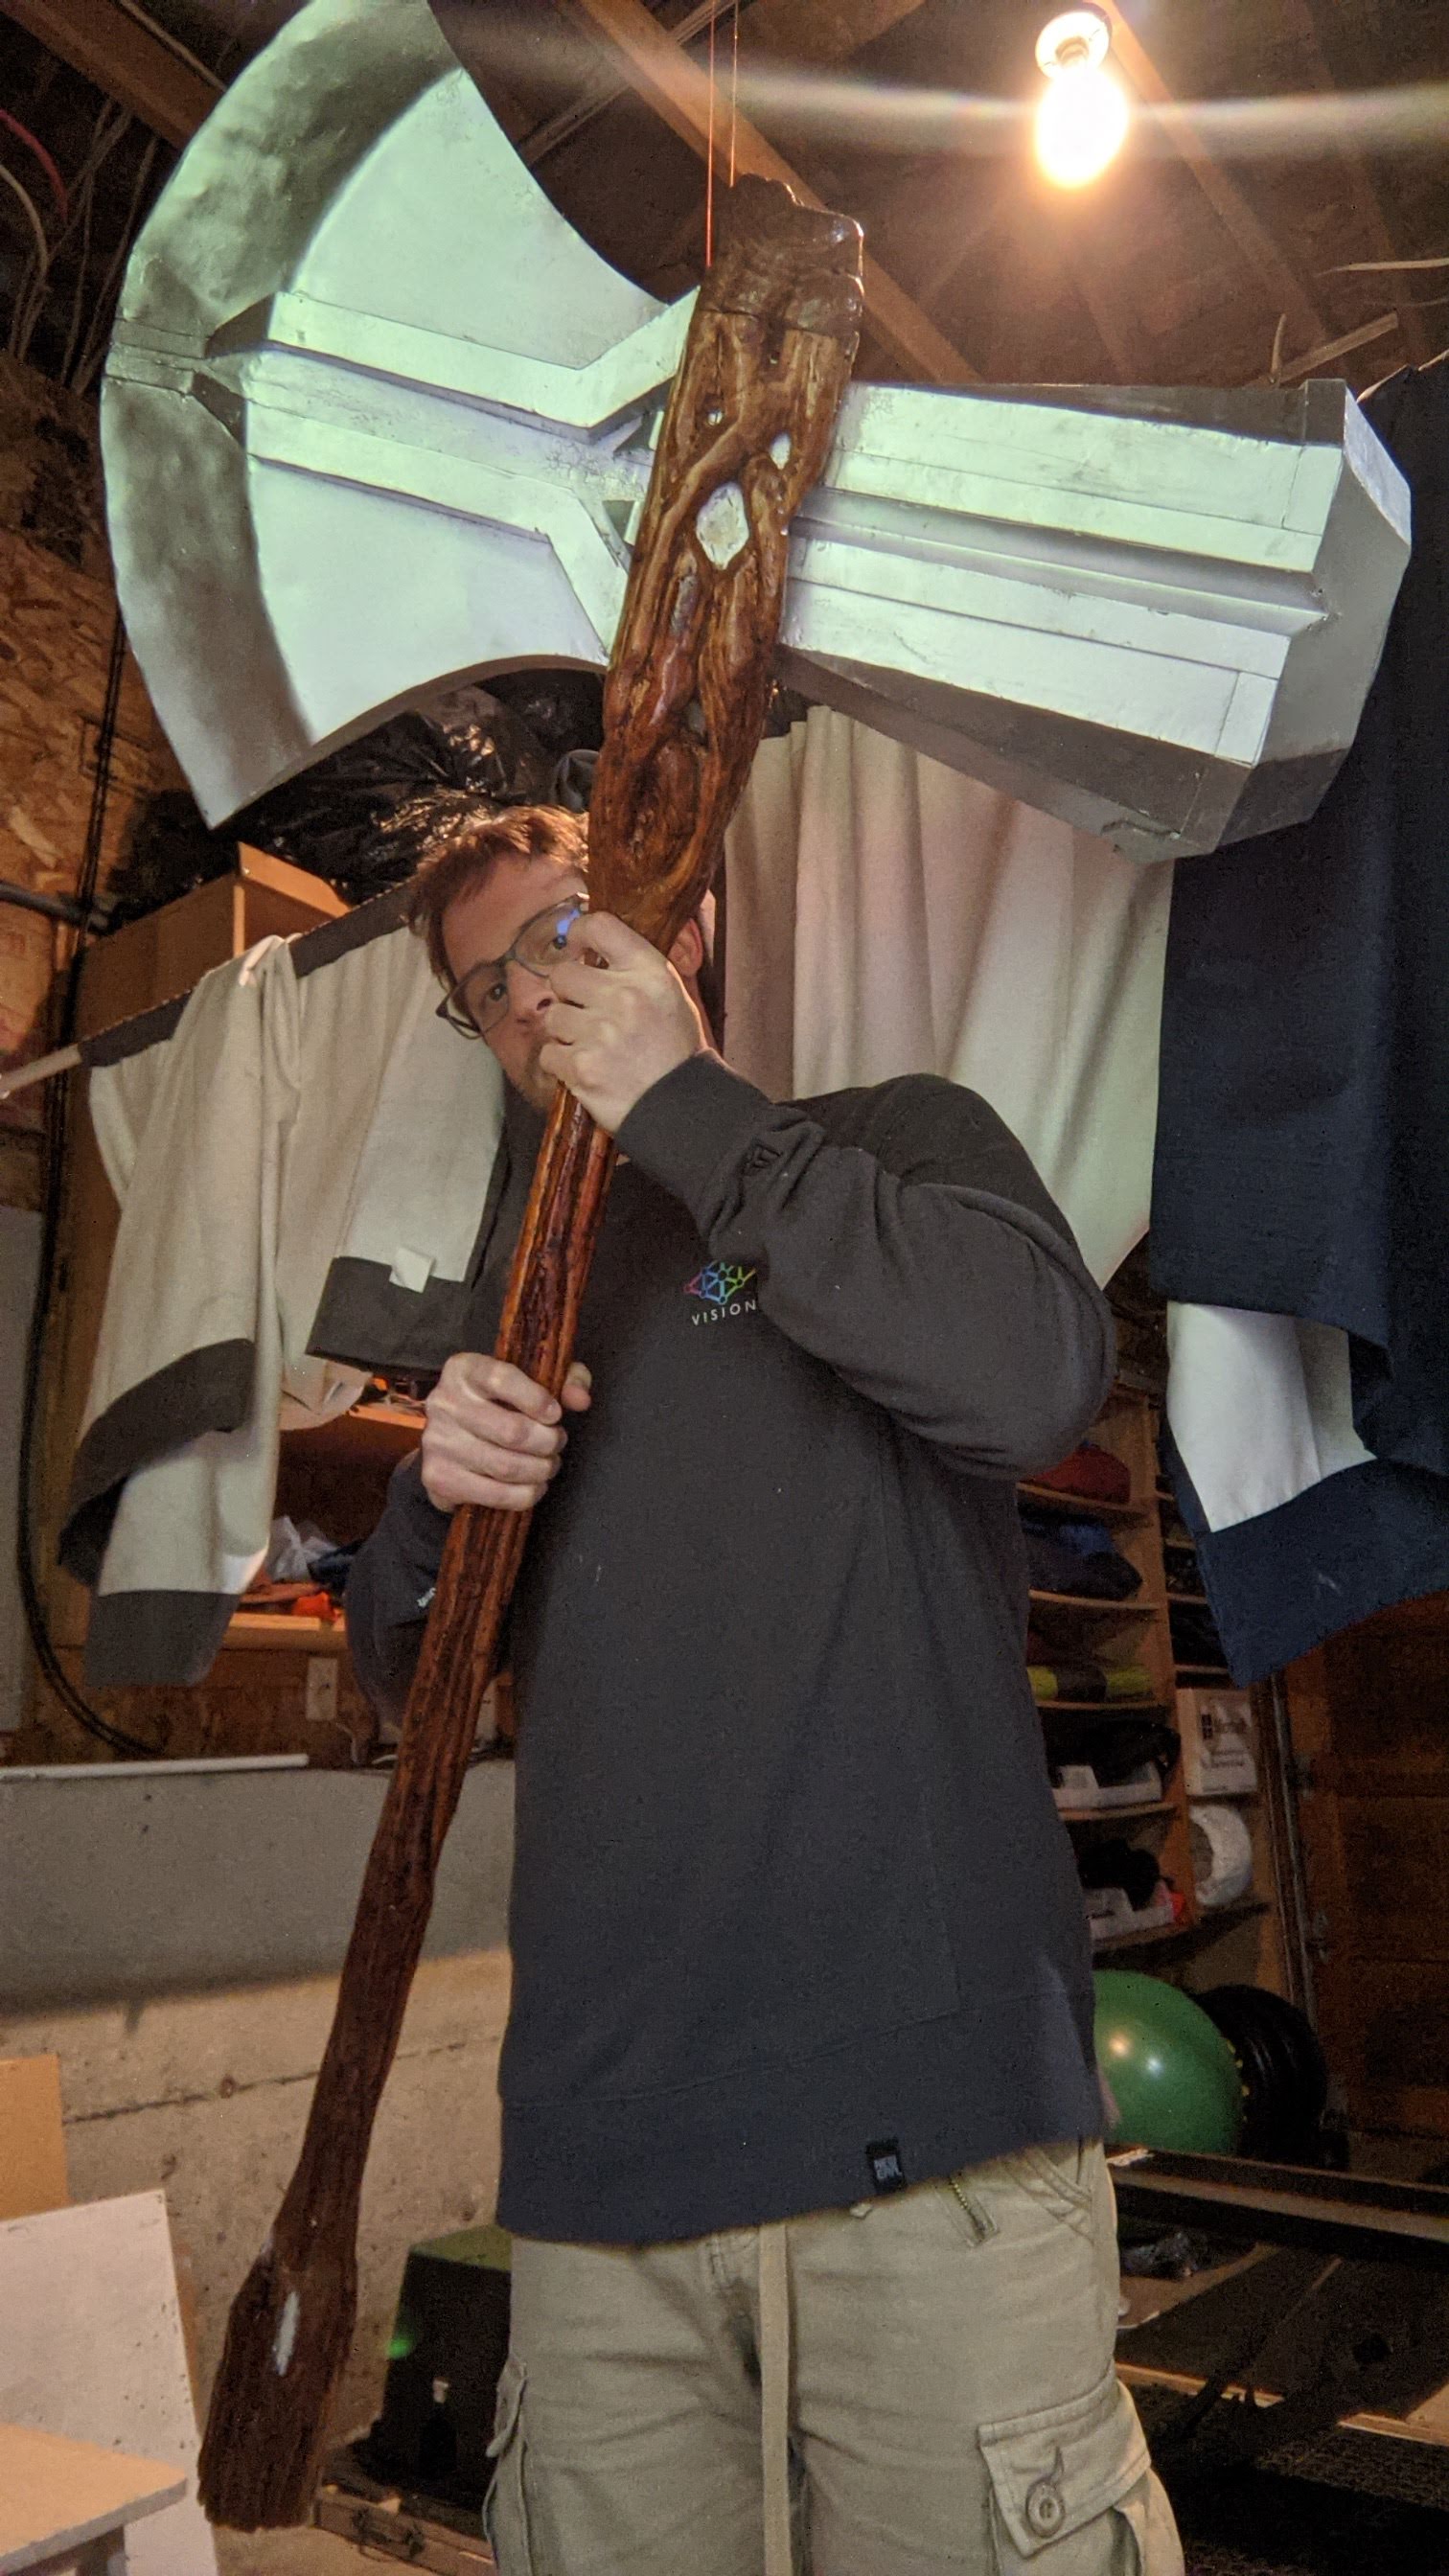
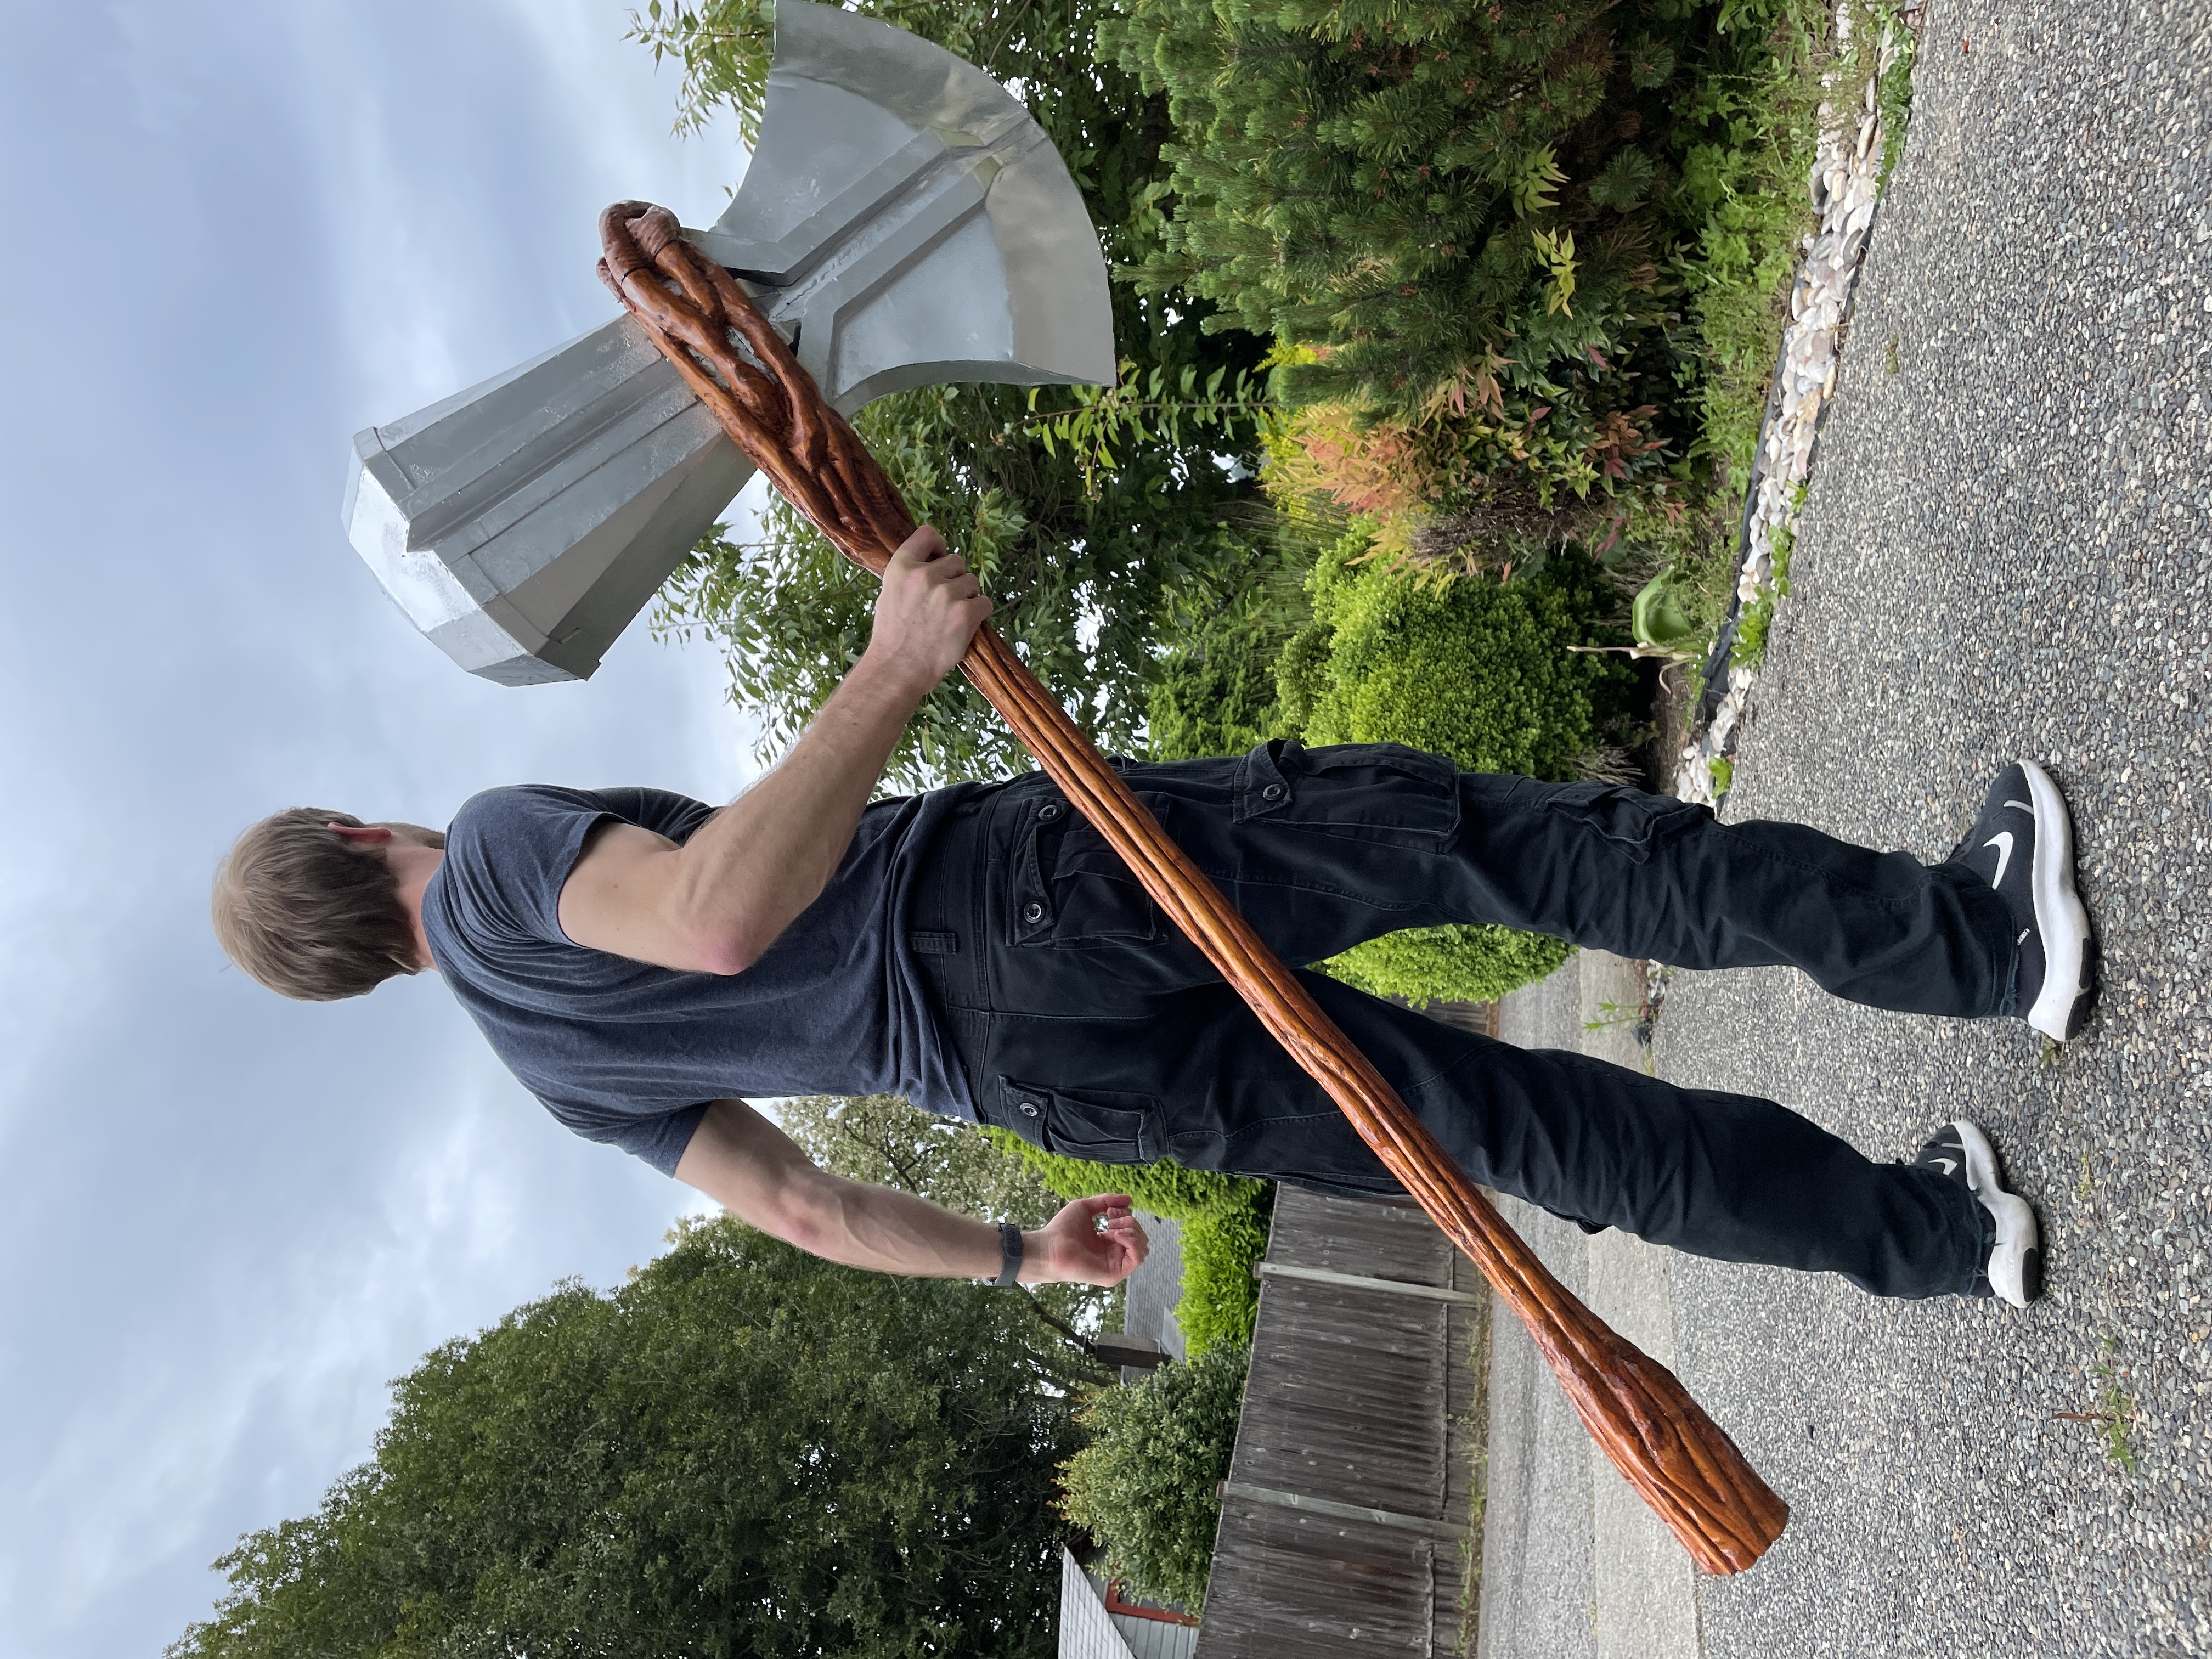
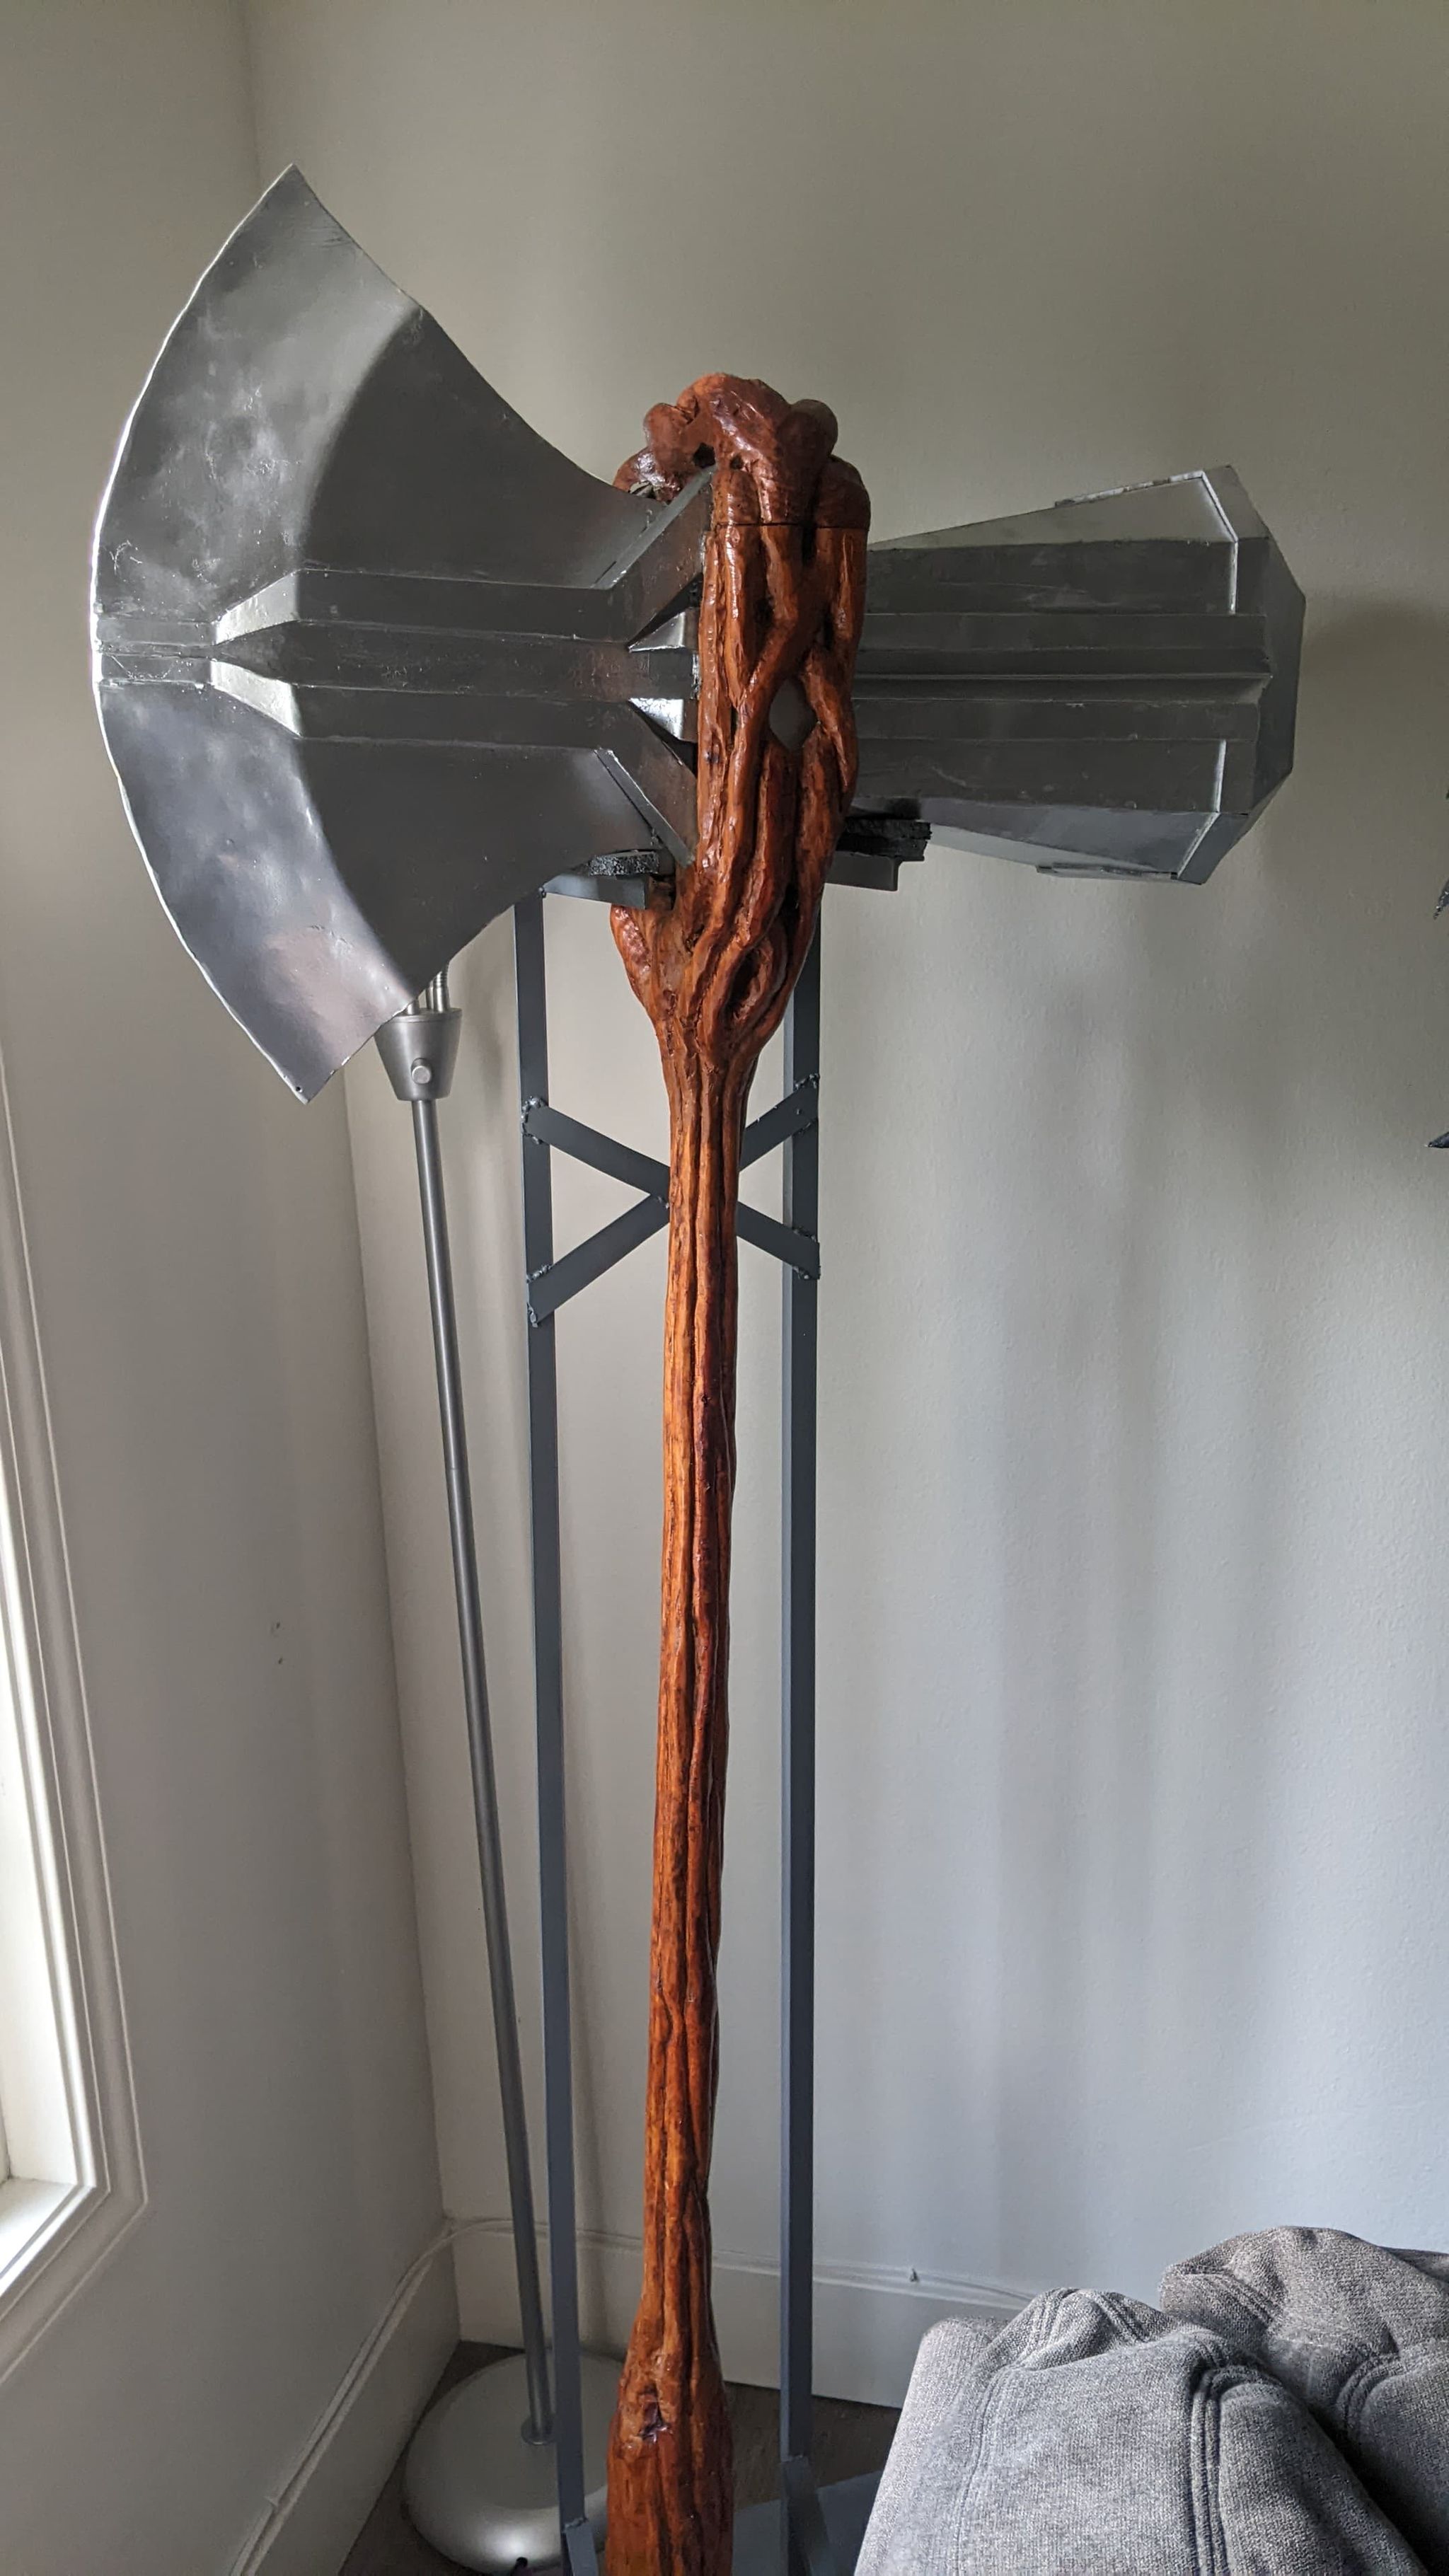
As I’ve said, the centre of mass is a bit of a problem; I should have used less steel. The head is about 13kgs alone, and the entire thing at about 16kgs. Other post-build considerations I have are perhaps a darker stain on the wood for the handle, and more careful measuring/cutting for the easy-to-measure parts like the hammer end. Finally, a computer-aided plasma cutter would have given me much more precise pieces. All those nitpicks aside, this was a lot of fun to make. I really enjoyed the wood and metal work, nothing fiddly with costumes or fitting to my shoulders or head, no foam.
Let’s compare to some other designs I found online - I tried to not bias myself by looking at these too much beforehand or during.
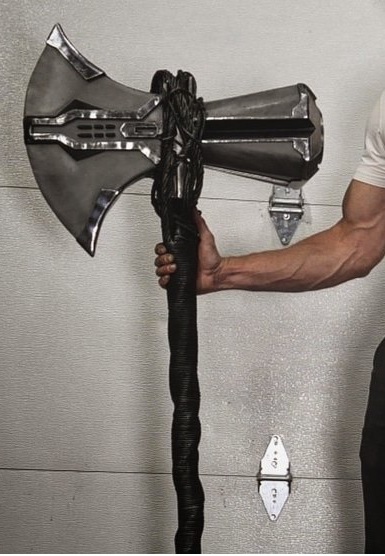
- There’s this from The Hacksmith, who also clearly did body prep for the role:
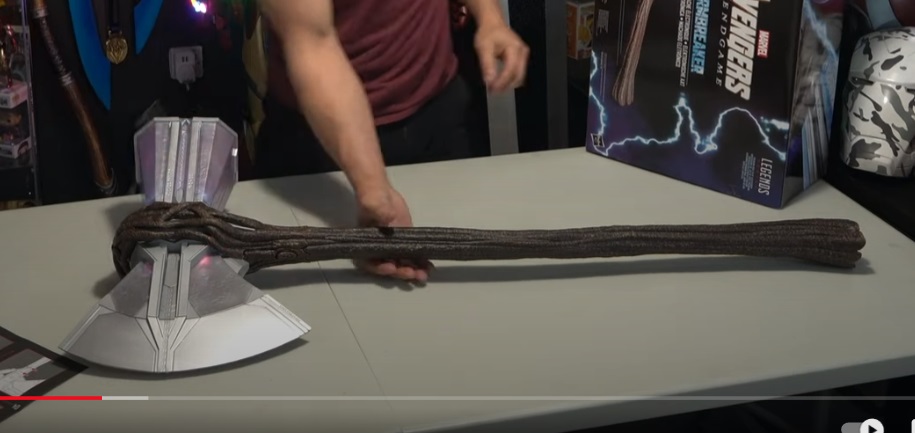
- Frankly Built gave it a crack with 3D printing the whole thing - I bet his is much lighter and easier to transport:
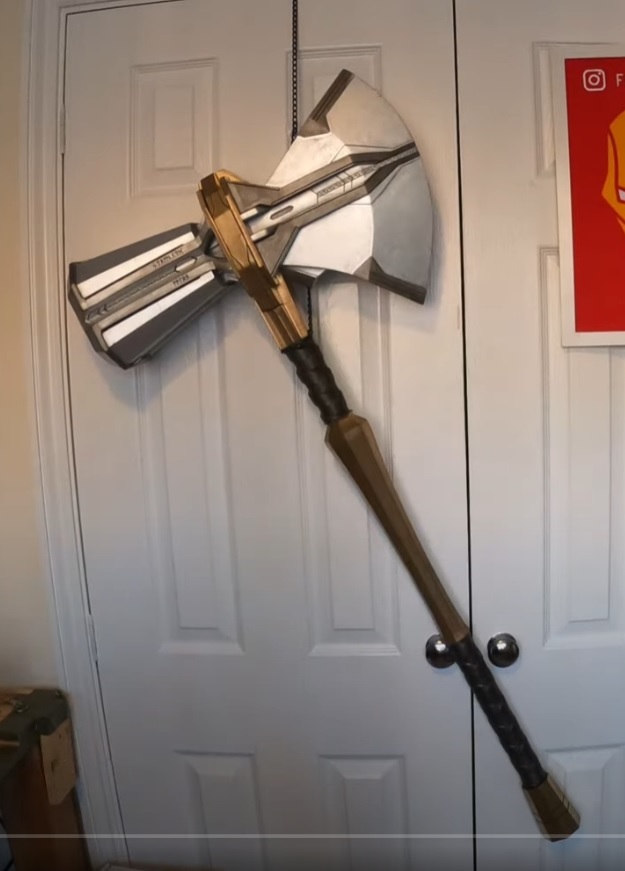
- Frankly Built then unboxed this one from Hasbro:
- Here’s a toy one from Amazon:
A lot of people seem to do a less branchy handle, or a curved handle. I don’t understand why; the film makes it pretty clear the handle is relatively straight and made from wood-based branches - maybe it’s something from the comics? But they do tend to get the head more accurate - I wish I could have achieved more detail there, it is the centrepiece after all. That Hasbro one appears to be the most accurate, except perhaps in size - perhaps I should have bought one and modelled from that instead of going from blurry film frames. Hacksmith used more ropey-looking stuff to make the branches at the top, and I think that’s a good idea. Theirs was ~47kgs though; at least I can carry mine reasonably.
Opinion after watching Thor 4
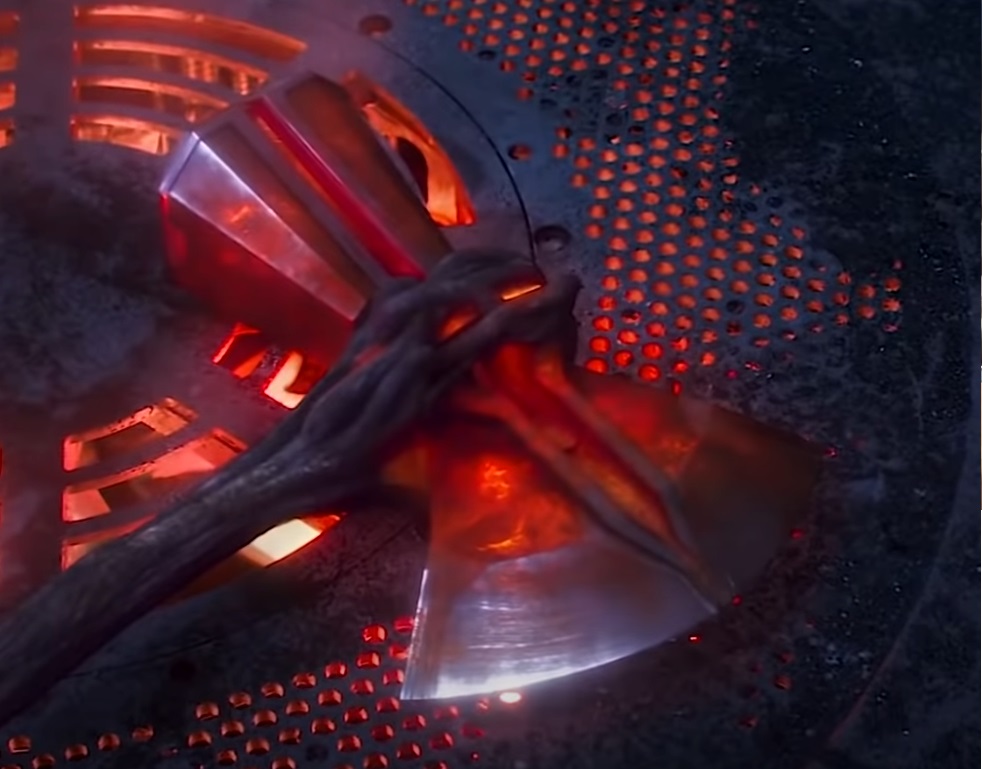
As can be seen, Stormbreaker does not have many clear shots in Avengers: Infinity War or Endgame. However, there are many slow, well-focused close ups in Thor: Love and Thunder:
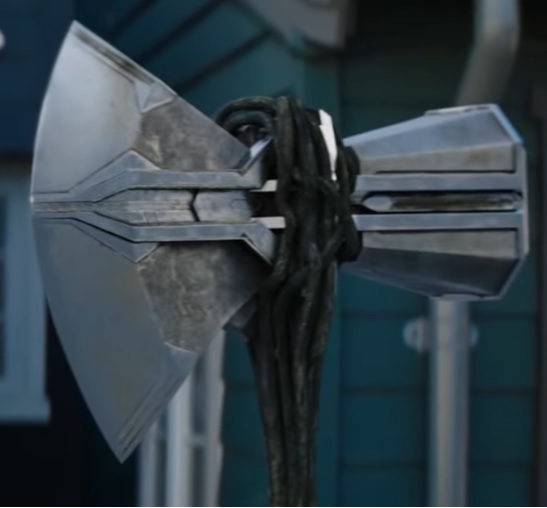
And after watching this I’m all the more impressed, even if I am saying that myself - I got really close! I’m judging this on size accuracy and shared detail between mine and the film. The major aberrations are the detailing on the top and bottom of the blade, and the branches wrapping around the head itself - these should have been thinner, sparser, and spread out further down the hilt.
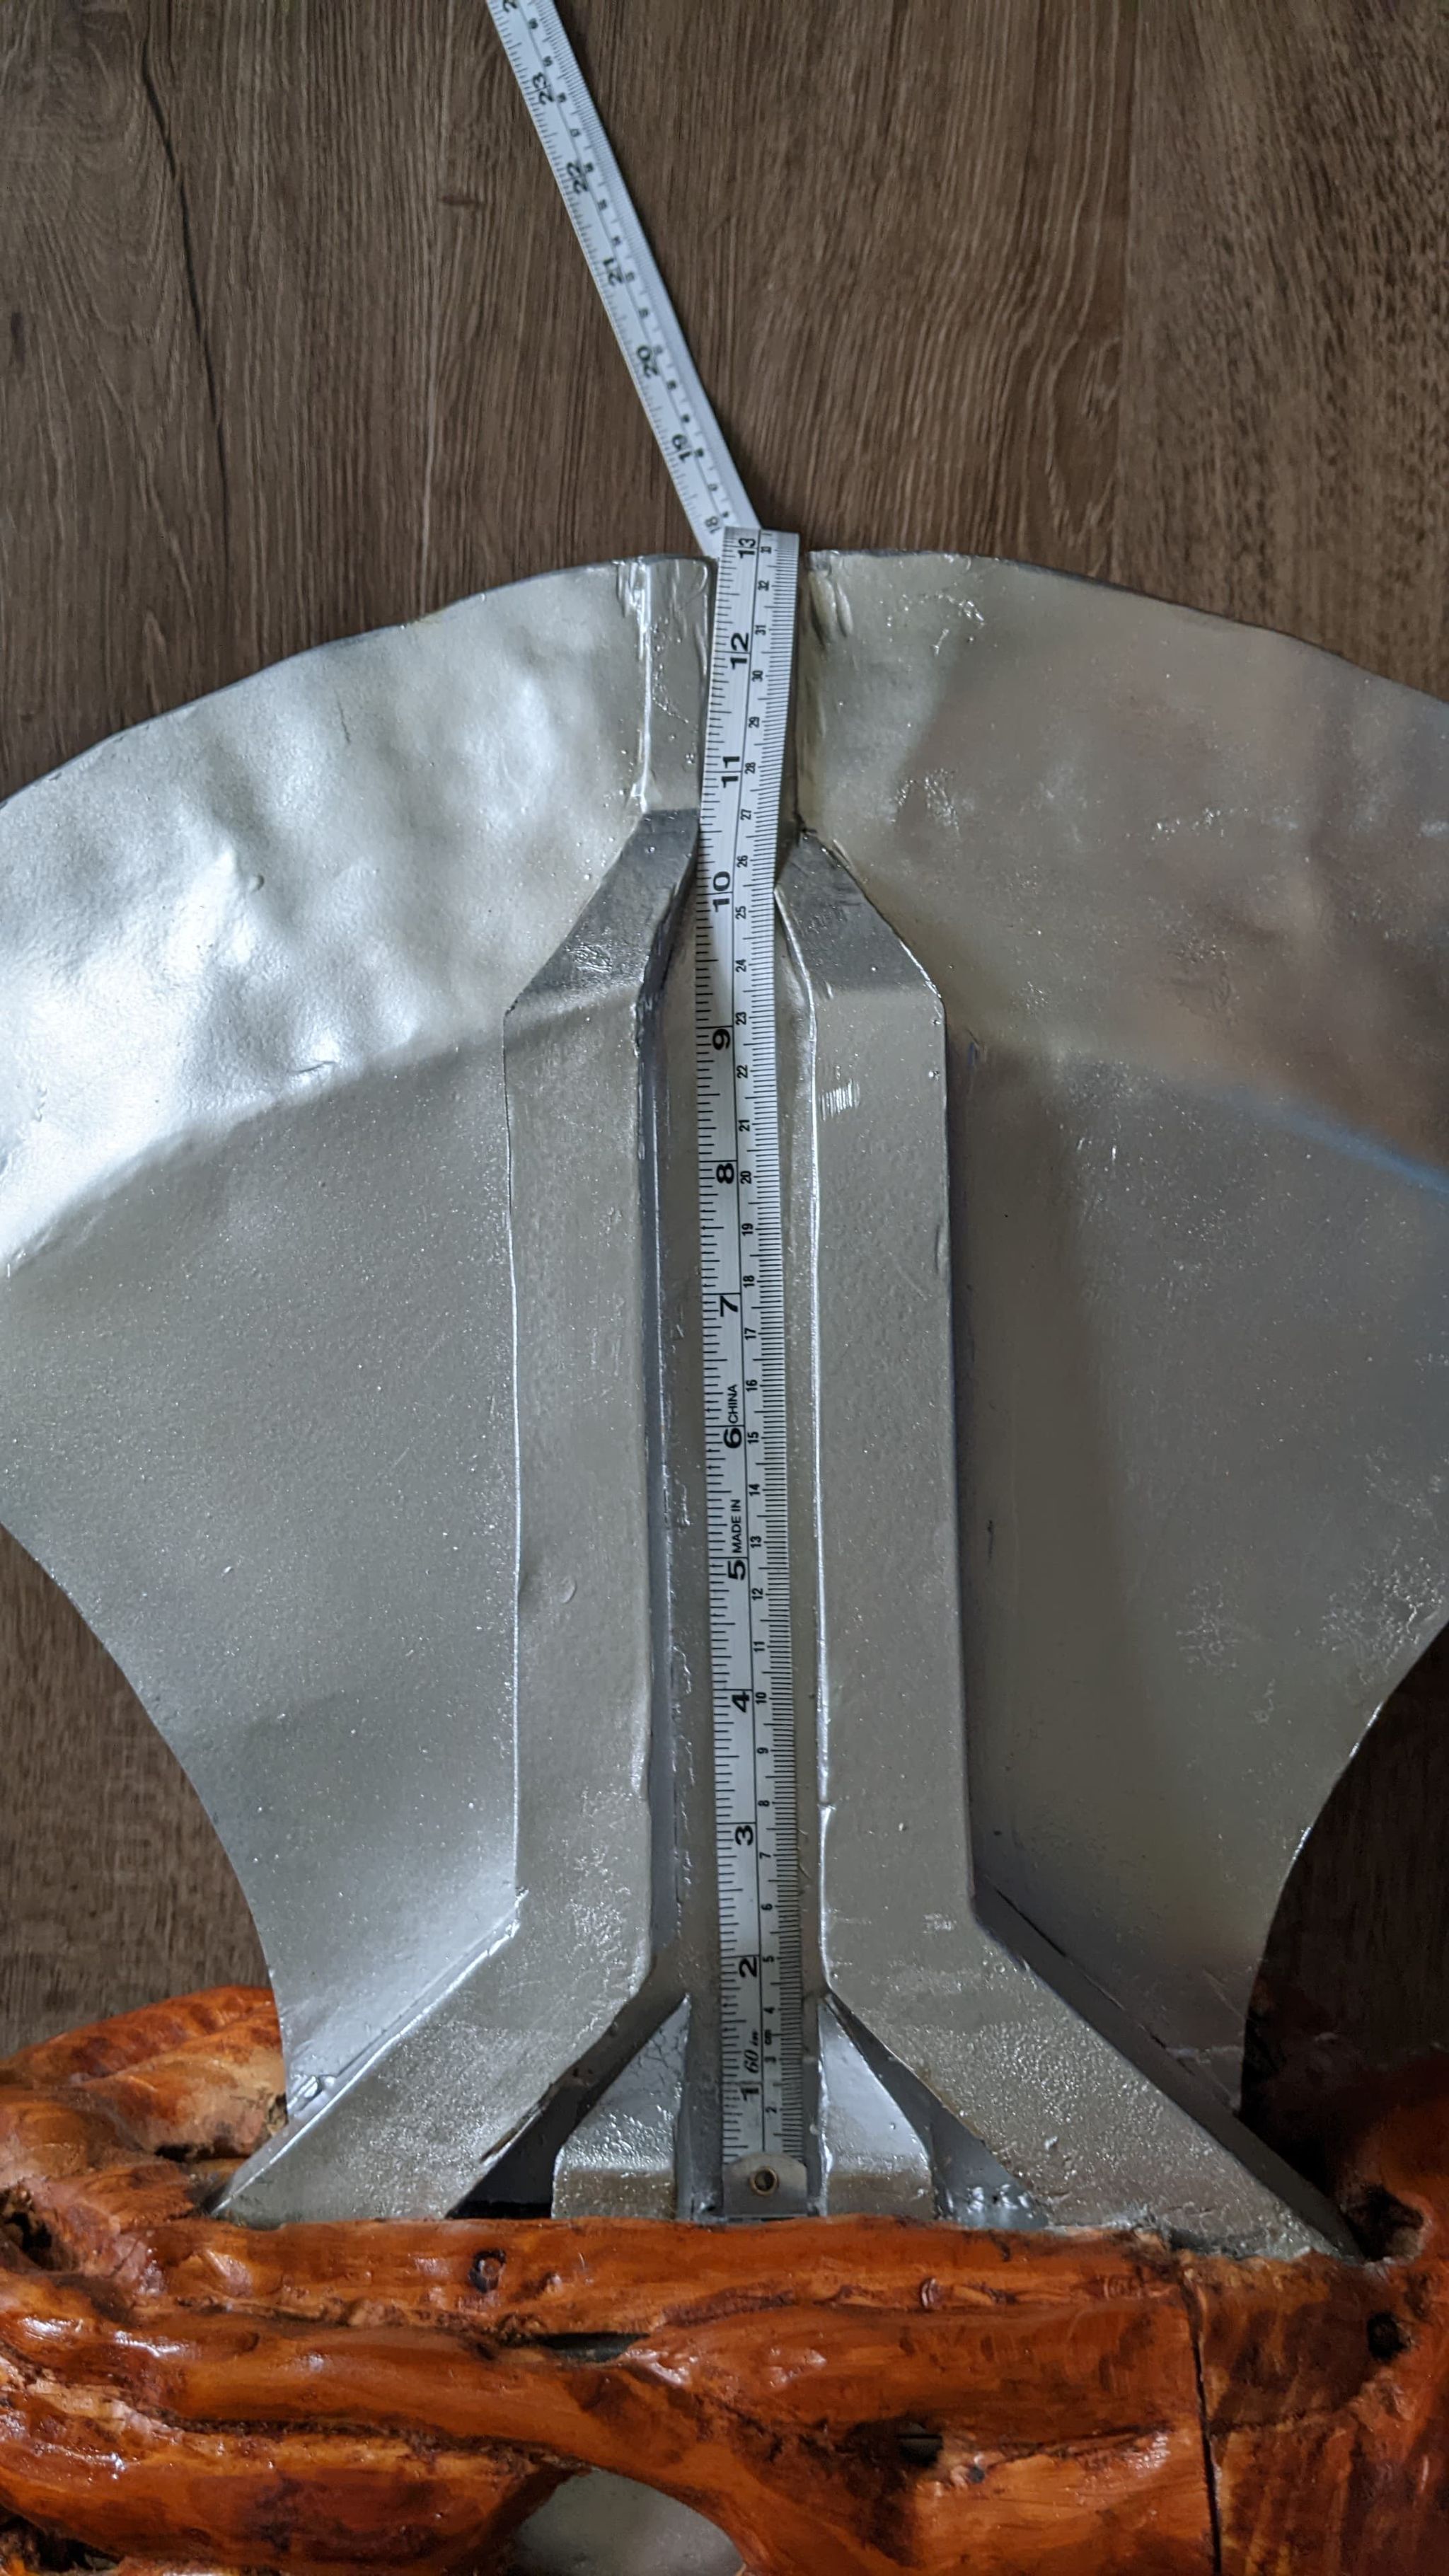
Templates
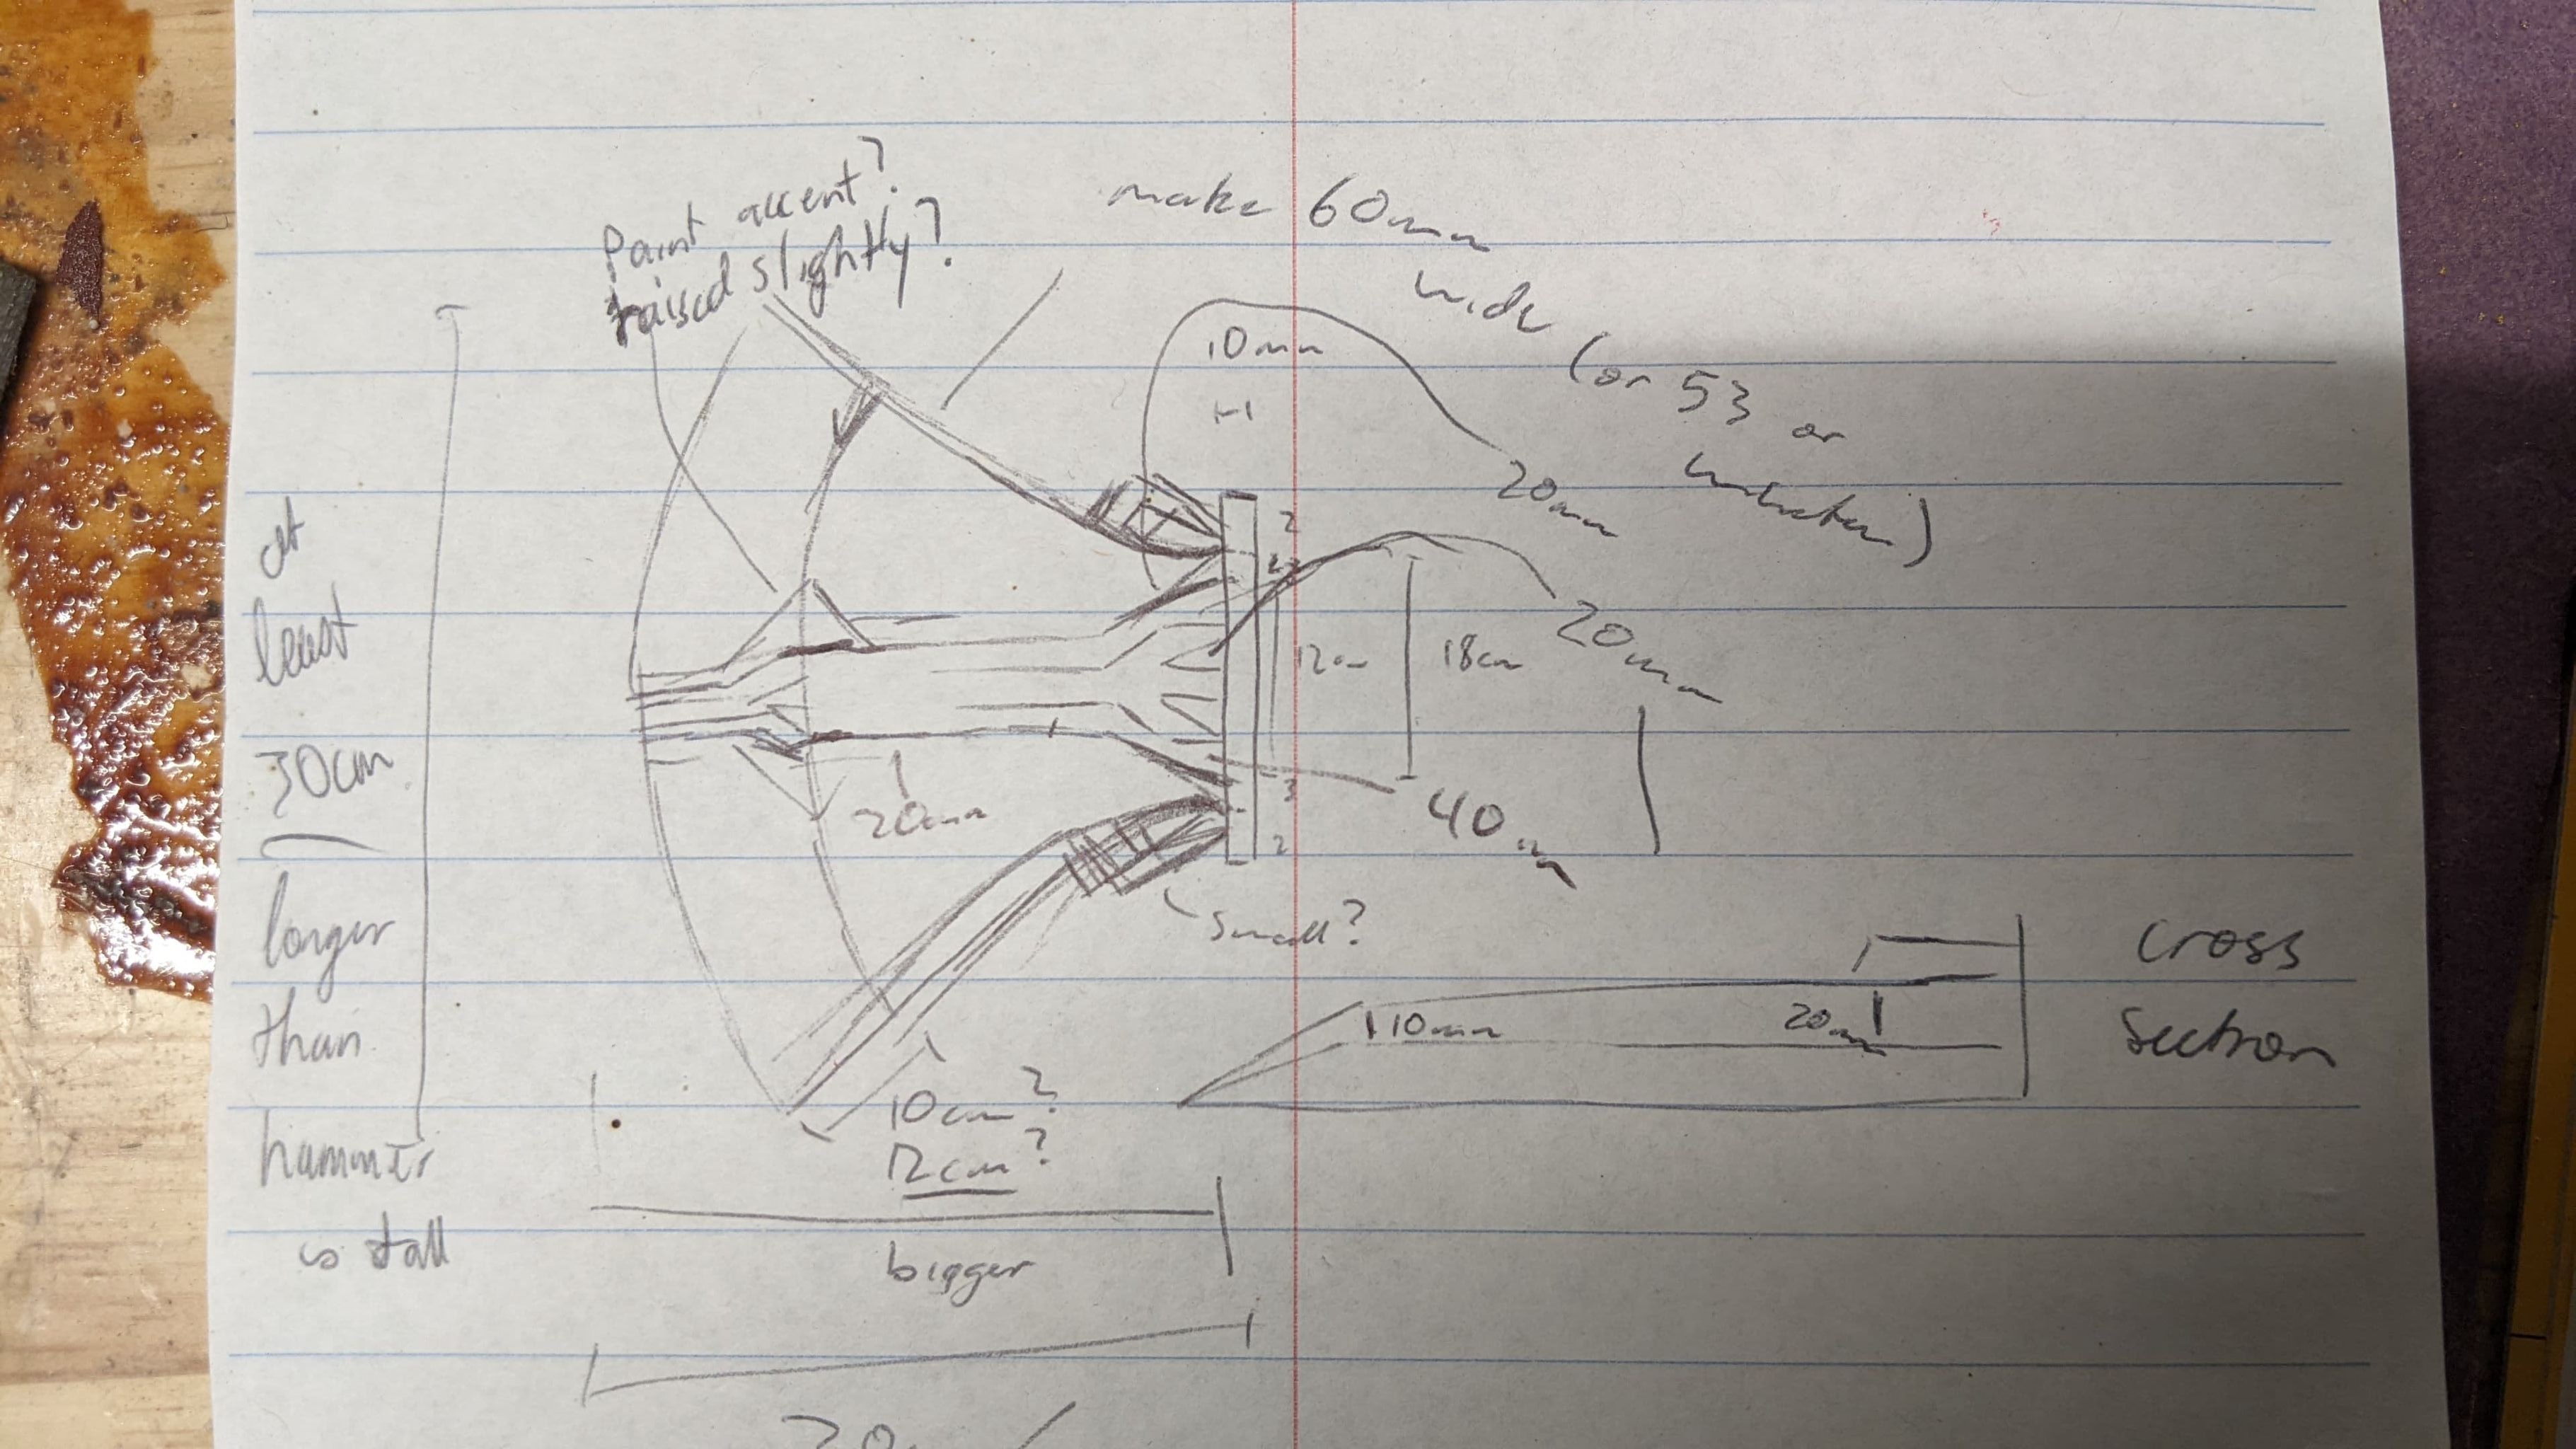
Alas, I lost my axeblade template, but here are my written notes with dimensions, along with some photos with a measuring tape: