Samus' Power Suit

After making Samus’ arm cannon - along with a Nerf gun inside of it - I thought “it seems a bit silly to have such a good arm piece, but not the rest of the costume”. I’d found Samus’ helmet on Thingiverse in various models, along with the shoulder pieces. The rest of the suit looks more body-molded than the shoulders and helmet; I could 3d print this, but getting size and shape right would take a lot of iterations, and these would also be big pieces. Regardless, I definitely thought I could give it a decent enough bash so that I had a full suit - much better than just the arm cannon.
I will admit that this whole suit was a bit of a rush job. While I considered the cannon a masterpiece not to be rushed, and the helmet similar - although to be honest I was careless with the paint - the suit was very much a “Well I have the cannon and the helmet, why not have the whole suit?”. Halloween was coming up, and I thought I could get it done in time … which experimentally I could, but it did mean accepting more errors than I preferred and doing fewer iterations of some pieces than perhaps I should have done. Nevertheless, I’m happy that I made it and happy with the result, enough to show it off and be proud. Body-fitting suits are hard, and this was my first ever with EVA foam.
Contents
Materials
Since I had 3d models of the helmet and shoulders, these were going to be 3d printed, and I used PLA. Simple, cheap, effective.
So what to make the rest of the suit from? Printing it sounded like it could be good, and I saw some designs online where people printed the whole thing. But many hardshell pieces of a costume can be a pain, and really reduce maneouverability, so after buying some EVA foam and testing it, I decided to make each piece from EVA foam: it can be heat-molded to a shape (within reason), it was easy to cut, and it came in large sheets. There’s also a plethora of tutorials online, and of course I ignored most of this, opting for trial and error. Most of the pieces were hot glued together, which was quick and easy but was one-way - however most glues probably were. It made pieces difficult to cut through, in a way other glues might not have, so if I did this again I think I would forgo this decision.
The undersuit was a latex onesie meant for diving or something, that I actually bought years ago to make a Tron costume from. I experimented with several different ways of attaching the foam panels before deciding on velcro - it could be applied en masse and give a greater surface area than singular pop tabs, and was easy to machine-sew on.
The Helmet and Shoulders
You might think that this was straightforward and I just printed these pieces, painted them, bam done.
No.
There were sizing issues, printing issues, printer failures, nozzle tests, and various other problems like weight, attachment, and everything else under the sun..
The Helmet
As linked above, there are several helmet models I found. I started with this well-labelled one from Thingiverse before realising that the default size it was printing at was far bigger than practical. Alright, time for a resize. I 3d-scanned my head and reconstructed the model around my head, resizing it to fit. But wait! I need to make sure my head fits through the bottom. Do I print half of it and test?
Then I came across this Frankly Built tutorial where he makes a Metroid Dread helmet, using a purchased model from do3d.com - and more importantly, he didn’t resize it, he just printed it and it just about worked. His head looks normal sized, so I bought this model for $25 and decided to give it a go (note: the model on do3d has changed since I printed this - it comes in fewer pieces).
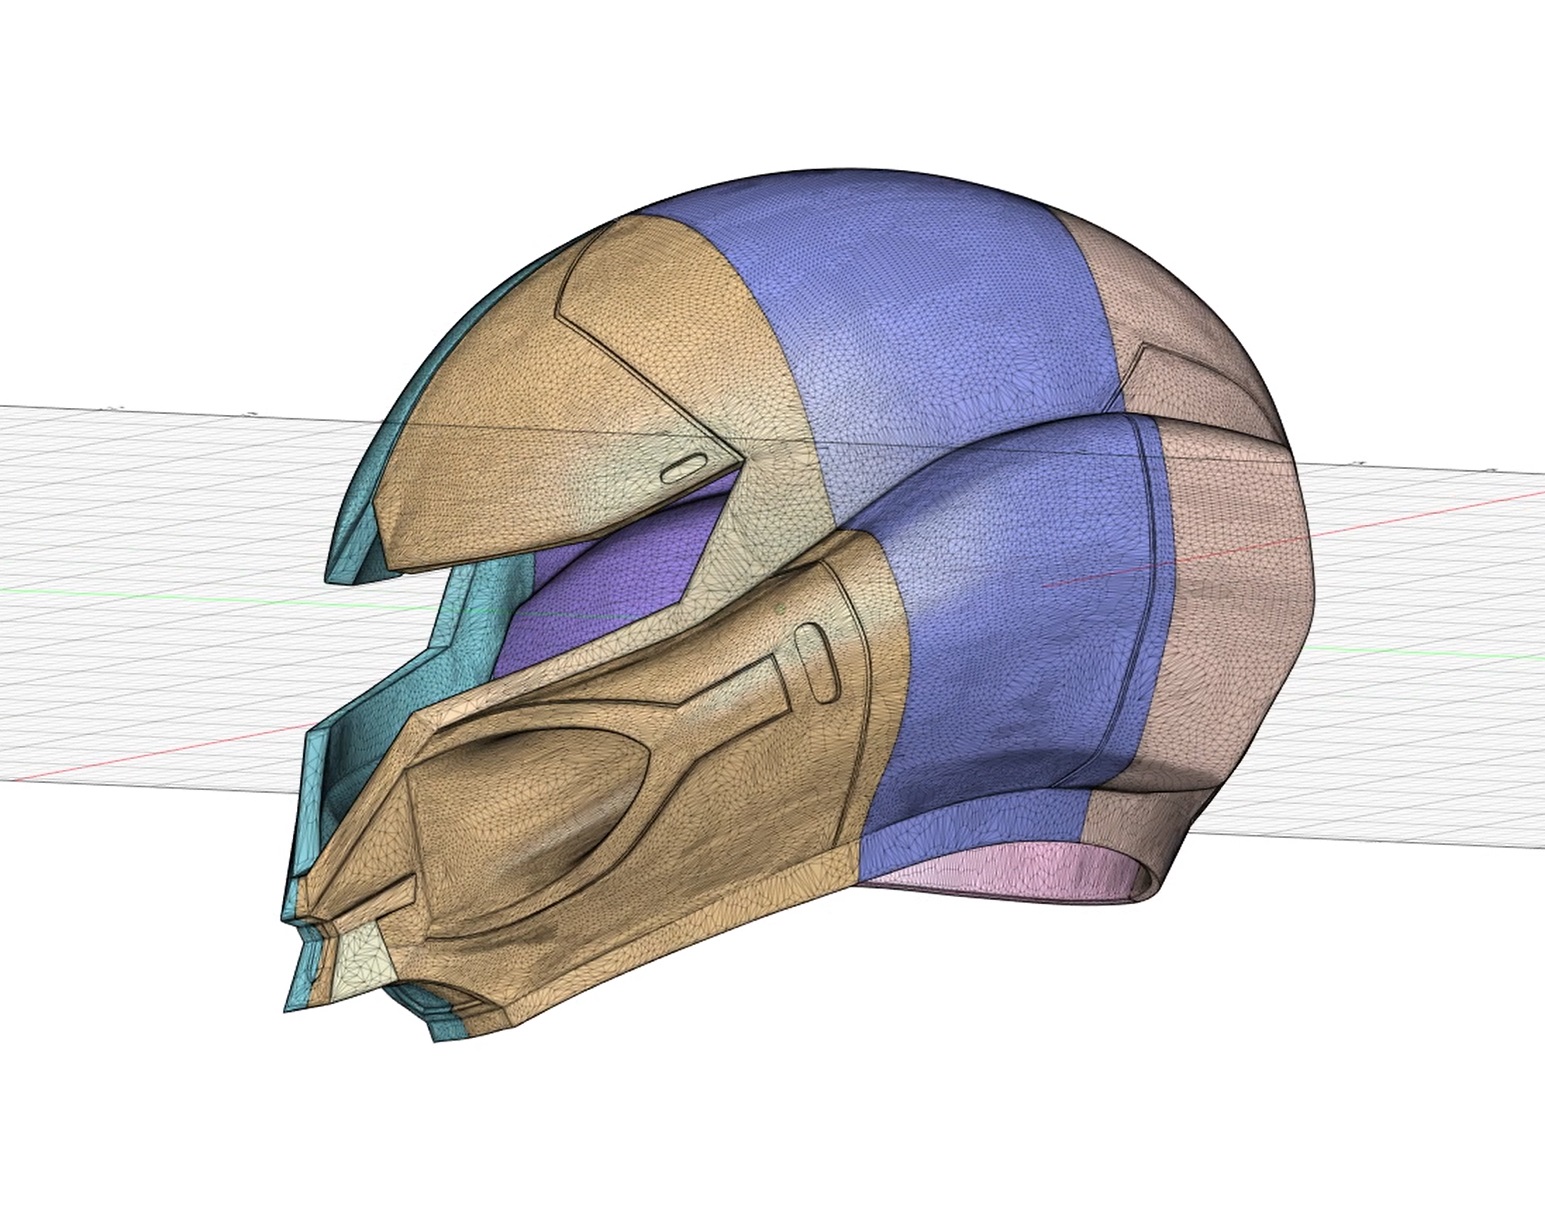
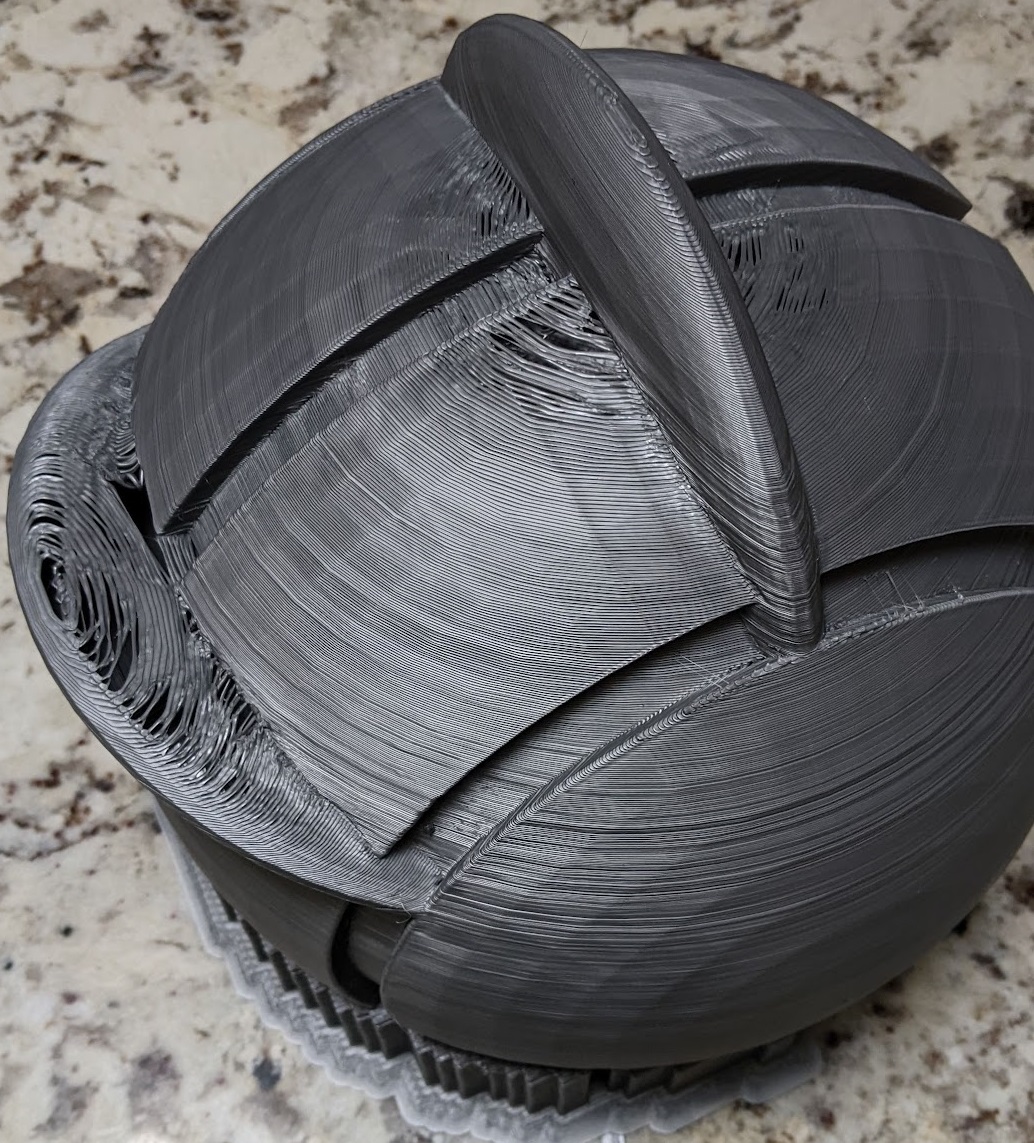
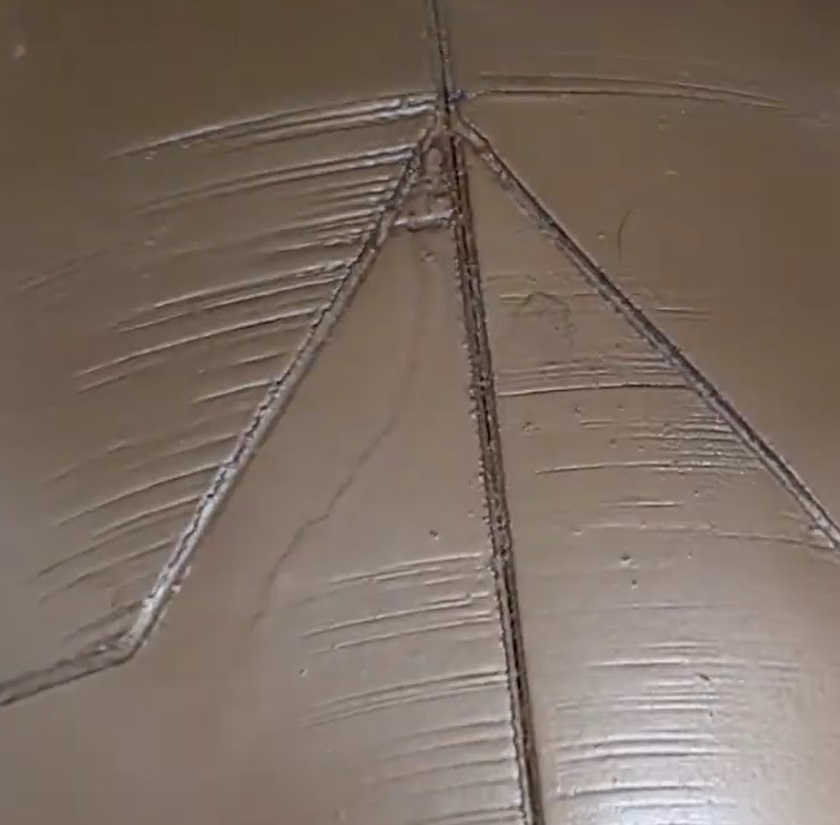
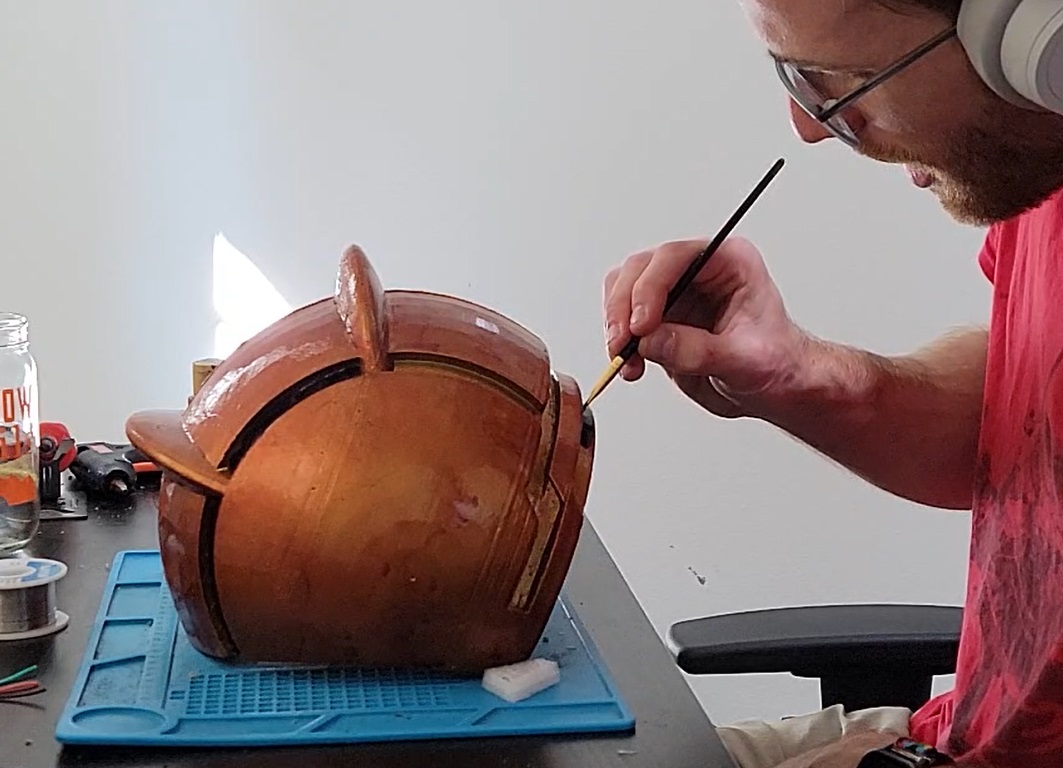
Without changing the size, it was too big for my printer. But thankfully, it came not just in a single model, but also in 6 pieces - the original model sliced down the middle of the face and twice sideways through the head. Each of these pieces fitted easily on my printer. Great! But I needed a way to reattach them after printing them and did not think glue was enough, so i added tabs across each of the cuts with a screw either side
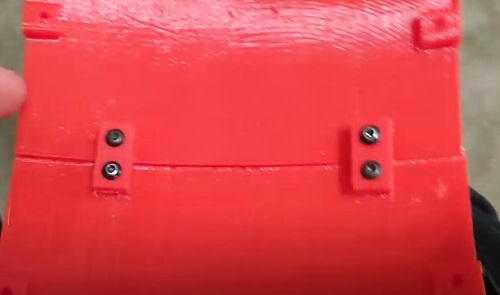
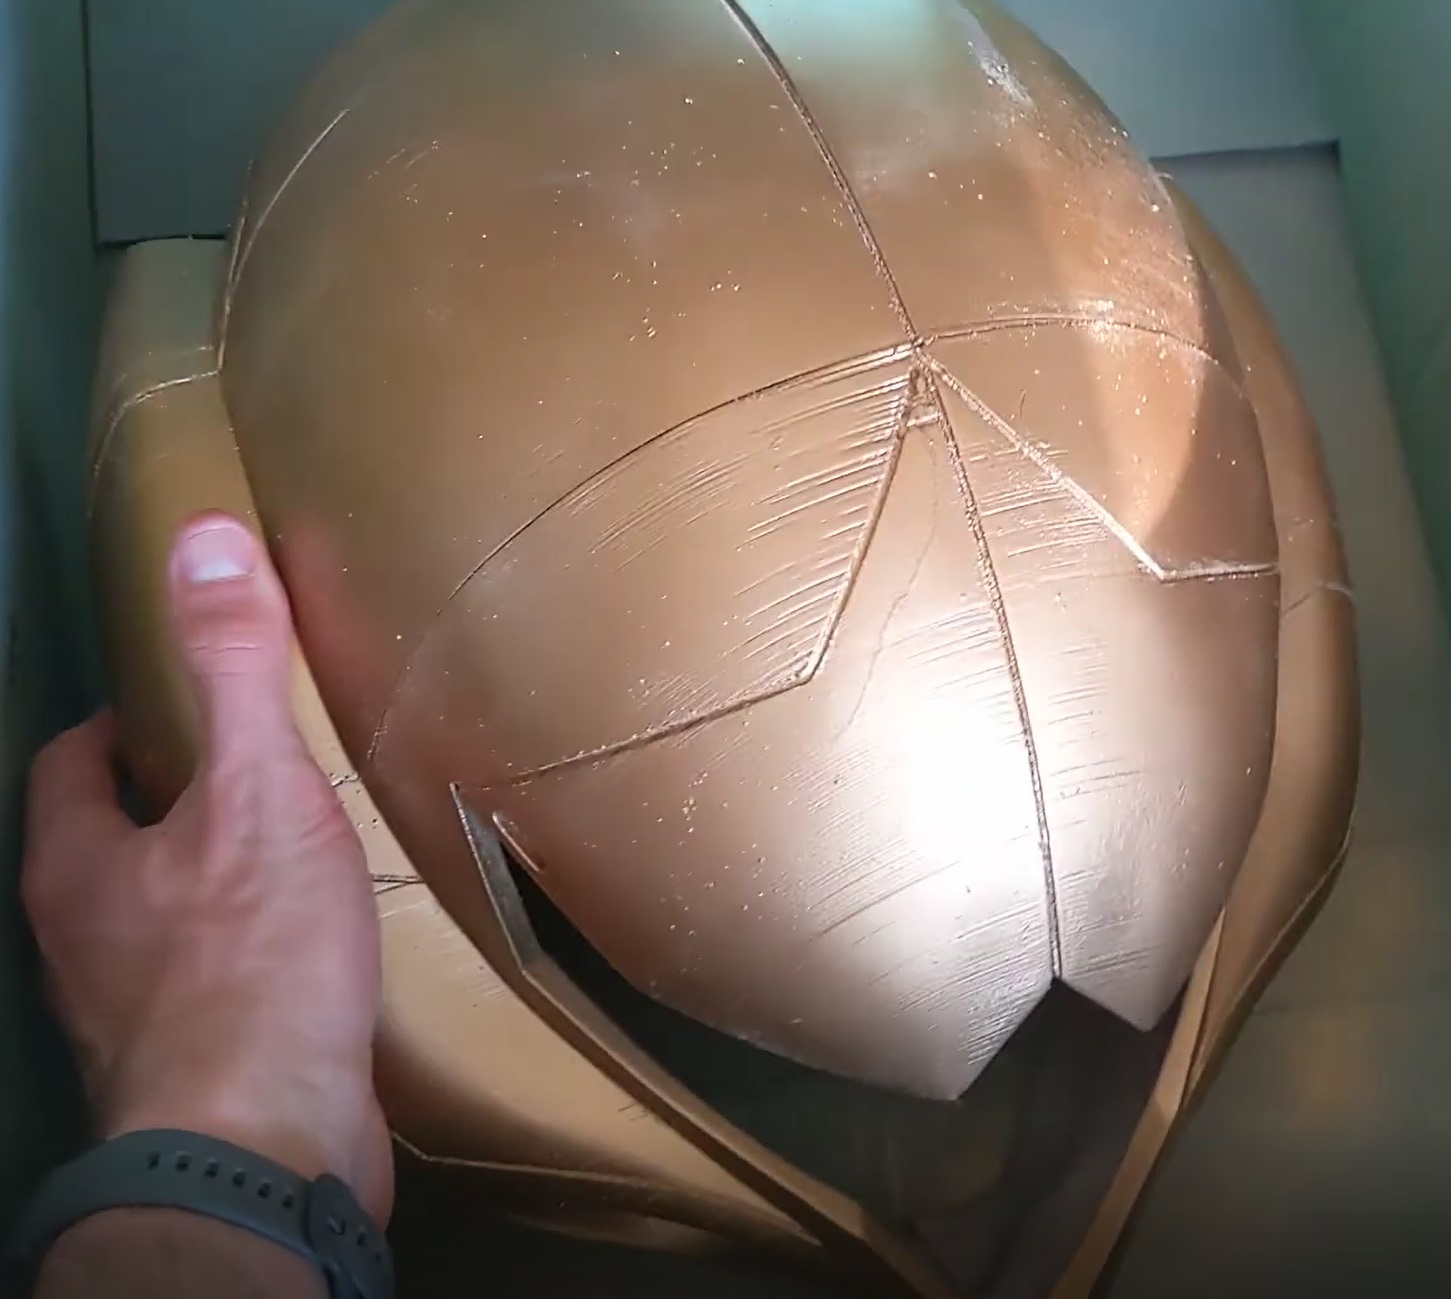
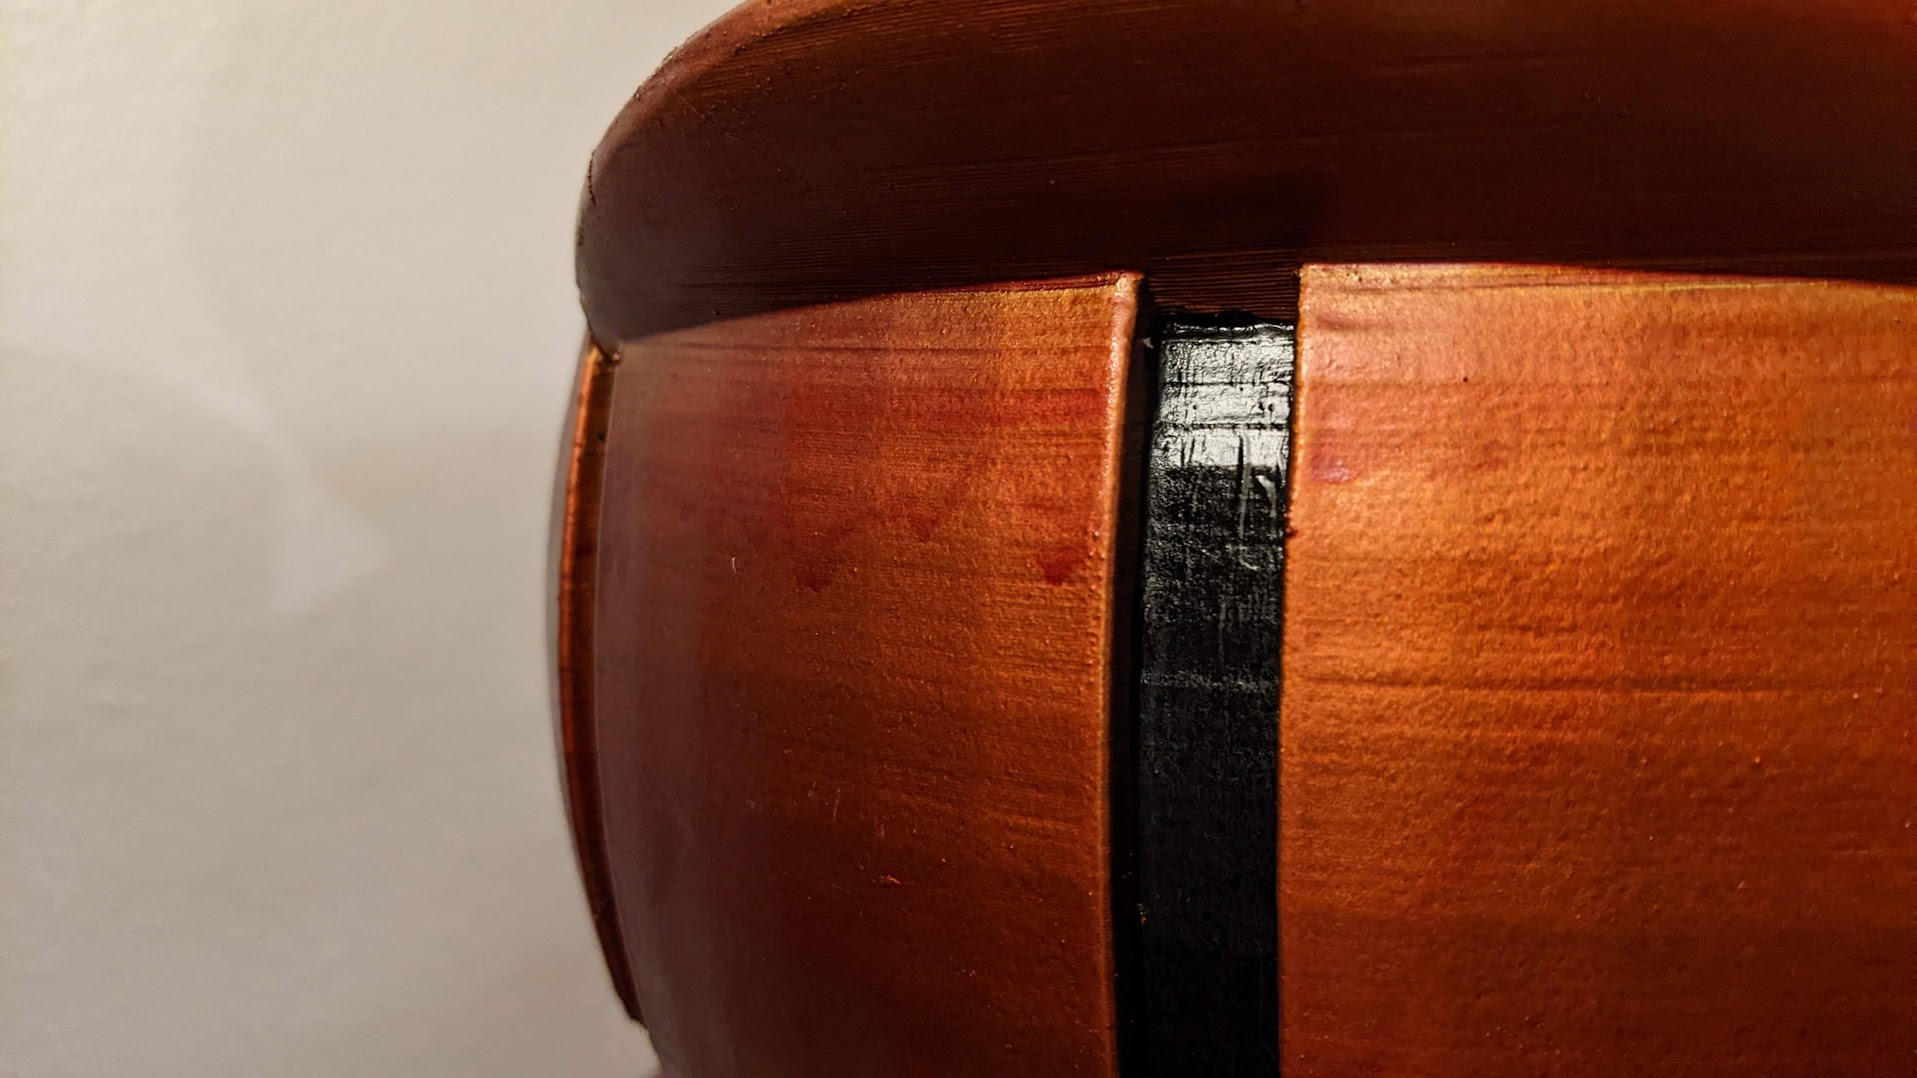
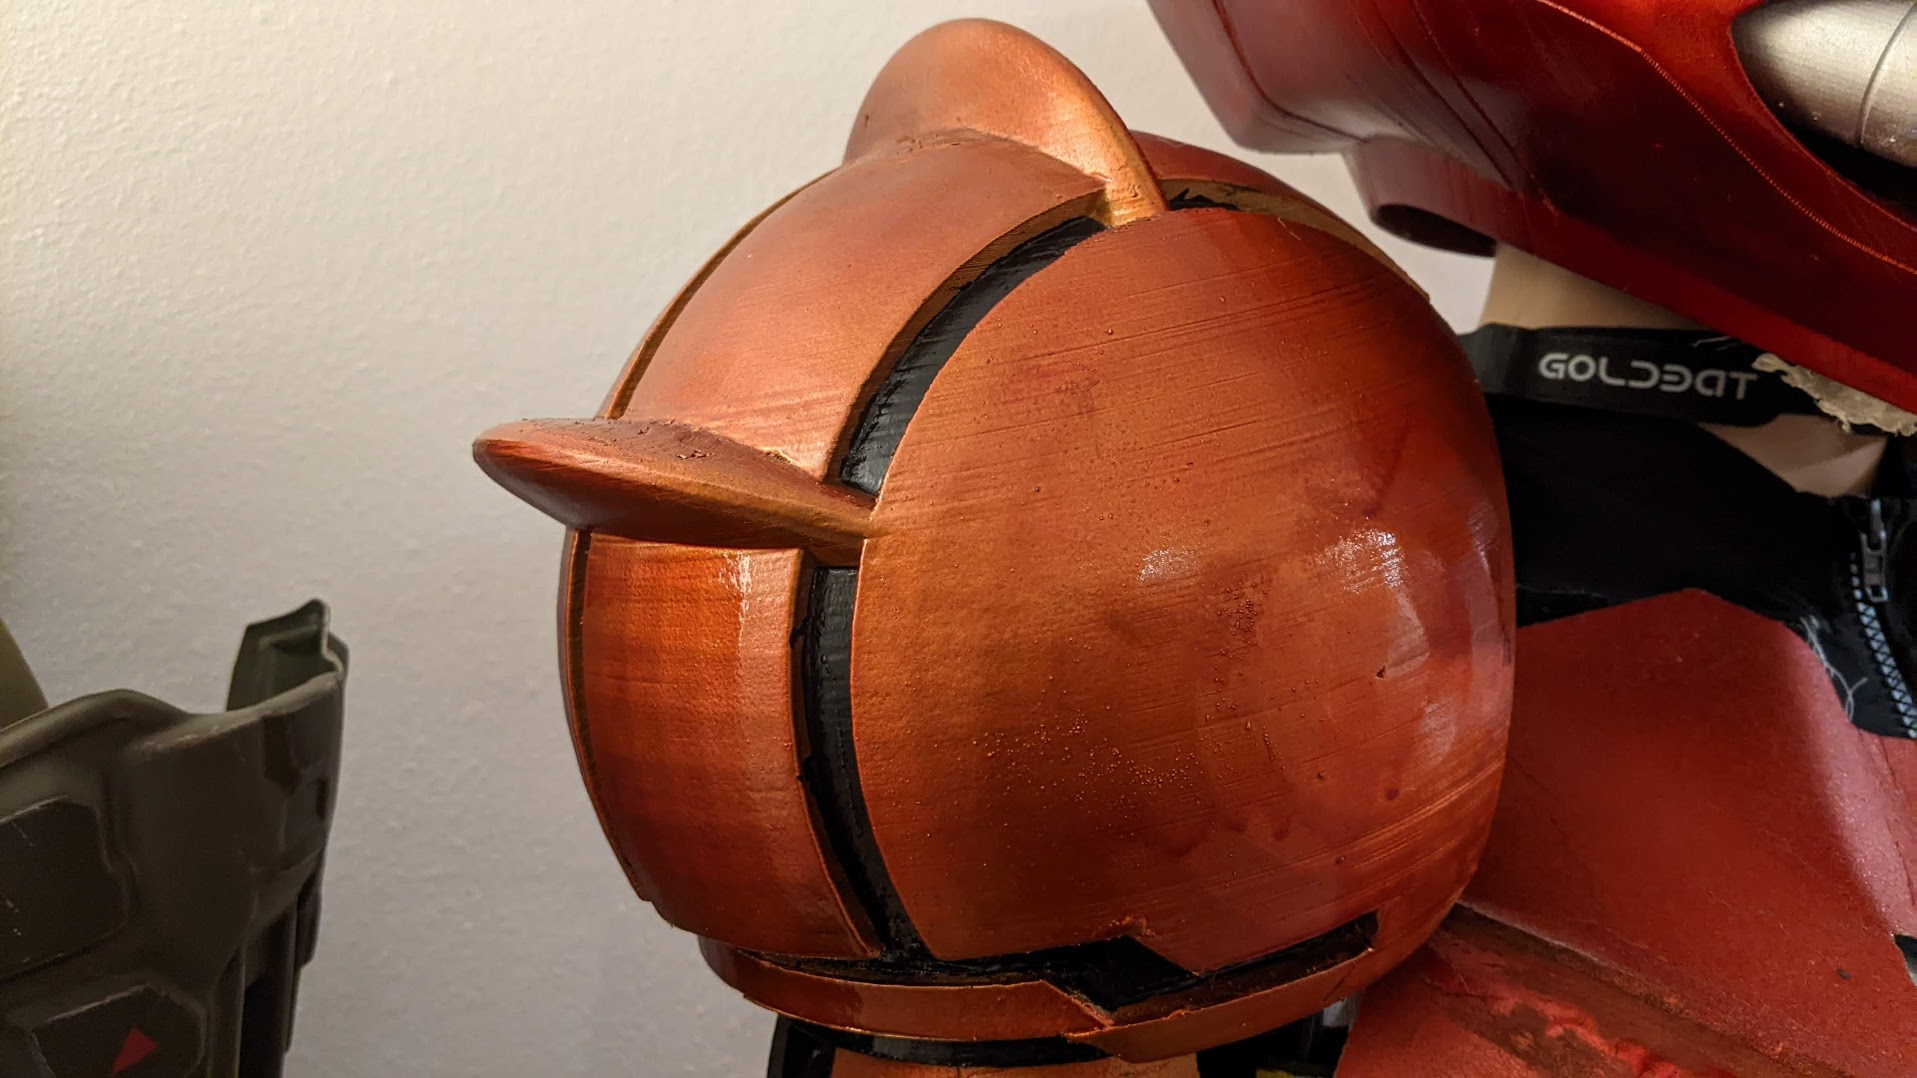
so I could screw it all back together at the end. This had some error and you can see the join lines close up, but it’s been negligible and I’ve gotten used to the look:
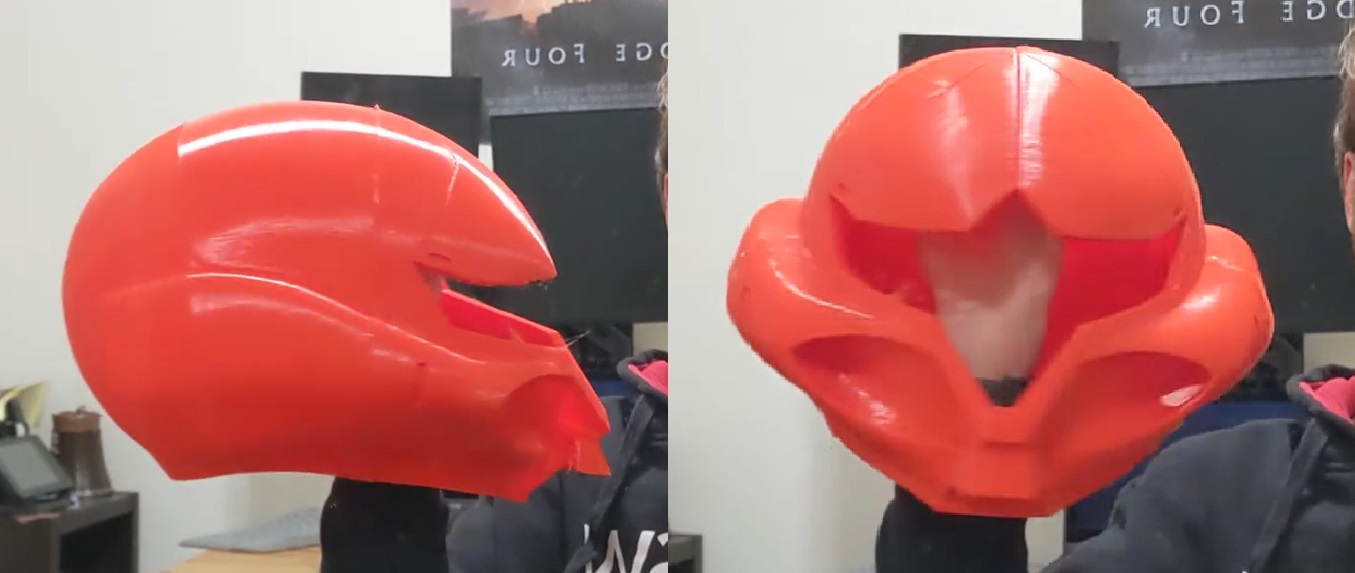
Next, the visor. Frankly Built used clear plastic with a sheet of green translucent plastic from car headlight tints; these cost a fair bit, but I found some coloured lighting tints for hobbyist filmmaking, and among these was a good shade of green. I cut it to a reasonable shape and held it in place with some foam around the top edges, and hot gluing it on the bottom edges. While doing this, I added a lot more foam on the inside of the helmet. Why? Well, for a start it’s hard plastic - not comfortable. Secondly, this balanced delicately on the top of my head and wobbled at the slightest motion - I wanted it to stay on a bit more solidly. So I added padding from EVA foam offcuts until it sat with pressure all over my head, holding it with some slight tension, and didn’t wobble:

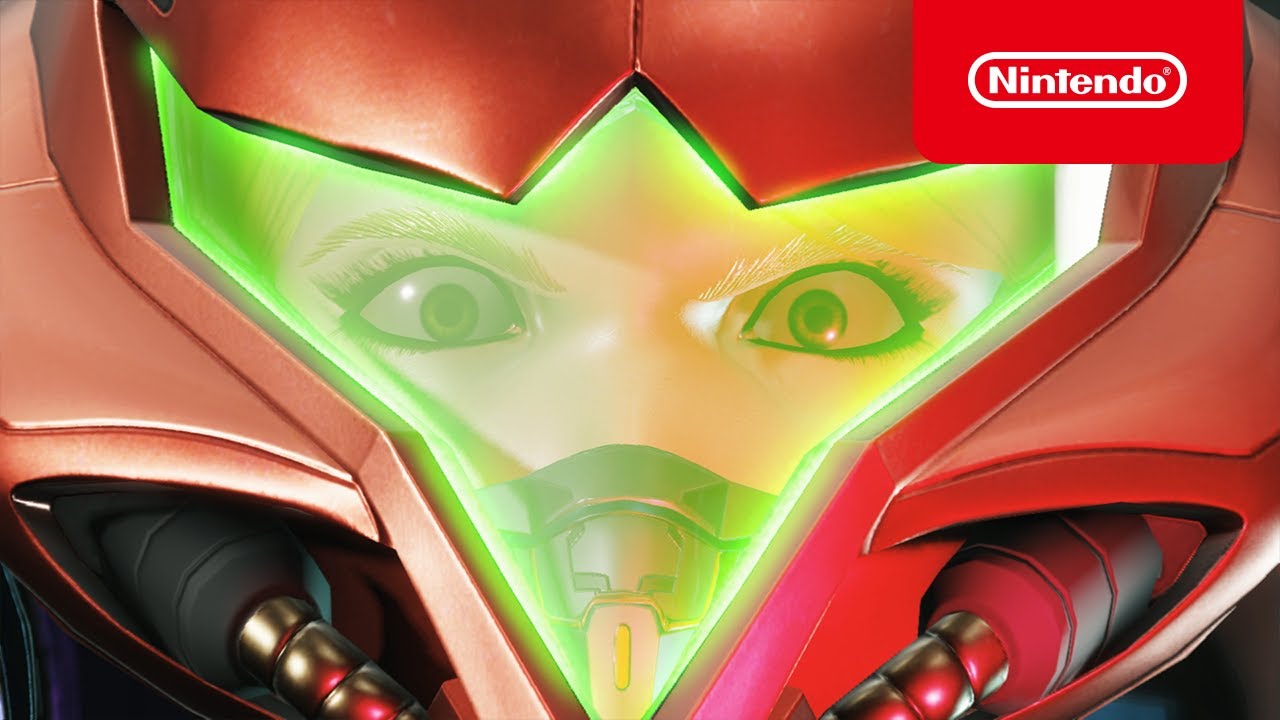
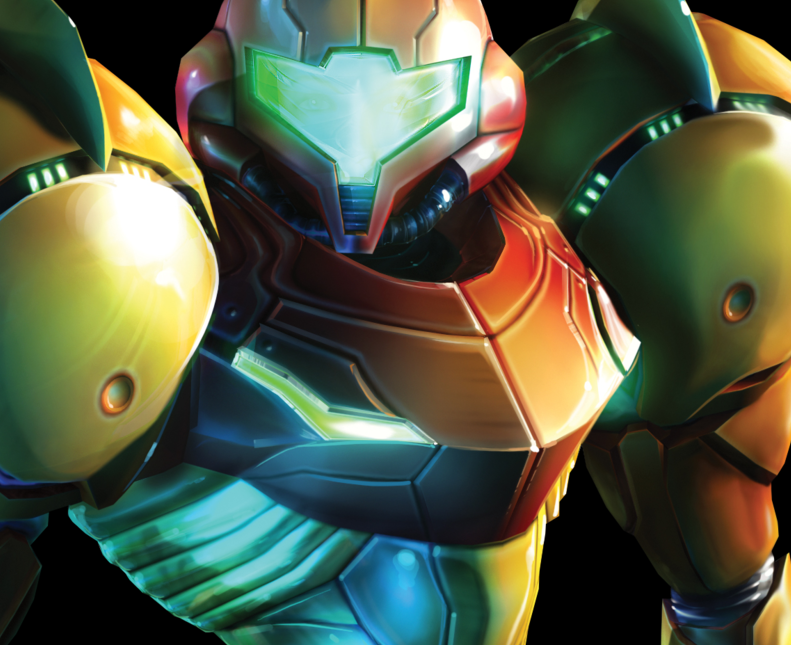
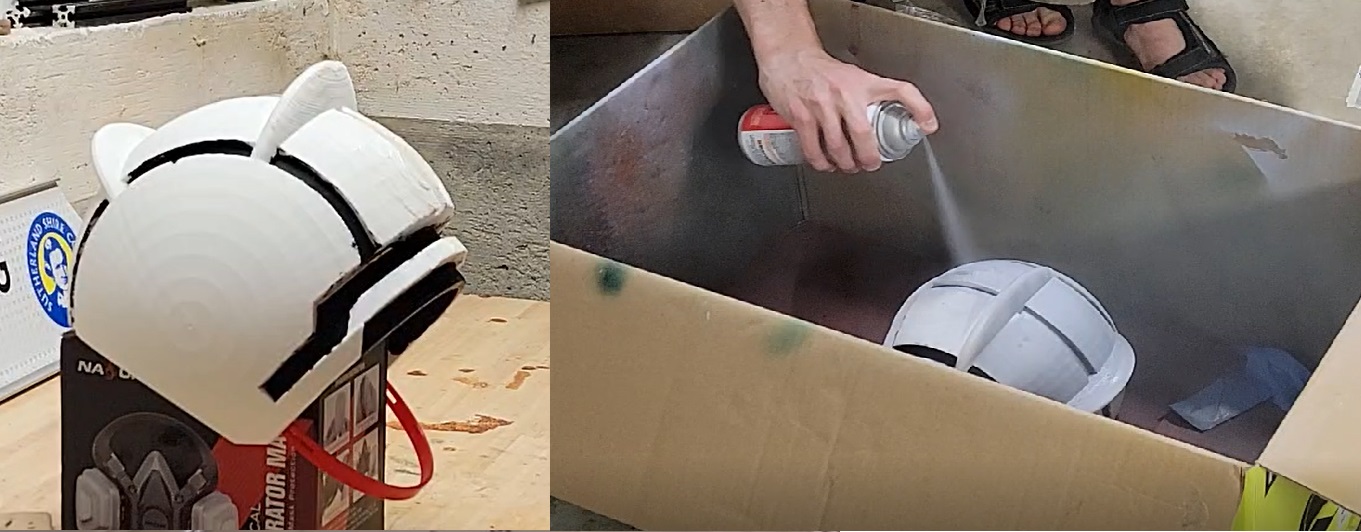
Finally, the mask (seen in above photo). Note in the following picture Samus appears to have some sort of oxygen mask covering her mouth and nose
Frankly Built achieved a similar thing with a basic gas mask from Home Depot, so I bought a similar one, tore off the air filters, and glued it in: perfect!
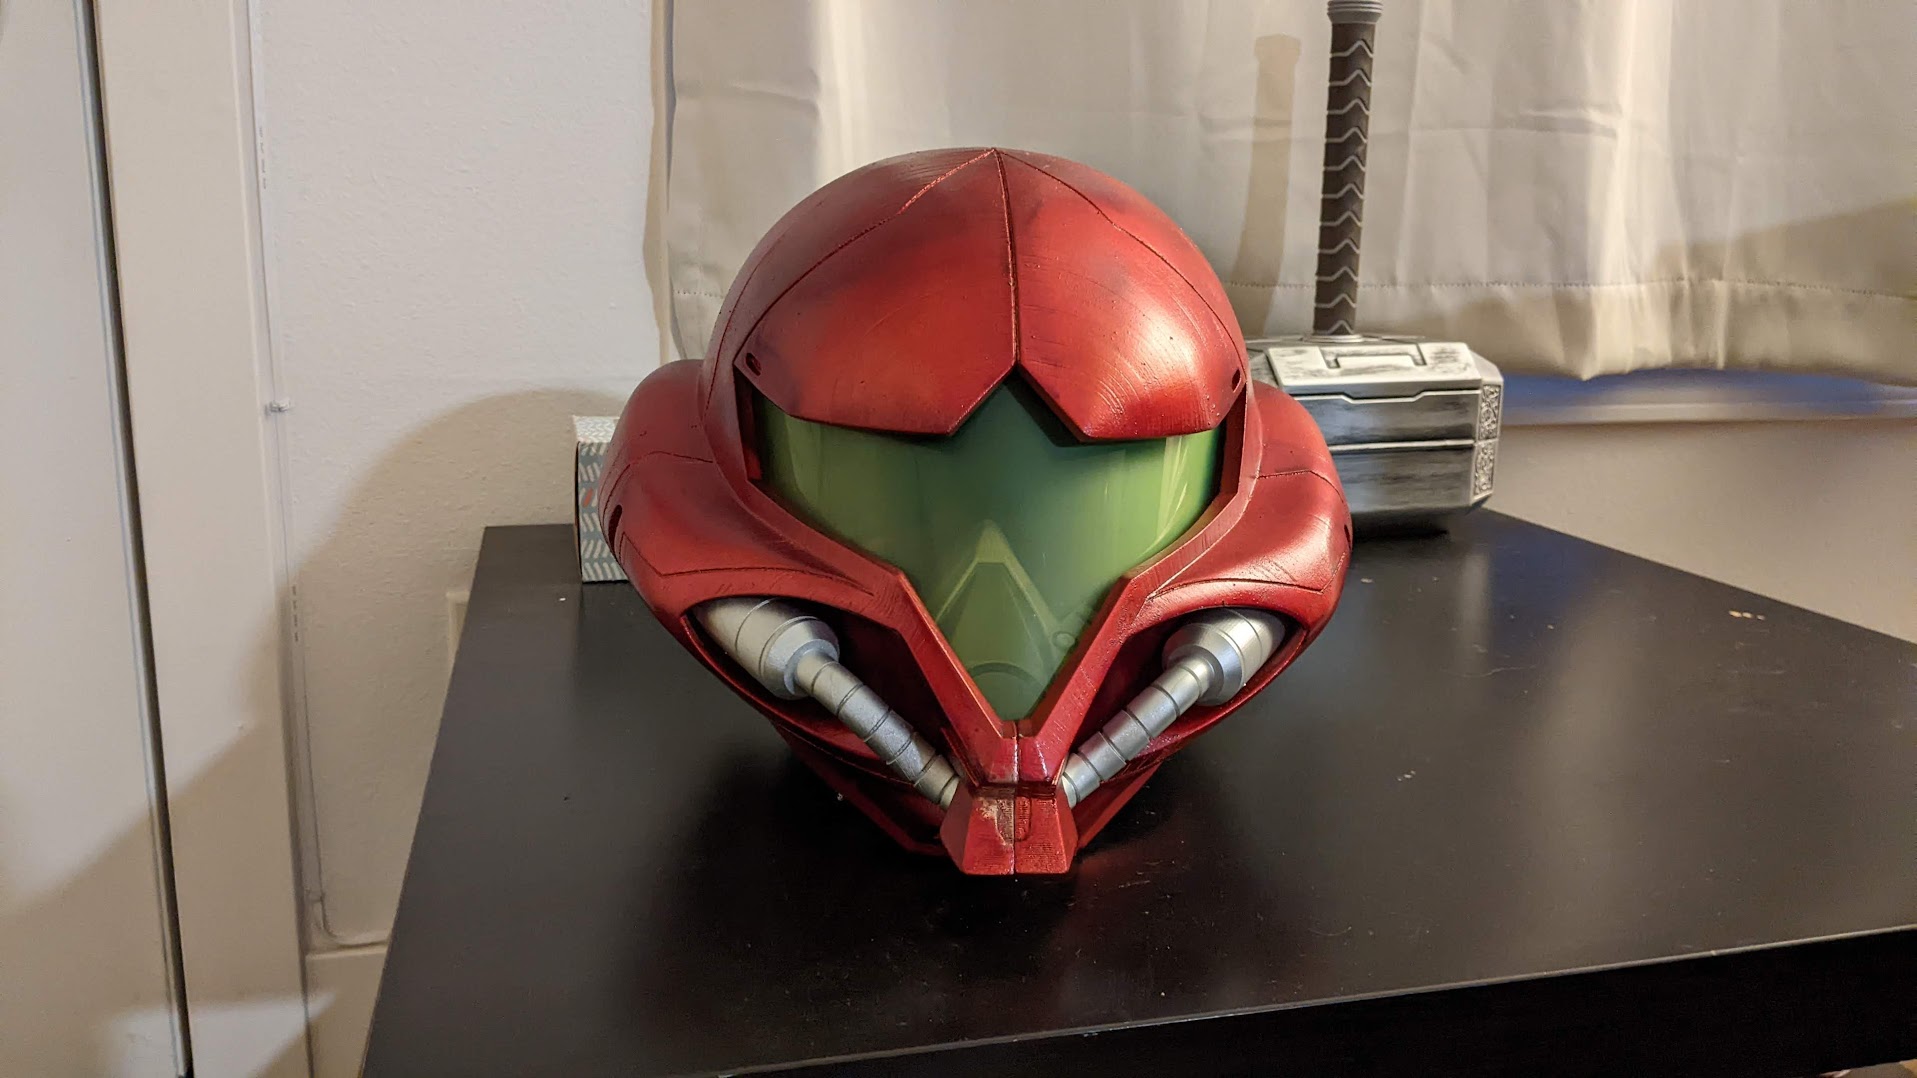
Very happy with this. I’ll go over the painting later.
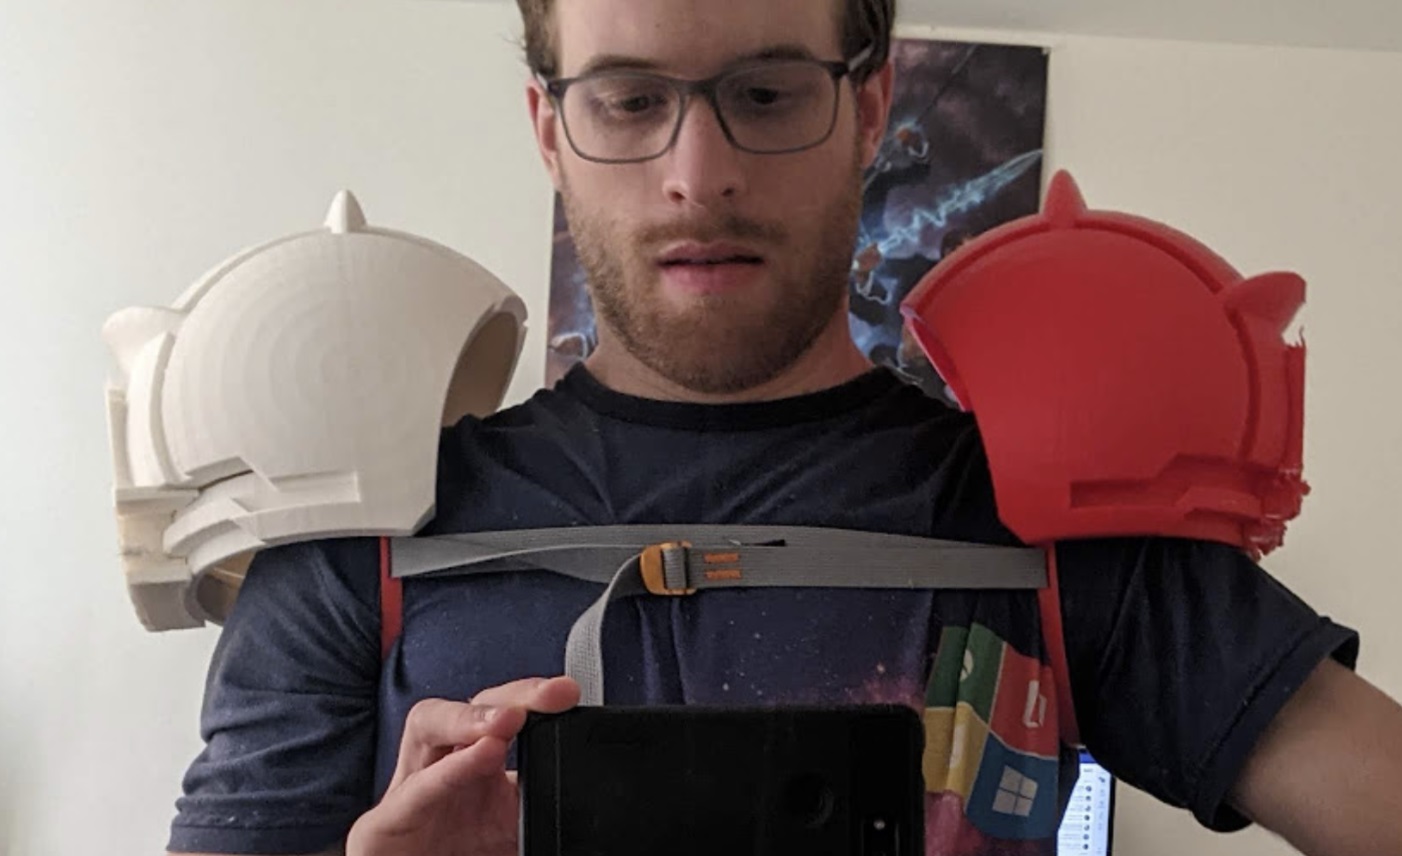
The Shoulders
The shoulders also came from Thingiverse, although I had to do some size checking. I printed some test slices to gauge size, and a full version to see how it looked. This first full shoulder ended up about 95% of the size that felt good, but also far too dense - I needed to really tone the settings down for the next print, since the sholder weighed about a kilogram alone. 1kg resting on each of my shoulders was not going to feel good.
The next problem was how to hold this to my body. The shoulder piece spans about 90 degrees, which doesn’t attach to a human shoulder well. I need something to hold it both inwards and upwards. I designed a ring to attach on the inside of the shoulder piece that had slits for straps to pass through.

This held it up around each arm, and with one on each shoulder, cinched tightly with elastic, these would hold each other in.
Certainly with my mega-heavy shoulder piece this wasn’t pleasant, but after reducing shell thickness and infill density I got one shoulder to 700 grams and the other to 500 grams. My printer also broke through this, and I had a lot of failures.
I’ll discuss sanding and painting below.
The jetpack
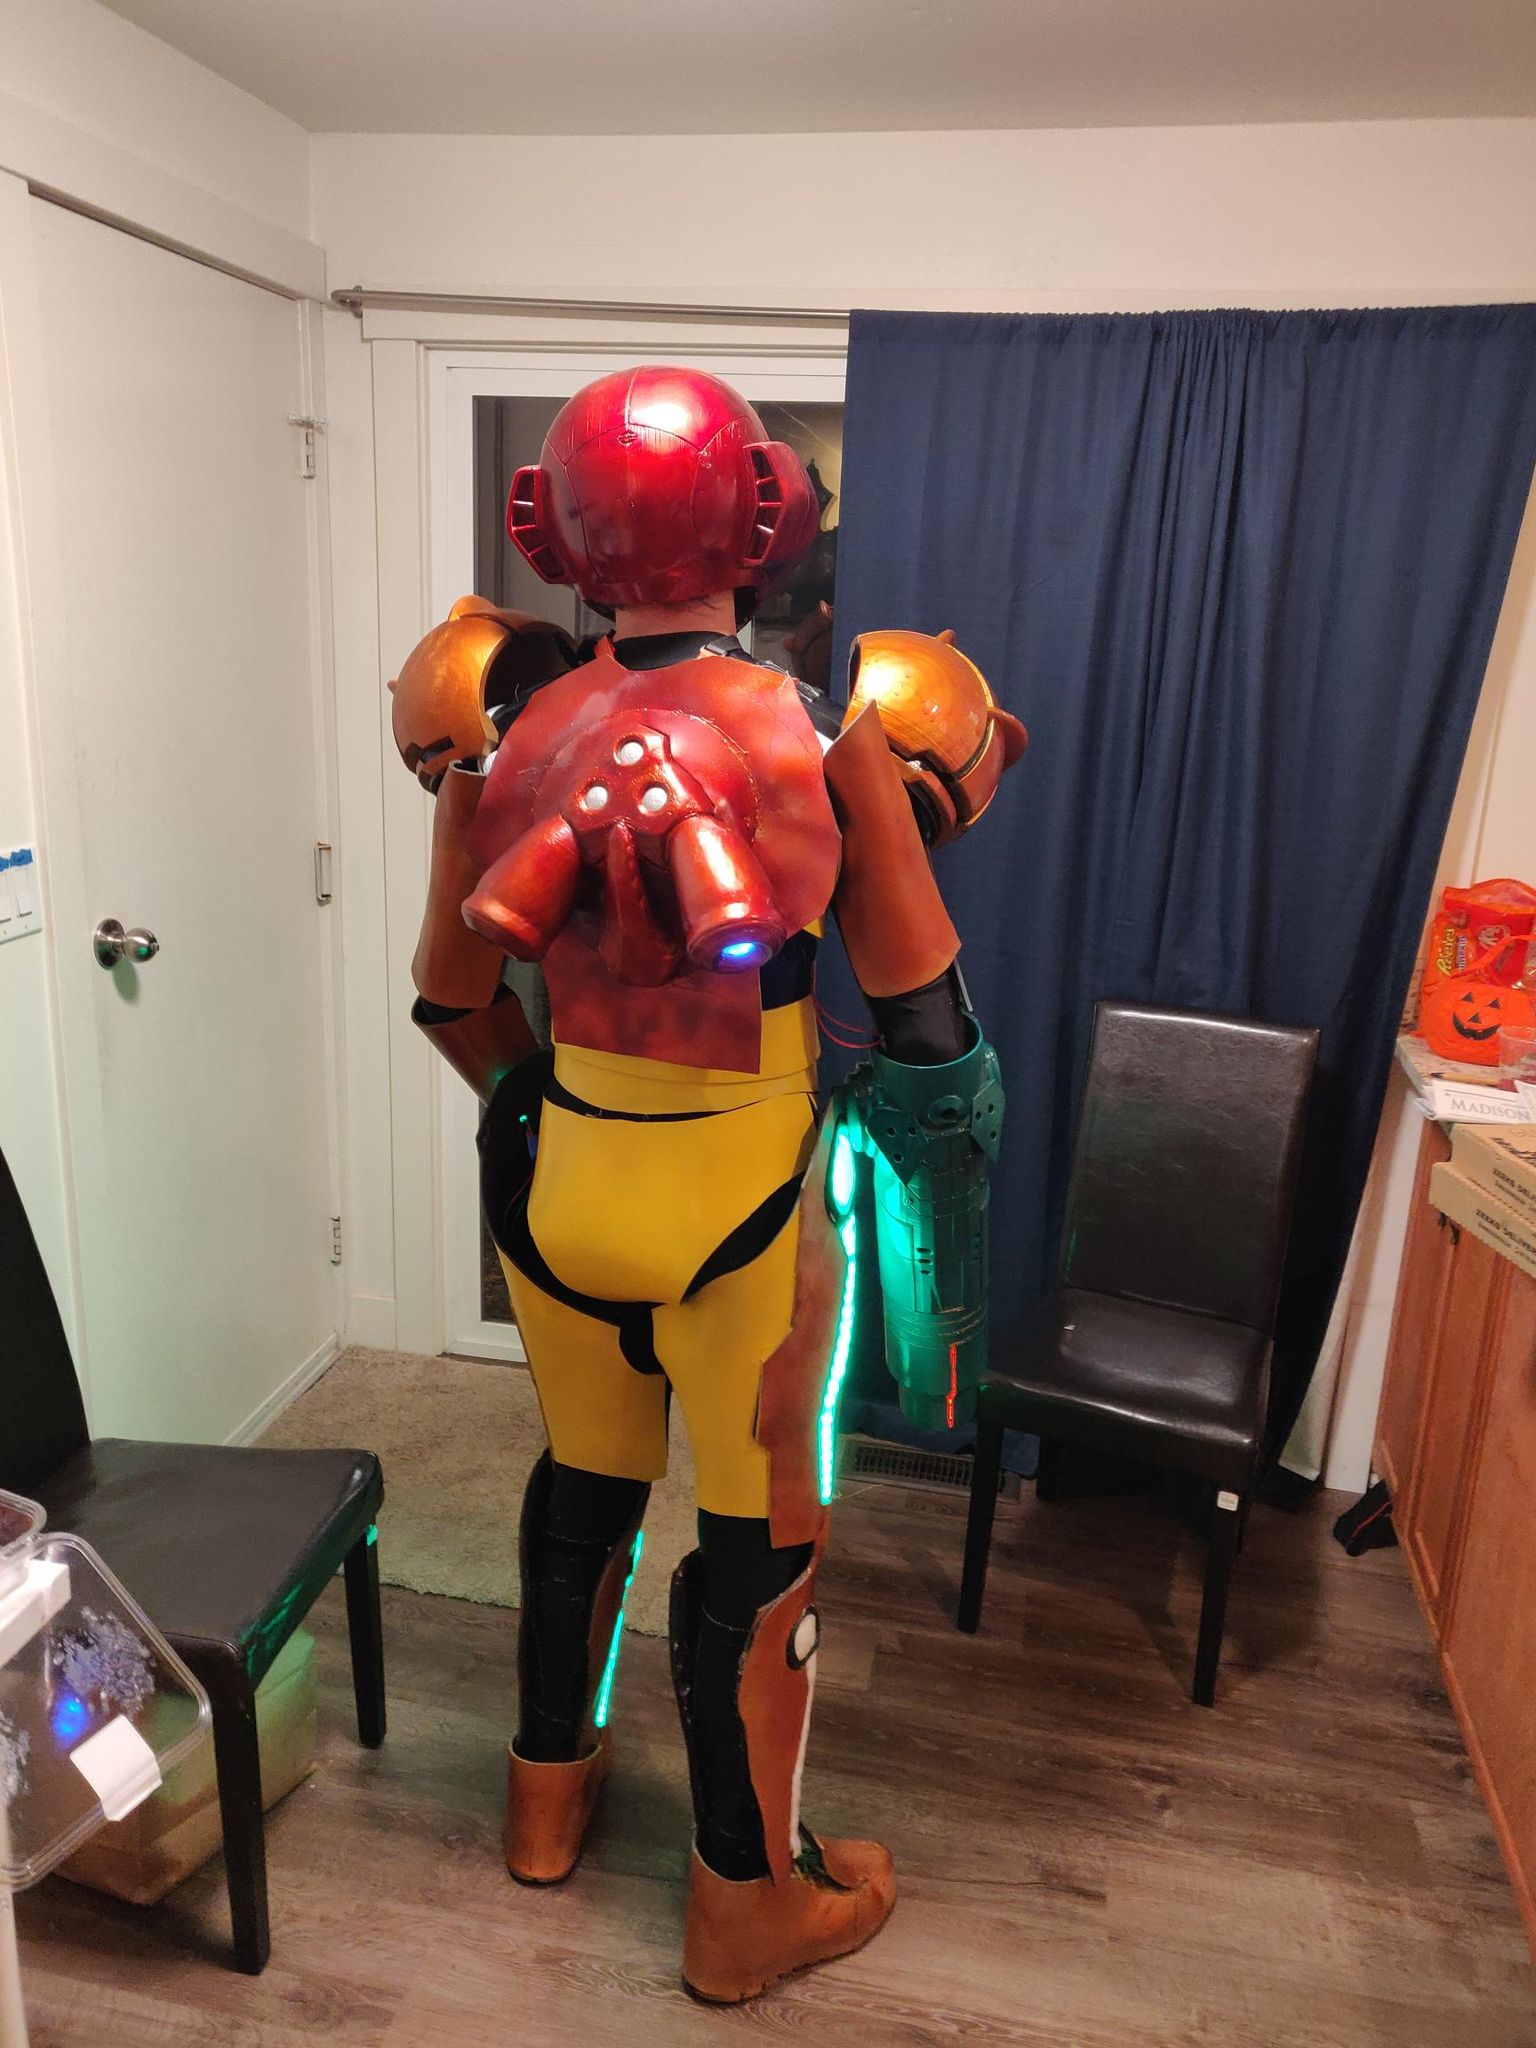
Take a look at Samus’ back:
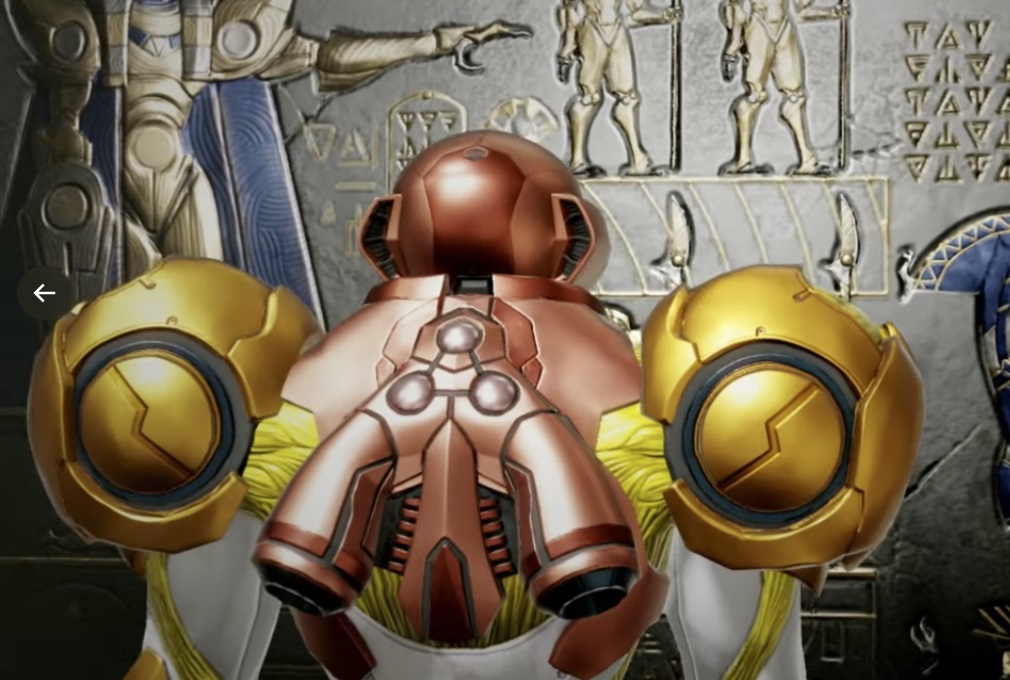
That’s a jetpack. Or at least I’m calling that a jetpack. I found a full model of Samus from Metroid Dread, which has a slightly different jetpack to Metroid Prime, but it was complete. I cut away the rest of the model to just have the jetpack pieces:
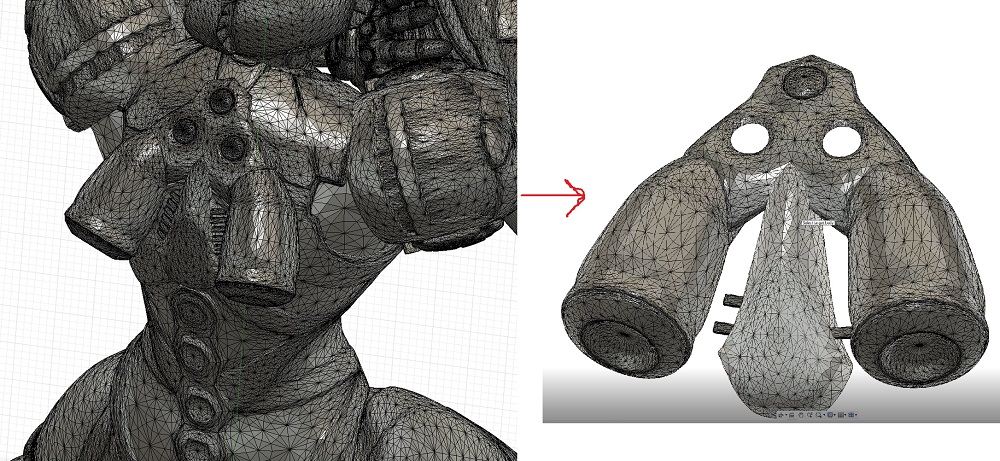
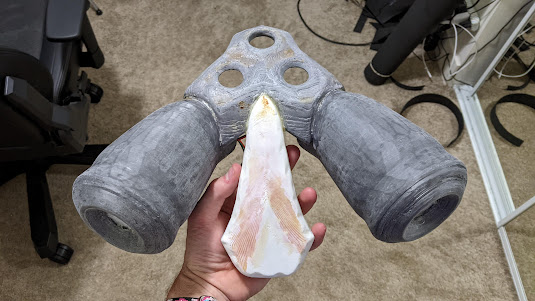
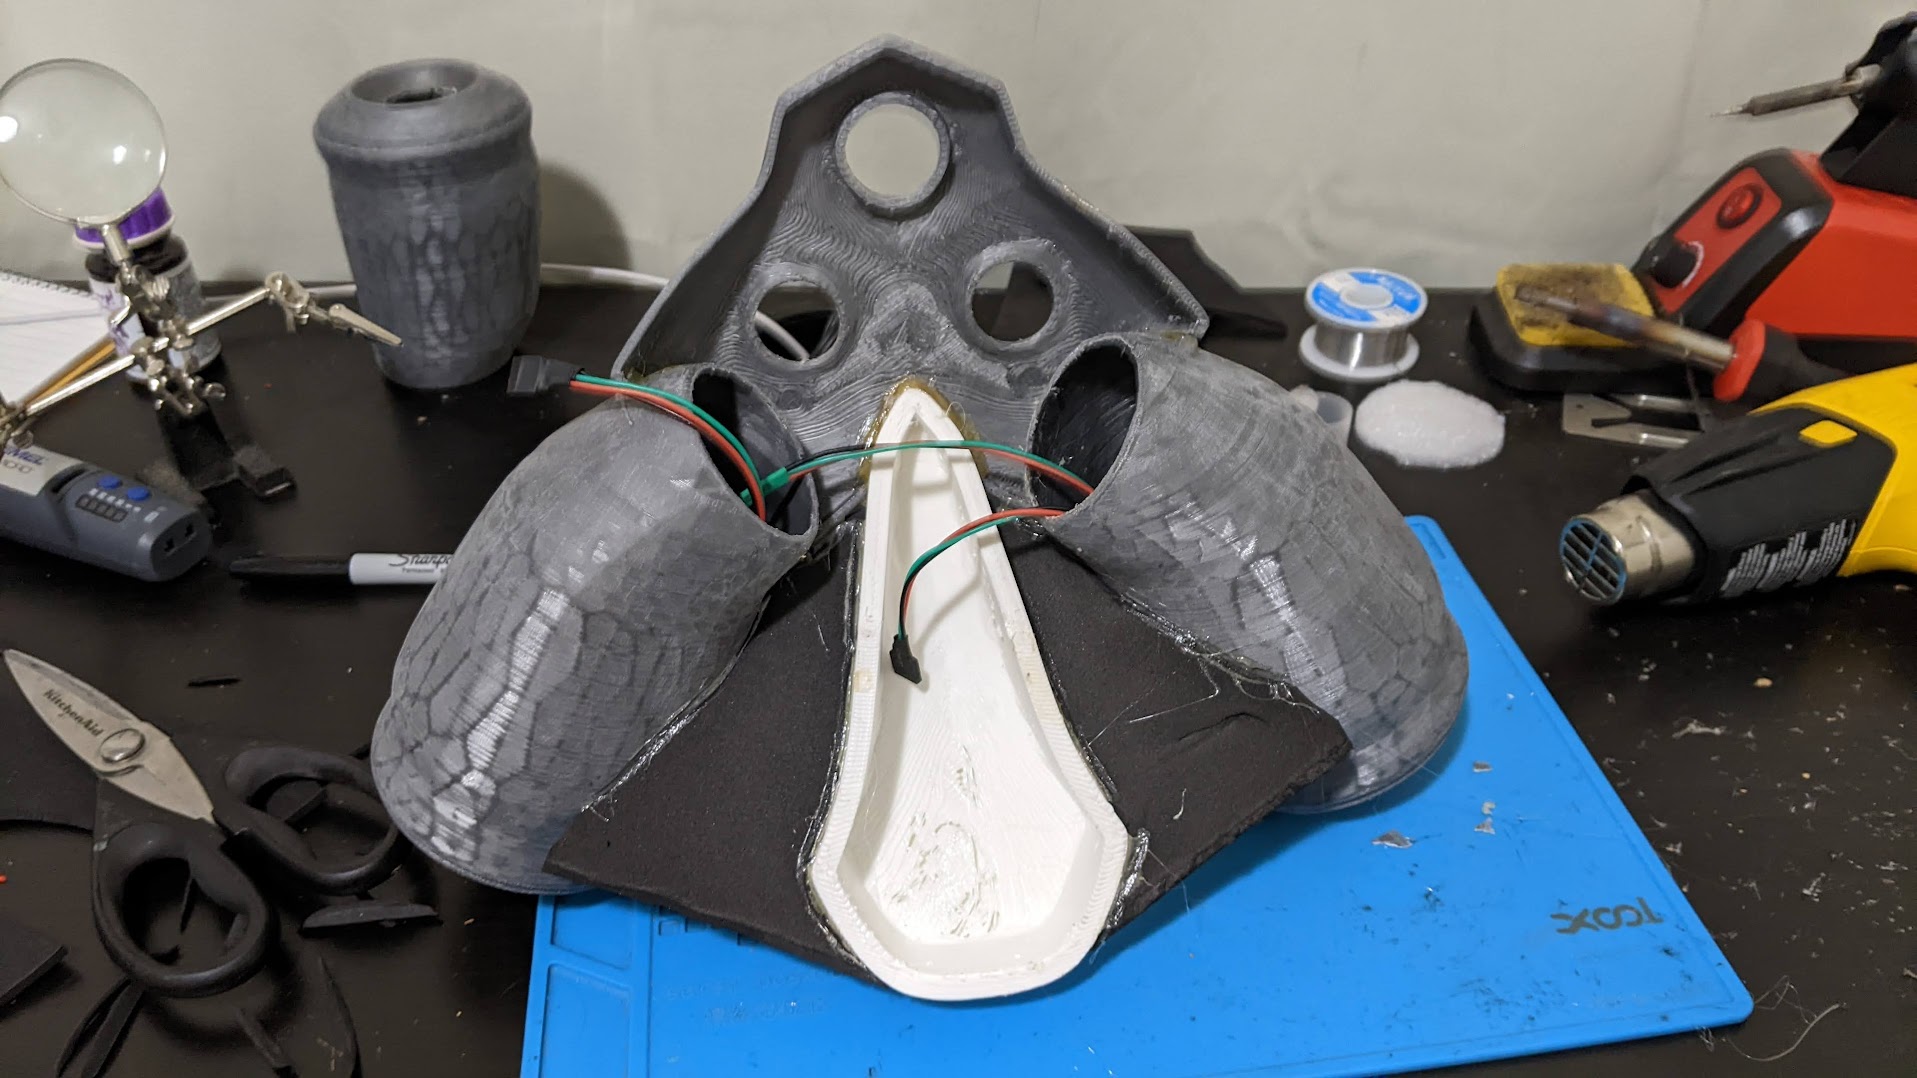
and thankfully these were all individual pieces in the model so I could print them separately. They came out a little thicker than I preferred, due to some messiness converting from a infinitely thin mesh to a full 3d body with thickness (a mixture of blender and fusion, in an existential crisis to find a new word that means combining), but it worked out. These pieces are just hot-glued together, and then glued down to a sheet of foam:
Forming the foam
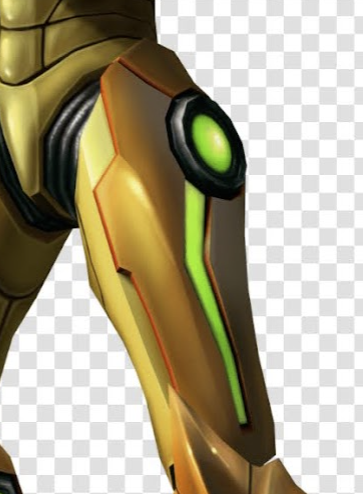
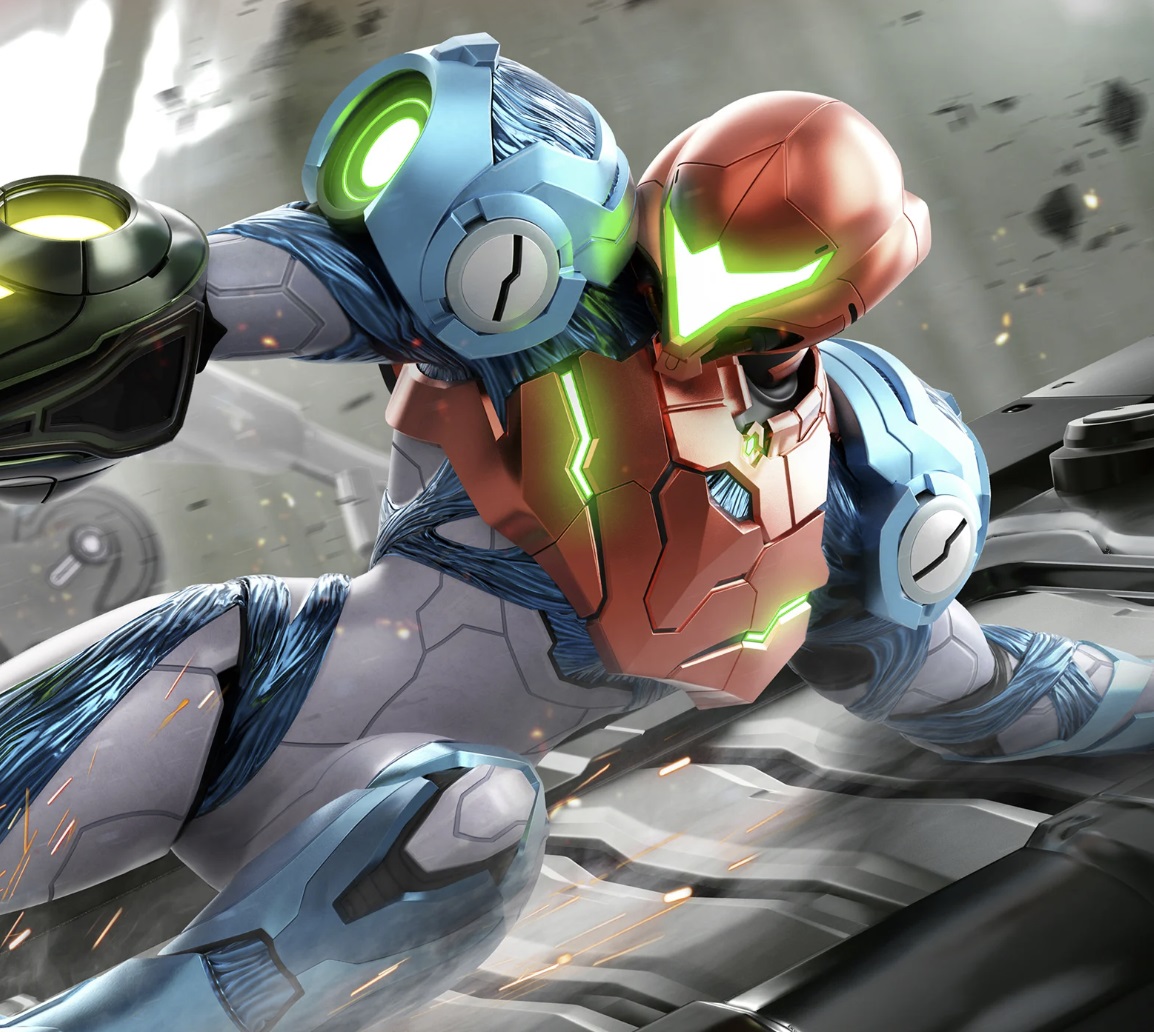
Let’s look at Samus’ armour again:
There’s black lines throughout the armour (see the abdomen in particular), which I’m going to use to break up the armour into distinct pieces, eg. a shin piece, a thigh piece, many chest pieces, etc. Given that this is all attached to a black onesie, the black background is taken care of; I just need each brightly coloured piece. The green will be LEDs, and the rest just formed from EVA foam.
The shins
Shins seemed the easiest starting point because I can reach my shin with both arms - this serves to help form the heated foam around my shin, and also meant I could prototype quickly with sewing various attachment methods. To get the shape I just … looked at a few images of Samus while holding foam sheets around my leg in various ways, and drew and cut repeatedly until I had the basic outline. A little refinement later, and I had what ended up being close to the final version. This was two layers - one to hold the shape, the other to add depth so that the LEDS could be inset into the foam.
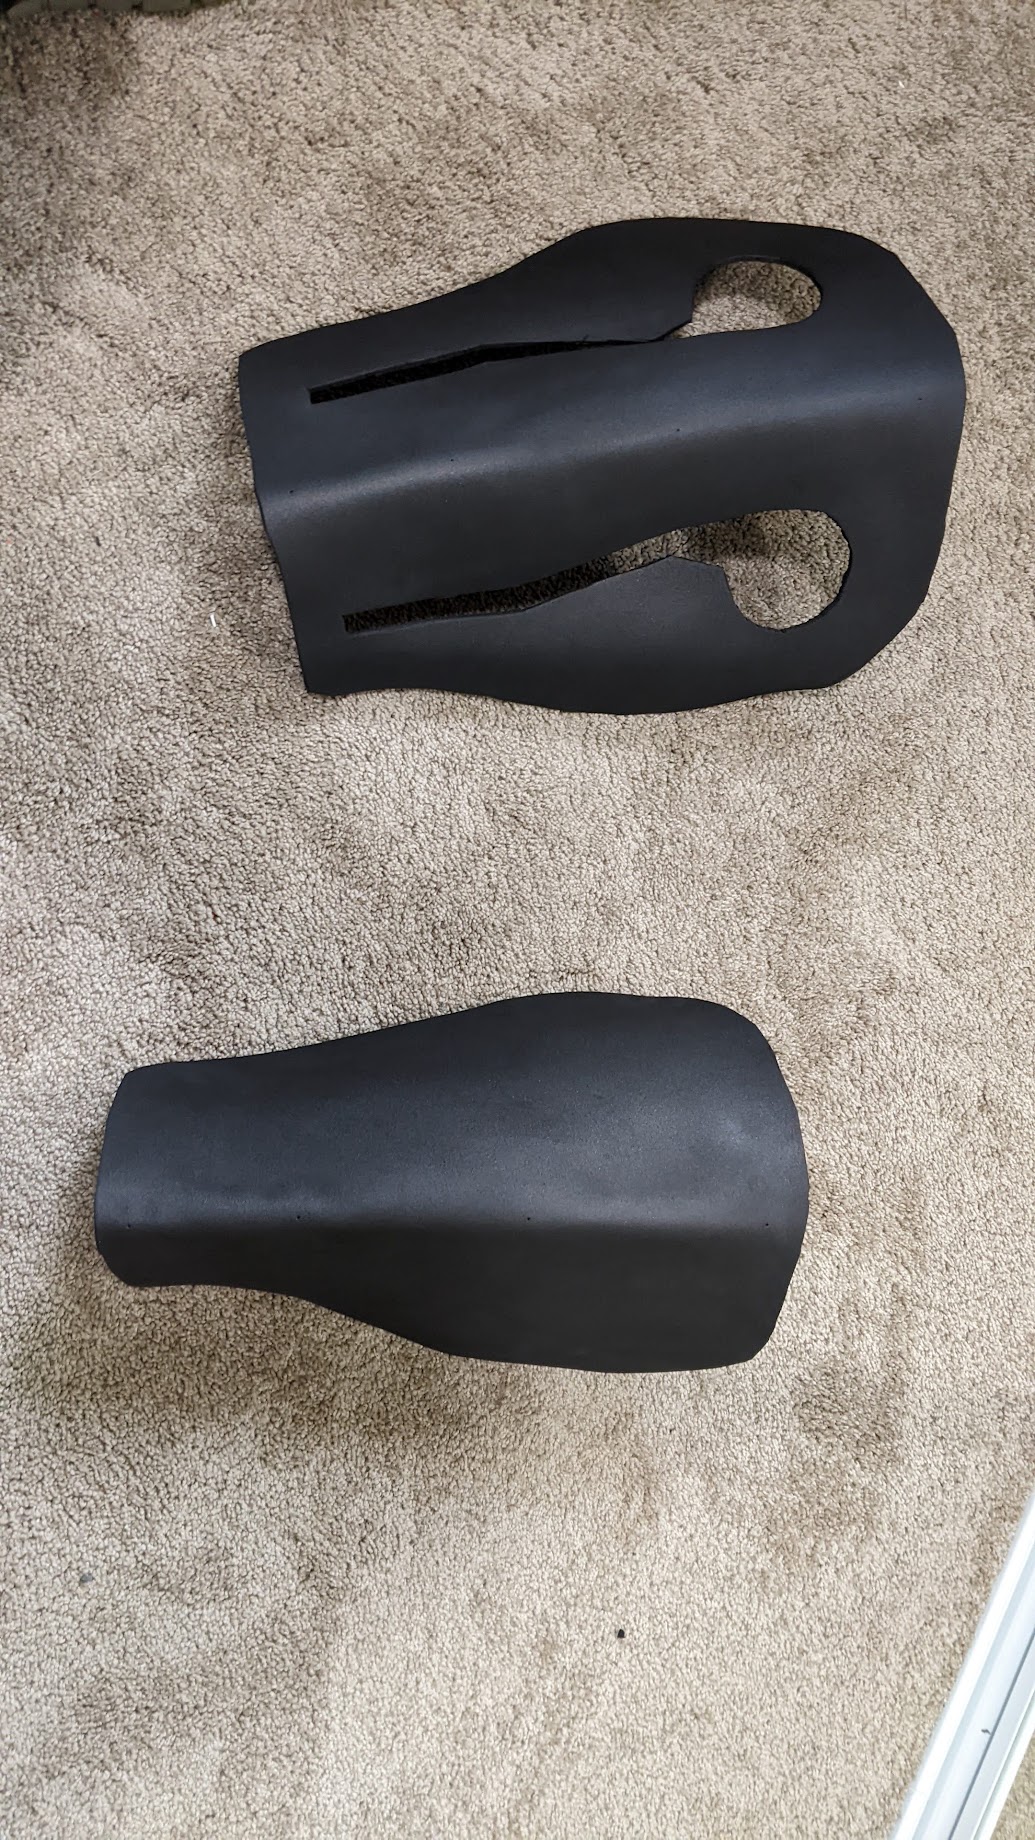
I had 4mm foam, so attempting to inset the LEDs into one sheet would have been a nightmare. Once I had the shape sketched and cut out, I started prototyping attachments by attaching the foam with metal pops:
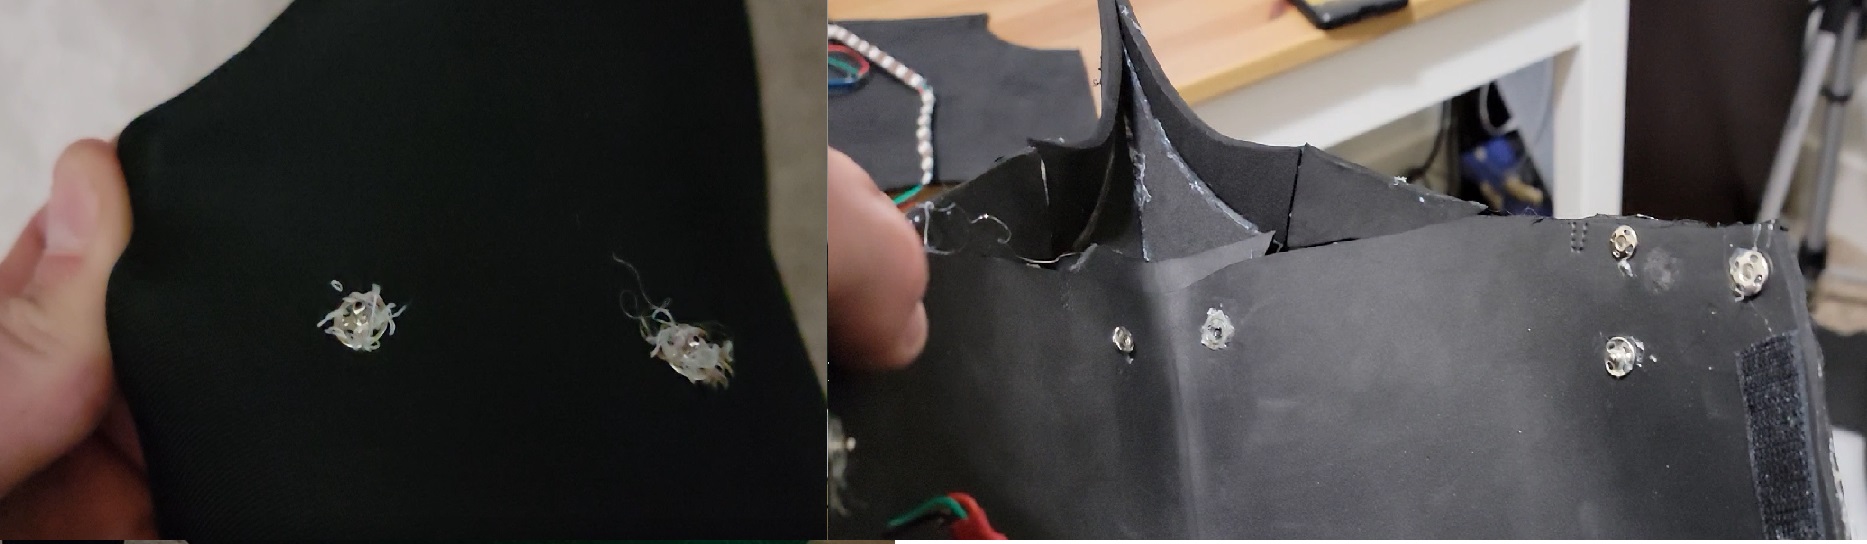
but as these were just singular points of connection, at the back of my shin where the tension was greatest (since that’s where the foam shape deviated from body shape the most) the foam pulled away at those points. I switched to velcro, where there’s far more surface area, and this held close to my leg a lot better. I also redid the shin piece: the first time, I glued two layers of foam together, cut out a section for the LEDs, and then heat-molded it.
This was bad, for one main reason: the two sheets are already glued. They have a relative position to each other. The heat-molding tries to warp each piece separately, but the glue resists since the two layers would otherwise be shifting relative to each other. For the second attempt, I cut two pieces, heat-formed them around my leg, and then glued them together. This held the right shape a lot stronger. The knee piece was made from two halves, glued together to get that curved shape, and then glued bending forwards on the top of the shin piece. Finally, although I now think this was a mistake, I had slit the outer sheet of foam on the shin to reduce the strain and let that black line down the front of the shin be visible, but then I decided I didn’t like this, and covered it up with EVA foam putty. This looked kinda awkward, but I didn’t want to redo the whole shin.
The thighs
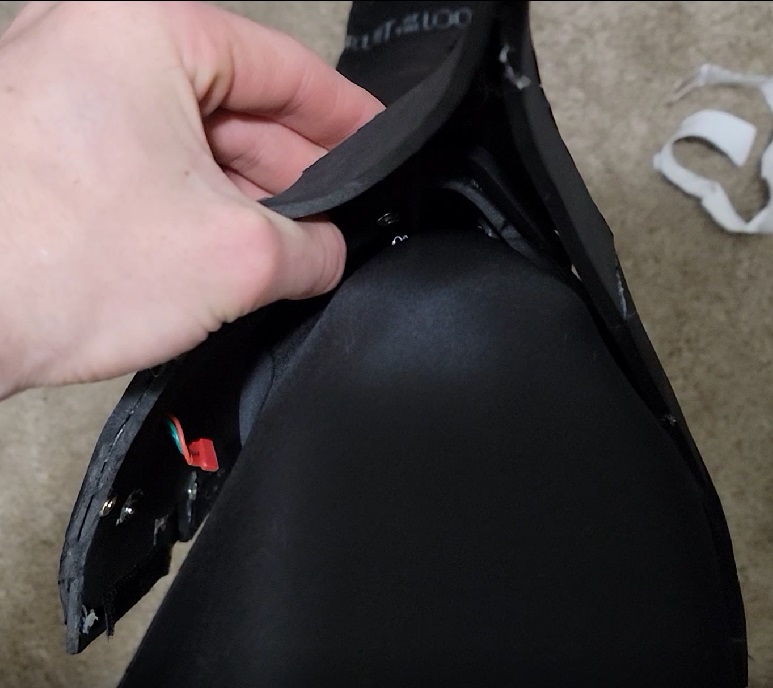
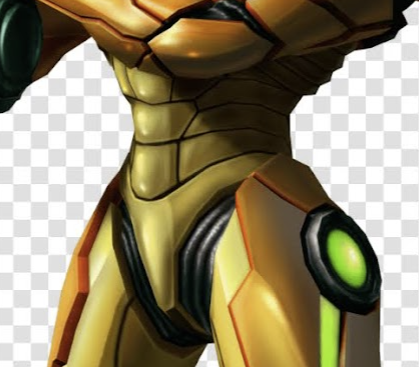
The thighs were next, because my mind was still on the legs and they were still easier to work with than, say, one arm, where by nature of the location I had to do it single-handedly (pun intended). Let’s look at the thigh pieces:
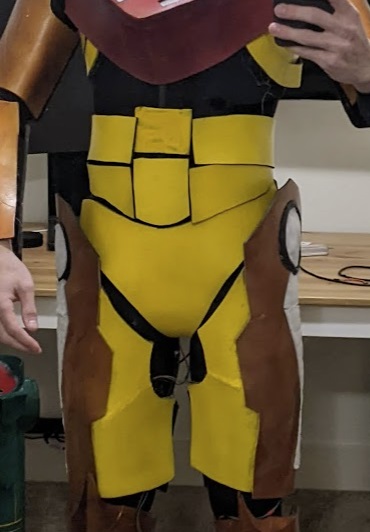
There’s an underlayer of yellow, and that orange piece on top of it that sits on the outer thigh, with the green light embedded in. This looks similar to the shin pieces, LED-wise, so I copied that strategy of putting a second layer over the first. I shaped both to my leg, and then glued them together. This took … just a lot of hours of iterating and pinning pieces together, reheating, trying again, and so on. Thighs are an utter pain to shape to. Finally, I got something resembling the shape I wanted:
Now to do that for the other leg, and we are good. One unfortunate side-effect of the thighs is that they are heavily shaped for when Samus is standing … and therefore they get squished in a sitting position and/or come off. I solved this by just not sitting when wearing this.
The abdomen
Moving up the body, we have the lower torso. This consists of what amounts to a large foam nappy, and what I implemented as several wraparound-the-waist pieces with some smaller squares at the front. Here’s what’s on Samus:
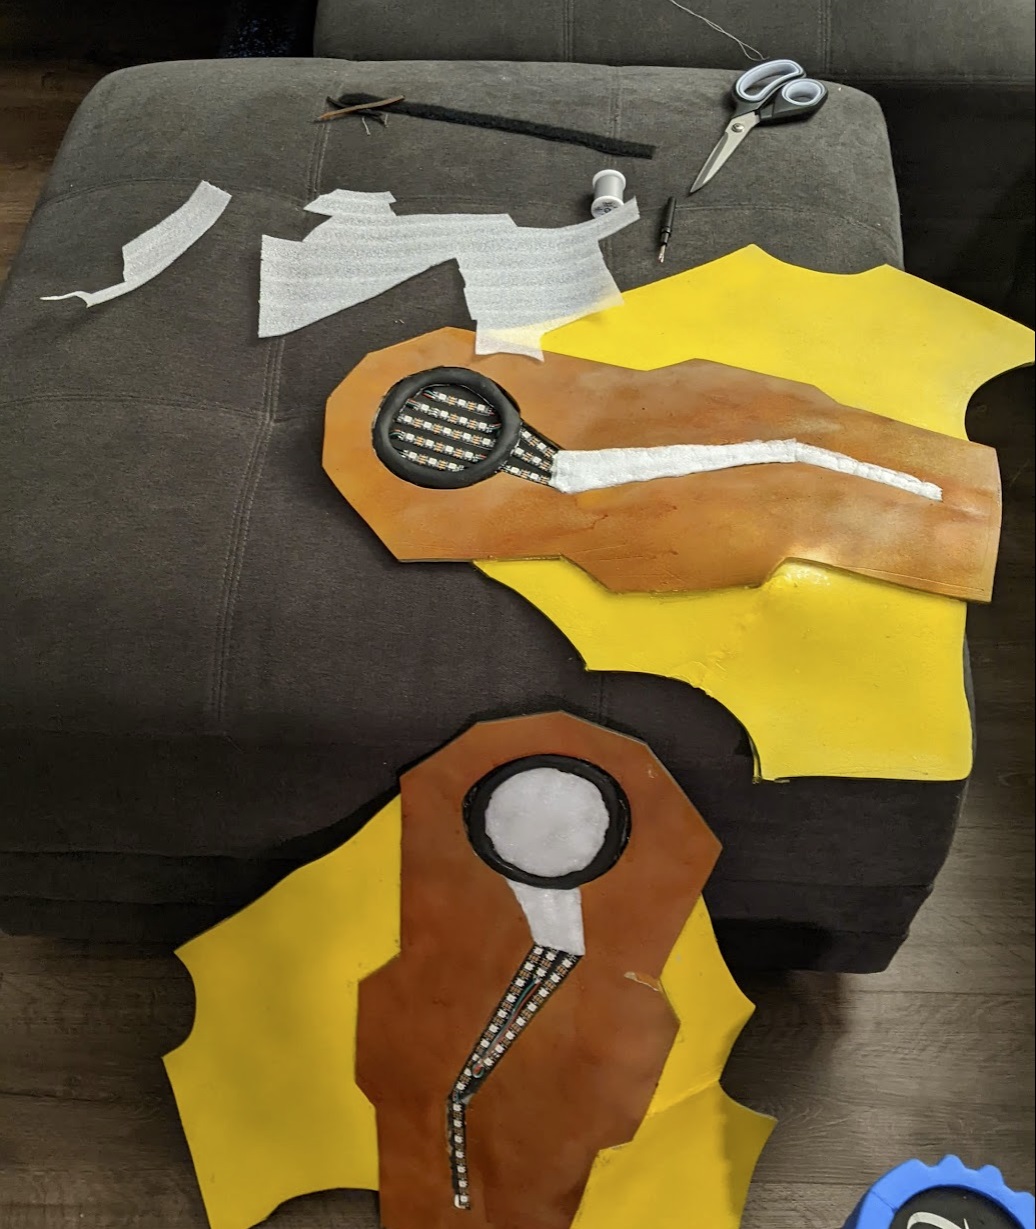
And here’s what I made:
In my mind it all fit together a lot smoother than it came out. This was pretty simple, not much to talk about. I did a couple of iterations per base shape, and then repeated the strips up the chest. This photo is missing the final touches I did around the chest.
The arms
Not much to say here either. These pieces just need to wrap around both upper arms, and my left forearm. I made two pieces for the upper arm to get a natural black line; I semi-regret that now as one single wraparound piece is functionally easier. Ah well.
The chest
The final of the major foam pieces, the chest. Take a look:
This breastplate is typically very triangular from a side profile; I wanted to capture that, and also the low angle it has down the front. What was difficult was the transition from there to the rest of the chest. I cut a piece of foam that resembled a bib to sit around my neck, and a bracing piece that would attach at a right angle to this to prop it up from my chest:
I didn’t want to spend too much time on this; at this stage, I was finding foam development really difficult to get as exact and good looking as 3D printing (it’s possible, experts do it all the time. An expert I am not). So I was sufficiently happy with this basic shape, and just honed the edges and added velcro until it sat right:
Then added slits for lights ….. and realised only too late that I’d somehow made this incredibly unsymmetrical. Ah well. Mistakes happen, and I was rushing this.
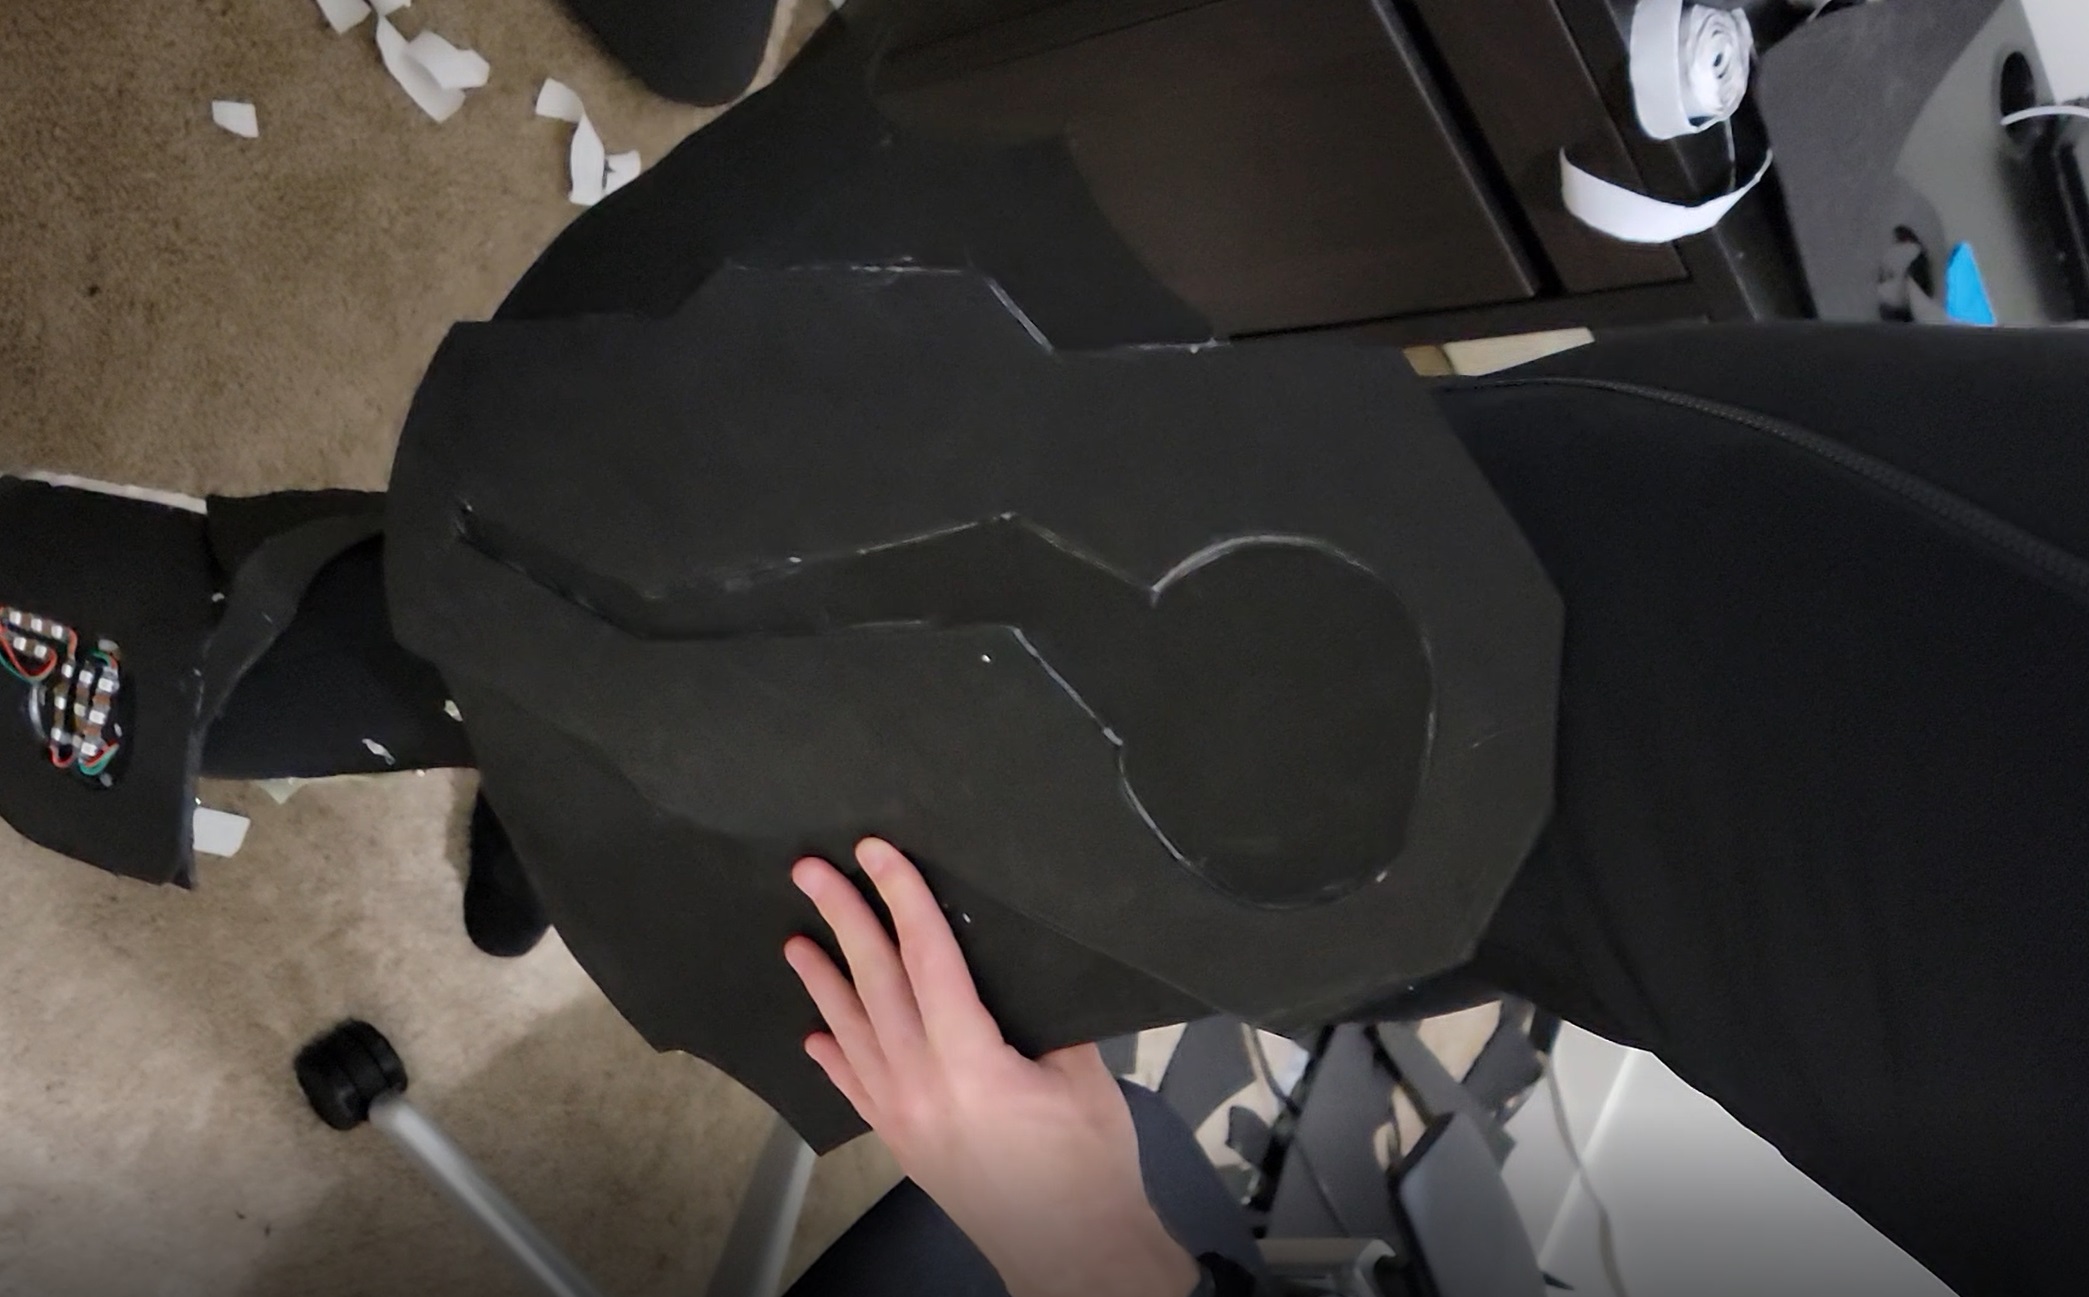
The back
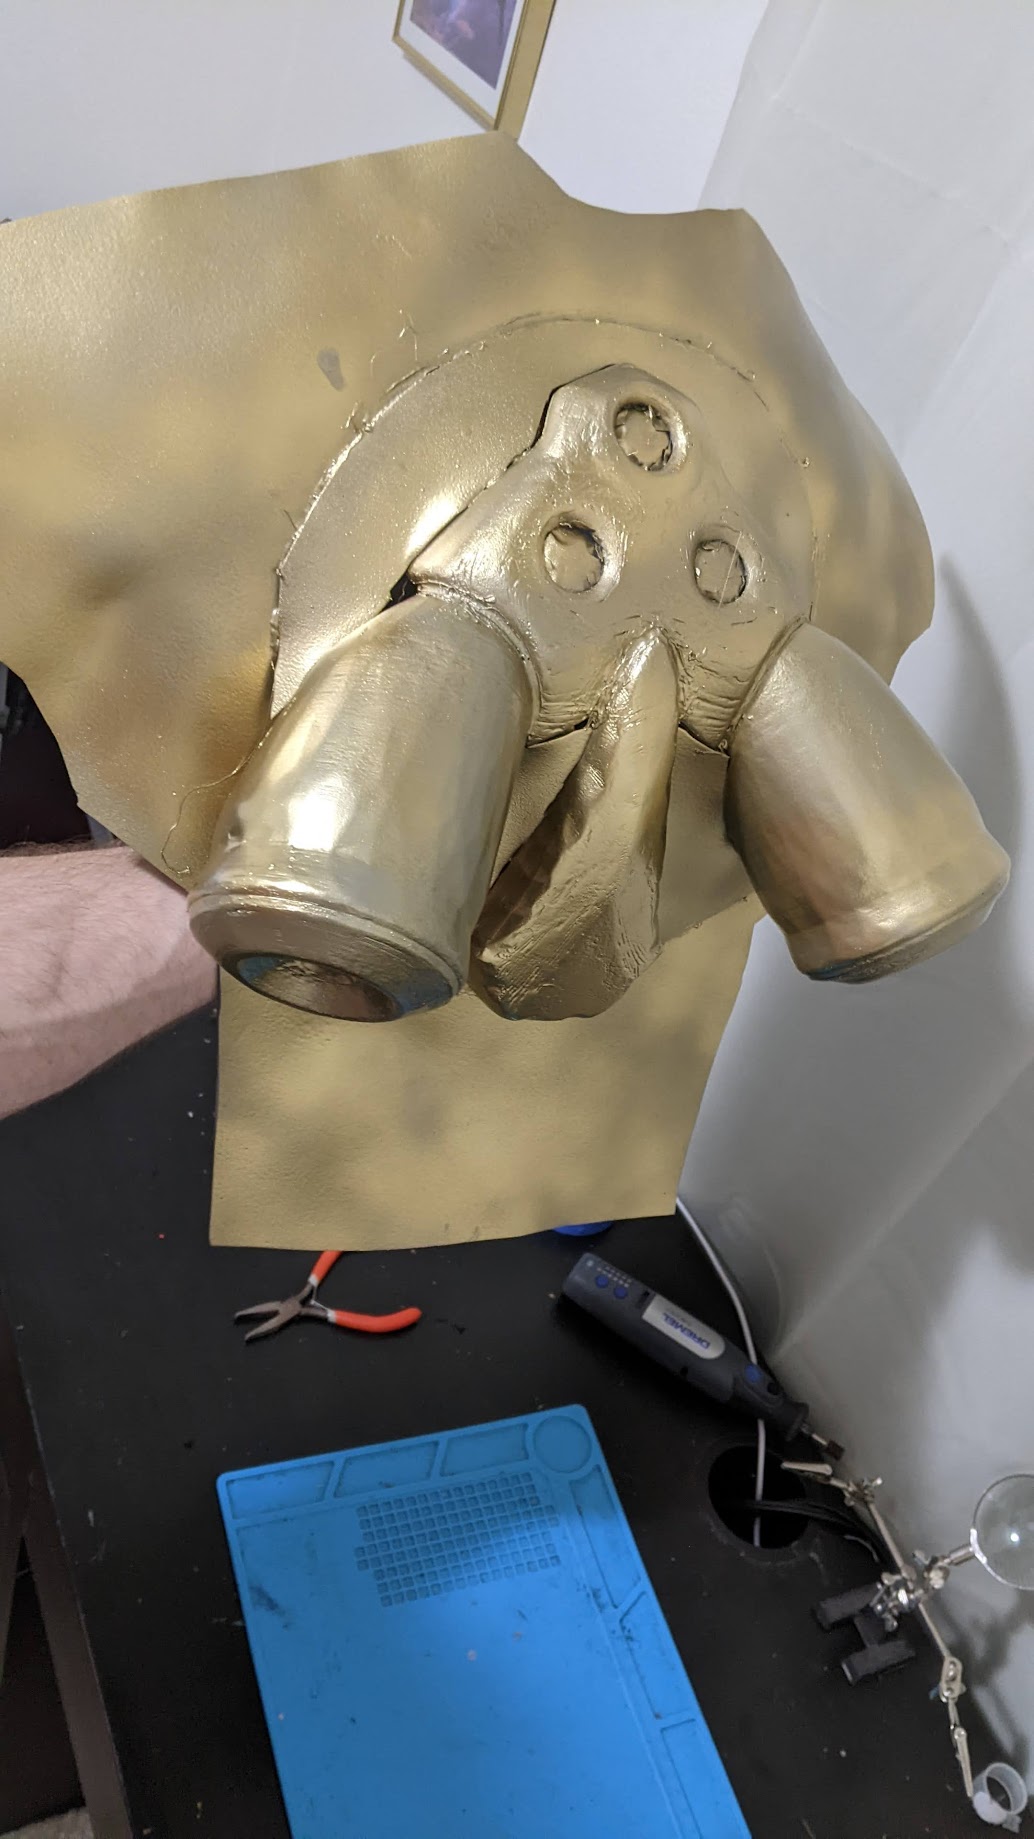
This is covered above in The Jetpack section. I just lay down on a piece of foam while a friend traced my outline, and then held this against my back and cut it down and heat-moulded it. Then I glued the 3d printed jetpack to it.
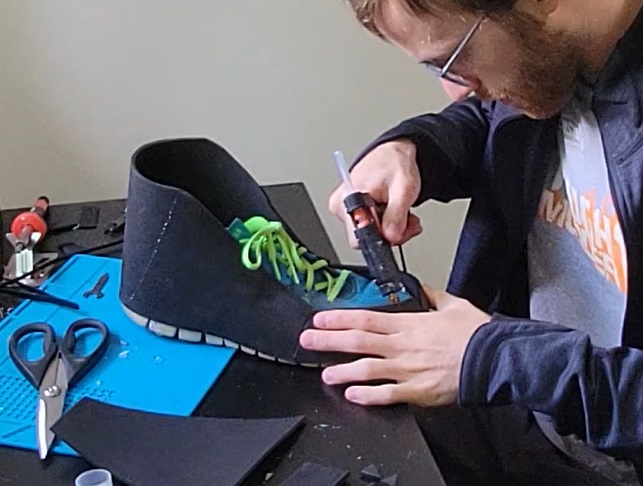
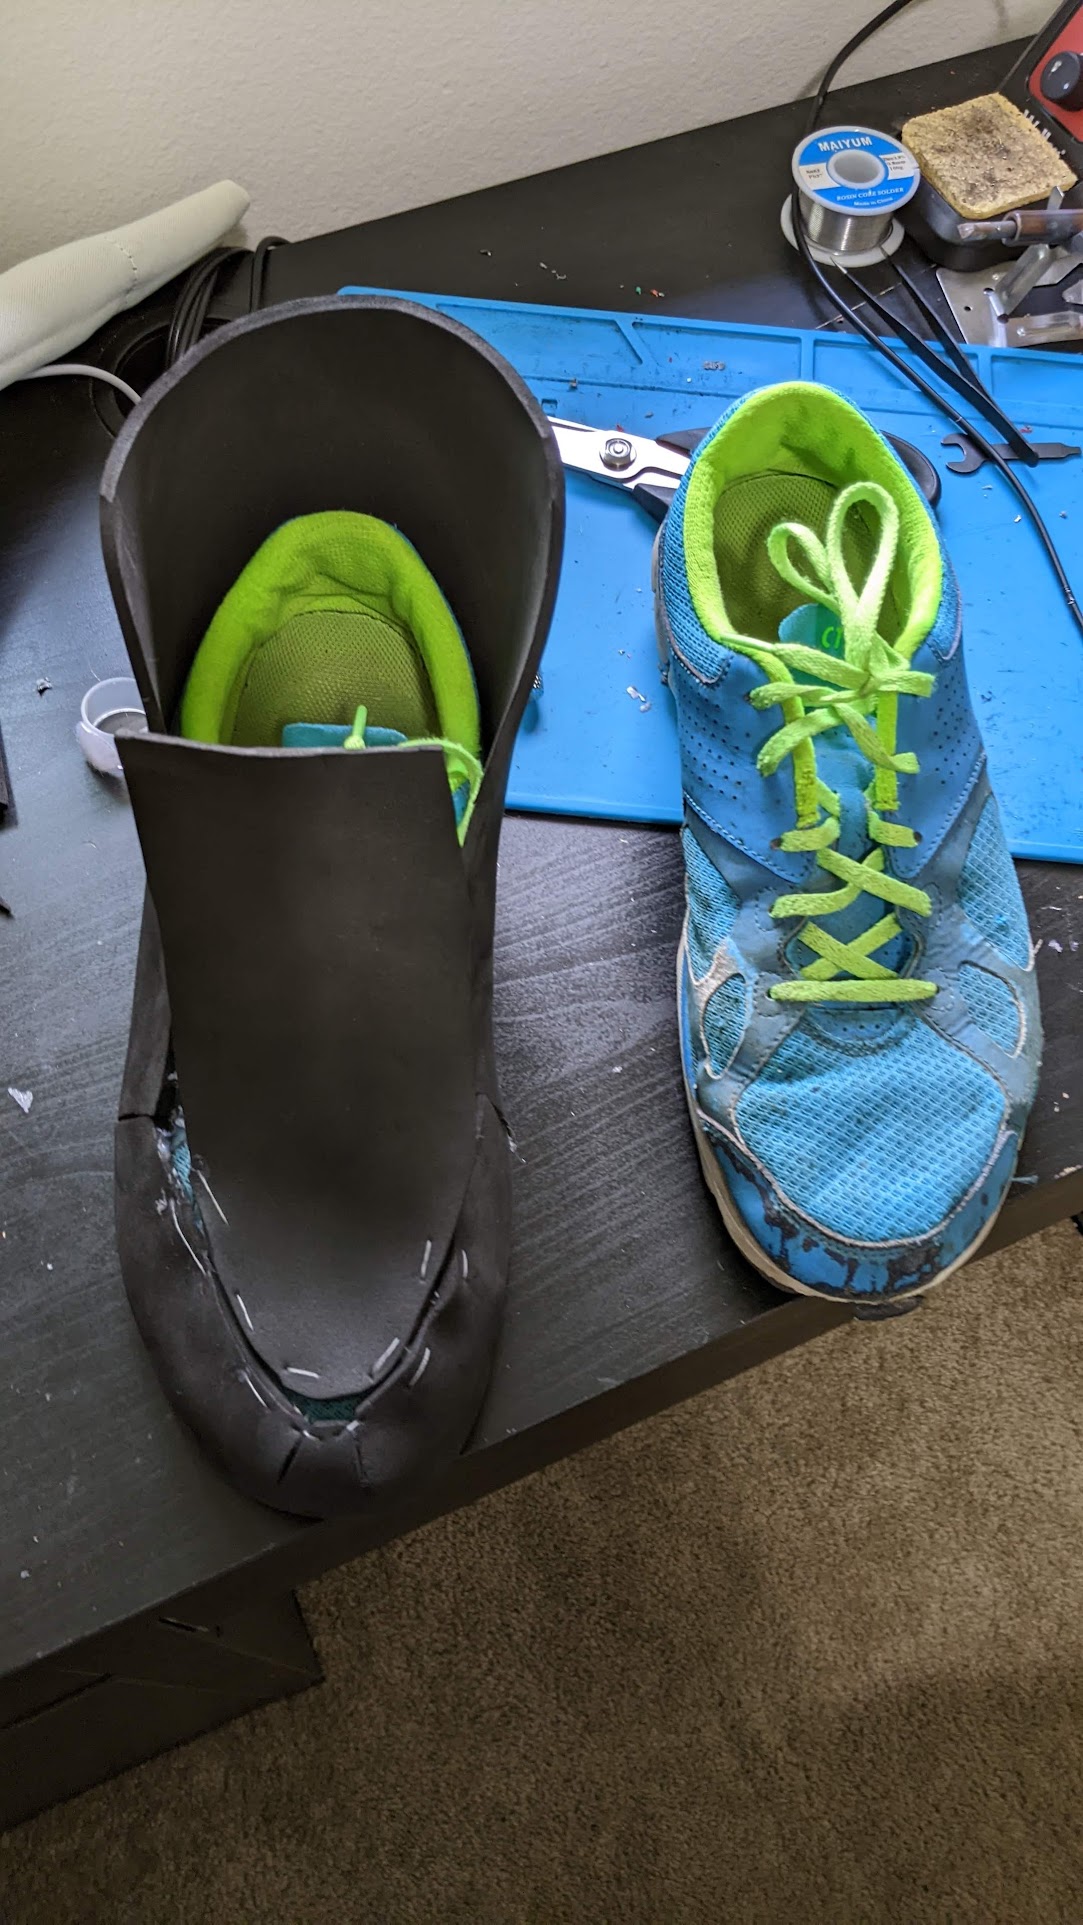
The shoes
To get the shoes Samus has I had some spare sneakers that, to be honest, were a little past their use-by date. I formed some foam pieces to fit around in the basic shape of Samus’ feet, added a tongue cover that folded forwards so my feet fit in, glued/sewed these down … and it worked just fine:
Lights
Looking at Samus from other games as well as the above images,
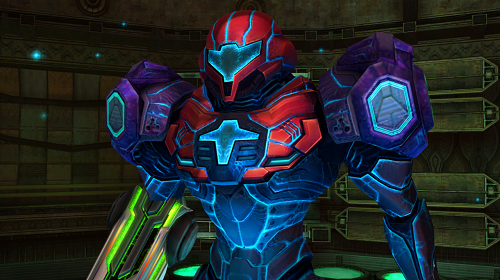
Her suit lights up. Of course it does - it’s a high tech space suit and these are practically required to light up by the Laws Of Science Fiction. I’m mostly focusing on her Prime suit, and while I see many small points of green light, I’ve picked just a few main ones from the Metroid Prime suit:
- Both sides of each shin
- The outside of each thigh
- two panels on the chest
- The ends of the jetpack. Not strictly canonical, but I’m not making a jetpack and not lighting up the exhaust vents. That just Simply Is Not Done.
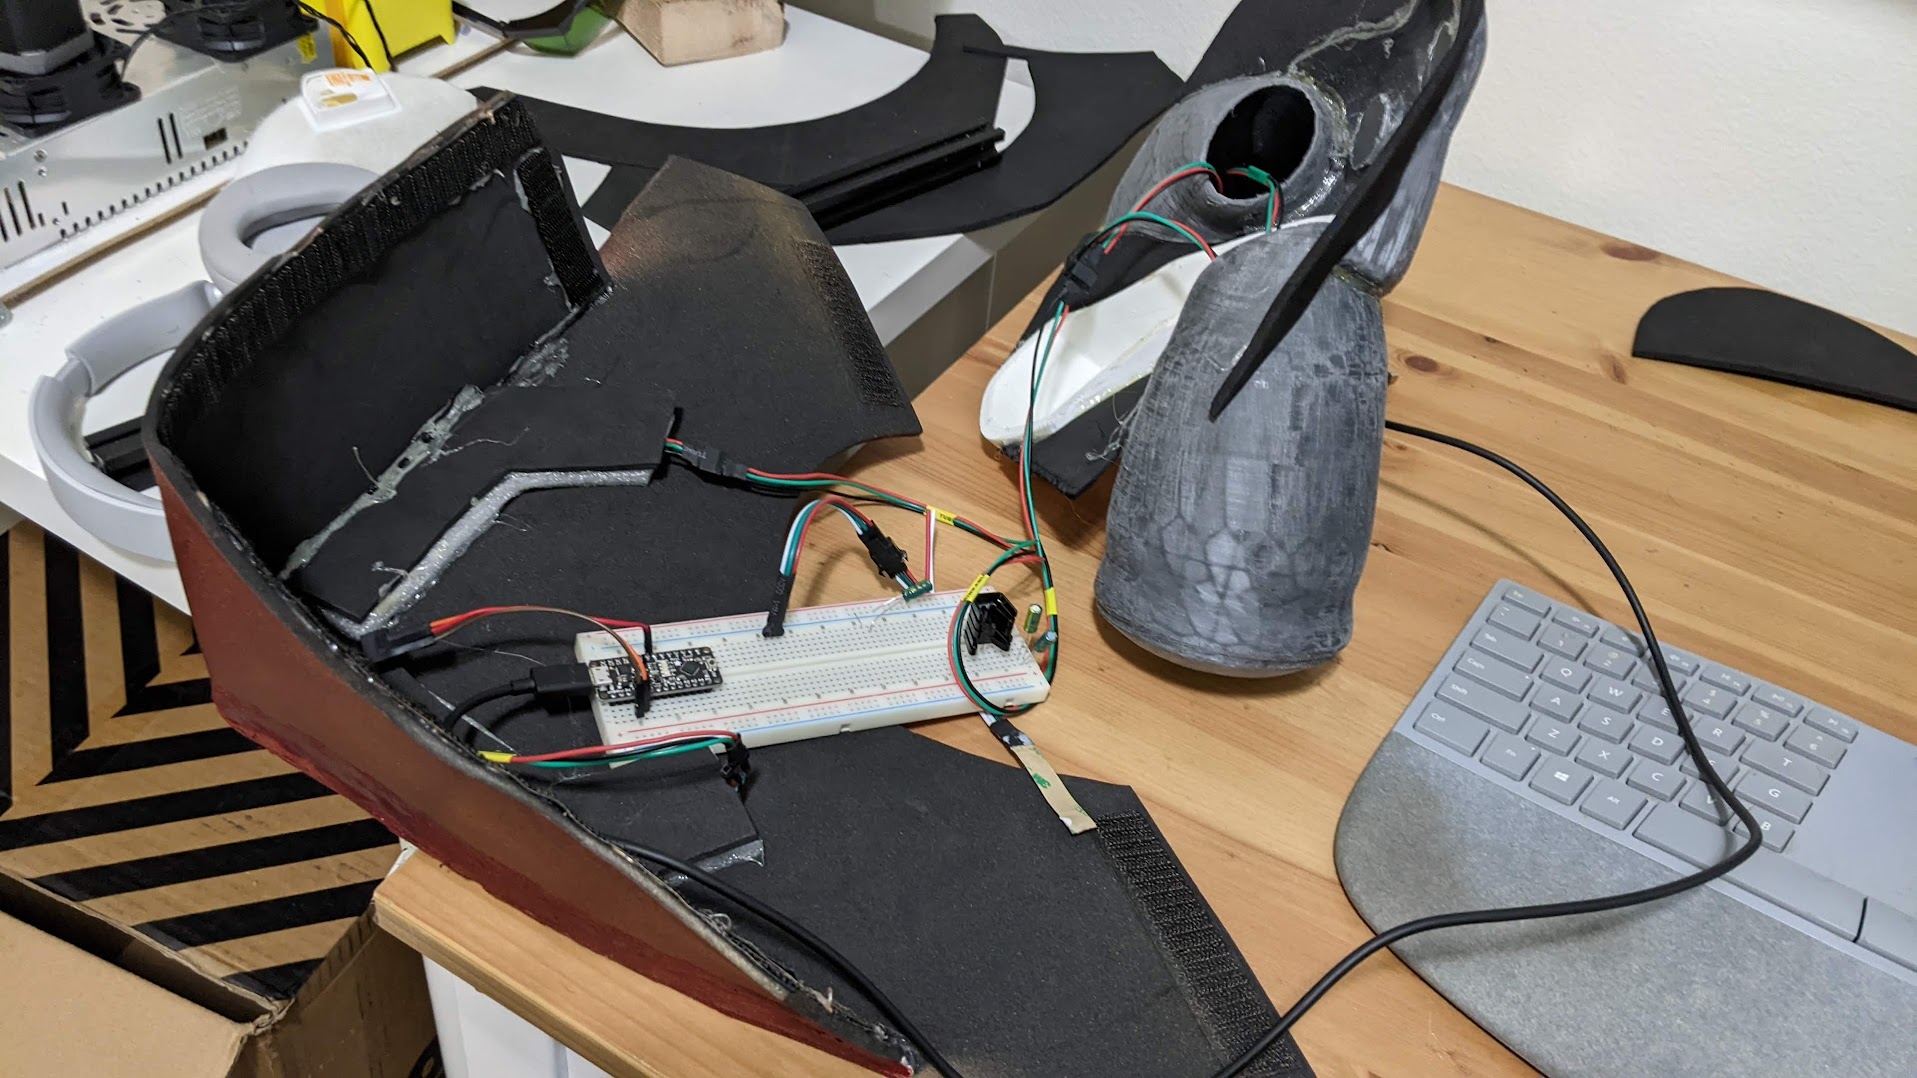
I used RGD strip LEDs, WS2812s - the same I used on Samus’ arm cannon. These were to be run from an Arduino that I would hide in the chest piece, and run power and data wires down my right arm to the cannon - so I could set the brightness, pattern, and anything else I wanted, from the controls on the arm cannon. At the start, I just set static colours - green for every LED except jetpack ones (specifically numbered LEDs along the strip), which were blue.
Attaching to the foam
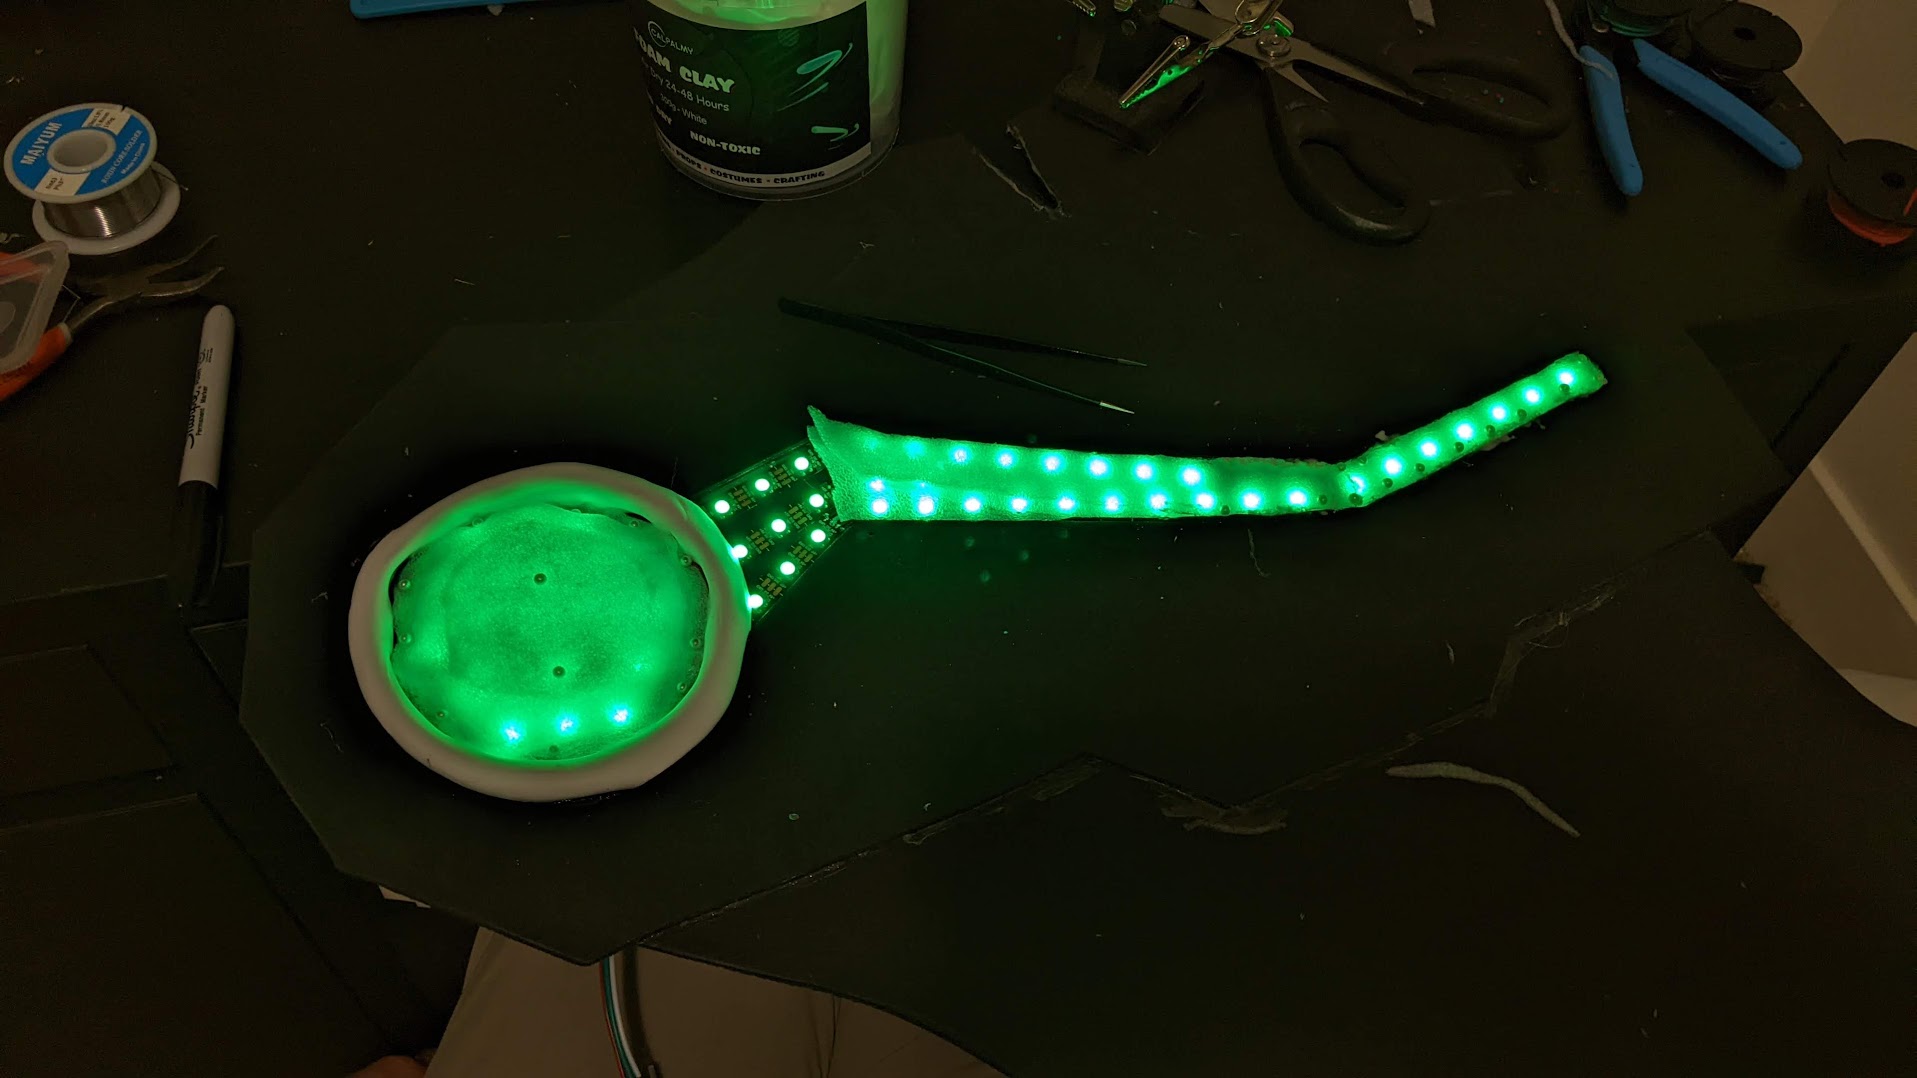
I wanted the LEDs to be diffused through some material. Samus’ glowing green armour parts are a consistent colour, not single dots. I tried covering the LEDs in EVA foam putty, but this barely diffused them - I could mostly see single points of light.
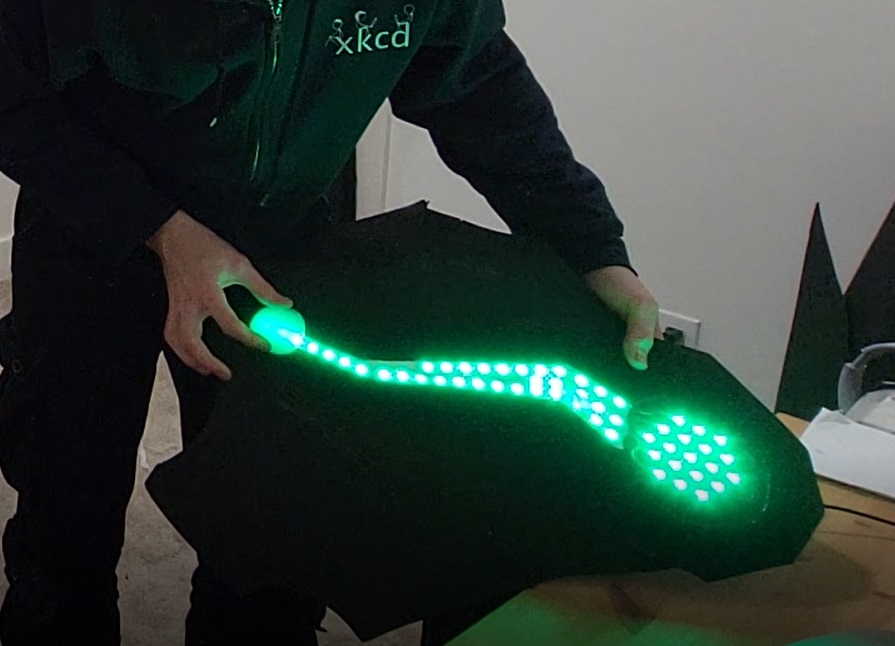
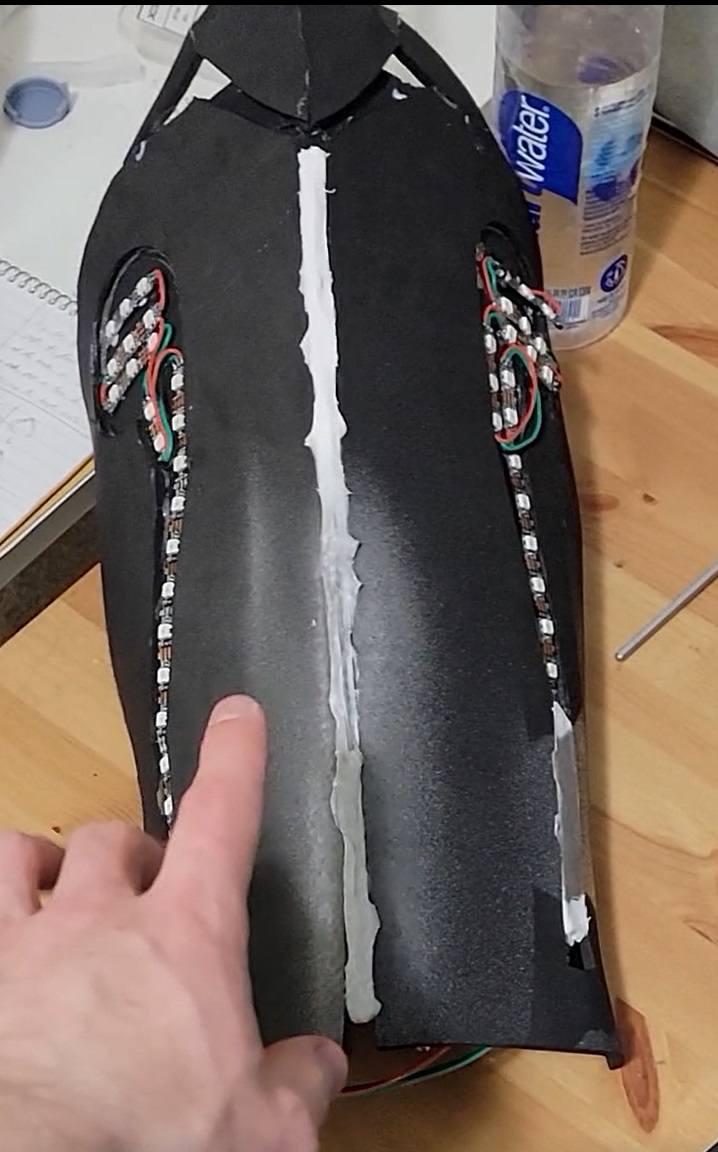
Then I tried more rigid packing foam. When thick enough this worked really well and I used it on the chest and the jetpack LEDs. But on the legs this was hard to cut into a good shape, and I had about 2-3mm of thickness to work with. Didn’t diffuse enough. Then I found some thin sheets of packing foam that I could cut and layer. 6 layers diffused enough but was too thick, so I went with three as a compromise and I think it looked alright. You can still see single points, but they are more diffuse than the EVA putty (I’m not sure the camera is capturing this well though):
But how to attach? I tried gluing the edges in - hot glue melted through the diffusing foam, and superglue appeared to just crack. In retrospect, I should have designed the shins with this in mind; I could have made it so that the packing foam tucked between the two layers of EVA foam around the LED cut-out area of the shin. Given that I didn’t do this, I decided eventually to sew the packing foam cover on, and this actually worked! Threading through the bottom layer of EVA foam and holding the edges of packing foam down, up and down the sides of the cut-out area:
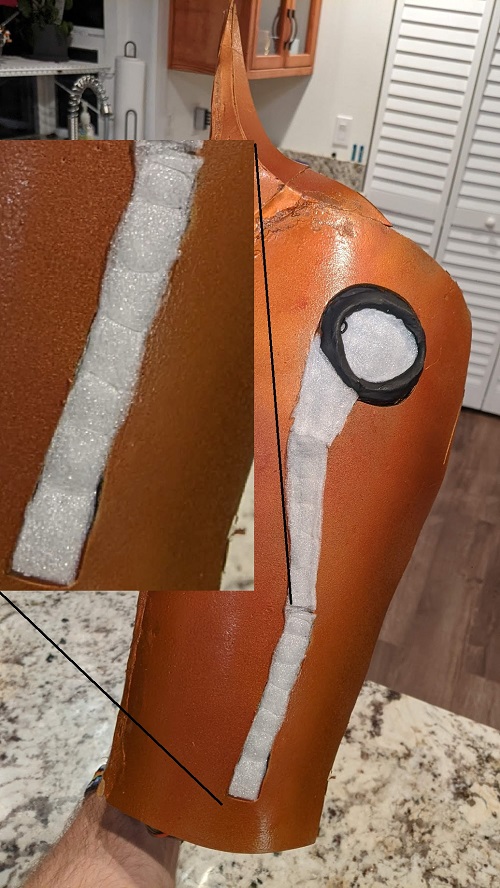
It held the packing foam down tight enough, and I could tuck the edges in a bit! Excellent!
Paint
As I’ve written about in the Samus arm cannon write-up, the helmet, shoulders, and jetpack underwent the process I know for prepping and painting 3D prints: sanding with 60, 120, and then 240 grit sandpaper, several layers of primer, an undercolour, and finally the outer colour. I’ll go into detail about the colour specifics here, rather than the process.
The Helmet
Following Frankly Built’s tutorial, I used Dupli-Color Red Metalcast over an undercoat of Krylon gold.
Not following Frank’s tutorial, I was a little heavy-handed with the red. You really just need to dust this on, and have a lot of patience. Small layer by small layer. I got impatient that not enough was coming out, and then … sprayed too much, and it started to run, and now I have run marks:
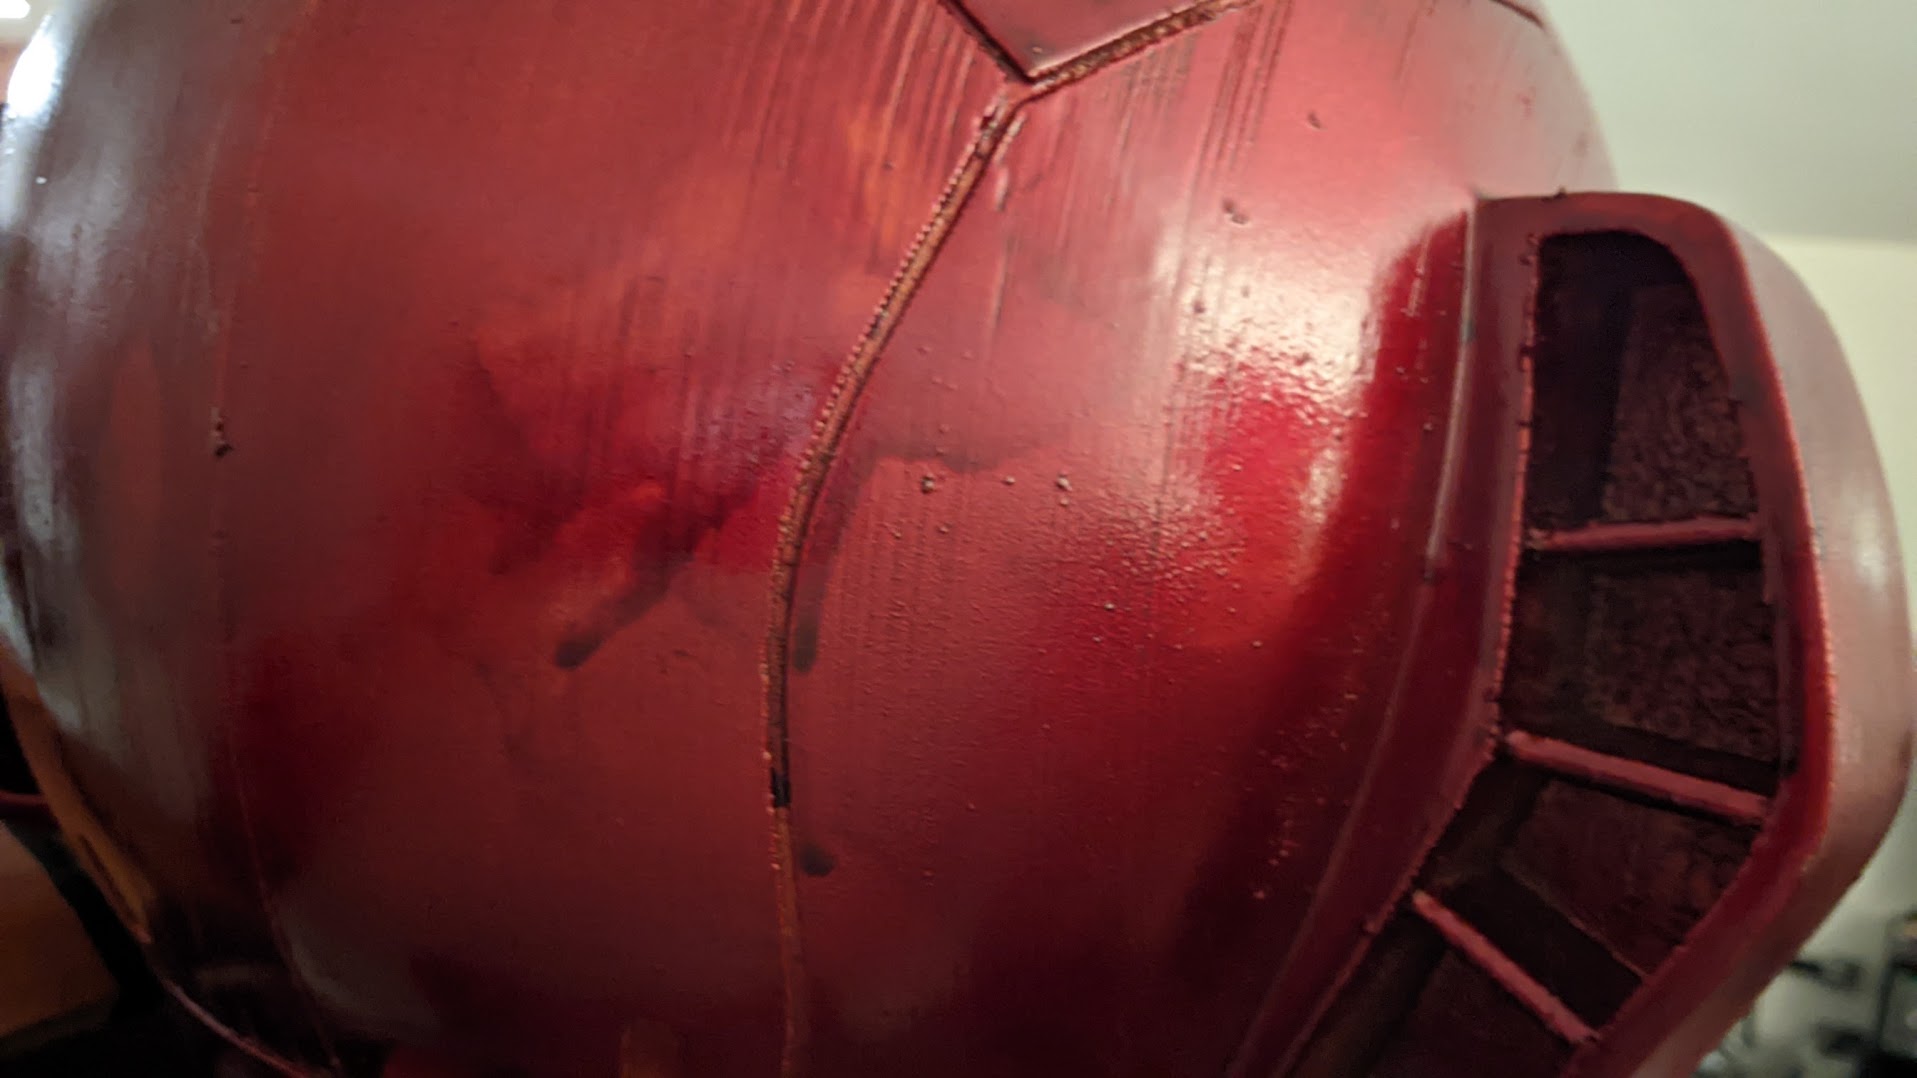
I could sand this off and start again on this patch, but … I don’t trust myself to not make it worse. There were also some print artifacts that no amount of filler or primer could remove (well, some amount, but an amount more than I was going to reasonably do):
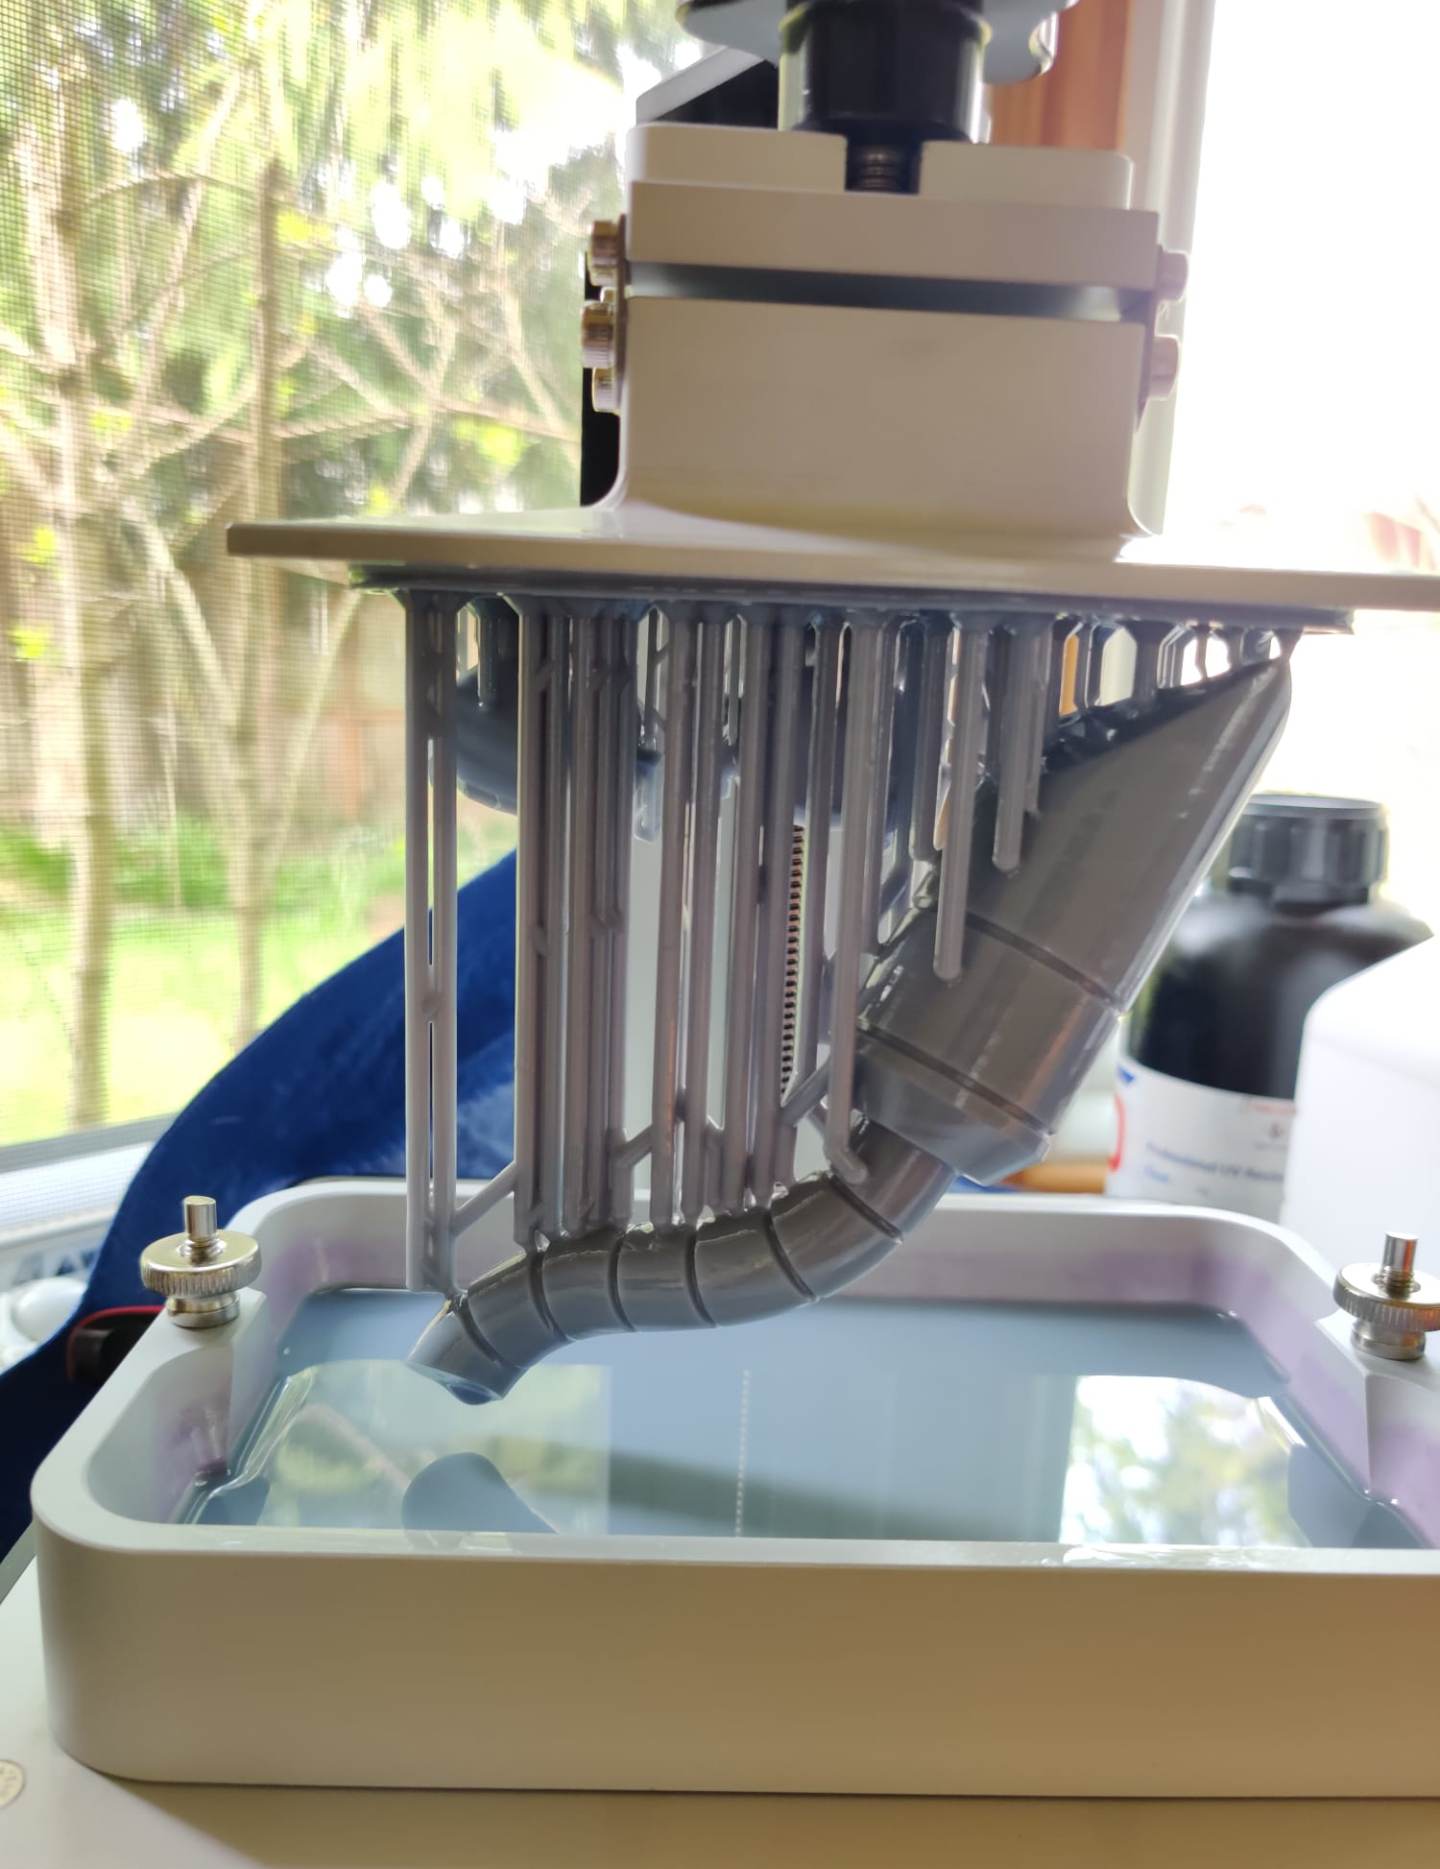
And this took so much time and material to print, that … I’ll live with this. In Frank’s video, he gets some artifacts, and just prints another whole dang helmet. He’s clearly more dedicated. The last painted pieces were the pipes on the front. These I SLA-printed - to keep that fine detail, instead of having to sand down a small tube - and spray painted, first with a couple layers of primer, and then a metallic silver. They just slotted into the front of the helmet, either side, and I got-glued them down
The Shoulders
Hoping that I’d learnt my lessons from the helmet, I tried to be lighter-handed with the paint on the shoulders. I hand-painted the inset channels black on the first and covered these in tape before doing several primer layers and an undercoat of gold.
On the other shoulder, I painted it all first and then hand-painted the inset channels later.
The final colour coat was Metalcast orange, and it took several very light layers over the gold for me to even see an effect. The metalcast red for the helmet had bled out from the can like nothing else, but this … was much sparser than expected, and I … got heavier handed due to impatience, and then the paint ran:
Ah well. It’s not particularly noticeable. I get impatient with paint, clearly. Unfortunately, while this paint came out sparser than the red, it also did not last long, and I went through at least four or five cans all up, which got … more expensive than I preferred. Finally, once all the orange and black was done, a clear coat to shine it up, and viola! It looked great.
The orange foam pieces
I had a considerable amount of back and forth for the orange pieces. Kamui Cosplay has a tutorial on how to prime EVA foam for spray painting which I tried, and I think I was a little heavy handed, or perhaps I was too close or too far? The plastiform layer didn’t feel like it did much, and I’m not sure why. So I just ended up doing some primer layers directly onto the foam, and then gold undercoat with orange metalcast over the top. One problem I ran into though was that I heat-formed the layers, then sat them down outside to spray paint - for hours on end. This meant that their weight naturally squashed them flat again, and when I bent them or reheated and bent them, the paint cracked a bit, like a hard plastic layer. Oops - maybe I should have used thicker foam? 4mm did seem thin … some things to consider, if there is a next time.
Some areas had to be corrected or patched up with EVA foam putty, since I’d made mistakes and cut bits out, or had aberrations from hot glue that needed smoothing over. Thankfully the putty painted similar to the foam.
The yellow foam pieces
These were simple. Just several coats of standard Home Depot yellow. Took me a couple of cans to get a yellow I liked, but no undercoats, nothing special. It didn’t stick too well, but these pieces were fairly slapdash regardless.
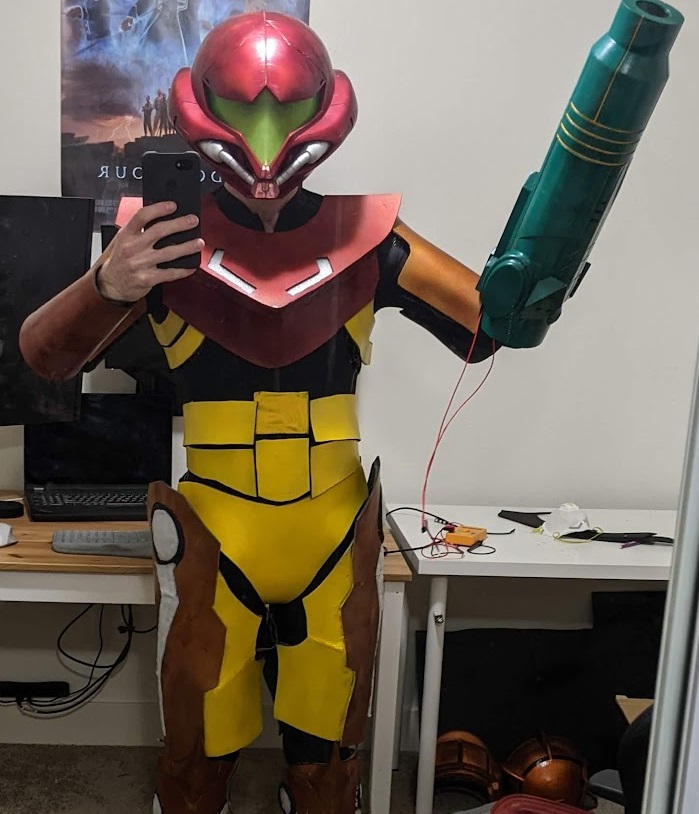
Final product
And here’s how it turned out!
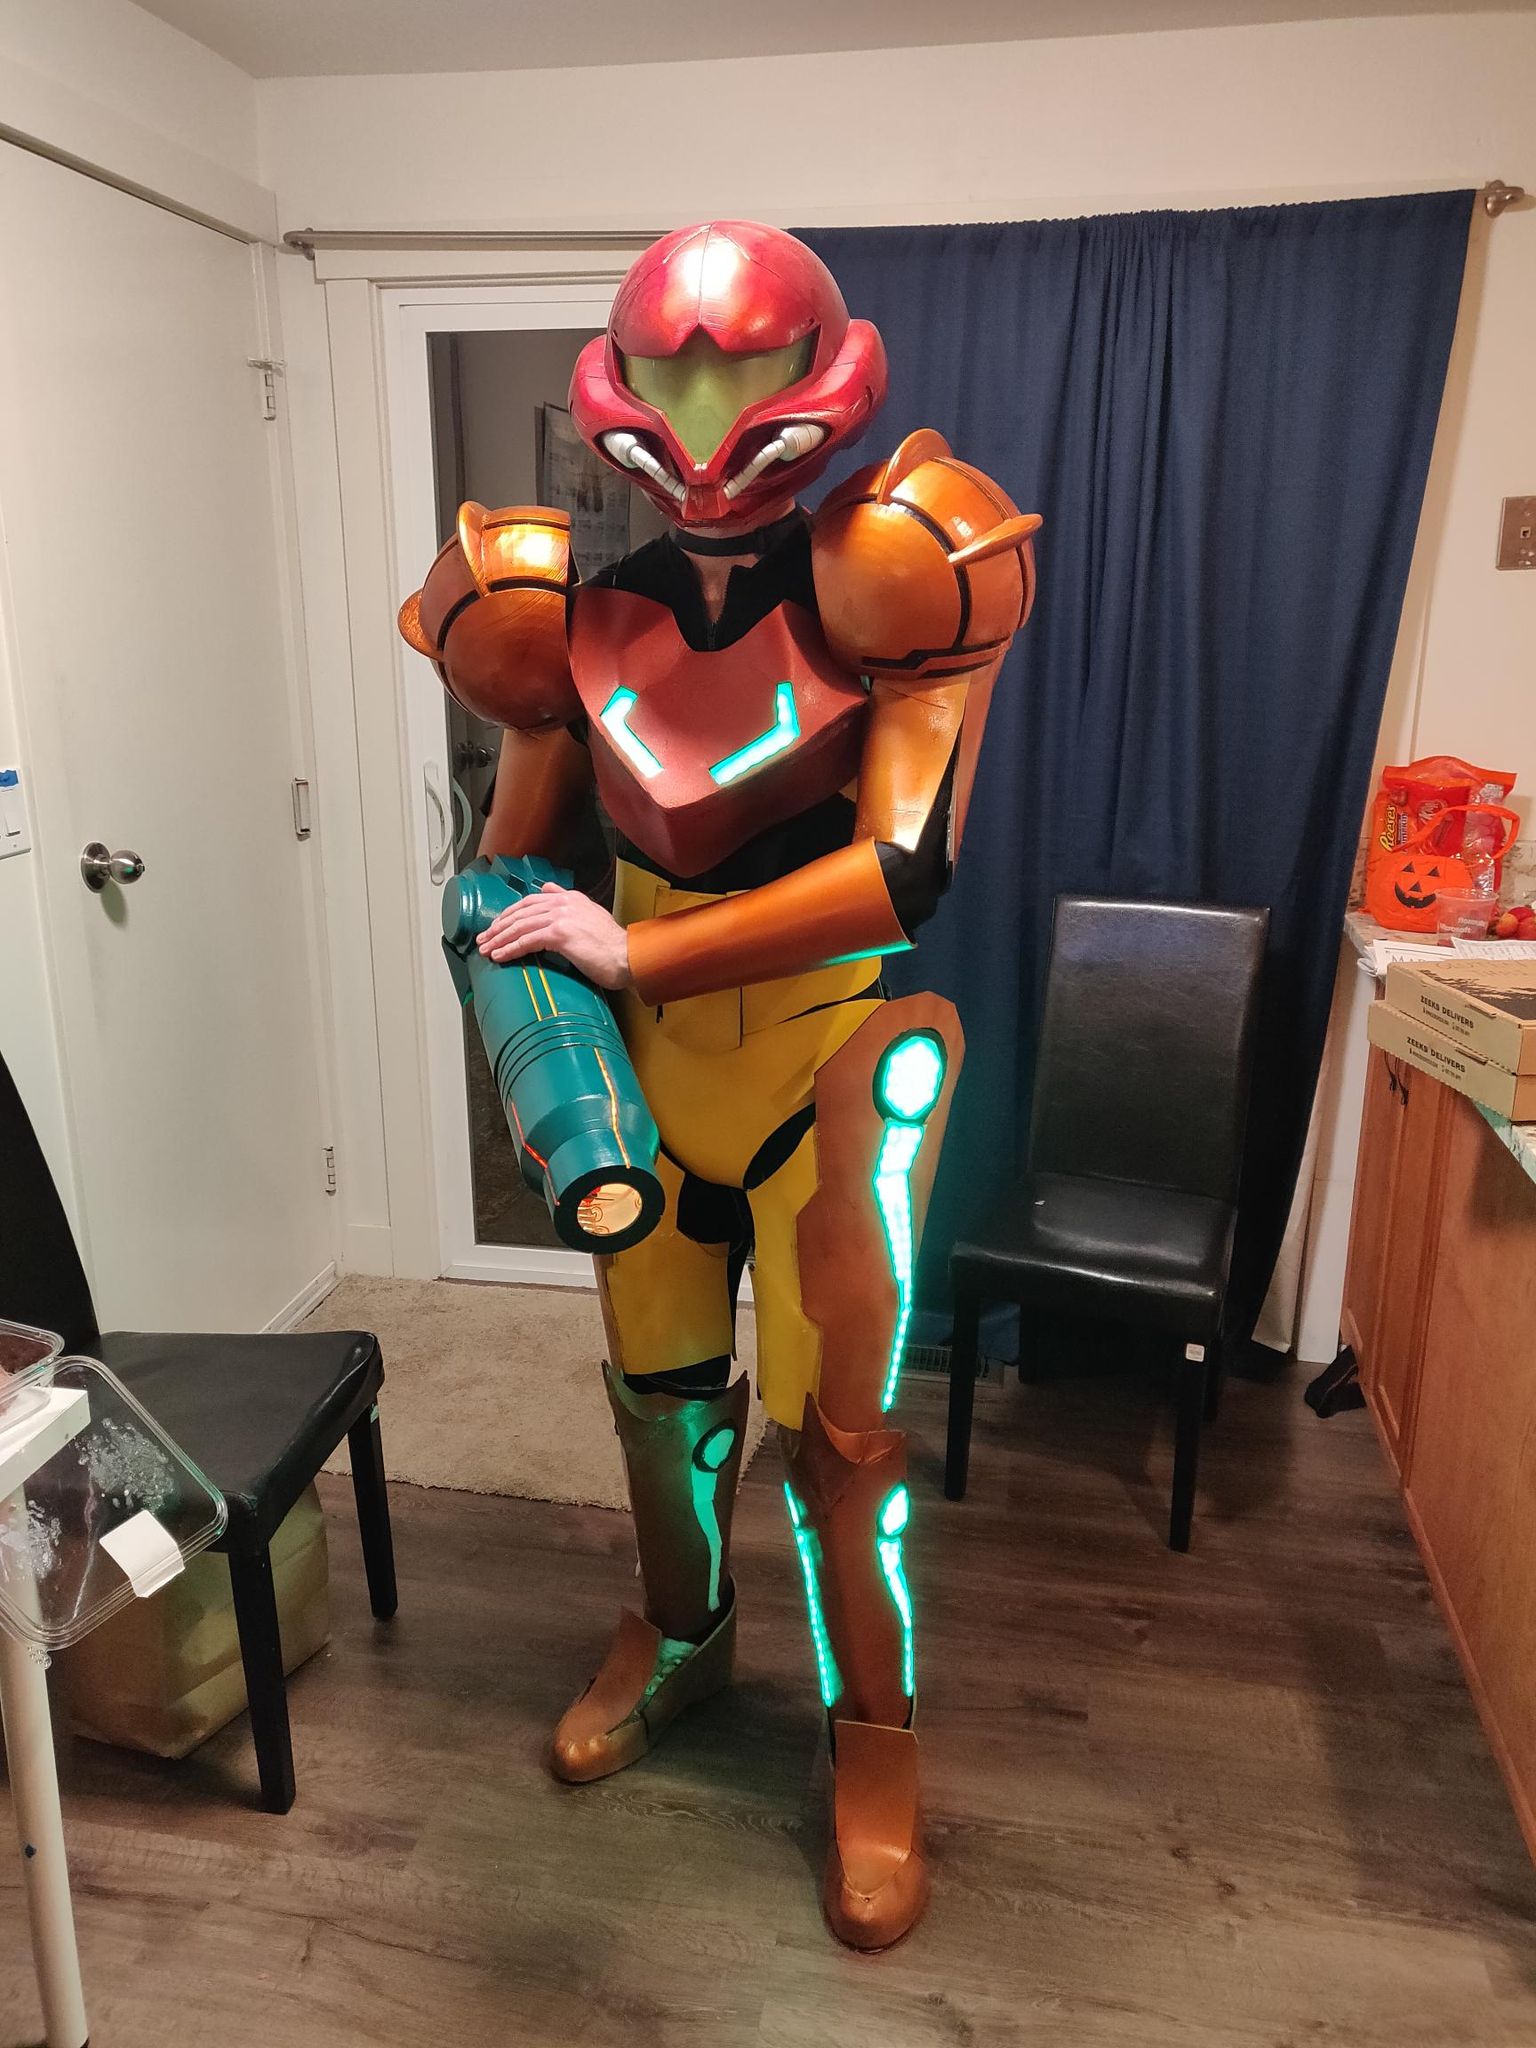
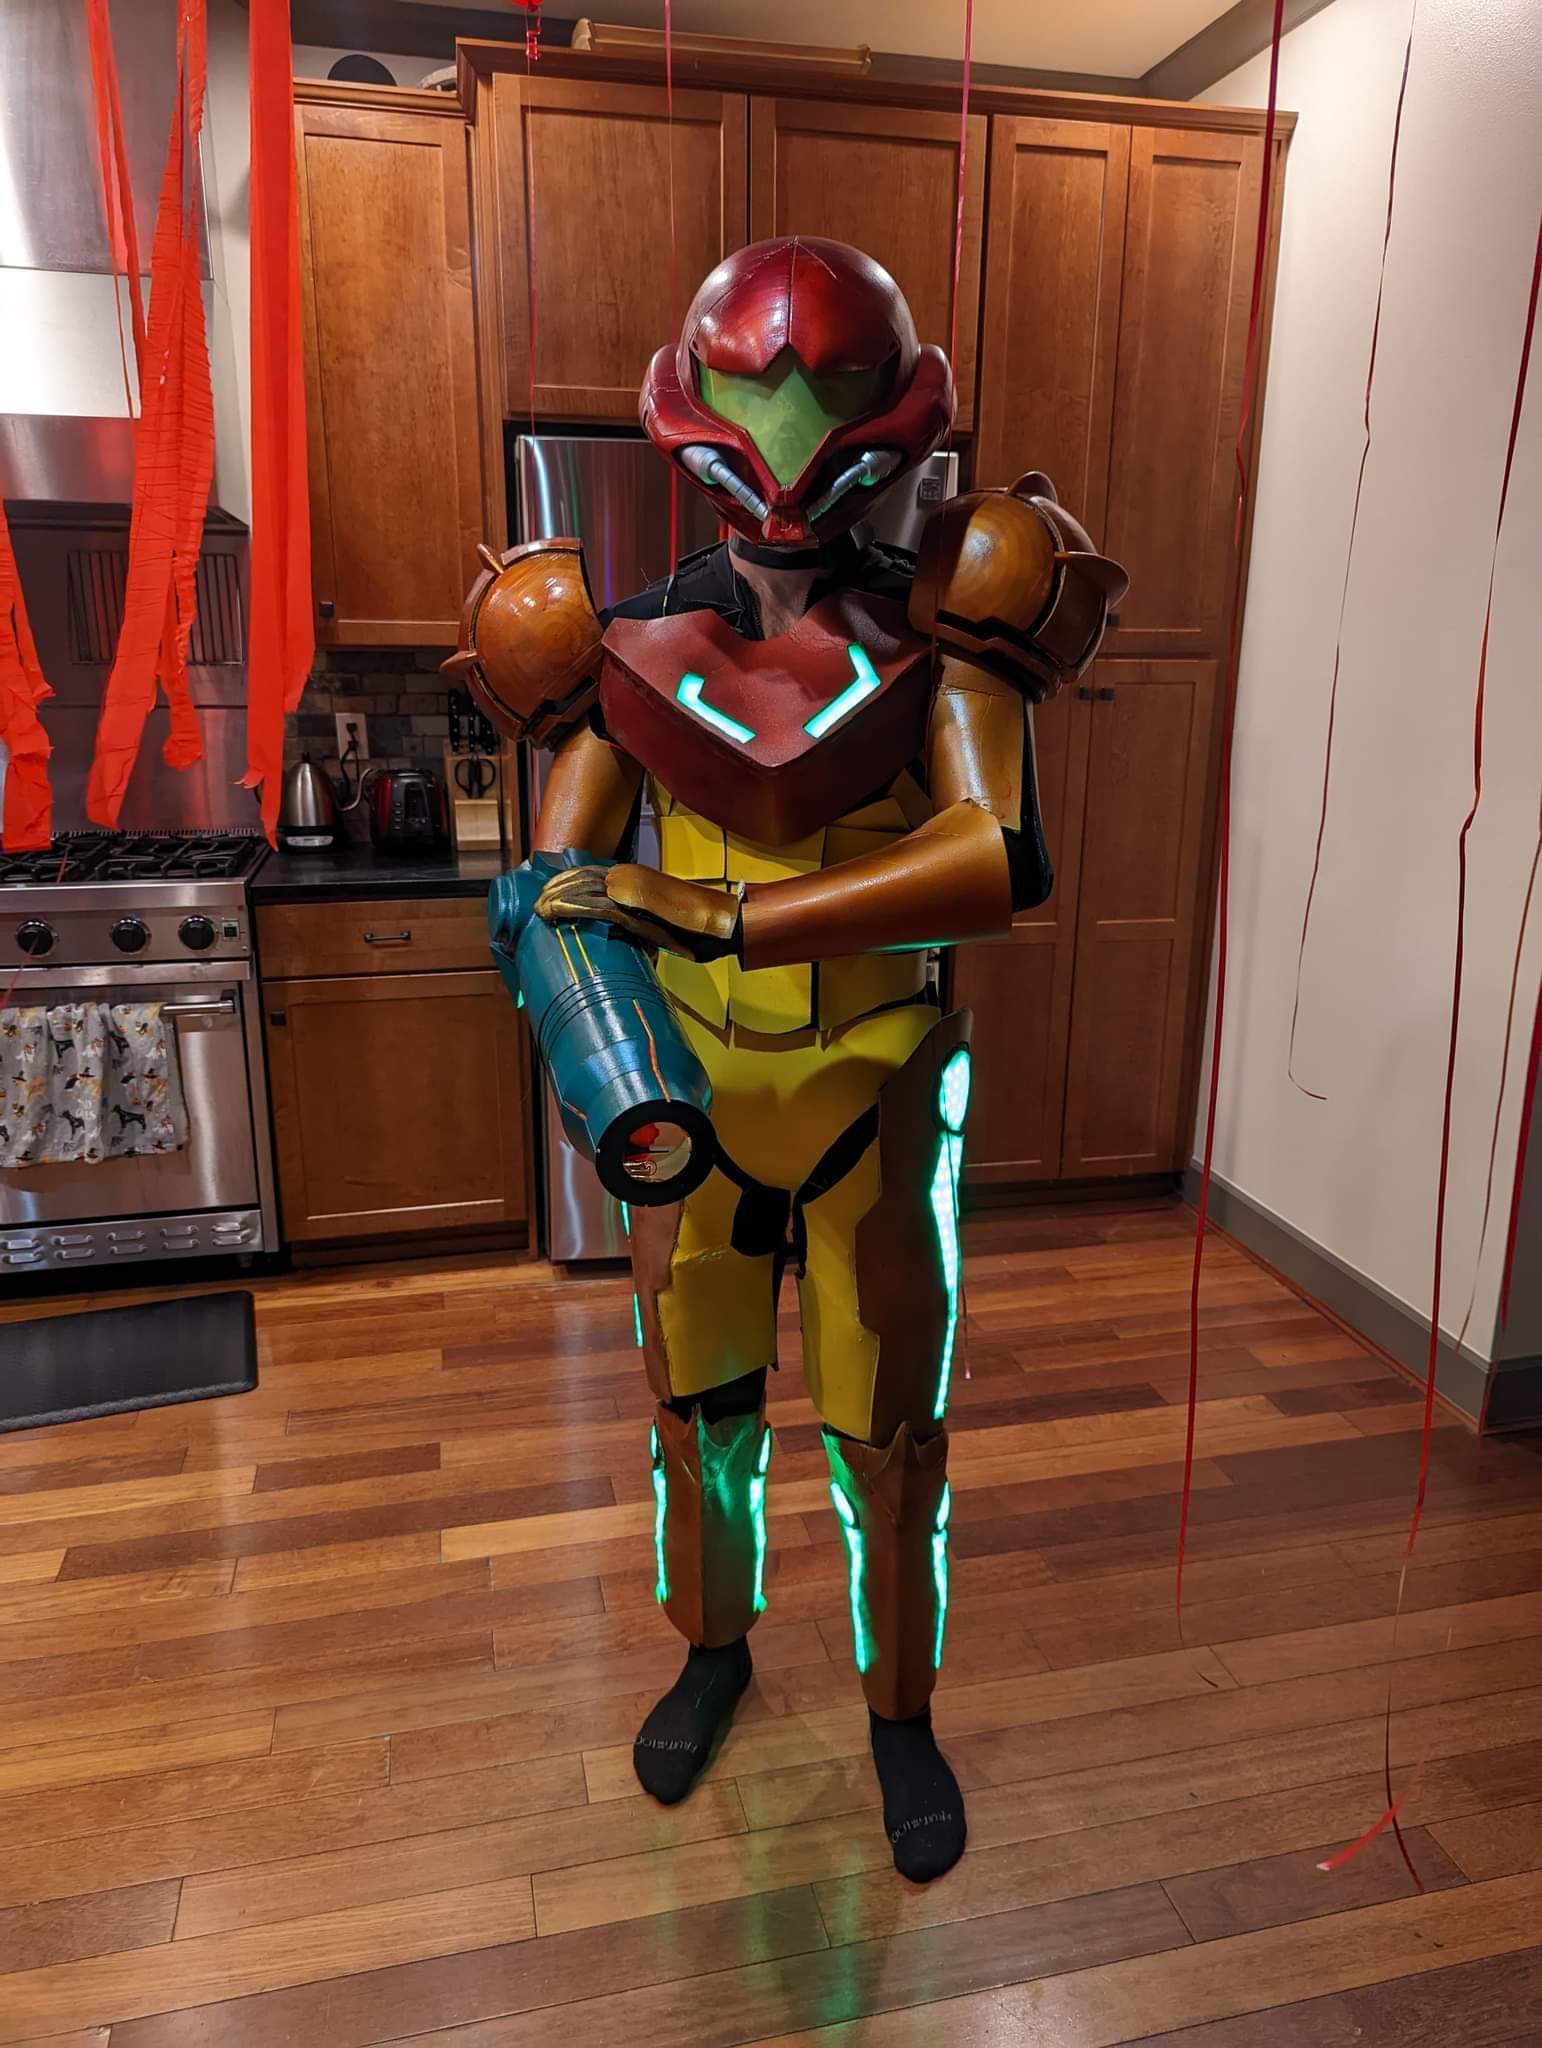
Like I said, the foam armour was a bit of a rush job, and it shows. I know it is all because I wanted to get it done in time for Halloween and also I just wanted some quick armour - I didn’t put intense thought and care into every piece, but still, hurts a little. This is also the most uncomfortable and finicky costume I have - there are so many pieces and I move like a penguin and cannot bend over or sit down. But! People loved it, and with the helmet, shoulders, and gun all together in one complete package, it does look really really good. I’m glad I have the whole thing, warts and all, and it was a good experiment and learning experience with EVA foam. If I made this again, I would do hardshell armour - perhaps not printed, perhaps heat-formed sheets? Not sure.
Models
All STL models have been linked in relevant sections, but here they are again. All credit to the designers of those pieces, I just used them.